engine YAMAHA WOLVERINE 350 2006 Owner's Manual
[x] Cancel search | Manufacturer: YAMAHA, Model Year: 2006, Model line: WOLVERINE 350, Model: YAMAHA WOLVERINE 350 2006Pages: 124, PDF Size: 11.48 MB
Page 45 of 124
6-5
6 0–10 hours
Avoid prolonged operation above 1/2 throttle. Vary
the speed of the ATV regularly. Do not operate it at
one set throttle position.
10–20 hours
Avoid prolonged operation above 3/4 throttle. Rev
the engine freely, but do not use full throttle at any
time.
20 hours and beyond
The ATV can now be operated normally.
CAUTION:ECB00220If any engine trouble should occur during the
engine break-in period, immediately have aYamaha dealer check the ATV.EBU20700Parking When parking the ATV, stop the engine, shift the
drive select lever into the forward position, apply
the parking brake, and then turn the fuel cock to
“OFF”.
EBU20760Parking on a slope
WARNING
EWB00830Avoid parking on hills or other inclines. Park-
ing on a hill or other incline could cause the
ATV to roll out of control, increasing the
chance of an accident. If you must park on an
incline, place the ATV transversely across the
incline, shift the drive select lever to the for-
ward position, stop the engine, apply the park-
ing brake, and then block the front and rear
wheels with rocks or other objects.
Do not park the ATV at all on hills that are sosteep you could not walk up them easily.
1. Bring the ATV to a stop by applying the brakes
in the forward position.
2. Stop the engine.
3. With the rear brake lever and pedal applied,
apply the parking brake, and then slowly re-
lease the brake pedal.
U3D560E0.book Page 5 Tuesday, December 27, 2005 12:13 PM
Page 50 of 124
7-3
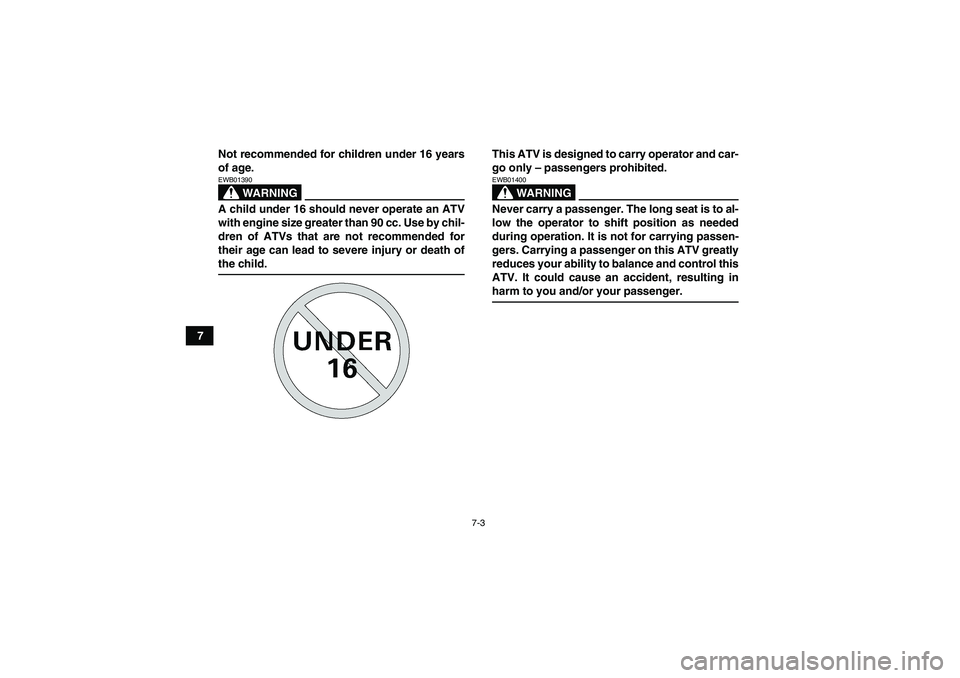
7Not recommended for children under 16 years
of age.
WARNING
EWB01390A child under 16 should never operate an ATV
with engine size greater than 90 cc. Use by chil-
dren of ATVs that are not recommended for
their age can lead to severe injury or death ofthe child.This ATV is designed to carry operator and car-
go only – passengers prohibited.
WARNING
EWB01400Never carry a passenger. The long seat is to al-
low the operator to shift position as needed
during operation. It is not for carrying passen-
gers. Carrying a passenger on this ATV greatly
reduces your ability to balance and control this
ATV. It could cause an accident, resulting inharm to you and/or your passenger.
U3D560E0.book Page 3 Tuesday, December 27, 2005 12:13 PM
Page 53 of 124
7-6
7 in the Owner’s Manual. Failure to inspect the
ATV before operating or failure to properly
maintain the ATV increases the possibility of
an accident or equipment damage.
WARNING
EWB01440Always use the size and type tires specified in
the Owner’s Manual for this ATV on page 5-4.
Always maintain proper tire pressure as de-
scribed in the Owner’s Manual on page 5-5.
Use of improper tires on this ATV, or operation
of this ATV with improper or uneven tire pres-
sure, may cause loss of control, increasingyour risk of an accident.
Do not operate at speeds too fast for your skills
or the conditions.
WARNING
EWB01450Always go at a speed that is proper for the ter-
rain, visibility and operating conditions, and
your experience. Operating this ATV at speeds
too fast for your skills or the conditions in-
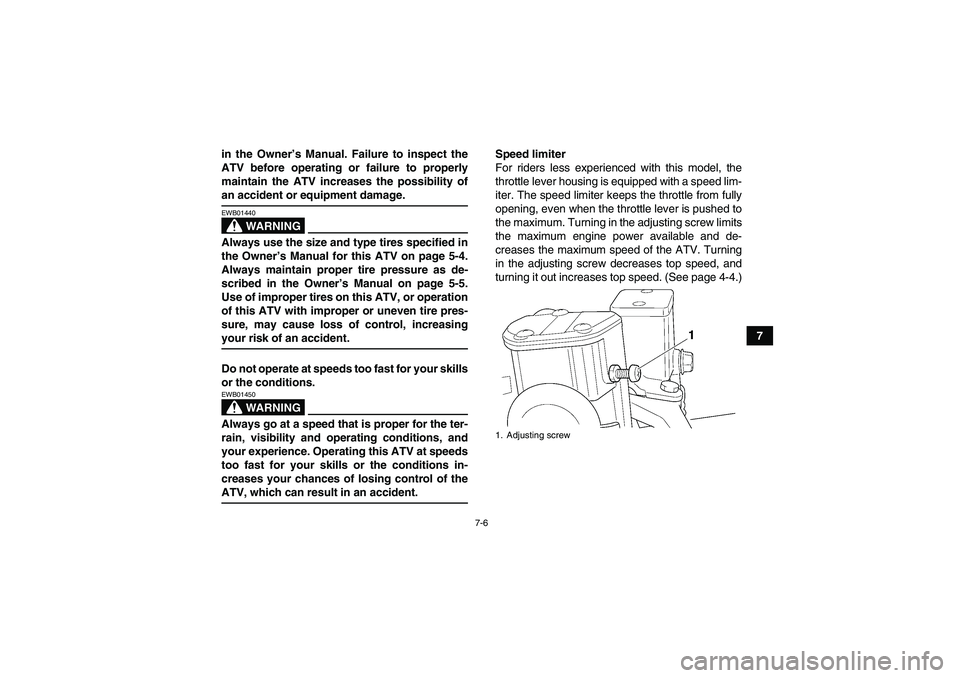
creases your chances of losing control of theATV, which can result in an accident.Speed limiter
For riders less experienced with this model, the
throttle lever housing is equipped with a speed lim-
iter. The speed limiter keeps the throttle from fully
opening, even when the throttle lever is pushed to
the maximum. Turning in the adjusting screw limits
the maximum engine power available and de-
creases the maximum speed of the ATV. Turning
in the adjusting screw decreases top speed, and
turning it out increases top speed. (See page 4-4.)
1. Adjusting screw
U3D560E0.book Page 6 Tuesday, December 27, 2005 12:13 PM
Page 59 of 124
7-12
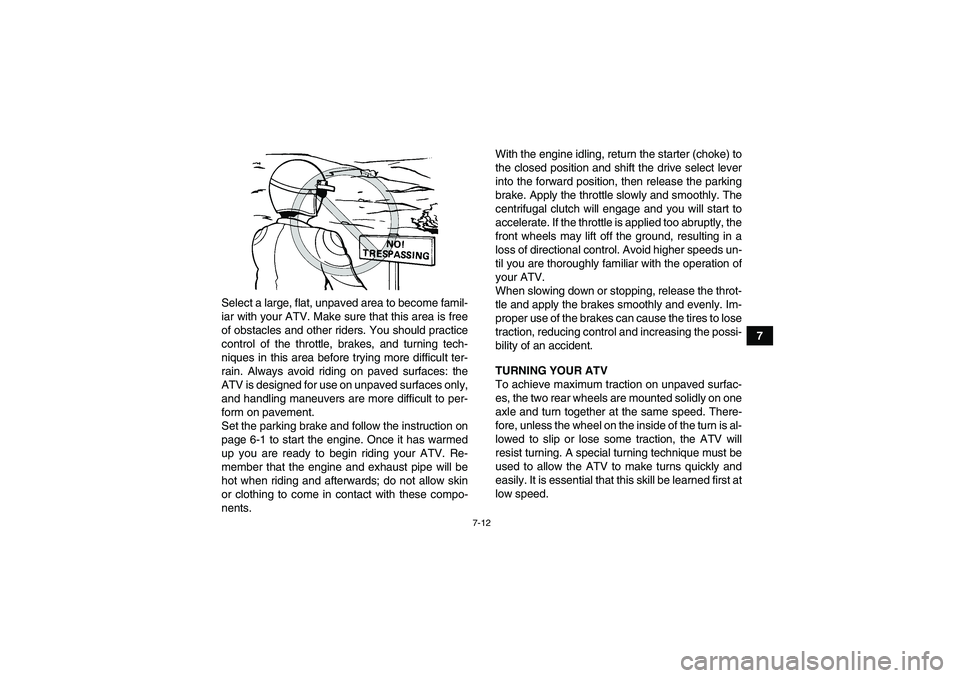
7 Select a large, flat, unpaved area to become famil-
iar with your ATV. Make sure that this area is free
of obstacles and other riders. You should practice
control of the throttle, brakes, and turning tech-
niques in this area before trying more difficult ter-
rain. Always avoid riding on paved surfaces: the
ATV is designed for use on unpaved surfaces only,
and handling maneuvers are more difficult to per-
form on pavement.
Set the parking brake and follow the instruction on
page 6-1 to start the engine. Once it has warmed
up you are ready to begin riding your ATV. Re-
member that the engine and exhaust pipe will be
hot when riding and afterwards; do not allow skin
or clothing to come in contact with these compo-
nents.With the engine idling, return the starter (choke) to
the closed position and shift the drive select lever
into the forward position, then release the parking
brake. Apply the throttle slowly and smoothly. The
centrifugal clutch will engage and you will start to
accelerate. If the throttle is applied too abruptly, the
front wheels may lift off the ground, resulting in a
loss of directional control. Avoid higher speeds un-
til you are thoroughly familiar with the operation of
your ATV.
When slowing down or stopping, release the throt-
tle and apply the brakes smoothly and evenly. Im-
proper use of the brakes can cause the tires to lose
traction, reducing control and increasing the possi-
bility of an accident.
TURNING YOUR ATV
To achieve maximum traction on unpaved surfac-
es, the two rear wheels are mounted solidly on one
axle and turn together at the same speed. There-
fore, unless the wheel on the inside of the turn is al-
lowed to slip or lose some traction, the ATV will
resist turning. A special turning technique must be
used to allow the ATV to make turns quickly and
easily. It is essential that this skill be learned first at
low speed.
U3D560E0.book Page 12 Tuesday, December 27, 2005 12:13 PM
Page 72 of 124
8-1
8
EBU21651
PERIODIC MAINTENANCE AND MINOR REPAIR
EBU21670Safety is an obligation of the owner. Periodic in-
spection, adjustment and lubrication will keep your
ATV in the safest and best operating condition
possible. The most important points of inspection,
adjustment, and lubrication are explained on the
following pages.
The intervals given in the periodic maintenance
and lubrication chart should be considered as a
general guide under normal riding conditions.
However, DEPENDING ON THE WEATHER,
TERRAIN, GEOGRAPHICAL LOCATION, AND
INDIVIDUAL USE, THE MAINTENANCE INTER-
VALS MAY NEED TO BE SHORTENED.
WARNING
EWB01840Never service an engine while it is running.
Moving parts can catch clothing or parts of the
body, causing injury. Electrical components
can cause shocks or start fires. Turn off the en-
gine when performing maintenance unlessotherwise specified. Have a Yamaha dealer
perform the service if you are not familiar with
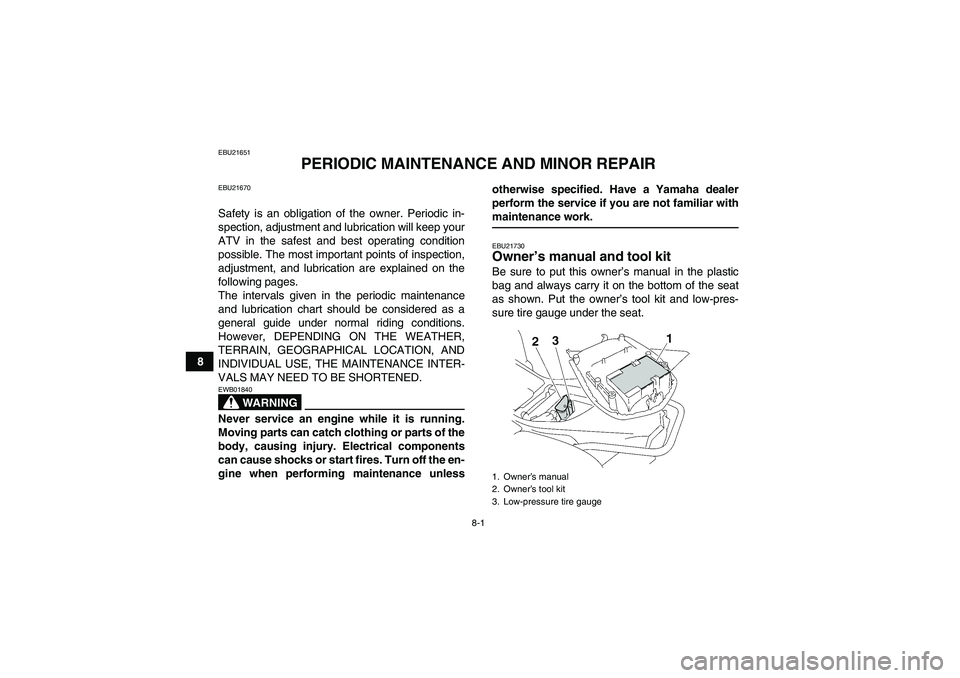
maintenance work.EBU21730Owner’s manual and tool kit Be sure to put this owner’s manual in the plastic
bag and always carry it on the bottom of the seat
as shown. Put the owner’s tool kit and low-pres-
sure tire gauge under the seat.1. Owner’s manual
2. Owner’s tool kit
3. Low-pressure tire gauge
U3D560E0.book Page 1 Tuesday, December 27, 2005 12:13 PM
Page 76 of 124
8-5
8
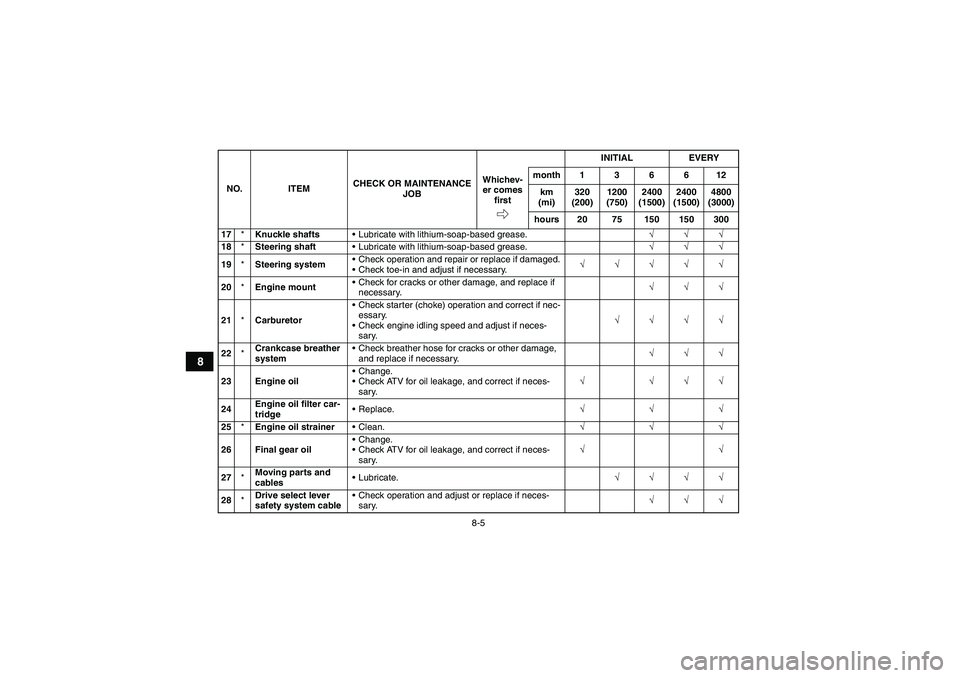
17*Knuckle shaftsLubricate with lithium-soap-based grease.√√√
18*Steering shaftLubricate with lithium-soap-based grease.√√√
19*Steering systemCheck operation and repair or replace if damaged.
Check toe-in and adjust if necessary.√√√√√
20*Engine mountCheck for cracks or other damage, and replace if
necessary.√√√
21*CarburetorCheck starter (choke) operation and correct if nec-
essary.
Check engine idling speed and adjust if neces-
sary.√√√√
22*Crankcase breather
systemCheck breather hose for cracks or other damage,
and replace if necessary.√√√
23 Engine oilChange.
Check ATV for oil leakage, and correct if neces-
sary.√ √√√
24Engine oil filter car-
tridgeReplace.√√√
25*Engine oil strainerClean.√√√
26 Final gear oilChange.
Check ATV for oil leakage, and correct if neces-
sary.√√
27*Moving parts and
cablesLubricate.√√√√
28*Drive select lever
safety system cableCheck operation and adjust or replace if neces-
sary.√√√ NO. ITEMCHECK OR MAINTENANCE
JOBINITIAL EVERY
Whichev-
er comes
firstmonth136612
km
(mi)320
(200)1200
(750)2400
(1500)2400
(1500)4800
(3000)
hours 20 75 150 150 300U3D560E0.book Page 5 Tuesday, December 27, 2005 12:13 PM
Page 78 of 124

8-7
8
EBU23080Removing and installing the panel The panel shown needs to be removed to perform
some of the maintenance jobs described in this
chapter. Refer to this section each time the panel
needs to be removed and installed.EBU23110Panel A
To remove the panelRemove the bolt, and then take the panel off.To install the panel
Place the panel in the original position and install
the bolt.CAUTION:ECB00380When installing the panel, be sure not to pinchthe cables or wires.EBU23210Checking the spark plug The spark plug is an important engine component,
which is easy to check. Since heat and deposits
will cause any spark plug to slowly erode, the spark
1. Panel A
1. Panel A
2. Bolt
U3D560E0.book Page 7 Tuesday, December 27, 2005 12:13 PM
Page 79 of 124
8-8
8 plug should be removed and checked in accor-
dance with the periodic maintenance and lubrica-
tion chart. In addition, the condition of the spark
plug can reveal the condition of the engine.
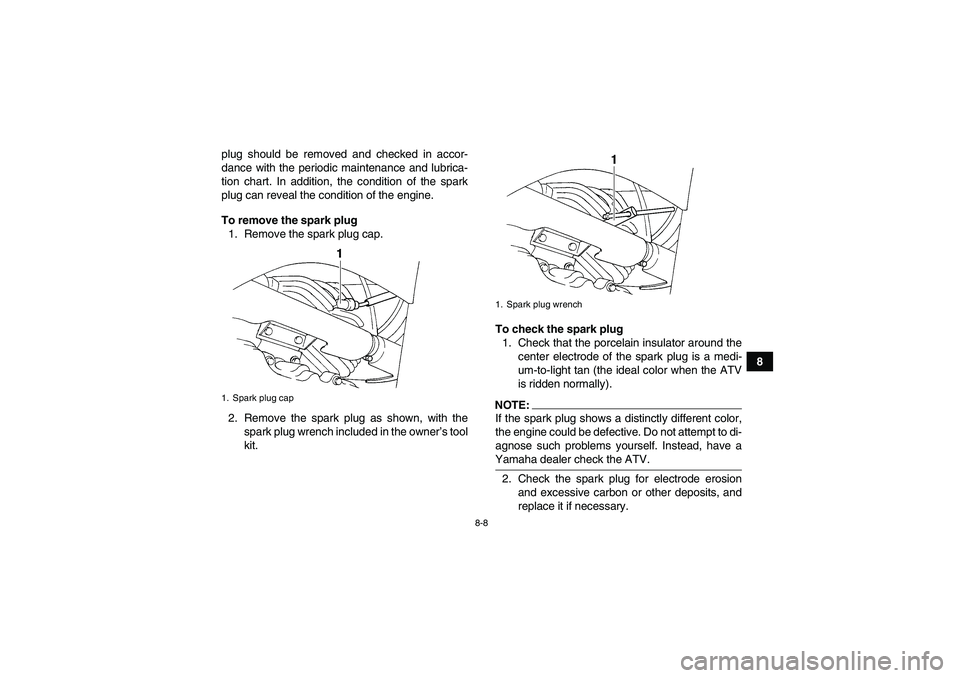
To remove the spark plug
1. Remove the spark plug cap.
2. Remove the spark plug as shown, with the
spark plug wrench included in the owner’s tool
kit.To check the spark plug
1. Check that the porcelain insulator around the
center electrode of the spark plug is a medi-
um-to-light tan (the ideal color when the ATV
is ridden normally).
NOTE:If the spark plug shows a distinctly different color,
the engine could be defective. Do not attempt to di-
agnose such problems yourself. Instead, have aYamaha dealer check the ATV.
2. Check the spark plug for electrode erosion
and excessive carbon or other deposits, and
replace it if necessary.
1. Spark plug cap
1. Spark plug wrench
U3D560E0.book Page 8 Tuesday, December 27, 2005 12:13 PM
Page 80 of 124
8-9
8To install the spark plug
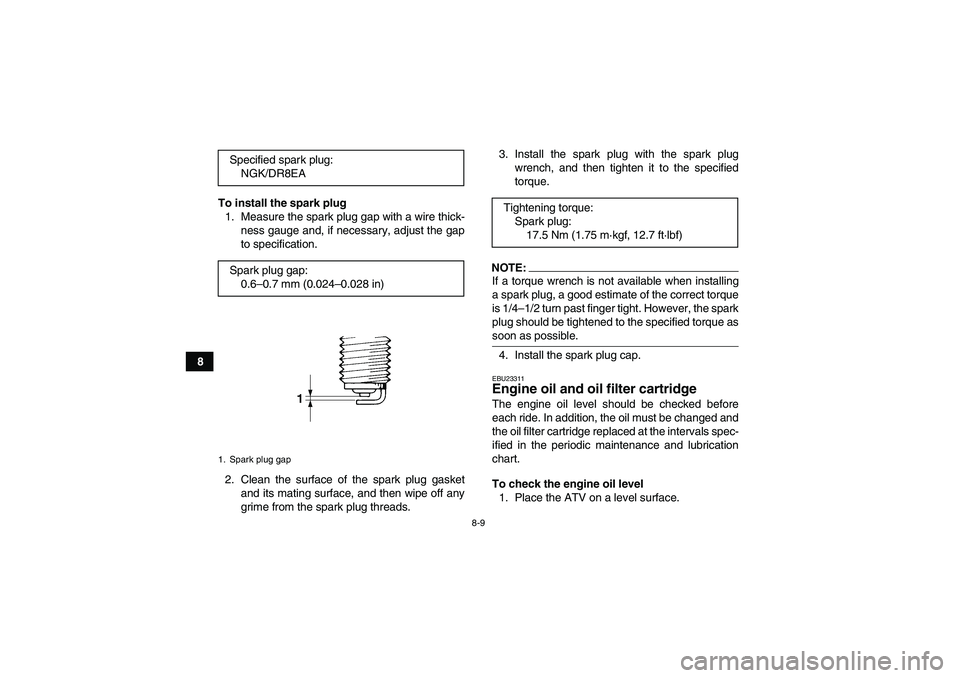
1. Measure the spark plug gap with a wire thick-
ness gauge and, if necessary, adjust the gap
to specification.
2. Clean the surface of the spark plug gasket
and its mating surface, and then wipe off any
grime from the spark plug threads.3. Install the spark plug with the spark plug
wrench, and then tighten it to the specified
torque.
NOTE:If a torque wrench is not available when installing
a spark plug, a good estimate of the correct torque
is 1/4–1/2 turn past finger tight. However, the spark
plug should be tightened to the specified torque assoon as possible.
4. Install the spark plug cap.EBU23311Engine oil and oil filter cartridge The engine oil level should be checked before
each ride. In addition, the oil must be changed and
the oil filter cartridge replaced at the intervals spec-
ified in the periodic maintenance and lubrication
chart.
To check the engine oil level
1. Place the ATV on a level surface. Specified spark plug:
NGK/DR8EA
Spark plug gap:
0.6–0.7 mm (0.024–0.028 in)
1. Spark plug gap
Tightening torque:
Spark plug:
17.5 Nm (1.75 m·kgf, 12.7 ft·lbf)
U3D560E0.book Page 9 Tuesday, December 27, 2005 12:13 PM
Page 81 of 124
8-10
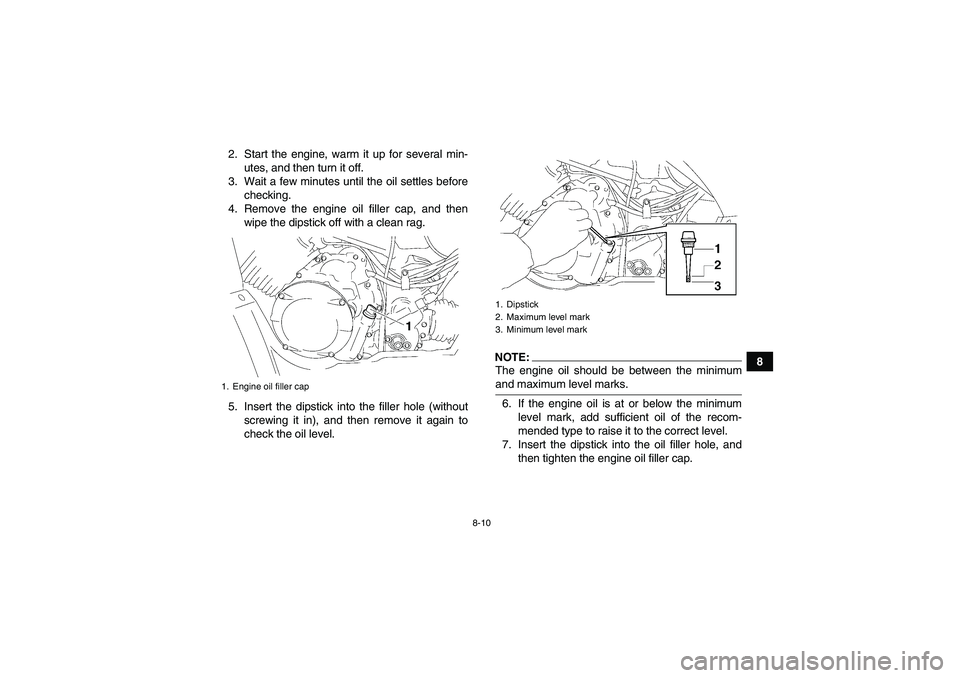
8 2. Start the engine, warm it up for several min-
utes, and then turn it off.
3. Wait a few minutes until the oil settles before
checking.
4. Remove the engine oil filler cap, and then
wipe the dipstick off with a clean rag.
5. Insert the dipstick into the filler hole (without
screwing it in), and then remove it again to
check the oil level.
NOTE:The engine oil should be between the minimumand maximum level marks.
6. If the engine oil is at or below the minimum
level mark, add sufficient oil of the recom-
mended type to raise it to the correct level.
7. Insert the dipstick into the oil filler hole, and
then tighten the engine oil filler cap.
1. Engine oil filler cap
1. Dipstick
2. Maximum level mark
3. Minimum level mark
U3D560E0.book Page 10 Tuesday, December 27, 2005 12:13 PM