headlight bulb YAMAHA WR 250F 2003 Manuale duso (in Italian)
[x] Cancel search | Manufacturer: YAMAHA, Model Year: 2003, Model line: WR 250F, Model: YAMAHA WR 250F 2003Pages: 860, PDF Dimensioni: 35.16 MB
Page 82 of 860

GENERAL SPECIFICATIONS
2 - 3
SPEC
Brake:
Front brake type Single disc brake
Operation Right hand operation
Rear brake type Single disc brake
Operation Right foot operation
Suspension:
Front suspension Telescopic fork
Rear suspension Swingarm (link type monocross suspension)
Shock absorber:
Front shock absorber Coil spring/oil damper
Rear shock absorber Coil spring/gas, oil damper
Wheel travel:
Front wheel travel 300 mm (11.8 in)
Rear wheel travel 315 mm (12.4 in)
Electrical:
Ignition system CDI
Generator system AC magneto
Battery type YTX5L-BS
Battery voltage/capacity 12 V/4 AH
Specific gravity 1.320
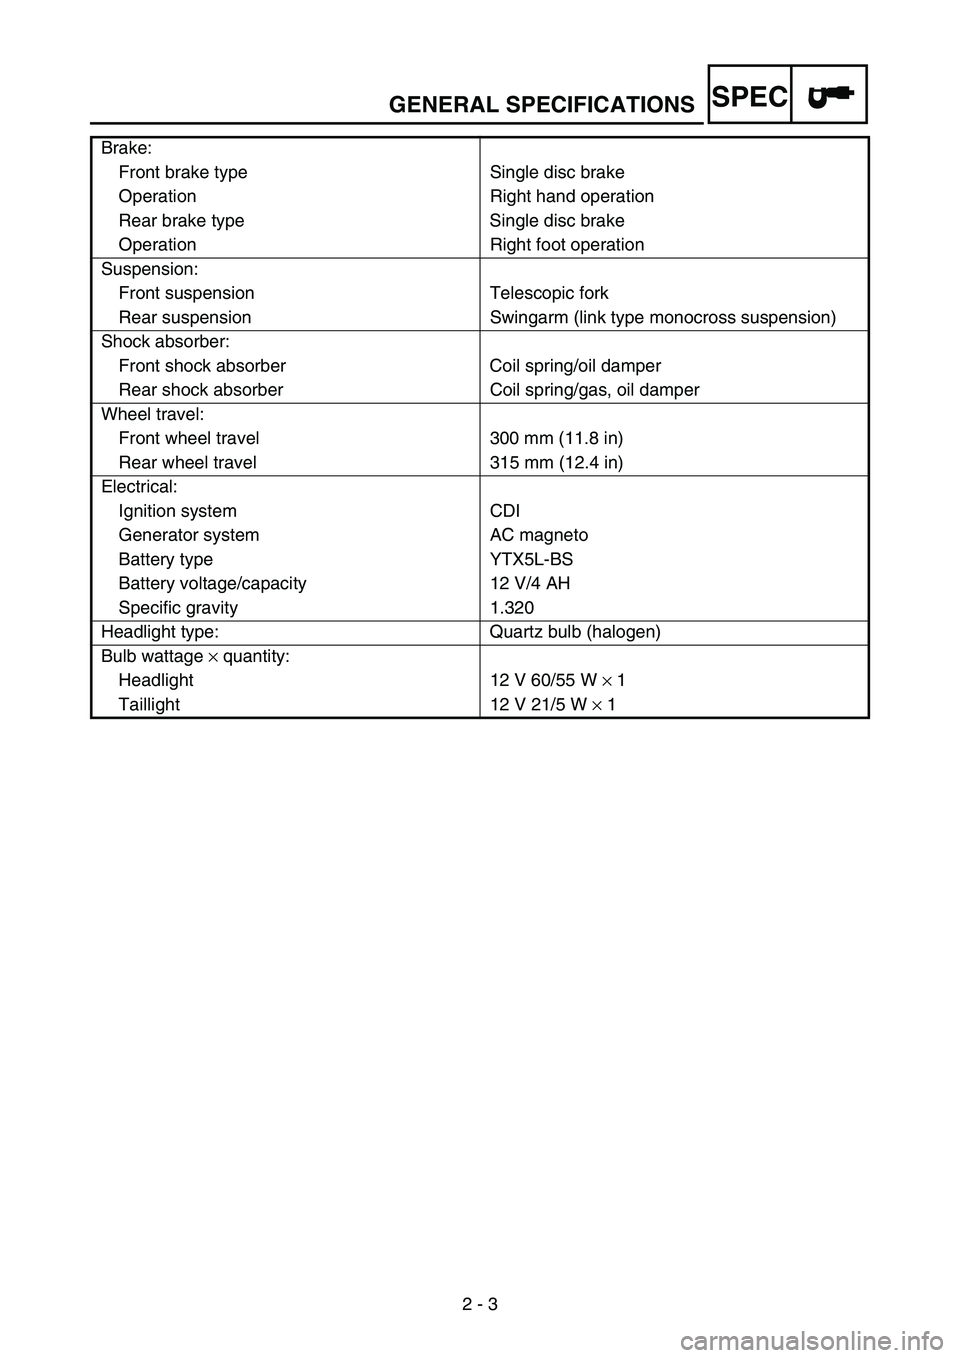
Headlight type: Quartz bulb (halogen)
Bulb wattage × quantity:
Headlight 12 V 60/55 W × 1
Taillight 12 V 21/5 W × 1
Page 322 of 860

3 - 131
INSP
ADJ
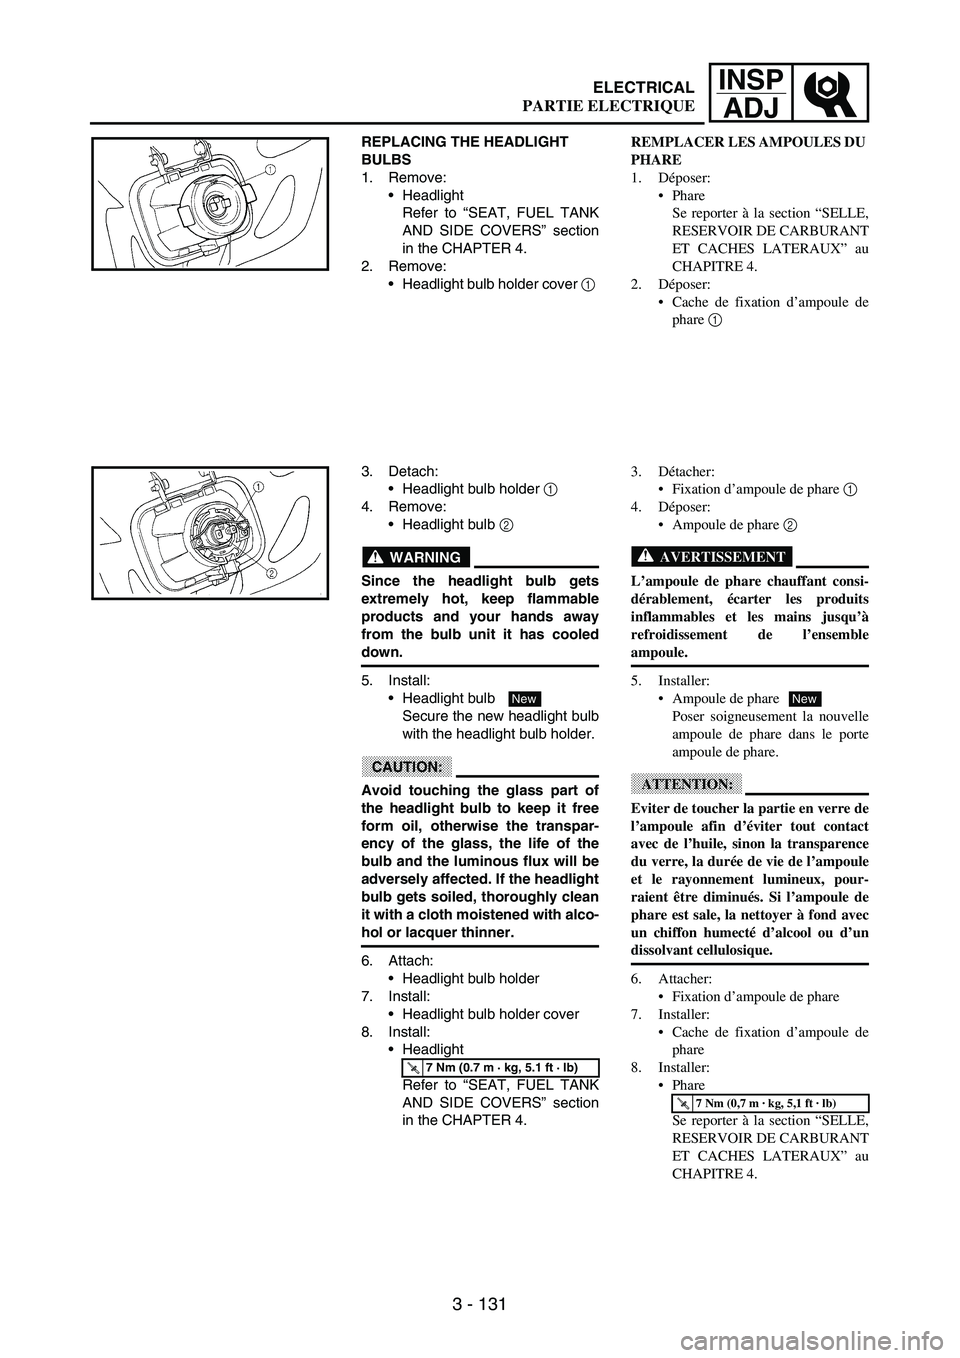
REPLACING THE HEADLIGHT
BULBS
1. Remove:
Headlight
Refer to “SEAT, FUEL TANK
AND SIDE COVERS” section
in the CHAPTER 4.
2. Remove:
Headlight bulb holder cover
1
3. Detach:
Headlight bulb holder
1
4. Remove:
Headlight bulb
2
WARNING
Since the headlight bulb gets
extremely hot, keep flammable
products and your hands away
from the bulb unit it has cooled
down.
5. Install:
Headlight bulb
Secure the new headlight bulb
with the headlight bulb holder.
CAUTION:
Avoid touching the glass part of
the headlight bulb to keep it free
form oil, otherwise the transpar-
ency of the glass, the life of the
bulb and the luminous flux will be
adversely affected. If the headlight
bulb gets soiled, thoroughly clean
it with a cloth moistened with alco-
hol or lacquer thinner.
6. Attach:
Headlight bulb holder
7. Install:
Headlight bulb holder cover
8. Install:
Headlight
Refer to “SEAT, FUEL TANK
AND SIDE COVERS” section
in the CHAPTER 4.
T R..7 Nm (0.7 m · kg, 5.1 ft · lb)
New
REMPLACER LES AMPOULES DU
PHARE
1. Déposer:
Phare
Se reporter à la section “SELLE,
RESERVOIR DE CARBURANT
ET CACHES LATERAUX” au
CHAPITRE 4.
2. Déposer:
Cache de fixation d’ampoule de
phare 1
3. Détacher:
Fixation d’ampoule de phare 1
4. Déposer:
Ampoule de phare 2
AVERTISSEMENT
L’ampoule de phare chauffant consi-
dérablement, écarter les produits
inflammables et les mains jusqu’à
refroidissement de l’ensemble
ampoule.
5. Installer:
Ampoule de phare
Poser soigneusement la nouvelle
ampoule de phare dans le porte
ampoule de phare.
ATTENTION:
Eviter de toucher la partie en verre de
l’ampoule afin d’éviter tout contact
avec de l’huile, sinon la transparence
du verre, la durée de vie de l’ampoule
et le rayonnement lumineux, pour-
raient être diminués. Si l’ampoule de
phare est sale, la nettoyer à fond avec
un chiffon humecté d’alcool ou d’un
dissolvant cellulosique.
6. Attacher:
Fixation d’ampoule de phare
7. Installer:
Cache de fixation d’ampoule de
phare
8. Installer:
Phare
Se reporter à la section “SELLE,
RESERVOIR DE CARBURANT
ET CACHES LATERAUX” au
CHAPITRE 4.
T R..7 Nm (0,7 m · kg, 5,1 ft · lb)
New
ELECTRICAL
PARTIE ELECTRIQUE