oil change YAMAHA WR 450F 2012 Owners Manual
[x] Cancel search | Manufacturer: YAMAHA, Model Year: 2012, Model line: WR 450F, Model: YAMAHA WR 450F 2012Pages: 96, PDF Size: 2.47 MB
Page 48 of 96

PERIODIC MAINTENANCE AND ADJUSTMENT
6-5
1
2
3
4
56
7
8
9
12 *Chassis fasteners Make sure that all nuts, bolts and screws are properly
tightened.
13 Brake lever pivot
shaft Lubricate with silicone grease.
14 Brake pedal pivot
shaft Lubricate with lithium-soap-based grease.
15 Clutch lever pivot
shaft Lubricate with lithium-soap-based grease.
16 Sidestand Check operation.
Lubricate with lithium-soap-based grease.
17 * Sidestand switch Check operation.
18 * Front fork Check operation and for oil leakage.
19 * Shock absorber
assembly Check operation and shock absorber for oil leakage.
20 * Rear suspension
relay arm and
connecting arm
pivoting points Check operation.
21 Engine oil Change.
Check oil level and vehicle for oil leakage.
22 Engine oil filter
element Replace.
23 * Cooling system Check hoses for cracks of damage.
Replace if necessary.
Check coolant level and vehicle for coolant leakage.
Change with ethylene glycol anti-freeze coolant. Every 1 year
NO. ITEM CHECKS AND MAINTENANCE JOBS
INITIAL
ODOMETER
READINGS
ANNUAL CHECK
1000 km
(600 mi) or
1 month 3000 km
(1800 mi) or 3
months 5000 km
(3000 mi) or 6
months1DX-9-E0.book 5 ページ 2011年10月10日 月曜日 午後2時14分
Page 51 of 96

PERIODIC MAINTENANCE AND ADJUSTMENT
6-8
2
3
4
567
8
9
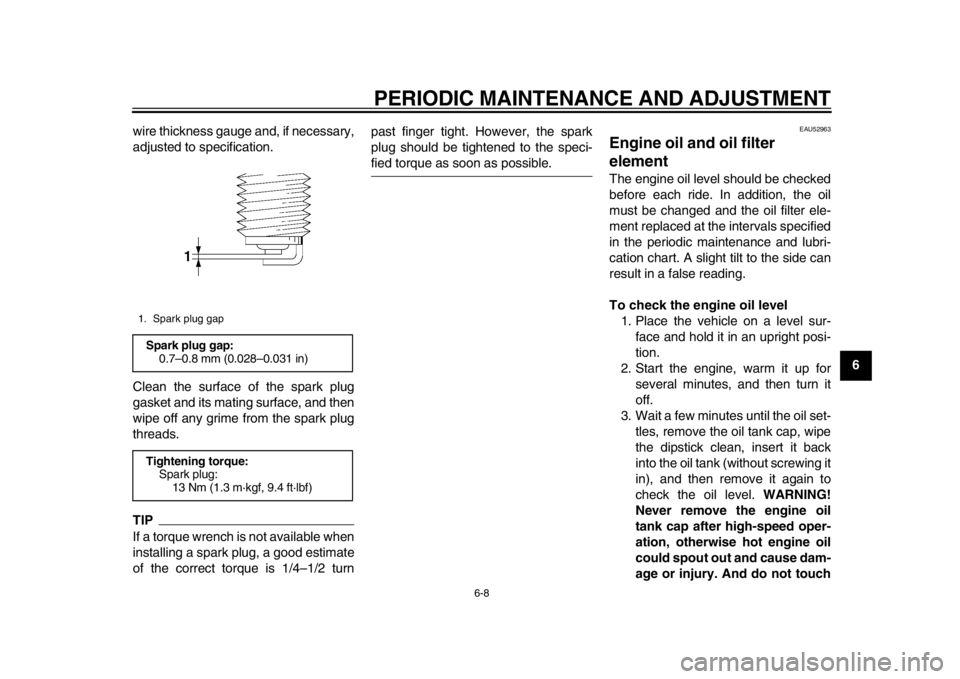
wire thickness gauge and, if necessary,
adjusted to specification.
Clean the surface of the spark plug
gasket and its mating surface, and then
wipe off any grime from the spark plug
threads.
TIPIf a torque wrench is not available when
installing a spark plug, a good estimate
of the correct torque is 1/4–1/2 turn past finger tight. However, the spark
plug should be tightened to the speci-
fied torque as soon as possible.
EAU52963
Engine oil and oil filter
element The engine oil level should be checked
before each ride. In addition, the oil
must be changed and the oil filter ele-
ment replaced at the intervals specified
in the periodic maintenance and lubri-
cation chart. A slight tilt to the side can
result in a false reading.
To check the engine oil level
1. Place the vehicle on a level sur- face and hold it in an upright posi-
tion.
2. Start the engine, warm it up for several minutes, and then turn it
off.
3. Wait a few minutes until the oil set- tles, remove the oil tank cap, wipe
the dipstick clean, insert it back
into the oil tank (without screwing it
in), and then remove it again to
check the oil level. WARNING!
Never remove the engine oil
tank cap after high-speed oper-
ation, otherwise hot engine oil
could spout out and cause dam-
age or injury. And do not touch
1. Spark plug gapSpark plug gap: 0.7–0.8 mm (0.028–0.031 in)
Tightening torque: Spark plug: 13 Nm (1.3 m·kgf, 9.4 ft·lbf)
1DX-9-E0.book 8 ページ 2011年10月10日 月曜日 午後2時14分
Page 53 of 96

PERIODIC MAINTENANCE AND ADJUSTMENT
6-10
2
3
4
567
8
9
6. Install the oil tank cap, and then
the check bolt and its gasket.
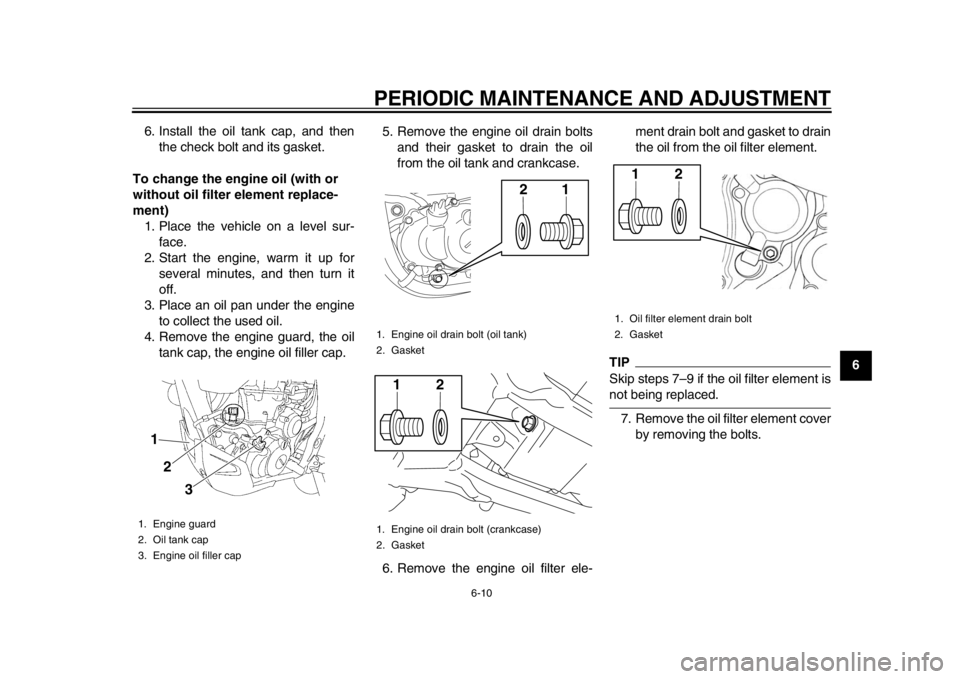
To change the engine oil (with or
without oil filter element replace-
ment) 1. Place the vehicle on a level sur- face.
2. Start the engine, warm it up for several minutes, and then turn it
off.
3. Place an oil pan under the engine to collect the used oil.
4. Remove the engine guard, the oil tank cap, the engine oil filler cap. 5. Remove the engine oil drain bolts
and their gasket to drain the oil
from the oil tank and crankcase.
6. Remove the engine oil filter ele- ment drain bolt and gasket to drain
the oil from the oil filter element.
TIPSkip steps 7–9 if the oil filter element isnot being replaced.
7. Remove the oil filter element cover by removing the bolts.
1. Engine guard
2. Oil tank cap
3. Engine oil filler cap1
2
3
1. Engine oil drain bolt (oil tank)
2. Gasket
1. Engine oil drain bolt (crankcase)
2. Gasket
21
21
1. Oil filter element drain bolt
2. Gasket
21
1DX-9-E0.book 10 ページ 2011年10月10日 月曜日 午後2時14分
Page 55 of 96

PERIODIC MAINTENANCE AND ADJUSTMENT
6-12
2
3
4
567
8
9
it for oil leakage. If oil is leaking, im-
mediately turn the engine off and
check for the cause.
13. Turn the engine off, wait a few min- utes until the oil settles, and then
check the oil level and correct it if
necessary.
14. Install the engine guard.
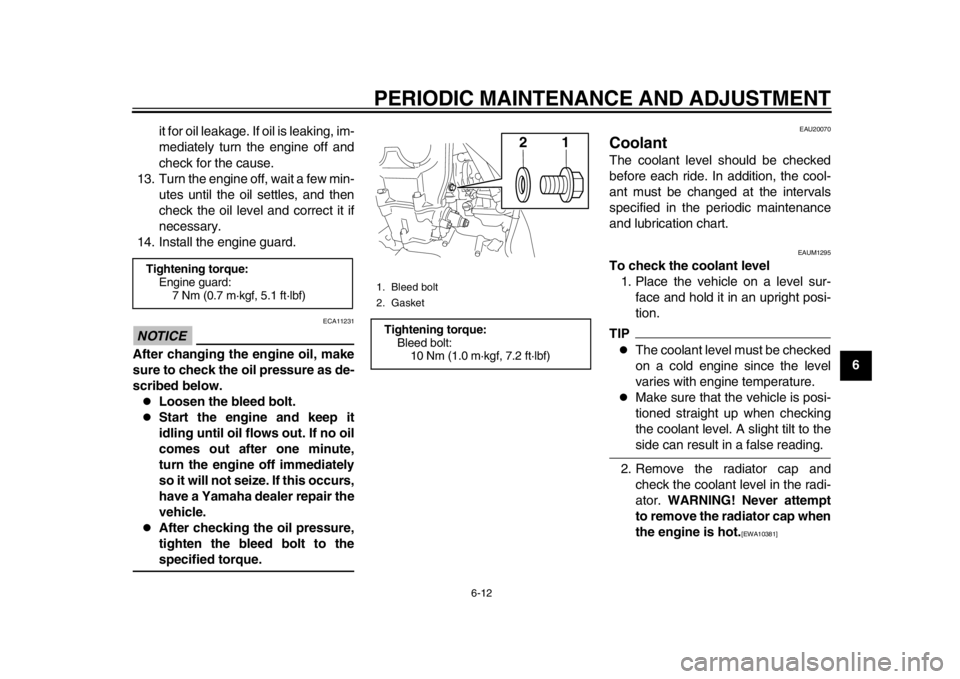
NOTICE
ECA11231
After changing the engine oil, make
sure to check the oil pressure as de-
scribed below.
Loosen the bleed bolt.
Start the engine and keep it
idling until oil flows out. If no oil
comes out after one minute,
turn the engine off immediately
so it will not seize. If this occurs,
have a Yamaha dealer repair the
vehicle.
After checking the oil pressure,
tighten the bleed bolt to thespecified torque.
EAU20070
Coolant The coolant level should be checked
before each ride. In addition, the cool-
ant must be changed at the intervals
specified in the periodic maintenance
and lubrication chart.
EAUM1295
To check the coolant level 1. Place the vehicle on a level sur- face and hold it in an upright posi-
tion.TIP
The coolant level must be checked
on a cold engine since the level
varies with engine temperature.
Make sure that the vehicle is posi-
tioned straight up when checking
the coolant level. A slight tilt to theside can result in a false reading.
2. Remove the radiator cap and check the coolant level in the radi-
ator. WARNING! Never attempt
to remove the radiator cap when
the engine is hot.
[EWA10381]
Tightening torque: Engine guard: 7 Nm (0.7 m·kgf, 5.1 ft·lbf)
1. Bleed bolt
2. GasketTightening torque:Bleed bolt:
10 Nm (1.0 m·kgf, 7.2 ft·lbf)
21
1DX-9-E0.book 12 ページ 2011年10月10日 月曜日 午後2時14分
Page 67 of 96

PERIODIC MAINTENANCE AND ADJUSTMENT
6-24
2
3
4
567
8
9
may deteriorate, causing leak-
age.
Refill with the same type of
brake fluid. Adding a brake fluid
other than DOT 4 may result in a
harmful chemical reaction.
Be careful that water does not
enter the brake fluid reservoir
when refilling. Water will signifi-
cantly lower the boiling point of
the fluid and may result in vaporlock.
NOTICE
ECA17640
Brake fluid may damage painted sur-
faces or plastic parts. Always cleanup spilled fluid immediately.
As the brake pads wear, it is normal for
the brake fluid level to gradually go
down. A low brake fluid level may indi-
cate worn brake pads and/or brake sys-
tem leakage; therefore, be sure to
check the brake pads for wear and the
brake system for leakage. If the brake
fluid level goes down suddenly, have a
Yamaha dealer check the cause before
further riding.
EAU52951
Changing the brake fluid Have a Yamaha dealer change the
brake fluid at the intervals specified in
the TIP after the periodic maintenance
and lubrication chart. In addition, have
the oil seals of the master cylinders and
calipers as well as the brake hoses re-
placed every 20000 km (12000 mi) or
every two years or whenever they are
damaged or leaking.
EAU22760
Drive chain slack The drive chain slack should be
checked before each ride and adjusted
if necessary.
EAU52480
To check the drive chain slack
1. Place the motorcycle on the side- stand.TIPWhen checking and adjusting the drive
chain slack, ther e should be no weighton the motorcycle.
2. Shift the transmission into the neu- tral position.
3. Pull the drive chain up above the drive chain guard installation bolt
with a force of 50 N (5.0 kgf, 11
lbf).
4. Measure drive chain slack be- tween the drive chain guard and
the bottom of the chain as shown.
Drive chain slack:48.0–58.0 mm (1.89–2.28 in)
1DX-9-E0.book 24 ページ 2011年10月10日 月曜日 午後2時14分