brake light YAMAHA XCITY 250 2012 Owners Manual
[x] Cancel search | Manufacturer: YAMAHA, Model Year: 2012, Model line: XCITY 250, Model: YAMAHA XCITY 250 2012Pages: 82, PDF Size: 1.89 MB
Page 6 of 82
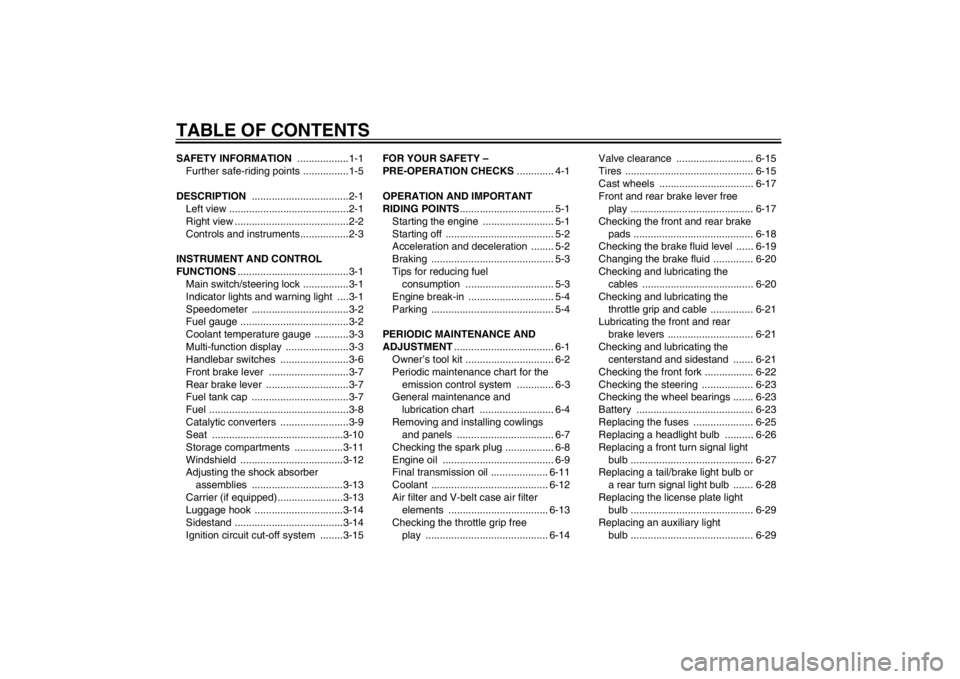
TABLE OF CONTENTSSAFETY INFORMATION ..................1-1
Further safe-riding points ................1-5
DESCRIPTION ..................................2-1
Left view ..........................................2-1
Right view ........................................2-2
Controls and instruments.................2-3
INSTRUMENT AND CONTROL
FUNCTIONS.......................................3-1
Main switch/steering lock ................3-1
Indicator lights and warning light ....3-1
Speedometer ..................................3-2
Fuel gauge ......................................3-2
Coolant temperature gauge ............3-3
Multi-function display ......................3-3
Handlebar switches ........................3-6
Front brake lever ............................3-7
Rear brake lever .............................3-7
Fuel tank cap ..................................3-7
Fuel .................................................3-8
Catalytic converters ........................3-9
Seat ..............................................3-10
Storage compartments .................3-11
Windshield ....................................3-12
Adjusting the shock absorber
assemblies ................................3-13
Carrier (if equipped).......................3-13
Luggage hook ...............................3-14
Sidestand ......................................3-14
Ignition circuit cut-off system ........3-15FOR YOUR SAFETY –
PRE-OPERATION CHECKS............. 4-1
OPERATION AND IMPORTANT
RIDING POINTS................................. 5-1
Starting the engine ......................... 5-1
Starting off ...................................... 5-2
Acceleration and deceleration ........ 5-2
Braking ........................................... 5-3
Tips for reducing fuel
consumption ............................... 5-3
Engine break-in .............................. 5-4
Parking ........................................... 5-4
PERIODIC MAINTENANCE AND
ADJUSTMENT................................... 6-1
Owner’s tool kit ............................... 6-2
Periodic maintenance chart for the
emission control system ............. 6-3
General maintenance and
lubrication chart .......................... 6-4
Removing and installing cowlings
and panels .................................. 6-7
Checking the spark plug ................. 6-8
Engine oil ....................................... 6-9
Final transmission oil .................... 6-11
Coolant ......................................... 6-12
Air filter and V-belt case air filter
elements ................................... 6-13
Checking the throttle grip free
play ........................................... 6-14Valve clearance ........................... 6-15
Tires ............................................. 6-15
Cast wheels ................................. 6-17
Front and rear brake lever free
play ........................................... 6-17
Checking the front and rear brake
pads .......................................... 6-18
Checking the brake fluid level ...... 6-19
Changing the brake fluid .............. 6-20
Checking and lubricating the
cables ....................................... 6-20
Checking and lubricating the
throttle grip and cable ............... 6-21
Lubricating the front and rear
brake levers .............................. 6-21
Checking and lubricating the
centerstand and sidestand ....... 6-21
Checking the front fork ................. 6-22
Checking the steering .................. 6-23
Checking the wheel bearings ....... 6-23
Battery ......................................... 6-23
Replacing the fuses ..................... 6-25
Replacing a headlight bulb .......... 6-26
Replacing a front turn signal light
bulb ........................................... 6-27
Replacing a tail/brake light bulb or
a rear turn signal light bulb ....... 6-28
Replacing the license plate light
bulb ........................................... 6-29
Replacing an auxiliary light
bulb ........................................... 6-29U5B2E4E0.book Page 1 Friday, June 1, 2012 9:06 AM
Page 22 of 82
INSTRUMENT AND CONTROL FUNCTIONS
3-6
3
TIP●
The oil change indicator will come
on at the initial 1000 km (600 mi)
and every 3000 km (1800 mi)
thereafter.
●
If the engine oil is changed before
the oil change indicator comes on
(i.e. before the periodic oil change
interval has been reached), the in-
dicator must be reset after the oil
change for the next periodic oil
change to be indicated at the cor-
rect time. After resetting, the indi-
cator will come on for two seconds.
If the indicator does not come on,
repeat the procedure.
EAU1234A
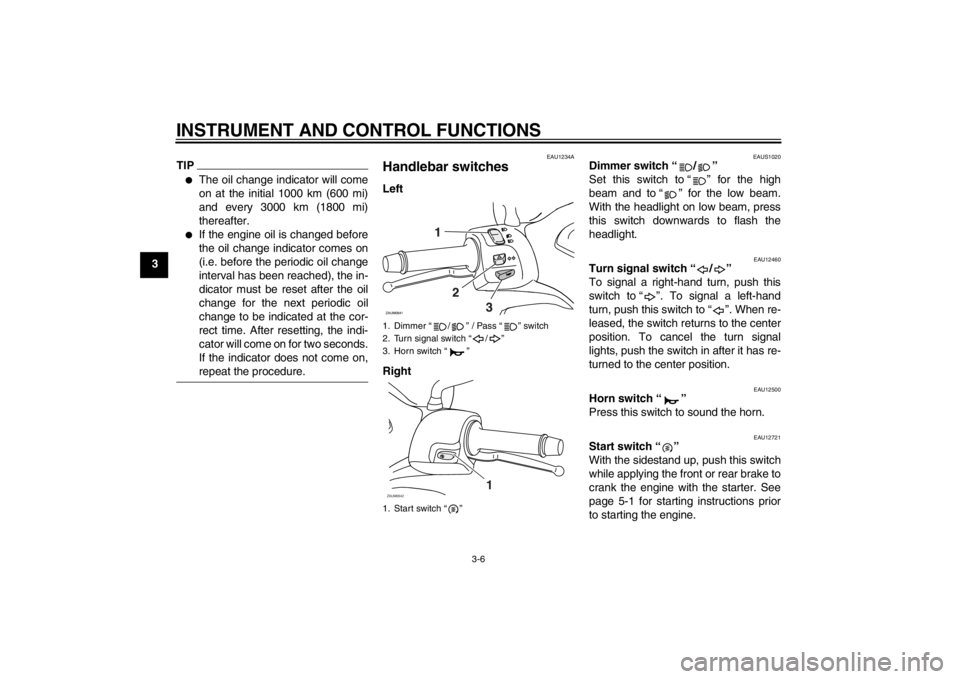
Handlebar switches Left
Right
EAUS1020
Dimmer switch “ / ”
Set this switch to “ ” for the high
beam and to “ ” for the low beam.
With the headlight on low beam, press
this switch downwards to flash the
headlight.
EAU12460
Turn signal switch “ / ”
To signal a right-hand turn, push this
switch to “ ”. To signal a left-hand
turn, push this switch to “ ”. When re-
leased, the switch returns to the center
position. To cancel the turn signal
lights, push the switch in after it has re-
turned to the center position.
EAU12500
Horn switch “ ”
Press this switch to sound the horn.
EAU12721
Start switch “ ”
With the sidestand up, push this switch
while applying the front or rear brake to
crank the engine with the starter. See
page 5-1 for starting instructions prior
to starting the engine.
1. Dimmer “ / ” / Pass “ ” switch
2. Turn signal switch “ / ”
3. Horn switch “ ”
1. Start switch “ ”ZAUM0642
1
U5B2E4E0.book Page 6 Friday, June 1, 2012 9:06 AM
Page 31 of 82
INSTRUMENT AND CONTROL FUNCTIONS
3-15
3
EAU45052
Ignition circuit cut-off system The ignition circuit cut-off system (com-
prising the sidestand switch and brake
light switches) has the following func-
tions.●
It prevents starting when the side-
stand is up, but neither brake is ap-
plied.
●
It prevents starting when either
brake is applied, but the sidestand
is still down.
●
It cuts the running engine when the
sidestand is moved down.
Periodically check the operation of the
ignition circuit cut-off system according
to the following procedure.
U5B2E4E0.book Page 15 Friday, June 1, 2012 9:06 AM
Page 34 of 82
FOR YOUR SAFETY – PRE-OPERATION CHECKS
4-2
4
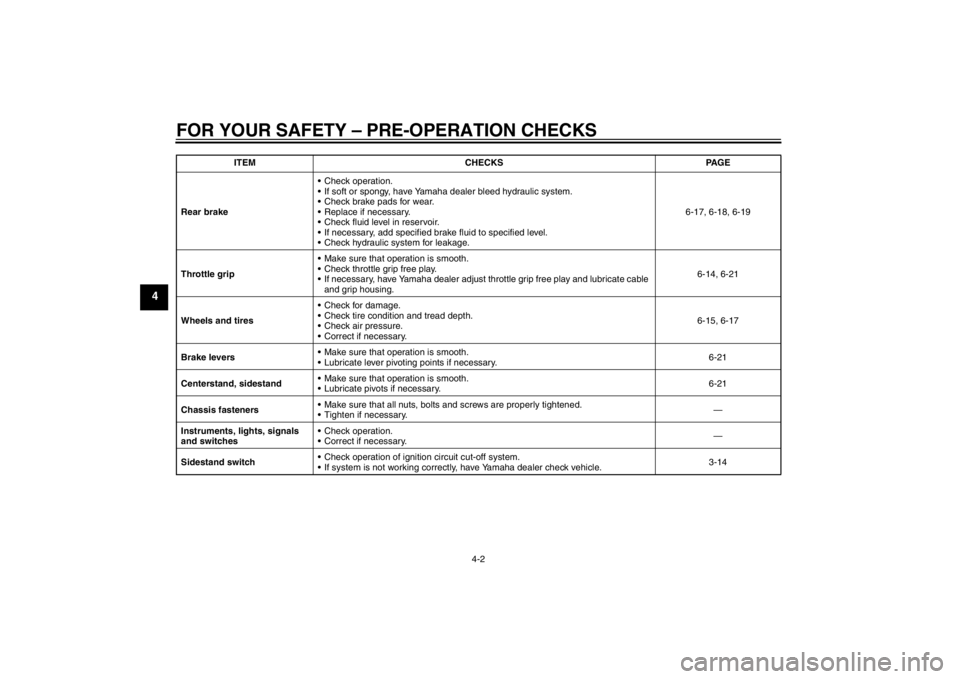
Rear brake Check operation.
If soft or spongy, have Yamaha dealer bleed hydraulic system.
Check brake pads for wear.
Replace if necessary.
Check fluid level in reservoir.
If necessary, add specified brake fluid to specified level.
Check hydraulic system for leakage.6-17, 6-18, 6-19
Throttle grip Make sure that operation is smooth.
Check throttle grip free play.
If necessary, have Yamaha dealer adjust throttle grip free play and lubricate cable
and grip housing.6-14, 6-21
Wheels and tires Check for damage.
Check tire condition and tread depth.
Check air pressure.
Correct if necessary.6-15, 6-17
Brake levers Make sure that operation is smooth.
Lubricate lever pivoting points if necessary.6-21
Centerstand, sidestand Make sure that operation is smooth.
Lubricate pivots if necessary.6-21
Chassis fasteners Make sure that all nuts, bolts and screws are properly tightened.
Tighten if necessary.—
Instruments, lights, signals
and switches Check operation.
Correct if necessary.—
Sidestand switch Check operation of ignition circuit cut-off system.
If system is not working correctly, have Yamaha dealer check vehicle.3-14 ITEM CHECKS PAGE
U5B2E4E0.book Page 2 Friday, June 1, 2012 9:06 AM
Page 37 of 82
OPERATION AND IMPORTANT RIDING POINTS
5-3
5
EAU16793
Braking
WARNING
EWA10300
●
Avoid braking hard or suddenly
(especially when leaning over to
one side), otherwise the scooter
may skid or overturn.
●
Railroad crossings, streetcar
rails, iron plates on road con-
struction sites, and manhole
covers become extremely slip-
pery when wet. Therefore, slow
down when approaching such
areas and cross them with cau-
tion.
●
Keep in mind that braking on a
wet road is much more difficult.
●
Ride slowly down a hill, as brak-
ing downhill can be very diffi-
cult.
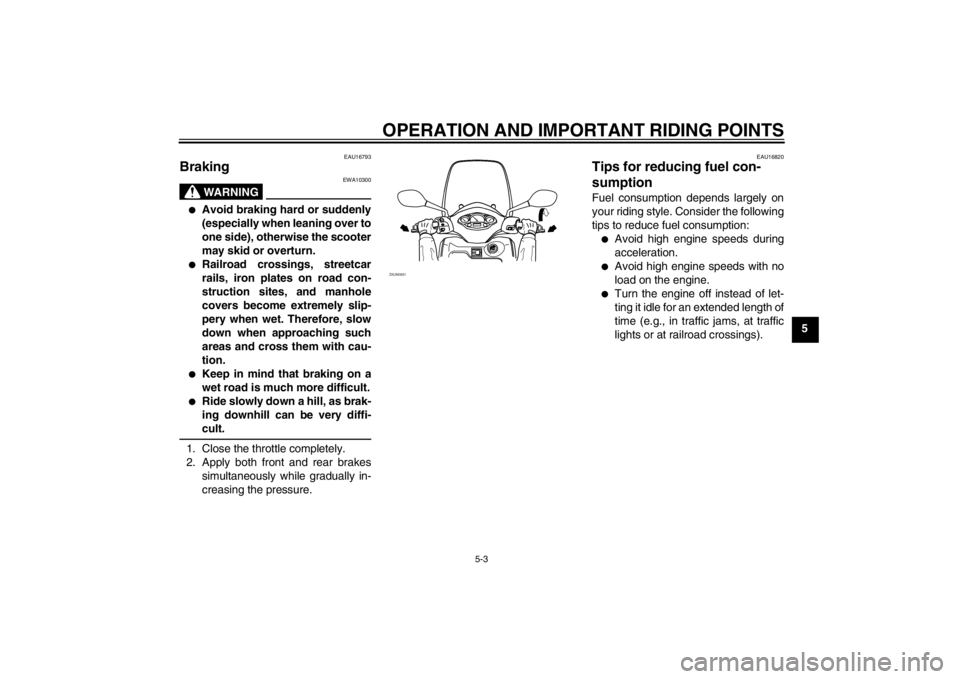
1. Close the throttle completely.
2. Apply both front and rear brakes
simultaneously while gradually in-
creasing the pressure.
EAU16820
Tips for reducing fuel con-
sumption Fuel consumption depends largely on
your riding style. Consider the following
tips to reduce fuel consumption:●
Avoid high engine speeds during
acceleration.
●
Avoid high engine speeds with no
load on the engine.
●
Turn the engine off instead of let-
ting it idle for an extended length of
time (e.g., in traffic jams, at traffic
lights or at railroad crossings).
PUSHOPE
N
ZAUM0651
U5B2E4E0.book Page 3 Friday, June 1, 2012 9:06 AM
Page 43 of 82

PERIODIC MAINTENANCE AND ADJUSTMENT
6-5
6
9*Steering bearings Check bearing play and steering
for roughness.√√√√√
Lubricate with lithium-soap-based
grease.Every 20000 km (12000 mi)
10*Chassis fasteners Make sure that all nuts, bolts and
screws are properly tightened.√√√√√
11Front brake lever
pivot shaft Lubricate with silicone grease.√√√√√
12Rear brake lever
pivot shaft Lubricate with silicone grease.√√√√√
13Sidestand, center-
stand Check operation.
Lubricate with lithium-soap-based
grease.√√√√√
14*Sidestand switch Check operation.√√√√√√
15*Front fork Check operation and for oil leak-
age.√√√√
16*Shock absorber as-
semblies Check operation and shock ab-
sorbers for oil leakage.√√√√
17 Engine oil Change. (See page 3-1.)√When the oil change indicator light comes on [every 3000 km
(1800 mi)]
Check oil level and vehicle for oil
leakage.Every 3000 km (1800 mi)√
18*Engine oil strainer Clean.√
19*Cooling system Check coolant level and vehicle
for coolant leakage.√√√√√
Change coolant. Every 3 years NO. ITEM CHECK OR MAINTENANCE JOBODOMETER READING
ANNUAL
CHECK 1000 km
(600 mi)10000 km
(6000 mi)20000 km
(12000 mi)30000 km
(18000 mi)40000 km
(24000 mi)
U5B2E4E0.book Page 5 Friday, June 1, 2012 9:06 AM
Page 44 of 82

PERIODIC MAINTENANCE AND ADJUSTMENT
6-6
6
EAU18670
TIP●
The air filter needs more frequent service if you are riding in unusually wet or dusty areas.
●
Hydraulic brake service
Regularly check and, if necessary, correct the brake fluid level.
Every two years replace the internal components of the brake master cylinders and calipers, and change the brake
fluid.
Replace the brake hoses every four years and if cracked or damaged.
20Final transmission
oil Check vehicle for oil leakage.√√ √
Change.√√√
21*V- b e l t Replace. Every 20000 km (12500 mi)
22*Front and rear brake
switches Check operation.√√√√√√
23Moving parts and
cables Lubricate.√√√√√
24*Throttle grip Check operation.
Check throttle grip free play, and
adjust if necessary.
Lubricate cable and grip housing.√√√√√
25*Lights, signals and
switches Check operation.
Adjust headlight beam.√√√√√√ NO. ITEM CHECK OR MAINTENANCE JOBODOMETER READING
ANNUAL
CHECK 1000 km
(600 mi)10000 km
(6000 mi)20000 km
(12000 mi)30000 km
(18000 mi)40000 km
(24000 mi)U5B2E4E0.book Page 6 Friday, June 1, 2012 9:06 AM
Page 66 of 82

PERIODIC MAINTENANCE AND ADJUSTMENT
6-28
65. Insert a new bulb into the socket,
push it in, and then turn it clock-
wise until it stops.
6. Install the socket (together with the
bulb) by turning it clockwise.
7. Install the cowling.
EAUM2191
Replacing a tail/brake light
bulb or a rear turn signal light
bulb 1. Place the vehicle on the center-
stand.
2. Remove panel B. (See page 6-7.)
3. Remove the tail/brake light unit by
removing the screws.
4. Remove the socket (together with
the bulb) by turning it counter-
clockwise.5. Remove the burnt out bulb by
pushing it in and turning it counter-
clockwise.
6. Insert a new bulb into the socket,
push it in, and then turn it clock-
wise until it stops.
7. Install the socket (together with the
bulb) by turning it clockwise.
8. Install the screws and the
tail/brake light unit.
9. Install the panel.1. ScrewZAUM0679
1
1. Tail/brake light bulb socket
2. Turn signal light bulb socketZAUM0680
12
U5B2E4E0.book Page 28 Friday, June 1, 2012 9:06 AM
Page 71 of 82
SCOOTER CARE AND STORAGE
7-1
7
EAU26094
Care While the open design of a scooter re-
veals the attractiveness of the technol-
ogy, it also makes it more vulnerable.
Rust and corrosion can develop even if
high-quality components are used. A
rusty exhaust pipe may go unnoticed
on a car, however, it detracts from the
overall appearance of a scooter. Fre-
quent and proper care does not only
comply with the terms of the warranty,
but it will also keep your scooter looking
good, extend its life and optimize its
performance.
Before cleaning
1. Cover the muffler outlet with a
plastic bag after the engine has
cooled down.
2. Make sure that all caps and covers
as well as all electrical couplers
and connectors, including the
spark plug cap, are tightly in-
stalled.
3. Remove extremely stubborn dirt,
like oil burnt onto the crankcase,
with a degreasing agent and a
brush, but never apply such prod-ucts onto seals, gaskets and wheel
axles. Always rinse the dirt and de-
greaser off with water.
Cleaning
NOTICE
ECA10783
●
Avoid using strong acidic wheel
cleaners, especially on spoked
wheels. If such products are
used on hard-to-remove dirt, do
not leave the cleaner on the af-
fected area any longer than in-
structed. Also, thoroughly rinse
the area off with water, immedi-
ately dry it, and then apply a cor-
rosion protection spray.
●
Improper cleaning can damage
plastic parts (such as cowlings,
panels, windshields, headlight
lenses, meter lenses, etc.) and
the mufflers. Use only a soft,
clean cloth or sponge with wa-
ter to clean plastic. However, if
the plastic parts cannot be thor-
oughly cleaned with water, di-
luted mild detergent with water
may be used. Be sure to rinseoff any detergent residue using
plenty of water, as it is harmful
to plastic parts.
●
Do not use any harsh chemical
products on plastic parts. Be
sure to avoid using cloths or
sponges which have been in
contact with strong or abrasive
cleaning products, solvent or
thinner, fuel (gasoline), rust re-
movers or inhibitors, brake flu-
id, antifreeze or electrolyte.
●
Do not use high-pressure wash-
ers or steam-jet cleaners since
they cause water seepage and
deterioration in the following ar-
eas: seals (of wheel and swing-
arm bearings, fork and brakes),
electric components (couplers,
connectors, instruments,
switches and lights), breather
hoses and vents.
●
For scooters equipped with a
windshield: Do not use strong
cleaners or hard sponges as
they will cause dulling or
scratching. Some cleaning com-
pounds for plastic may leave
scratches on the windshield.
U5B2E4E0.book Page 1 Friday, June 1, 2012 9:06 AM
Page 76 of 82

SPECIFICATIONS
8-2
8
Caster angle:
26.00 °
Trail:
96 mm (3.8 in)Front tire:Type:
Tubeless
Size:
120/70-16 M/C 57P
Manufacturer/model:
PIRELLI/SPORT DEMON FRONTRear tire:Type:
Tubeless
Size:
140/70-15 69P
Manufacturer/model:
PIRELLI/SPORT DEMONLoading:Maximum load:
185 kg (408 lb)
(Total weight of rider, passenger, cargo and
accessories)Tire air pressure (measured on cold
tires):Loading condition:
0–90 kg (0–198 lb)
Front:
170 kPa (1.70 kgf/cm², 25 psi)
Rear:
190 kPa (1.90 kgf/cm², 28 psi)
Loading condition:
90–185 kg (198–408 lb)Front:
180 kPa (1.80 kgf/cm², 26 psi)
Rear:
200 kPa (2.00 kgf/cm², 29 psi)
Front wheel:Wheel type:
Cast wheel
Rim size:
16 M/C x MT3.00Rear wheel:Wheel type:
Cast wheel
Rim size:
15 M/C x MT4.00Front brake:Type:
Single disc brake
Operation:
Right hand operation
Specified brake fluid:
DOT 4Rear brake:Type:
Single disc brake
Operation:
Left hand operation
Specified brake fluid:
DOT 4Front suspension:Type:
Telescopic fork
Spring/shock absorber type:
Coil spring/oil damperWheel travel:
100.0 mm (3.94 in)
Rear suspension:Type:
Unit swing
Spring/shock absorber type:
Coil spring/oil damper
Wheel travel:
105.0 mm (4.13 in)Electrical system:Ignition system:
TCI
Charging system:
AC magnetoBattery:Model:
GTX9-BS
Voltage, capacity:
12 V, 8.0 AhHeadlight:Bulb type:
Halogen bulbBulb voltage, wattage × quantity:Low beam headlight:
12 V, 55.0 W × 1
High beam headlight:
12 V, 55.0 W × 1
Tail/brake light:
12 V, 5.0 W/21.0 W × 2
Front turn signal light:
12 V, 10.0 W × 2
Rear turn signal light:
12 V, 10.0 W × 2
U5B2E4E0.book Page 2 Friday, June 1, 2012 9:06 AM