key battery YAMAHA XJ 1300 2015 Owners Manual
[x] Cancel search | Manufacturer: YAMAHA, Model Year: 2015, Model line: XJ 1300, Model: YAMAHA XJ 1300 2015Pages: 98, PDF Size: 2.6 MB
Page 18 of 98

INSTRUMENT AND CONTROL FUNCTIONS
3-3
3
EAU10693
LOCK
The steering is locked, and all electrical
systems are off. The key can be re-
moved.
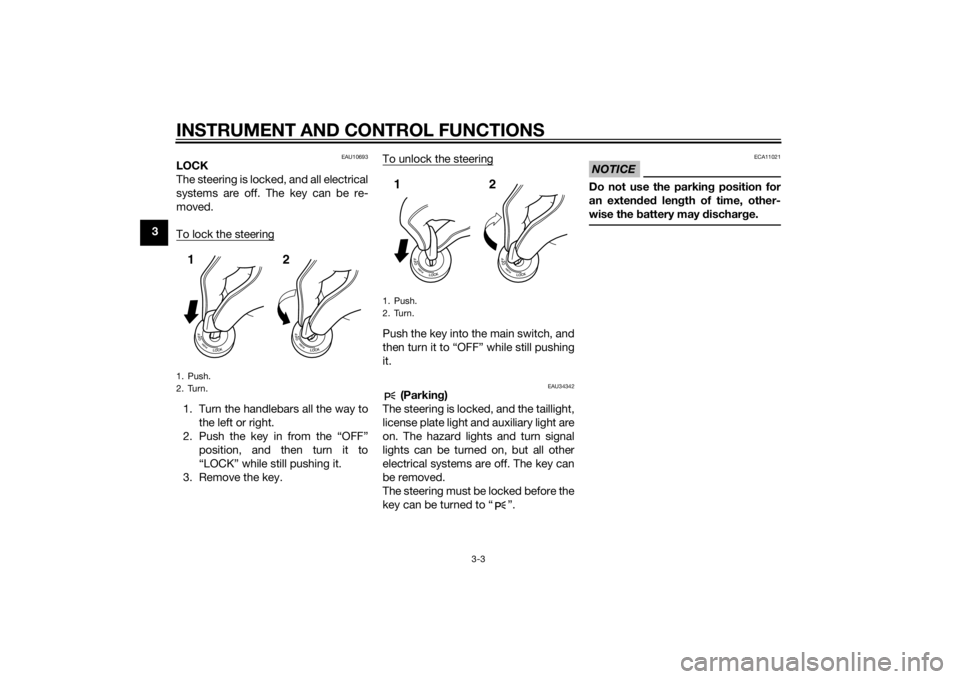
To lock the steering1. Turn the handlebars all the way tothe left or right.
2. Push the key in from the “OFF” position, and then turn it to
“LOCK” while still pushing it.
3. Remove the key. To unlock the steering
Push the key into the main switch, and
then turn it to “OFF” while still pushing
it.
EAU34342
(Parkin
g)
The steering is locked, and the taillight,
license plate light and auxiliary light are
on. The hazard lights and turn signal
lights can be turned on, but all other
electrical systems are off. The key can
be removed.
The steering must be locked before the
key can be turned to “ ”.
NOTICE
ECA11021
Do not use the parkin g position for
an exten ded len gth of time, other-
wise the battery may d ischarge.
1. Push.
2. Turn.12
1. Push.
2. Turn.12
U2PNE0E0.book Page 3 Tuesday, September 16, 2014 4:15 PM
Page 74 of 98

PERIODIC MAINTENANCE AND ADJUSTMENT
6-29
6battery tends to discharge more quick-
ly if the vehicle is equipped with op-
tional electrical accessories.
NOTICE
ECA16522
To char
ge a VRLA (Valve Re gulate d
Lea d Aci d) battery, a special (con-
stant-voltag e) battery char ger is re-
quired . Using a conventional b attery
char ger will damag e the b attery.To store the b attery
1. If the vehicle will not be used for more than one month, remove the
battery, fully charge it, and then
place it in a cool, dry place.
NOTICE: When removin g the
b attery, be sure the key is
turne d to “OFF”, then d iscon-
nect the neg ative lead b efore
d isconnectin g the positive lea d.
[ECA16303]
2. If the battery will be stored for
more than two months, check it at
least once a month and fully
charge it if necessary.
3. Fully charge the battery before in- stallation. NOTICE: When install-
in g the b attery, be sure the key is turned
to “OFF”, then connect
the positive lead before con-
nectin g the ne gative lea d.
[ECA16841]
4. After installation, make sure that
the battery leads are properly con-
nected to the battery terminals.NOTICE
ECA16531
Always keep the b attery charged .
Storin g a d ischar ged battery can
cause permanent battery damag e.
EAU43274
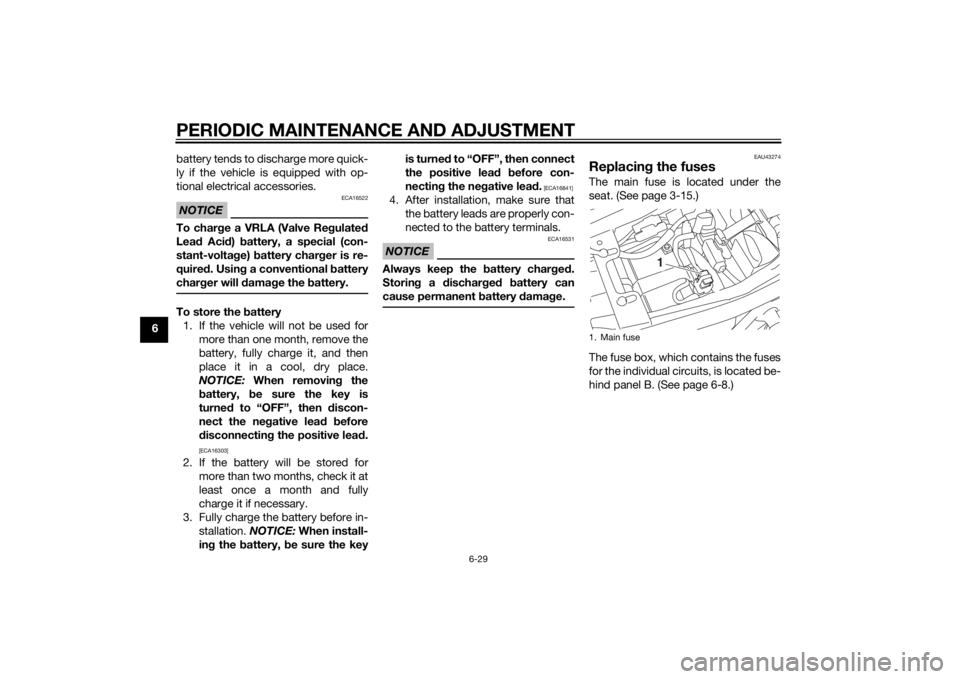
Replacin g the fusesThe main fuse is located under the
seat. (See page 3-15.)
The fuse box, which contains the fuses
for the individual circuits, is located be-
hind panel B. (See page 6-8.)1. Main fuse
1
U2PNE0E0.book Page 29 Tuesda y, September 16, 2014 4:15 PM