wheel YAMAHA XJ6-S 2014 User Guide
[x] Cancel search | Manufacturer: YAMAHA, Model Year: 2014, Model line: XJ6-S, Model: YAMAHA XJ6-S 2014Pages: 104, PDF Size: 2.84 MB
Page 66 of 104
PERIODIC MAINTENANCE AND ADJUSTMENT
6-21
6wei
ght of ri der, passen ger, car-
g o, an d accessories approve d
for this mo del.
WARNING
EWA10512
Never overloa d your vehicle. Opera-
tion of an overloa ded vehicle coul d
cause an acci dent.
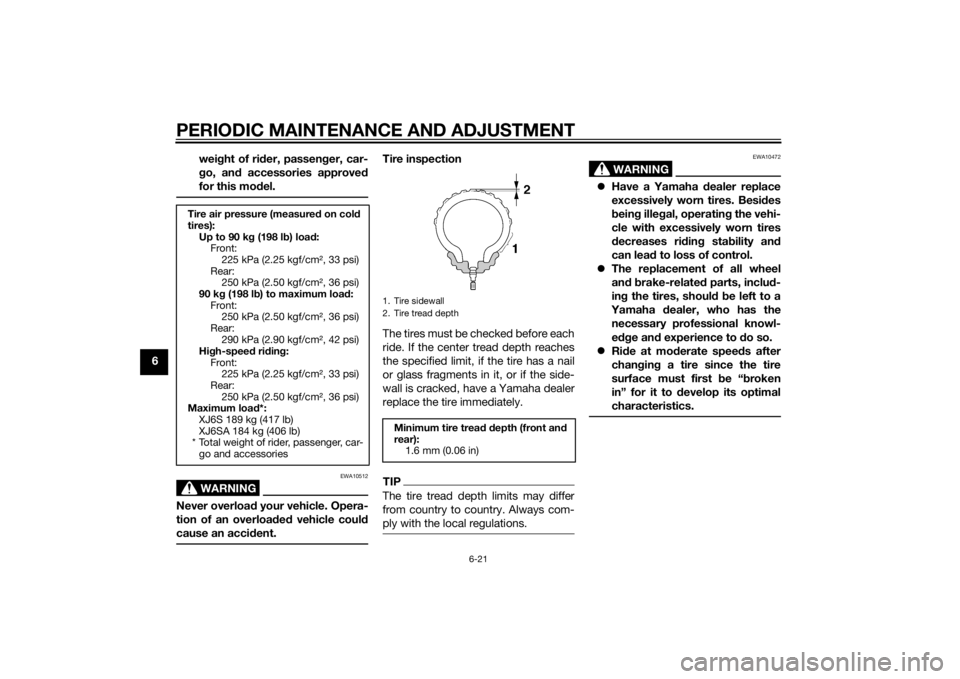
Tire inspection
The tires must be checked before each
ride. If the center tread depth reaches
the specified limit, if the tire has a nail
or glass fragments in it, or if the side-
wall is cracked, have a Yamaha dealer
replace the tire immediately.TIPThe tire tread depth limits may differ
from country to country. Always com-
ply with the local regulations.
WARNING
EWA10472
Have a Yamaha dealer replace
excessively worn tires. Besi des
b ein g ille gal, operatin g the vehi-
cle with excessively worn tires
d ecreases rid ing sta bility an d
can lead to loss of control.
The replacement of all wheel
and b rake-relate d parts, inclu d-
in g the tires, shoul d b e left to a
Yamaha dealer, who has the
necessary professional knowl-
e dge an d experience to do so.
Ride at mo derate speed s after
chan gin g a tire since the tire
surface must first be “ broken
in” for it to develop its optimal
characteristics.
Tire air pressure (measure d on col d
tires): Up to 90 k g (198 l b) loa d:
Front:
225 kPa (2.25 kgf/cm², 33 psi)
Rear: 250 kPa (2.50 kgf/cm², 36 psi)
90 k g (198 l b) to maximum load :
Front: 250 kPa (2.50 kgf/cm², 36 psi)
Rear: 290 kPa (2.90 kgf/cm², 42 psi)
Hi gh-spee d ri din g:
Front: 225 kPa (2.25 kgf/cm², 33 psi)
Rear:
250 kPa (2.50 kgf/cm², 36 psi)
Maximum loa d*:
XJ6S 189 kg (417 lb)
XJ6SA 184 kg (406 lb)
* Total weight of rider, passenger, car- go and accessories
1. Tire sidewall
2. Tire tread depthMinimum tire trea d d epth (front an d
rear): 1.6 mm (0.06 in)
U36CE4E0.book Page 21 Tuesday, July 2, 2013 3:47 PM
Page 67 of 104
PERIODIC MAINTENANCE AND ADJUSTMENT
6-22
6
Tire information
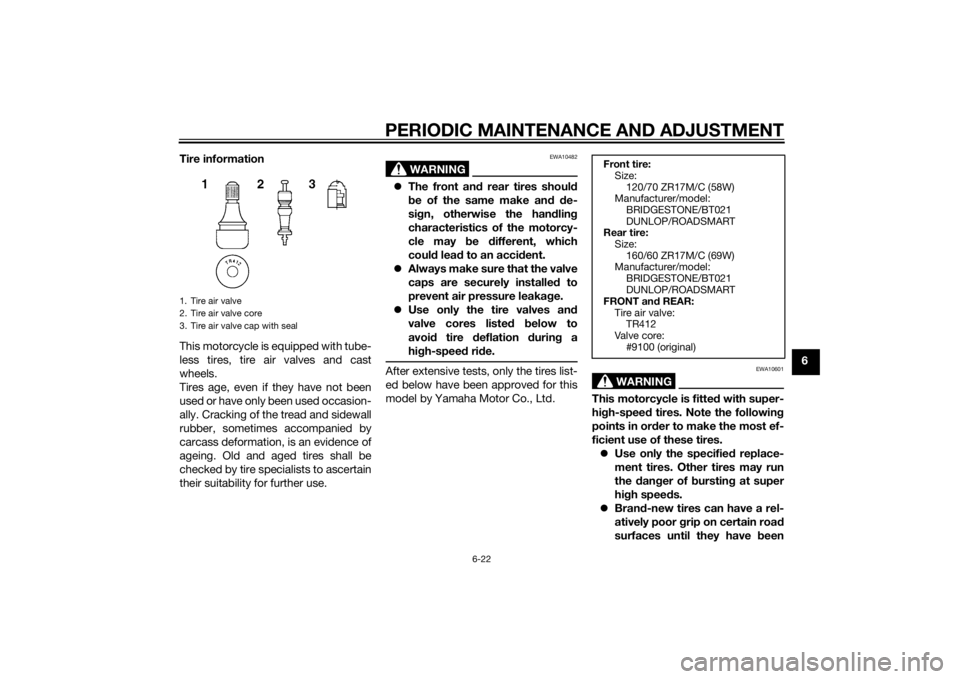
This motorcycle is equipped with tube-
less tires, tire air valves and cast
wheels.
Tires age, even if they have not been
used or have only been used occasion-
ally. Cracking of the tread and sidewall
rubber, sometimes accompanied by
carcass deformation, is an evidence of
ageing. Old and aged tires shall be
checked by tire specialists to ascertain
their suitability for further use.
WARNING
EWA10482
The front an d rear tires shoul d
b e of the same make an d d e-
si gn, otherwise the han dlin g
characteristics of the motorcy-
cle may b e different, which
coul d lea d to an acci dent.
Always make sure that the valve
caps are securely installe d to
prevent air pressure leaka ge.
Use only the tire valves an d
valve cores liste d below to
avoi d tire deflation during a
hi gh-spee d ri de.After extensive tests, only the tires list-
ed below have been approved for this
model by Yamaha Motor Co., Ltd.
WARNING
EWA10601
This motorcycle is fitte d with super-
hi gh-spee d tires. Note the followin g
points in or der to make the most ef-
ficient use of these tires. Use only the specified replace-
ment tires. Other tires may run
the dan ger of bursting at super
hi gh spee ds.
Bran d-new tires can have a rel-
atively poor grip on certain roa d
surfaces until they have been
1. Tire air valve
2. Tire air valve core
3. Tire air valve cap with seal
Front tire:
Size:
120/70 ZR17M/C (58W)
Manufacturer/model:
BRIDGESTONE/BT021
DUNLOP/ROADSMART
Rear tire:
Size: 160/60 ZR17M/C (69W)
Manufacturer/model:
BRIDGESTONE/BT021
DUNLOP/ROADSMART
FRONT and REAR:
Tire air valve: TR412
Valve core:
#9100 (original)
U36CE4E0.book Page 22 Tuesday, July 2, 2013 3:47 PM
Page 68 of 104
PERIODIC MAINTENANCE AND ADJUSTMENT
6-23
6“
b roken in”. Therefore, it is a d-
visa ble before doin g any hi gh-
speed ridin g to ri de conserva-
tively for approximately 100 km
(60 mi) after installin g a new tire.
The tires must b e warmed up
b efore a hi gh-spee d run.
Always a djust the tire air pres-
sure accor din g to the operating
con ditions.
EAU21963
Cast wheelsTo maximize the performance, durabil-
ity, and safe operation of your vehicle,
note the following points regarding the
specified wheels.
The wheel rims should be
checked for cracks, bends, warp-
age or other damage before each
ride. If any damage is found, have
a Yamaha dealer replace the
wheel. Do not attempt even the
smallest repair to the wheel. A de-
formed or cracked wheel must be
replaced.
The wheel should be balanced
whenever either the tire or wheel
has been changed or replaced. An
unbalanced wheel can result in
poor performance, adverse han-
dling characteristics, and a short-
ened tire life.
EAU47591
Adjustin g the clutch lever free
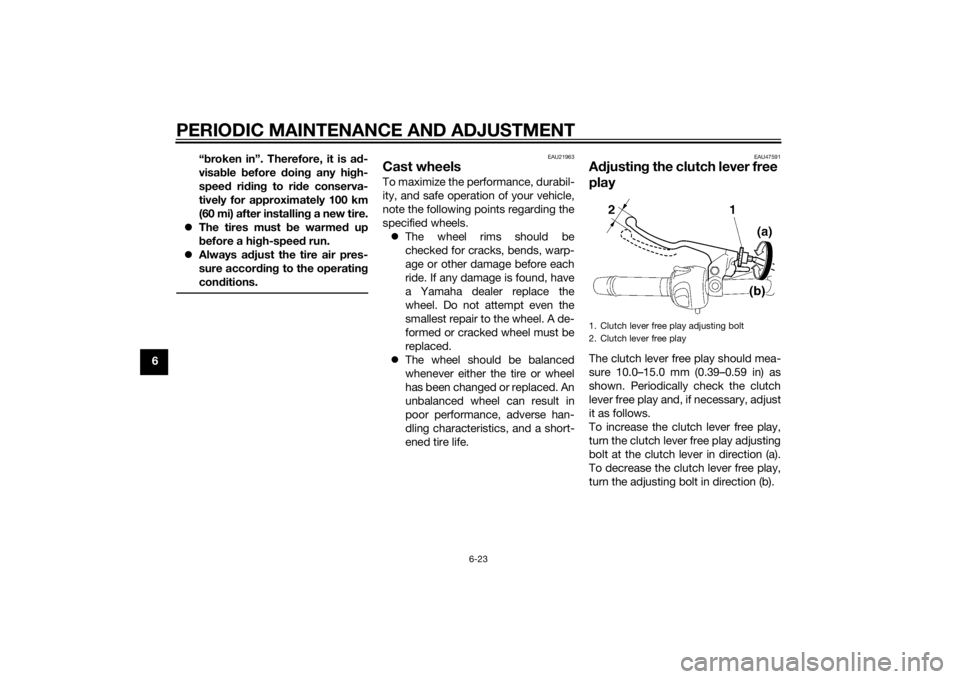
playThe clutch lever free play should mea-
sure 10.0–15.0 mm (0.39–0.59 in) as
shown. Periodically check the clutch
lever free play and, if necessary, adjust
it as follows.
To increase the clutch lever free play,
turn the clutch lever free play adjusting
bolt at the clutch lever in direction (a).
To decrease the clutch lever free play,
turn the adjusting bolt in direction (b).1. Clutch lever free play adjusting bolt
2. Clutch lever free play
U36CE4E0.book Page 23 Tuesday, July 2, 2013 3:47 PM
Page 73 of 104
PERIODIC MAINTENANCE AND ADJUSTMENT
6-28
6
EAU22733
Changin g the brake flui dHave a Yamaha dealer change the
brake fluid at the intervals specified in
the periodic maintenance and lubrica-
tion chart. In addition, have the oil seals
of the master cylinders and calipers as
well as the brake hoses replaced at the
intervals listed below or whenever they
are damaged or leaking.
Oil seals: Replace every two
years.
Brake hoses: Replace every four
years.
EAU22762
Drive chain slackThe drive chain slack should be
checked before each ride and adjusted
if necessary.
EAU22795
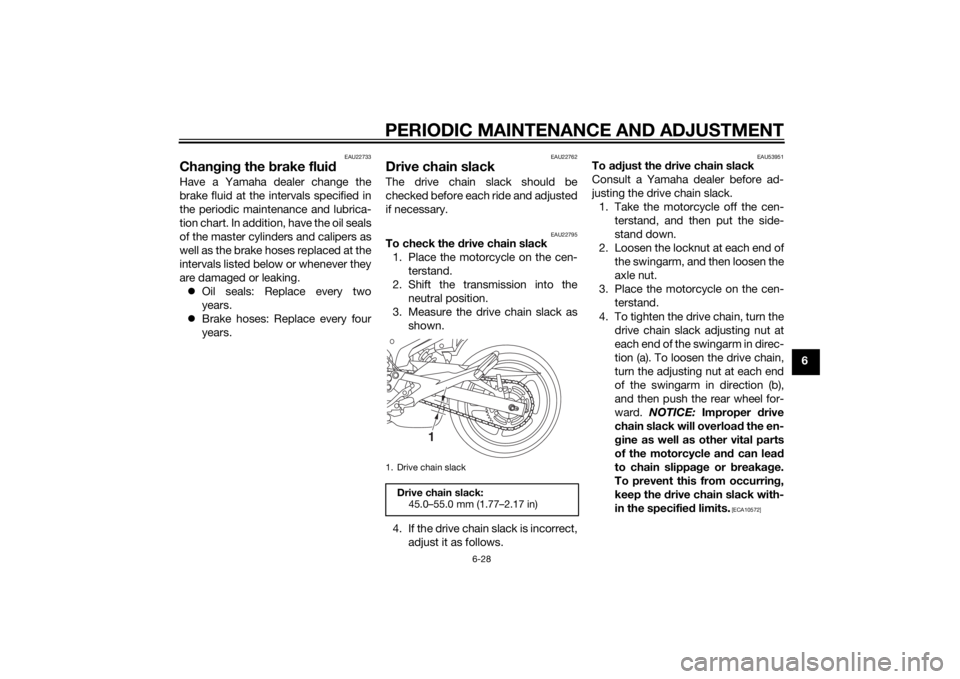
To check the drive chain slack
1. Place the motorcycle on the cen- terstand.
2. Shift the transmission into the neutral position.
3. Measure the drive chain slack as shown.
4. If the drive chain slack is incorrect, adjust it as follows.
EAU53951
To a djust the drive chain slack
Consult a Yamaha dealer before ad-
justing the drive chain slack. 1. Take the motorcycle off the cen- terstand, and then put the side-
stand down.
2. Loosen the locknut at each end of the swingarm, and then loosen the
axle nut.
3. Place the motorcycle on the cen- terstand.
4. To tighten the drive chain, turn the drive chain slack adjusting nut at
each end of the swingarm in direc-
tion (a). To loosen the drive chain,
turn the adjusting nut at each end
of the swingarm in direction (b),
and then push the rear wheel for-
ward. NOTICE: Improper d rive
chain slack will overloa d the en-
g ine as well as other vital parts
of the motorcycle an d can lead
to chain slippa ge or b reakag e.
To prevent this from occurrin g,
keep the d rive chain slack with-
in the specifie d limits.
[ECA10572]
1. Drive chain slack
Drive chain slack:
45.0–55.0 mm (1.77–2.17 in)
1
U36CE4E0.book Page 28 Tuesday, July 2, 2013 3:47 PM
Page 74 of 104
PERIODIC MAINTENANCE AND ADJUSTMENT
6-29
6
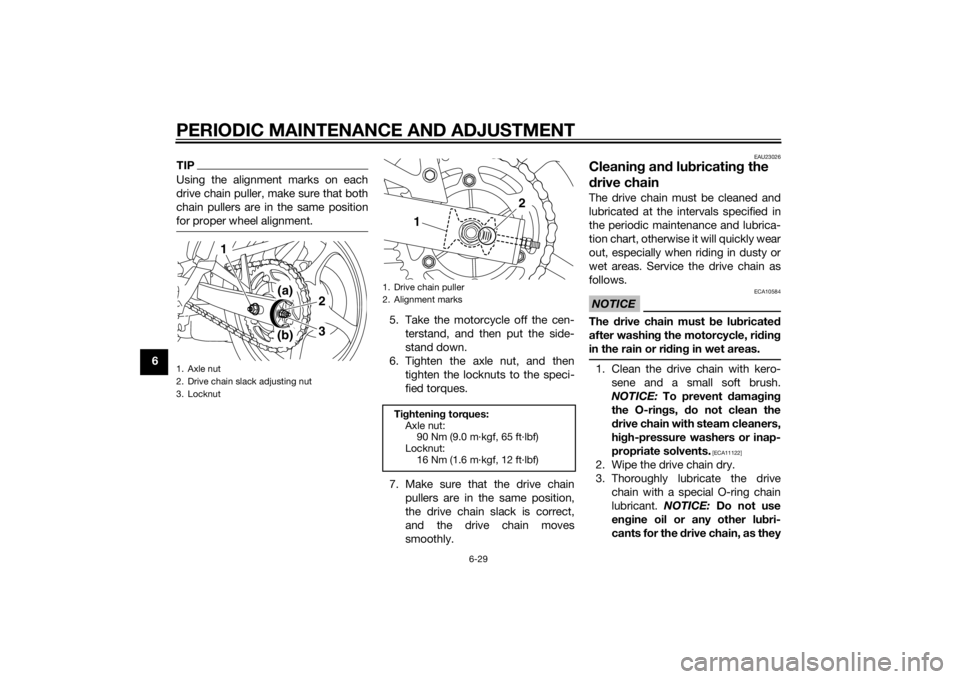
TIPUsing the alignment marks on each
drive chain puller, make sure that both
chain pullers are in the same position
for proper wheel alignment.
5. Take the motorcycle off the cen-terstand, and then put the side-
stand down.
6. Tighten the axle nut, and then tighten the locknuts to the speci-
fied torques.
7. Make sure that the drive chain pullers are in the same position,
the drive chain slack is correct,
and the drive chain moves
smoothly.
EAU23026
Cleanin g an d lu bricatin g the
d rive chainThe drive chain must be cleaned and
lubricated at the intervals specified in
the periodic maintenance and lubrica-
tion chart, otherwise it will quickly wear
out, especially when riding in dusty or
wet areas. Service the drive chain as
follows.NOTICE
ECA10584
The drive chain must be lu bricated
after washin g the motorcycle, ri din g
in the rain or ri din g in wet areas.1. Clean the drive chain with kero-
sene and a small soft brush.
NOTICE: To prevent d amaging
the O-ring s, do not clean the
d rive chain with steam cleaners,
hi gh-pressure washers or inap-
propriate solvents.
[ECA11122]
2. Wipe the drive chain dry.
3. Thoroughly lubricate the drive chain with a special O-ring chain
lubricant. NOTICE: Do not use
en gine oil or any other lu bri-
cants for the drive chain, as they
1. Axle nut
2. Drive chain slack adjusting nut
3. Locknut
3
1
2
(a)(b)
1. Drive chain puller
2. Alignment marksTi ghtenin g torques:
Axle nut: 90 Nm (9.0 m·kgf, 65 ft·lbf)
Locknut:
16 Nm (1.6 m·kgf, 12 ft·lbf)
1
2
U36CE4E0.book Page 29 Tuesday, July 2, 2013 3:47 PM
Page 79 of 104
PERIODIC MAINTENANCE AND ADJUSTMENT
6-34
6
EAU45512
Checking the steerin gWorn or loose steering bearings may
cause danger. Therefore, the operation
of the steering must be checked as fol-
lows at the intervals specified in the
periodic maintenance and lubrication
chart.
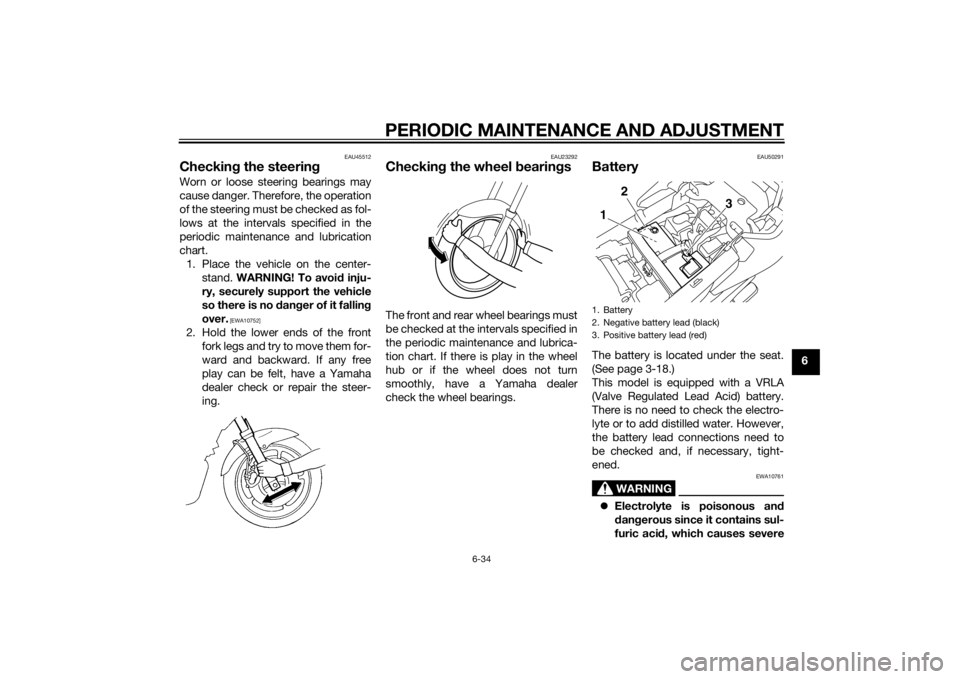
1. Place the vehicle on the center- stand. WARNING! To avoi d inju-
ry, securely support the vehicle
so there is no d anger of it fallin g
over.
[EWA10752]
2. Hold the lower ends of the front fork legs and try to move them for-
ward and backward. If any free
play can be felt, have a Yamaha
dealer check or repair the steer-
ing.
EAU23292
Checkin g the wheel bearin gsThe front and rear wheel bearings must
be checked at the intervals specified in
the periodic maintenance and lubrica-
tion chart. If there is play in the wheel
hub or if the wheel does not turn
smoothly, have a Yamaha dealer
check the wheel bearings.
EAU50291
BatteryThe battery is located under the seat.
(See page 3-18.)
This model is equipped with a VRLA
(Valve Regulated Lead Acid) battery.
There is no need to check the electro-
lyte or to add distilled water. However,
the battery lead connections need to
be checked and, if necessary, tight-
ened.
WARNING
EWA10761
Electrolyte is poisonous an d
d an gerous since it contains sul-
furic aci d, which causes severe1. Battery
2. Negative battery lead (black)
3. Positive battery lead (red)1 2
3
U36CE4E0.book Page 34 Tuesday, July 2, 2013 3:47 PM
Page 86 of 104
PERIODIC MAINTENANCE AND ADJUSTMENT
6-41
6
EAU39021
Auxiliary light bul bIf the auxiliary light does not come on,
have a Yamaha dealer check the elec-
trical circuit or replace the bulb.
EAU44792
Front wheel (for non-ABS
mo dels)
WARNING
EWA14841
For the ABS mo del, have a Yamaha
d ealer remove an d install the wheel.
EAU56280
To remove the front wheel
WARNING
EWA10822
To avoi d injury, securely support the
vehicle so there is no dan ger of it
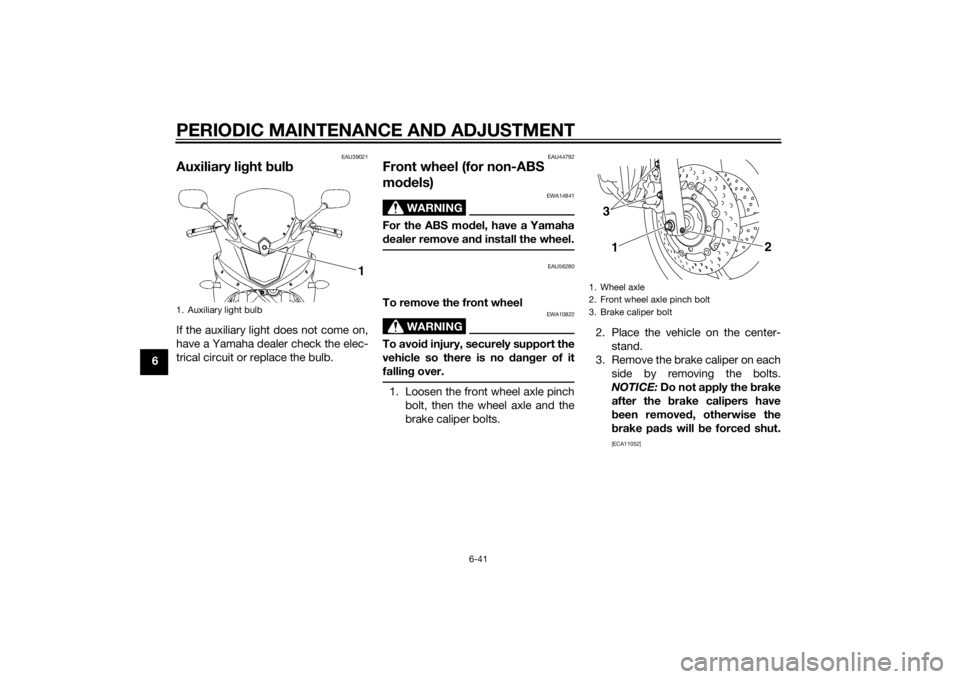
fallin g over.1. Loosen the front wheel axle pinch
bolt, then the wheel axle and the
brake caliper bolts. 2. Place the vehicle on the center-
stand.
3. Remove the brake caliper on each side by removing the bolts.
NOTICE: Do not apply the b rake
after the brake calipers have
b een removed , otherwise the
b rake pa ds will b e forced shut.
[ECA11052]
1. Auxiliary light bulb
1
1. Wheel axle
2. Front wheel axle pinch bolt
3. Brake caliper bolt
13
2
U36CE4E0.book Page 41 Tuesday, July 2, 2013 3:47 PM
Page 87 of 104
PERIODIC MAINTENANCE AND ADJUSTMENT
6-42
6
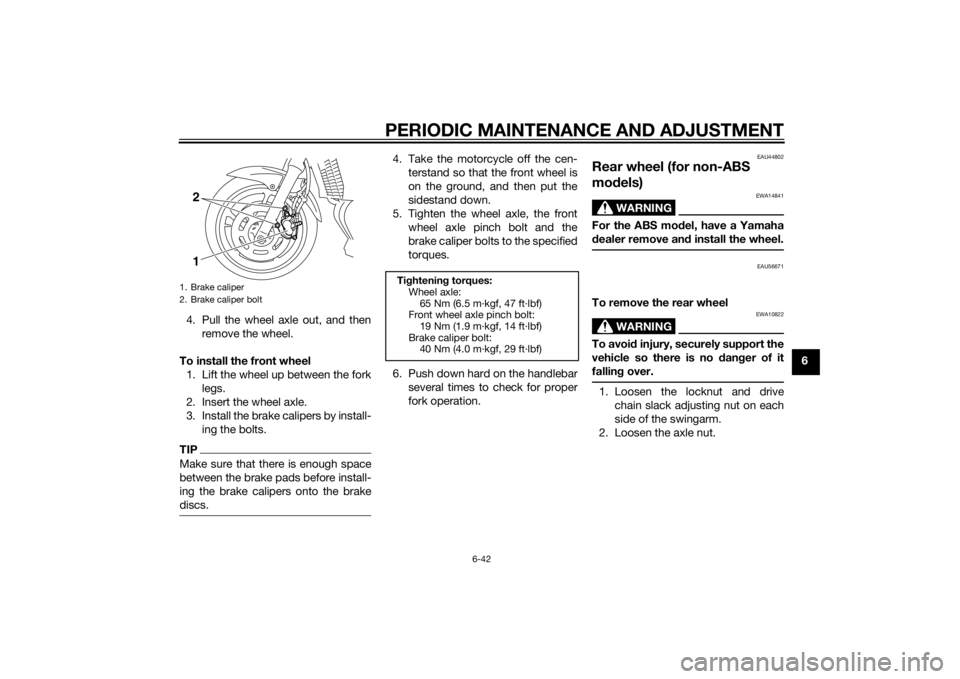
4. Pull the wheel axle out, and then
remove the wheel.
To install the front wheel 1. Lift the wheel up between the fork legs.
2. Insert the wheel axle.
3. Install the brake calipers by install- ing the bolts.
TIPMake sure that there is enough space
between the brake pads before install-
ing the brake calipers onto the brake
discs.
4. Take the motorcycle off the cen-terstand so that the front wheel is
on the ground, and then put the
sidestand down.
5. Tighten the wheel axle, the front wheel axle pinch bolt and the
brake caliper bolts to the specified
torques.
6. Push down hard on the handlebar several times to check for proper
fork operation.
EAU44802
Rear wheel (for non-ABS
mo dels)
WARNING
EWA14841
For the ABS mo del, have a Yamaha
d ealer remove an d install the wheel.
EAU56671
To remove the rear wheel
WARNING
EWA10822
To avoi d injury, securely support the
vehicle so there is no dan ger of it
fallin g over.1. Loosen the locknut and drive
chain slack adjusting nut on each
side of the swingarm.
2. Loosen the axle nut.
1. Brake caliper
2. Brake caliper bolt
1 2
Ti ghtenin g torques:
Wheel axle: 65 Nm (6.5 m·kgf, 47 ft·lbf)
Front wheel axle pinch bolt:
19 Nm (1.9 m·kgf, 14 ft·lbf)
Brake caliper bolt: 40 Nm (4.0 m·kgf, 29 ft·lbf)
U36CE4E0.book Page 42 Tuesday, July 2, 2013 3:47 PM
Page 88 of 104
PERIODIC MAINTENANCE AND ADJUSTMENT
6-43
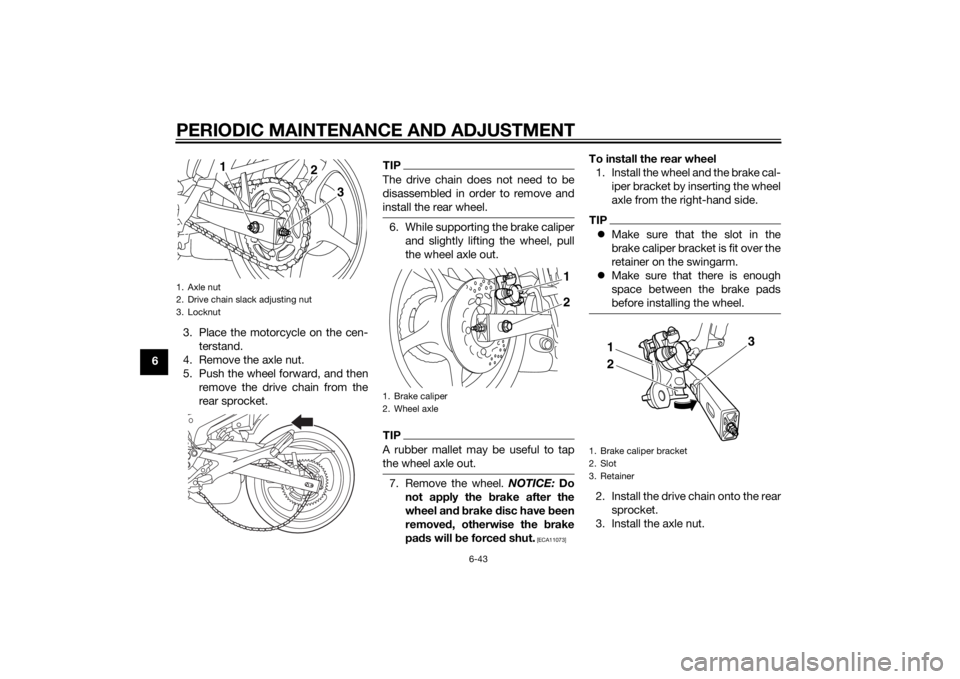
63. Place the motorcycle on the cen-
terstand.
4. Remove the axle nut.
5. Push the wheel forward, and then remove the drive chain from the
rear sprocket.
TIPThe drive chain does not need to be
disassembled in order to remove and
install the rear wheel.6. While supporting the brake caliperand slightly lifting the wheel, pull
the wheel axle out.TIPA rubber mallet may be useful to tap
the wheel axle out.7. Remove the wheel. NOTICE: Do
not apply the b rake after the
wheel an d b rake disc have b een
remove d, otherwise the brake
pa ds will be force d shut.
[ECA11073]
To install the rear wheel
1. Install the wheel and the brake cal- iper bracket by inserting the wheel
axle from the right-hand side.TIPMake sure that the slot in the
brake caliper bracket is fit over the
retainer on the swingarm.
Make sure that there is enough
space between the brake pads
before installing the wheel.2. Install the drive chain onto the rear
sprocket.
3. Install the axle nut.
1. Axle nut
2. Drive chain slack adjusting nut
3. Locknut
1
3
2
1. Brake caliper
2. Wheel axle
1
2
1. Brake caliper bracket
2. Slot
3. Retainer
2 31
U36CE4E0.book Page 43 Tuesday, July 2, 2013 3:47 PM
Page 89 of 104
PERIODIC MAINTENANCE AND ADJUSTMENT
6-44
6
4. Adjust the drive chain slack. (See
page 6-28.)
5. Take the motorcycle off the cen- terstand so that the rear wheel is
on the ground, and then put the
sidestand down.
6. Tighten the axle nut, and then tighten the locknuts to the speci-
fied torques.
EAU25872
Trou bleshootin gAlthough Yamaha motorcycles receive
a thorough inspection before shipment
from the factory, trouble may occur
during operation. Any problem in the
fuel, compression, or ignition systems,
for example, can cause poor starting
and loss of power.
The following troubleshooting charts
represent quick and easy procedures
for checking these vital systems your-
self. However, should your motorcycle
require any repair, take it to a Yamaha
dealer, whose skilled technicians have
the necessary tools, experience, and
know-how to service the motorcycle
properly.
Use only genuine Yamaha replace-
ment parts. Imitation parts may look
like Yamaha parts, but they are often
inferior, have a shorter service life and
can lead to expensive repair bills.
WARNING
EWA15142
When checkin g the fuel system, d o
not smoke, an d make sure there are
no open flames or sparks in the ar-
ea, inclu din g pilot li ghts from water heaters or furnaces. Gasoline or
g
asoline vapors can i gnite or ex-
plo de, causin g severe injury or prop-
erty damag e.
Tightenin g torques:
Axle nut: 90 Nm (9.0 m·kgf, 65 ft·lbf)
Locknut:
16 Nm (1.6 m·kgf, 12 ft·lbf)
U36CE4E0.book Page 44 Tuesday, July 2, 2013 3:47 PM