change wheel YAMAHA XJ6-S 2014 Owners Manual
[x] Cancel search | Manufacturer: YAMAHA, Model Year: 2014, Model line: XJ6-S, Model: YAMAHA XJ6-S 2014Pages: 104, PDF Size: 2.84 MB
Page 2 of 104

EAU50921
Read this manual carefully before operatin g this vehicle. This manual shoul d stay with this vehicle if it is sol d.
General manager of quality assurance div.
Date of issue: 1 Aug. 2002 Place of issue: Shizuoka, Japan
DECLARATION of CONFORMITY
YAMAHA MOTOR ELECTRONICS CO., LTD.1450-6, Mori, Mori-machi, Shuchi-gun, Shizuoka-ken, 437-0292 Japan
Company: YAMAHA MOTOR ELECTRONICS CO., LTD. We
Address: 1450-6, Mori, Mori-Machi, Shuchi-gun, Shizuoka-Ken, 437-0292 Japan
Kind of equipment: IMMOBILIZER Hereby declare that the product:
Type-designation: 5SL-00
is in compliance with following norm(s) or documents:
R&TTE Directive(1999/5/EC)
EN300 330-2 v1.3.1(2006-01), EN300 330-2 v1.5.1(2010-02)
EN60950-1:2006/A11:2009
Two or Three-Wheel Motor Vehicles Directive(97/24/EC: Chapter 8, EMC)
1
2
3
4 Version up the norm of EN60950 to EN60950-1
To change company name
version up of the following norm:
• EN300 330-2 v1.1.1 to EN300 330-2 v1.3.1 and EN300 330-2 v1.5.1
27 Feb. 2006
1 Mar. 2007
8 Jul. 2010
Revision record
No. Contents
To change contact person and integrate type-designation. Date
9 Jun. 2005
U36CE4E0.book Page 1 Tuesday, July 2, 2013 3:47 PM
Page 68 of 104

PERIODIC MAINTENANCE AND ADJUSTMENT
6-23
6“
b roken in”. Therefore, it is a d-
visa ble before doin g any hi gh-
speed ridin g to ri de conserva-
tively for approximately 100 km
(60 mi) after installin g a new tire.
The tires must b e warmed up
b efore a hi gh-spee d run.
Always a djust the tire air pres-
sure accor din g to the operating
con ditions.
EAU21963
Cast wheelsTo maximize the performance, durabil-
ity, and safe operation of your vehicle,
note the following points regarding the
specified wheels.
The wheel rims should be
checked for cracks, bends, warp-
age or other damage before each
ride. If any damage is found, have
a Yamaha dealer replace the
wheel. Do not attempt even the
smallest repair to the wheel. A de-
formed or cracked wheel must be
replaced.
The wheel should be balanced
whenever either the tire or wheel
has been changed or replaced. An
unbalanced wheel can result in
poor performance, adverse han-
dling characteristics, and a short-
ened tire life.
EAU47591
Adjustin g the clutch lever free
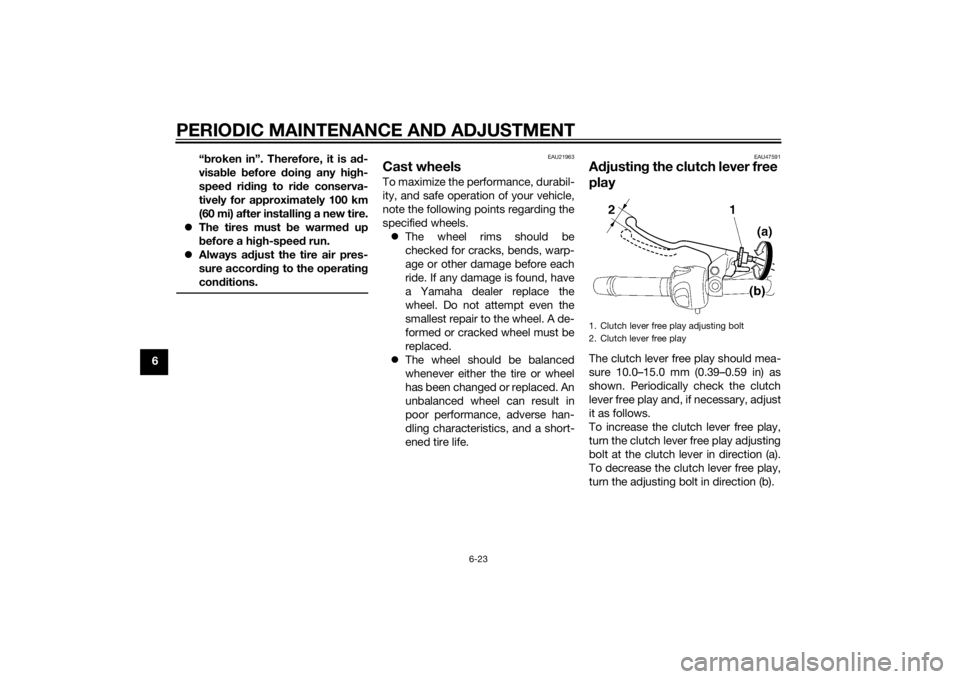
playThe clutch lever free play should mea-
sure 10.0–15.0 mm (0.39–0.59 in) as
shown. Periodically check the clutch
lever free play and, if necessary, adjust
it as follows.
To increase the clutch lever free play,
turn the clutch lever free play adjusting
bolt at the clutch lever in direction (a).
To decrease the clutch lever free play,
turn the adjusting bolt in direction (b).1. Clutch lever free play adjusting bolt
2. Clutch lever free play
U36CE4E0.book Page 23 Tuesday, July 2, 2013 3:47 PM
Page 73 of 104

PERIODIC MAINTENANCE AND ADJUSTMENT
6-28
6
EAU22733
Changin g the brake flui dHave a Yamaha dealer change the
brake fluid at the intervals specified in
the periodic maintenance and lubrica-
tion chart. In addition, have the oil seals
of the master cylinders and calipers as
well as the brake hoses replaced at the
intervals listed below or whenever they
are damaged or leaking.
Oil seals: Replace every two
years.
Brake hoses: Replace every four
years.
EAU22762
Drive chain slackThe drive chain slack should be
checked before each ride and adjusted
if necessary.
EAU22795
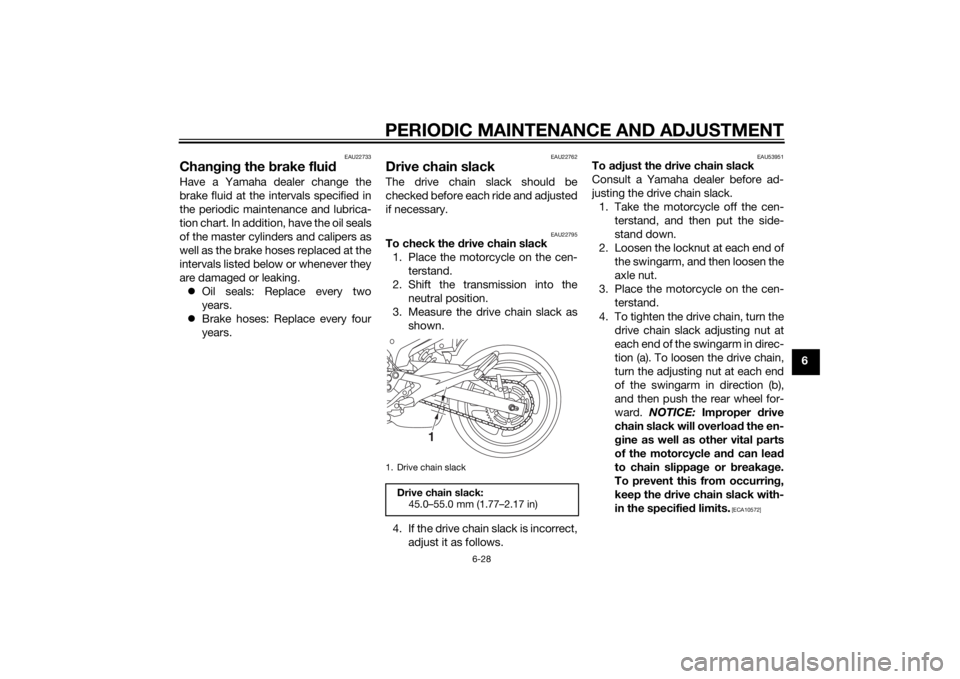
To check the drive chain slack
1. Place the motorcycle on the cen- terstand.
2. Shift the transmission into the neutral position.
3. Measure the drive chain slack as shown.
4. If the drive chain slack is incorrect, adjust it as follows.
EAU53951
To a djust the drive chain slack
Consult a Yamaha dealer before ad-
justing the drive chain slack. 1. Take the motorcycle off the cen- terstand, and then put the side-
stand down.
2. Loosen the locknut at each end of the swingarm, and then loosen the
axle nut.
3. Place the motorcycle on the cen- terstand.
4. To tighten the drive chain, turn the drive chain slack adjusting nut at
each end of the swingarm in direc-
tion (a). To loosen the drive chain,
turn the adjusting nut at each end
of the swingarm in direction (b),
and then push the rear wheel for-
ward. NOTICE: Improper d rive
chain slack will overloa d the en-
g ine as well as other vital parts
of the motorcycle an d can lead
to chain slippa ge or b reakag e.
To prevent this from occurrin g,
keep the d rive chain slack with-
in the specifie d limits.
[ECA10572]
1. Drive chain slack
Drive chain slack:
45.0–55.0 mm (1.77–2.17 in)
1
U36CE4E0.book Page 28 Tuesday, July 2, 2013 3:47 PM