light YAMAHA XJ600N 2000 Owners Manual
[x] Cancel search | Manufacturer: YAMAHA, Model Year: 2000, Model line: XJ600N, Model: YAMAHA XJ600N 2000Pages: 101, PDF Size: 19.23 MB
Page 12 of 101
R
2-2
DESCRIPTION
/Net/layout8/layout_G2/work/Imai_work/OM-PS/AA9156_XJ600SN-E6/English/E-2.frame
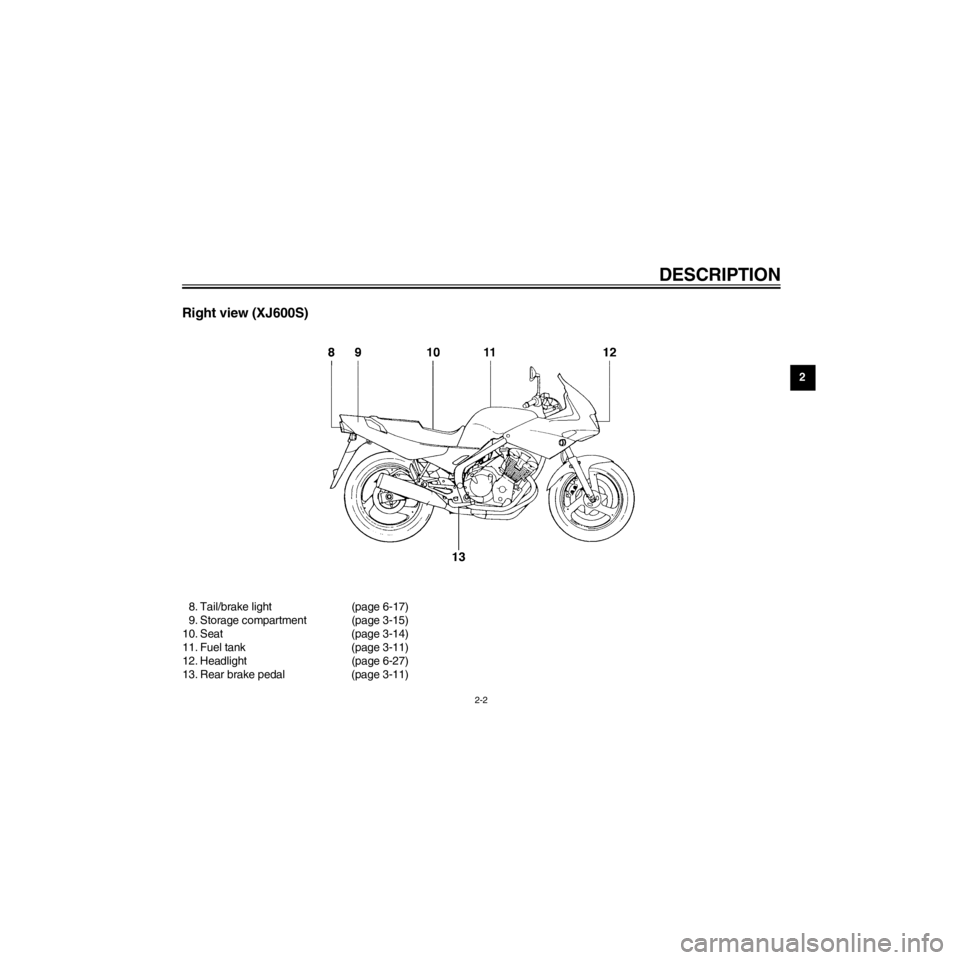
Right view (XJ600S)
8. Tail/brake light (page 6-17)
9. Storage compartment (page 3-15)
10. Seat (page 3-14)
11. Fuel tank (page 3-11)
12. Headlight (page 6-27)
13. Rear brake pedal (page 3-11)
Page 15 of 101
L
2-5
DESCRIPTION
/Net/layout8/layout_G2/work/Imai_work/OM-PS/AA9156_XJ600SN-E6/English/E-2.frame
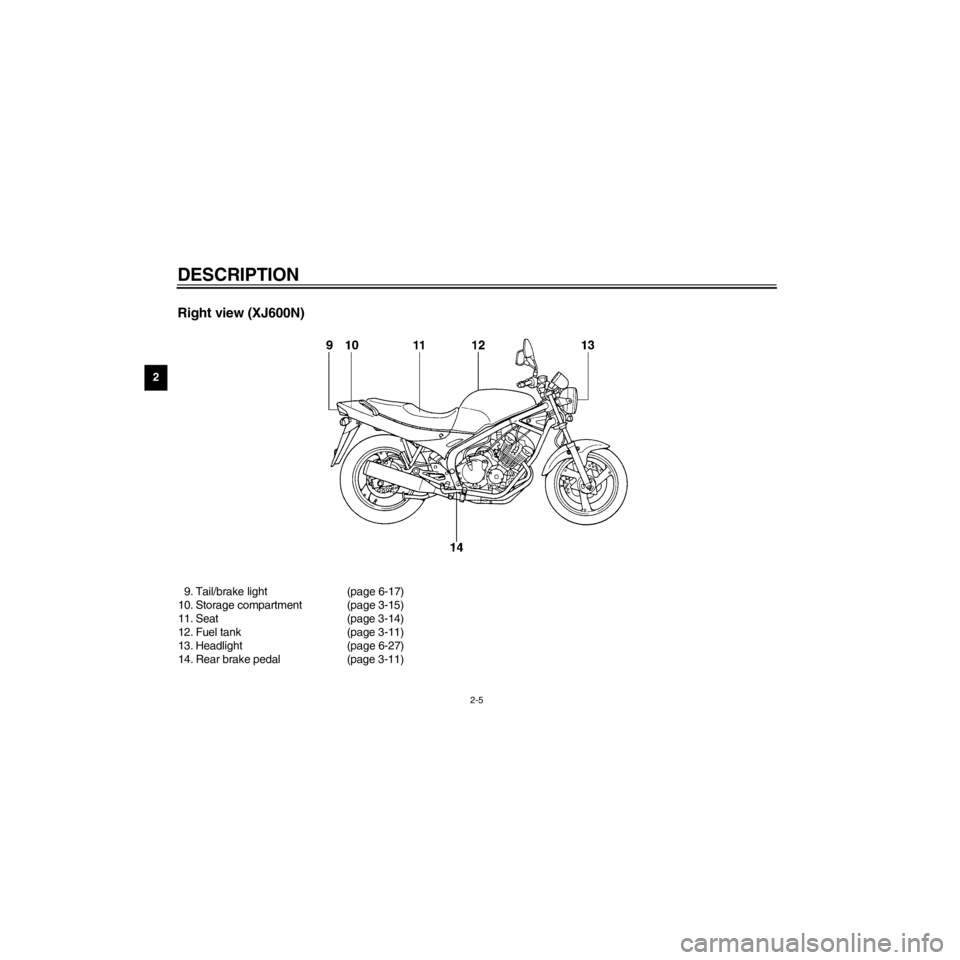
Right view (XJ600N)
9. Tail/brake light (page 6-17)
10. Storage compartment (page 3-15)
11. Seat (page 3-14)
12. Fuel tank (page 3-11)
13. Headlight (page 6-27)
14. Rear brake pedal (page 3-11)
Page 18 of 101
R
INSTRUMENT AND CONTROL FUNCTIONS
/Net/layout8/layout_G2/work/Imai_work/OM-PS/AA9156_XJ600SN-E6/English/E-3TOC.-
Main switch ......................................................... 3-1
Steering lock (for XJ600N) ................................ 3-3
Indicator lights .................................................... 3-3
Oil level indicator circuit check ........................... 3-5
Speedometer (for XJ600S) ................................. 3-6
Speedometer (for XJ600N) ................................ 3-6
Tachometer ........................................................ 3-7
Handlebar switches ............................................ 3-7
Clutch lever ........................................................ 3-9
Shift pedal ........................................................ 3-10
Front brake lever .............................................. 3-10
Rear brake pedal .............................................. 3-11Fuel tank cap .................................................... 3-11
Fuel ................................................................... 3-12
Fuel tank breather hose (for Germany only) ..... 3-12
Fuel cock........................................................... 3-13
Starter (choke) Ò Ó ......................................... 3-14
Seat................................................................... 3-14
Helmet holders .................................................. 3-15
Storage compartment ....................................... 3-15
Rear shock absorber adjustment ...................... 3-15
Luggage strap holders ...................................... 3-16
Sidestand .......................................................... 3-17
Sidestand/clutch switch operation check .......... 3-17
Page 19 of 101
L
3-1
INSTRUMENT AND CONTROL FUNCTIONS
/Net/layout8/layout_G2/work/Imai_work/OM-PS/AA9156_XJ600SN-E6/English/E-3.frame
EAU00027
EAU00028
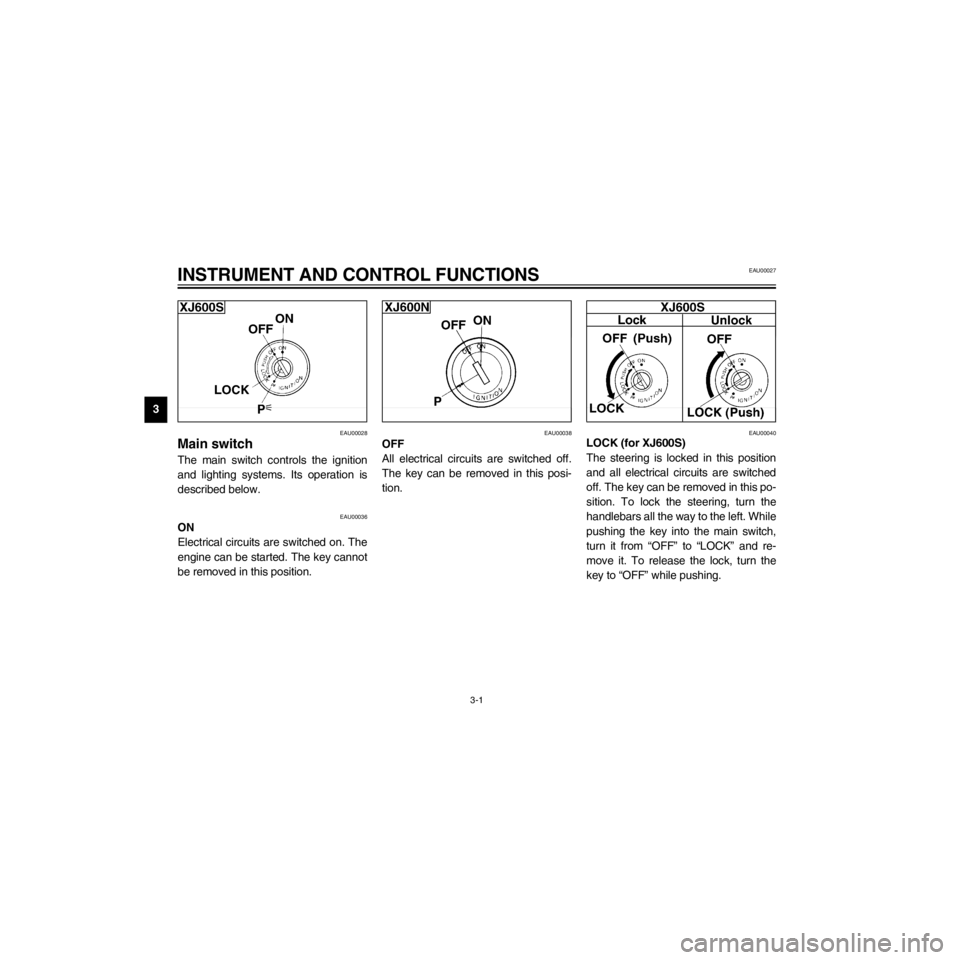
Main switch
The main switch controls the ignition
and lighting systems. Its operation is
described below.
EAU00036
ON
Electrical circuits are switched on. The
engine can be started. The key cannot
be removed in this position.
EAU00038
OFF
All electrical circuits are switched off.
The key can be removed in this posi-
tion.
EAU00040
LOCK (for XJ600S)
The steering is locked in this position
and all electrical circuits are switched
off. The key can be removed in this po-
sition. To lock the steering, turn the
handlebars all the way to the left. While
pushing the key into the main switch,
turn it from ÒOFFÓ to ÒLOCKÓ and re-
move it. To release the lock, turn the
key to ÒOFFÓ while pushing.
Page 20 of 101
R
3-2
INSTRUMENT AND CONTROL FUNCTIONS
/Net/layout8/layout_G2/work/Imai_work/OM-PS/AA9156_XJ600SN-E6/English/E-3.frame
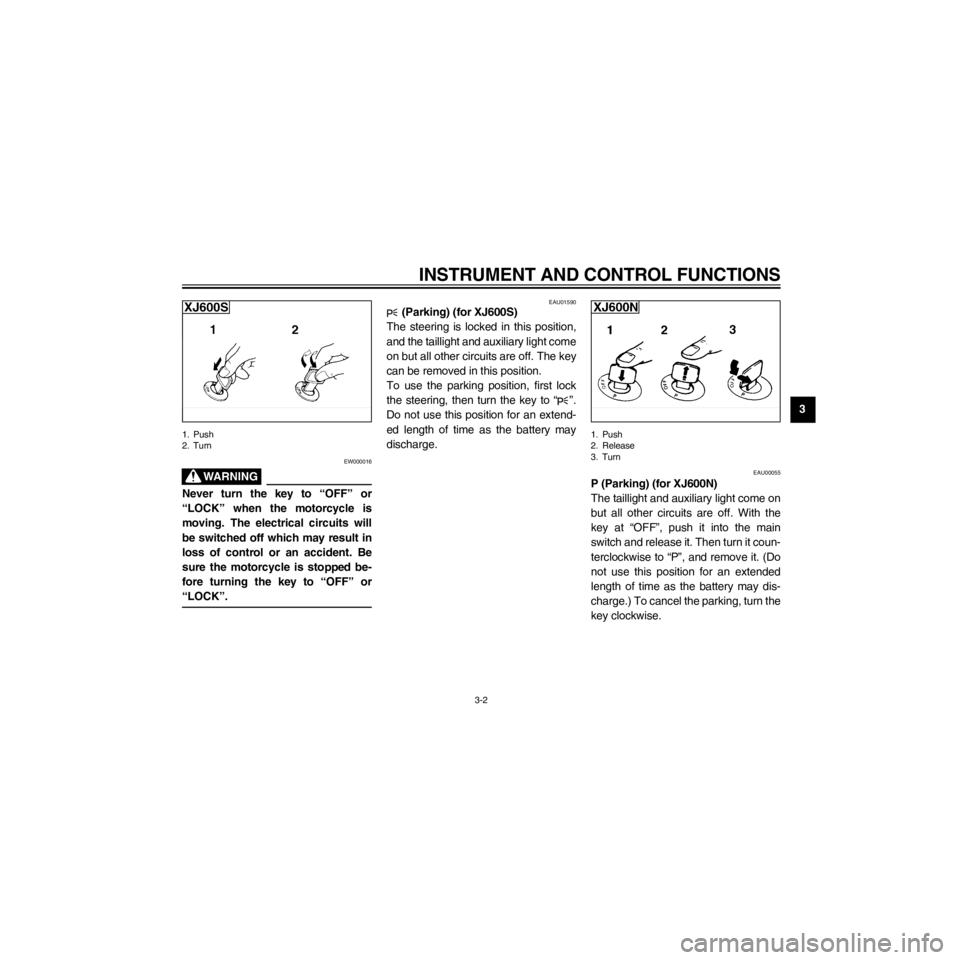
1. Push
2. Turn
EW000016
Never turn the key to ÒOFFÓ or
ÒLOCKÓ when the motorcycle is
moving. The electrical circuits will
be switched off which may result in
loss of control or an accident. Be
sure the motorcycle is stopped be-
fore turning the key to ÒOFFÓ or
ÒLOCKÓ.
EAU01590
(Parking) (for XJ600S)
The steering is locked in this position,
and the taillight and auxiliary light come
on but all other circuits are off. The key
can be removed in this position.
To use the parking position, first lock
the steering, then turn the key to Ò Ó.
Do not use this position for an extend-
ed length of time as the battery may
discharge.
1. Push
2. Release
3. Turn
EAU00055
P (Parking) (for XJ600N)
The taillight and auxiliary light come on
but all other circuits are off. With the
key at ÒOFFÓ, push it into the main
switch and release it. Then turn it coun-
terclockwise to ÒPÓ, and remove it. (Do
not use this position for an extended
length of time as the battery may dis-
charge.) To cancel the parking, turn the
key clockwise.
Page 21 of 101
L
3-3
INSTRUMENT AND CONTROL FUNCTIONS
/Net/layout8/layout_G2/work/Imai_work/OM-PS/AA9156_XJ600SN-E6/English/E-3.frame
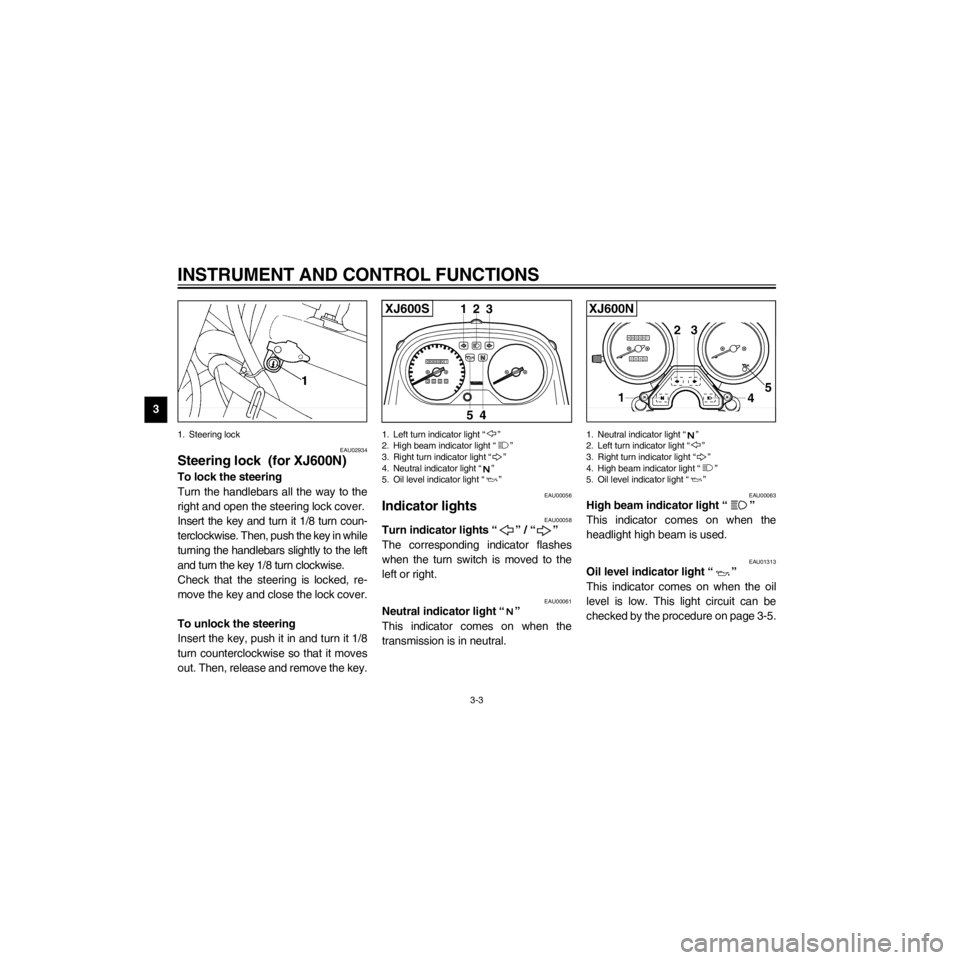
1. Steering lock
EAU02934
Steering lock (for XJ600N)
To lock the steering
Turn the handlebars all the way to the
right and open the steering lock cover.
Insert the key and turn it 1/8 turn coun-
terclockwise. Then, push the key in while
turning the handlebars slightly to the left
and turn the key 1/8 turn clockwise.
Check that the steering is locked, re-
move the key and close the lock cover.
To unlock the steering
Insert the key, push it in and turn it 1/8
turn counterclockwise so that it moves
out. Then, release and remove the key.
000 001
0000
3
45
21XJ600S
1. Left turn indicator light Ò Ó
2. High beam indicator light Ò Ó
3. Right turn indicator light Ò Ó
4. Neutral indicator light Ò Ó
5. Oil level indicator light Ò Ó
EAU00056
Indicator lights
EAU00058
Turn indicator lights Ò Ó / Ò Ó
The corresponding indicator flashes
when the turn switch is moved to the
left or right.
EAU00061
Neutral indicator light Ò Ó
This indicator comes on when the
transmission is in neutral.
1. Neutral indicator light Ò Ó
2. Left turn indicator light Ò Ó
3. Right turn indicator light Ò Ó
4. High beam indicator light Ò Ó
5. Oil level indicator light Ò Ó
EAU00063
High beam indicator light Ò Ó
This indicator comes on when the
headlight high beam is used.
EAU01313
Oil level indicator light Ò Ó
This indicator comes on when the oil
level is low. This light circuit can be
checked by the procedure on page 3-5.
Page 22 of 101
R
3-4
INSTRUMENT AND CONTROL FUNCTIONS
/Net/layout8/layout_G2/work/Imai_work/OM-PS/AA9156_XJ600SN-E6/English/E-3.frame
EC000000
CAUTION:
Do not run the motorcycle until you
know it has sufficient engine oil.
NOTE:
Even if the oil is filled to the specified
level, the indicator light may flicker
when riding on a slope or during sud-
den acceleration or deceleration, but
this is normal.
Page 23 of 101

L
3-5
INSTRUMENT AND CONTROL FUNCTIONS
/Net/layout8/layout_G2/work/Imai_work/OM-PS/AA9156_XJ600SN-E6/English/E-3.frame
EAU00071
Oil level indicator circuit check
Turn the main switch to ÒONÓ and
the engine stop switch to Ò Ó.
Oil level indicator light
does not come on.Oil level indicator light
comes on.
Check engine oil level.
Oil level indicator light
comes on.Oil level indicator light
does not come on.
Engine oil level and
electrical circuit are OK.
Go ahead with riding.
Put the transmission in neutral
or apply the clutch lever, then
push the start switch.
Oil level
is OK.
Supply
engine oil.
Oil level
is low.
Ask a Yamaha dealer to
inspect electrical circuit.
Page 25 of 101
L
3-7
INSTRUMENT AND CONTROL FUNCTIONS
/Net/layout8/layout_G2/work/Imai_work/OM-PS/AA9156_XJ600SN-E6/English/E-3.frame
0 1 2348
9
10
11 56
7
2
13
XJ600S
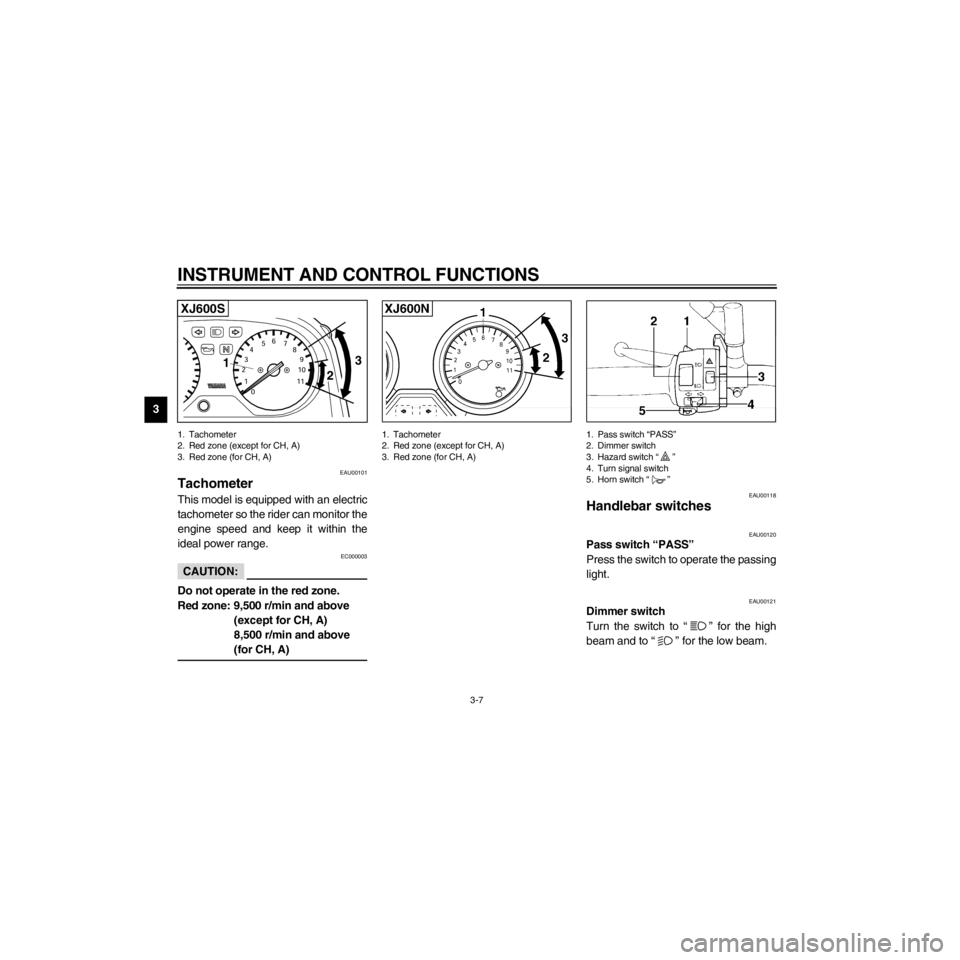
1. Tachometer
2. Red zone (except for CH, A)
3. Red zone (for CH, A)
EAU00101
Tachometer
This model is equipped with an electric
tachometer so the rider can monitor the
engine speed and keep it within the
ideal power range.
EC000003
CAUTION:
Do not operate in the red zone.
Red zone: 9,500 r/min and above
(except for CH, A)
8,500 r/min and above
(for CH, A)
1. Tachometer
2. Red zone (except for CH, A)
3. Red zone (for CH, A)1. Pass switch ÒPASSÓ
2. Dimmer switch
3. Hazard switch Ò Ó
4. Turn signal switch
5. Horn switch Ò Ó
EAU00118
Handlebar switches
EAU00120
Pass switch ÒPASSÓ
Press the switch to operate the passing
light.
EAU00121
Dimmer switch
Turn the switch to Ò Ó for the high
beam and to Ò Ó for the low beam.
Page 26 of 101
R
3-8
INSTRUMENT AND CONTROL FUNCTIONS
/Net/layout8/layout_G2/work/Imai_work/OM-PS/AA9156_XJ600SN-E6/English/E-3.frame
EAU00144
Hazard switch Ò Ó
The hazard switch should be turned on
under emergency or hazardous condi-
tions. All turn signal lights will flash si-
multaneously when this switch is
turned on with the main switch in the
ÒONÓ or ÒPÓ position.
EC000006
CAUTION:
The battery can discharge from ex-
tended use, making it difficult to op-
erate the starter.
NOTE:
Turn on the hazard switch to warn oth-
er drivers if your motorcycle must be
stopped where it might be a traffic haz-
ard.
EAU00127
Turn signal switch
To signal a right-hand turn, push the
switch to Ò Ó. To signal a left-hand
turn, push the switch to Ò Ó. Once the
switch is released it will return to the
center position. To cancel the signal,
push the switch in after it has returned
to the center position.
EAU00129
Horn switch Ò Ó
Press the switch to sound the horn.