engine YAMAHA XJR 1300 2000 Owner's Guide
[x] Cancel search | Manufacturer: YAMAHA, Model Year: 2000, Model line: XJR 1300, Model: YAMAHA XJR 1300 2000Pages: 95, PDF Size: 2.92 MB
Page 65 of 95
PERIODIC MAINTENANCE AND MINOR REPAIR
6-21
6
EAU00773
Throttle cable and grip
lubricationThe throttle twist grip assembly should
be greased at the time that the cable is
lubricated, since the grip must be re-
moved to get at the end of the throttle
cable. After removing the screws, hold
the end of the cable up in the air and
put in several drops of lubricant. With
the throttle grip disassembled, coat the
metal surface of the grip assembly with
a suitable all-purpose grease.
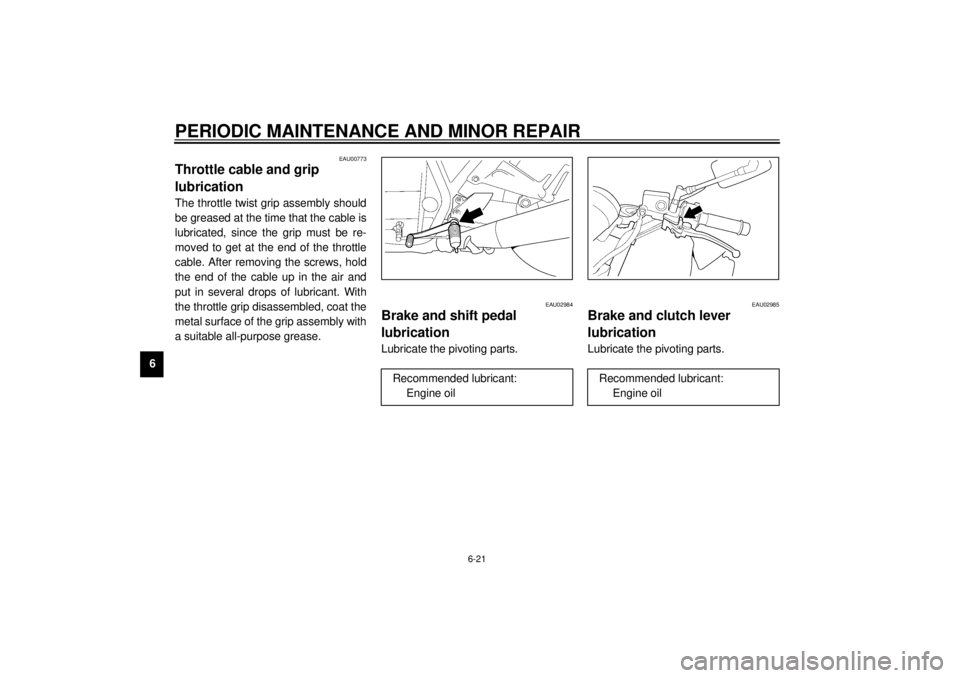
EAU02984
Brake and shift pedal
lubricationLubricate the pivoting parts.
EAU02985
Brake and clutch lever
lubricationLubricate the pivoting parts.
Recommended lubricant:
Engine oil
Recommended lubricant:
Engine oil
Page 66 of 95
PERIODIC MAINTENANCE AND MINOR REPAIR
6-22
6
EAU02965
Center and sidestand
lubricationLubricate the pivoting and mating
joints. Check to see that the center and
sidestand move up and down smooth-
ly.
EW000114
WARNING
@ If the center and/or sidestand does
not move smoothly, consult a
Yamaha dealer. @
EAU02939
Front fork inspectionVisual check
EW000115
WARNING
@ Securely support the motorcycle so
there is no danger of it falling over. @Check for scratches or damage on the
inner tube and excessive oil leakage
from the front fork.
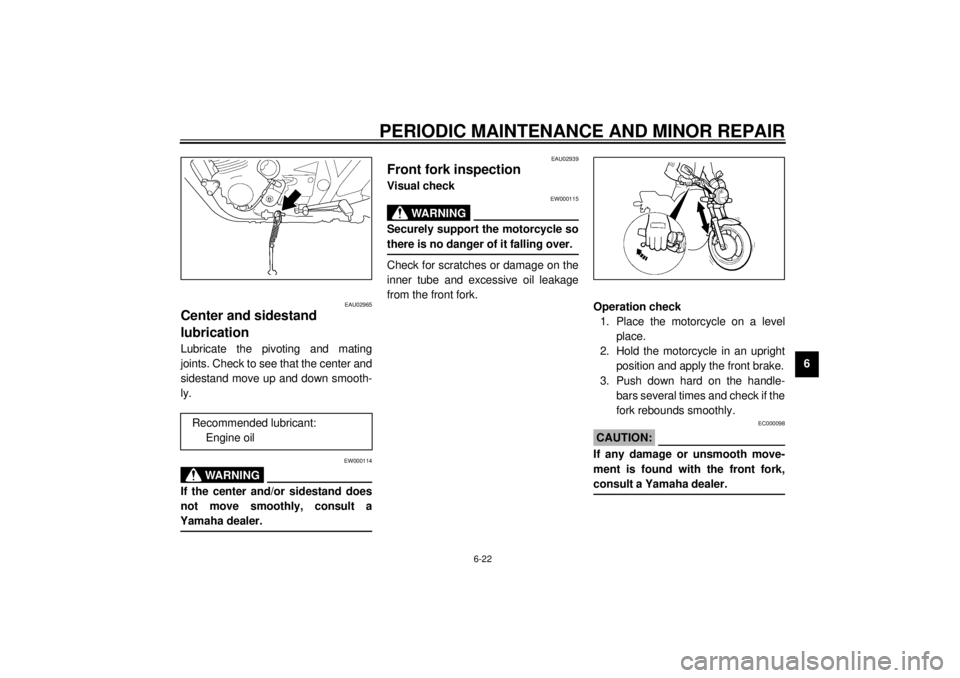
Operation check
1. Place the motorcycle on a level
place.
2. Hold the motorcycle in an upright
position and apply the front brake.
3. Push down hard on the handle-
bars several times and check if the
fork rebounds smoothly.
EC000098
CAUTION:@ If any damage or unsmooth move-
ment is found with the front fork,
consult a Yamaha dealer. @
Recommended lubricant:
Engine oil
Page 67 of 95
PERIODIC MAINTENANCE AND MINOR REPAIR
6-23
6
EAU00794
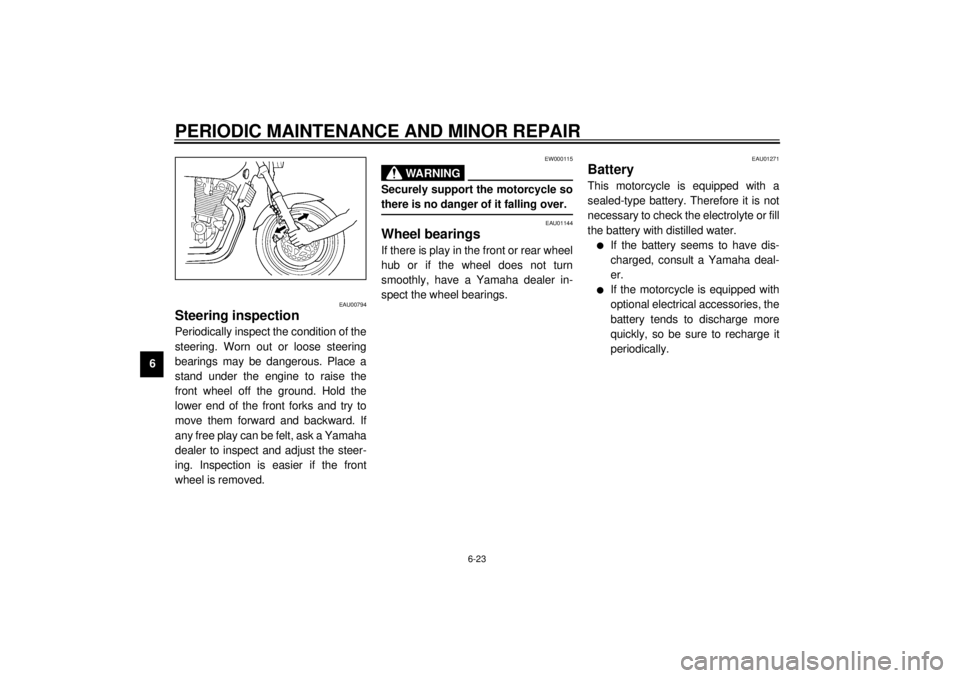
Steering inspectionPeriodically inspect the condition of the
steering. Worn out or loose steering
bearings may be dangerous. Place a
stand under the engine to raise the
front wheel off the ground. Hold the
lower end of the front forks and try to
move them forward and backward. If
any free play can be felt, ask a Yamaha
dealer to inspect and adjust the steer-
ing. Inspection is easier if the front
wheel is removed.
EW000115
WARNING
@ Securely support the motorcycle so
there is no danger of it falling over. @
EAU01144
Wheel bearingsIf there is play in the front or rear wheel
hub or if the wheel does not turn
smoothly, have a Yamaha dealer in-
spect the wheel bearings.
EAU01271
BatteryThis motorcycle is equipped with a
sealed-type battery. Therefore it is not
necessary to check the electrolyte or fill
the battery with distilled water.l
If the battery seems to have dis-
charged, consult a Yamaha deal-
er.
l
If the motorcycle is equipped with
optional electrical accessories, the
battery tends to discharge more
quickly, so be sure to recharge it
periodically.
Page 72 of 95
PERIODIC MAINTENANCE AND MINOR REPAIR
6-28
6
EAU00869
Front wheel removal
EW000122
WARNING
@ l
It is advisable to have a Yamaha
dealer service the wheel.
l
Securely support the motor-
cycle so there is no danger of it
falling over.
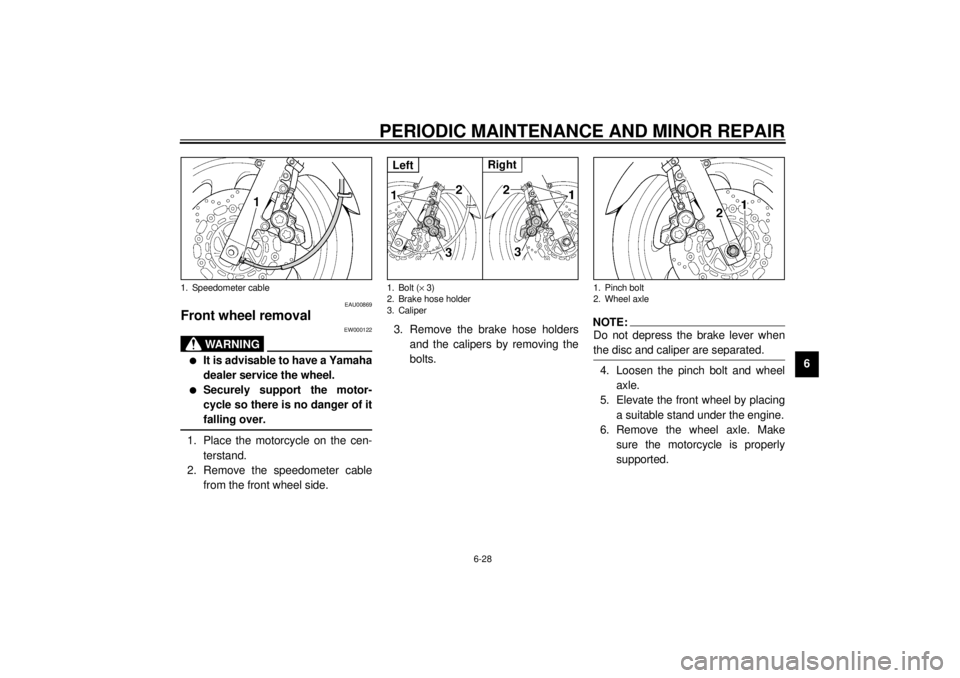
@1. Place the motorcycle on the cen-
terstand.
2. Remove the speedometer cable
from the front wheel side.3. Remove the brake hose holders
and the calipers by removing the
bolts.
NOTE:@ Do not depress the brake lever when
the disc and caliper are separated. @4. Loosen the pinch bolt and wheel
axle.
5. Elevate the front wheel by placing
a suitable stand under the engine.
6. Remove the wheel axle. Make
sure the motorcycle is properly
supported.
1. Speedometer cable
1. Bolt (´ 3)
2. Brake hose holder
3. CaliperLeft
Right
1. Pinch bolt
2. Wheel axle
Page 76 of 95
PERIODIC MAINTENANCE AND MINOR REPAIR
6-32
6
EAU01297
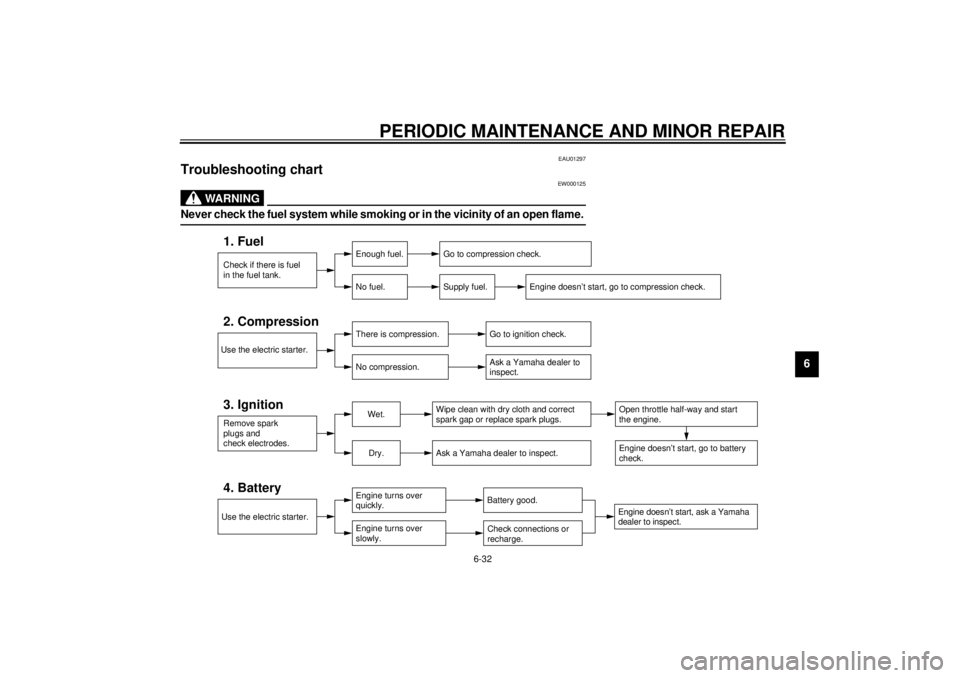
Troubleshooting chart
EW000125
WARNING
@ Never check the fuel system while smoking or in the vicinity of an open flame. @
Check if there is fuel
in the fuel tank.1. Fuel
Enough fuel.
No fuel.
Go to compression check.
Supply fuel.
Use the electric starter.2. Compression
There is compression.
No compression.
Go to ignition check.
Ask a Yamaha dealer to
inspect.
Remove spark
plugs and
check electrodes.3. Ignition
Wet.
Dry.
Wipe clean with dry cloth and correct
spark gap or replace spark plugs.
Ask a Yamaha dealer to inspect.
Engine doesn’t start, go to battery
check.Open throttle half-way and start
the engine.
Use the electric starter.4. Battery
Engine turns over
quickly.
Engine turns over
slowly.
Battery good.Check connections or
recharge.
Engine doesn’t start, ask a Yamaha
dealer to inspect.
Engine doesn’t start, go to compression check.
Page 81 of 95

MOTORCYCLE CARE AND STORAGE
7-3
71. Clean your motorcycle with cold
water and soap after the engine
has cooled down.
ECA00012
CAUTION:@ Do not use warm water since it in-
creases the corrosive action of the
salt. @2. Be sure to apply a corrosion pro-
tection spray on all (even chrome-
and nickel-plated) metal surfaces
to prevent corrosion.After cleaning
1. Dry the motorcycle with a chamois
or an absorbing cloth.
2. Immediately dry the drive chain
and lubricate it to prevent it from
rusting.
3. Use a chrome polish to shine
chrome, aluminum and stainless-
steel parts, including the exhaust
system. (Even the thermally in-
duced discoloring of stainless-
steel exhaust systems can be re-
moved through polishing.)
4. To prevent corrosion, it is recom-
mended to apply a corrosion pro-
tection spray on all (even chrome-
and nickel-plated) metal surfaces.
5. Use spray oil as a universal clean-
er to remove any remaining dirt.
6. Touch up minor paint damage
caused by stones, etc.
7. Wax all painted surfaces.
8. Let the motorcycle dry completely
before storing it or covering it.
EWA00001
WARNING
@ Make sure that there is no oil or wax
on the brakes and tires. If neces-
sary, clean the brake discs and lin-
ings with a regular brake disc
cleaner or acetone, and wash the
tires with warm water and mild soap.
Then, carefully test the motorcycle
for its braking performance and cor-
nering behavior. @
Page 83 of 95

MOTORCYCLE CARE AND STORAGE
7-5
7a. Remove the spark plug caps and
spark plugs.
b. Pour a teaspoonful of engine oil
into each spark plug bore.
c. Install the spark plug caps onto the
spark plugs and place the spark
plugs on the cylinder head so that
the electrodes are grounded. (This
will limit sparking during the next
step.)
d. Turn the engine over several times
with the starter. (This will coat the
cylinder walls with oil.)
e. Remove the spark plug caps from
the spark plugs, install the spark
plugs and then the spark plug
caps.
EWA00003
WARNING
@ When turning the engine over, be
sure to ground the spark plug elec-
trodes to prevent damage or injury
from sparking. @
6. Lubricate all control cables and
the pivoting points of all levers and
pedals as well as of the sidestand/
centerstand.
7. Check and, if necessary, correct
the tire air pressure, then raise the
motorcycle so that both of its
wheels are off the ground. Alterna-
tively, turn the wheels a little every
month in order to prevent the tires
from becoming degraded in one
spot.
8. Cover up the muffler outlets with
plastic bags to prevent moisture
from entering.9. Remove the battery and fully
charge it. Store it in a cool, dry
place and recharge it once a
month. Do not store the battery in
an excessively cold or warm place
(less than 0 °C or more than
30 °C). For more information, see
“Battery storage” in the chapter
“PERIODIC MAINTENANCE AND
MINOR REPAIRS”.
NOTE:@ Make any necessary repairs before
storing the motorcycle. @
Page 85 of 95

8-1
8
EAU01038
8-SPECIFICATIONSSpecifications
Model XJR1300/XJR1300SP
Dimensions
Overall length 2,250 mm (for SF, N, S)
2,175 mm (except for SF, N, S)
Overall width 775 mm
Overall height 1,115 mm
Seat height 775 mm
Wheelbase 1,500 mm
Ground clearance 120 mm
Minimum turning radius 2,800 mm
Basic weight (with oil and full
fuel tank)
253 kg
Engine
Engine type Air-cooled 4-stroke, DOHC
Cylinder arrangement Forward-inclined parallel
4-cylinder
Displacement 1,250 cm
3
Bore ´ Stroke 79.0 ´ 63.8 mm
Compression ratio 9.7:1
Starting system Electric starter
Lubrication system Wet sumpEngine oil
Ty p e
Recommended engine oil
classification API Service SE, SF, SG type or
higher
Quantity
Periodic oil change 3.0 L
With oil filter replacement 3.35 L
Total amount 4.2 L
Air filterDry type element
-20˚ -10˚ 0˚
10˚20˚ 30˚
40˚50˚C
SAE 10W/30
SAE 15W/40SAE 20W/40SAE 20W/50
SAE 10W/40
CAUTION:Be sure to use motor oils that do not contain anti-friction
modifiers. Passenger car motor oils (often labeled
“Energy Conserving”) contain anti-friction additives which
will cause clutch and/or starter clutch slippage, resulting in
reduced component life and poor engine performance.
Page 93 of 95
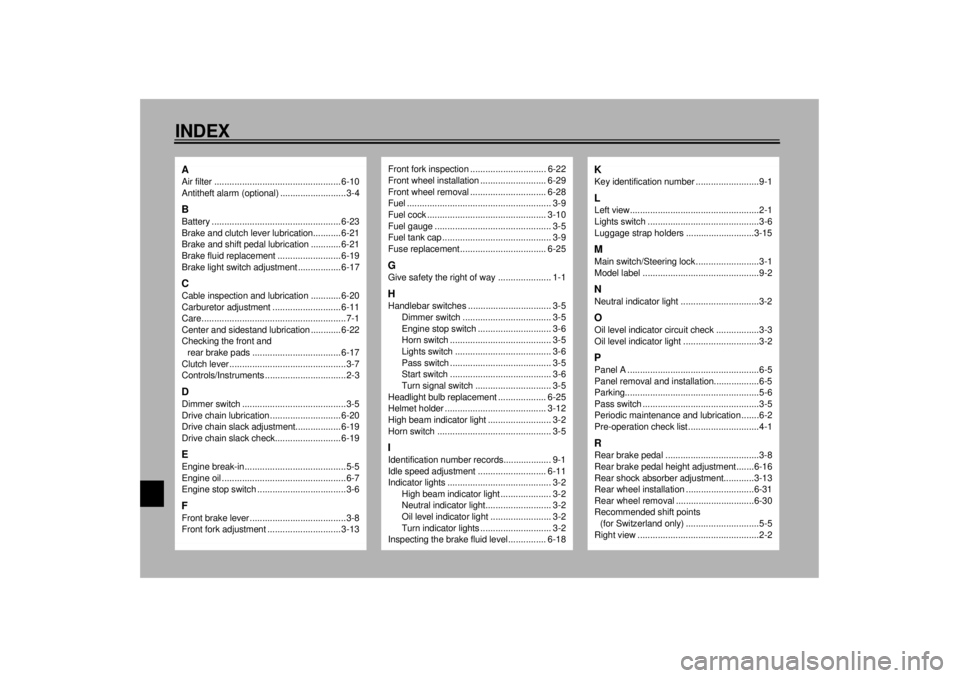
10-INDEXAAir filter .................................................. 6-10
Antitheft alarm (optional) ..........................3-4BBattery ................................................... 6-23
Brake and clutch lever lubrication........... 6-21
Brake and shift pedal lubrication ............ 6-21
Brake fluid replacement ......................... 6-19
Brake light switch adjustment ................. 6-17CCable inspection and lubrication ............ 6-20
Carburetor adjustment ........................... 6-11
Care.........................................................7-1
Center and sidestand lubrication ............ 6-22
Checking the front and
rear brake pads ................................... 6-17
Clutch lever ..............................................3-7
Controls/Instruments ................................2-3DDimmer switch .........................................3-5
Drive chain lubrication ............................ 6-20
Drive chain slack adjustment.................. 6-19
Drive chain slack check.......................... 6-19EEngine break-in........................................5-5
Engine oil .................................................6-7
Engine stop switch ...................................3-6FFront brake lever ......................................3-8
Front fork adjustment ............................. 3-13
Front fork inspection .............................. 6-22
Front wheel installation .......................... 6-29
Front wheel removal .............................. 6-28
Fuel ......................................................... 3-9
Fuel cock ............................................... 3-10
Fuel gauge .............................................. 3-5
Fuel tank cap ........................................... 3-9
Fuse replacement.................................. 6-25GGive safety the right of way ..................... 1-1HHandlebar switches ................................. 3-5
Dimmer switch ................................... 3-5
Engine stop switch ............................. 3-6
Horn switch ........................................ 3-5
Lights switch ...................................... 3-6
Pass switch ........................................ 3-5
Start switch ........................................ 3-6
Turn signal switch .............................. 3-5
Headlight bulb replacement ................... 6-25
Helmet holder ........................................ 3-12
High beam indicator light ......................... 3-2
Horn switch ............................................. 3-5IIdentification number records................... 9-1
Idle speed adjustment ........................... 6-11
Indicator lights ......................................... 3-2
High beam indicator light .................... 3-2
Neutral indicator light.......................... 3-2
Oil level indicator light ........................ 3-2
Turn indicator lights ............................ 3-2
Inspecting the brake fluid level............... 6-18
KKey identification number .........................9-1LLeft view...................................................2-1
Lights switch ............................................3-6
Luggage strap holders ...........................3-15MMain switch/Steering lock .........................3-1
Model label ..............................................9-2NNeutral indicator light ...............................3-2OOil level indicator circuit check .................3-3
Oil level indicator light ..............................3-2PPanel A ....................................................6-5
Panel removal and installation..................6-5
Parking.....................................................5-6
Pass switch ..............................................3-5
Periodic maintenance and lubrication .......6-2
Pre-operation check list ............................4-1RRear brake pedal .....................................3-8
Rear brake pedal height adjustment.......6-16
Rear shock absorber adjustment............3-13
Rear wheel installation ...........................6-31
Rear wheel removal ...............................6-30
Recommended shift points
(for Switzerland only) .............................5-5
Right view ................................................2-2
Page 94 of 95
INDEX
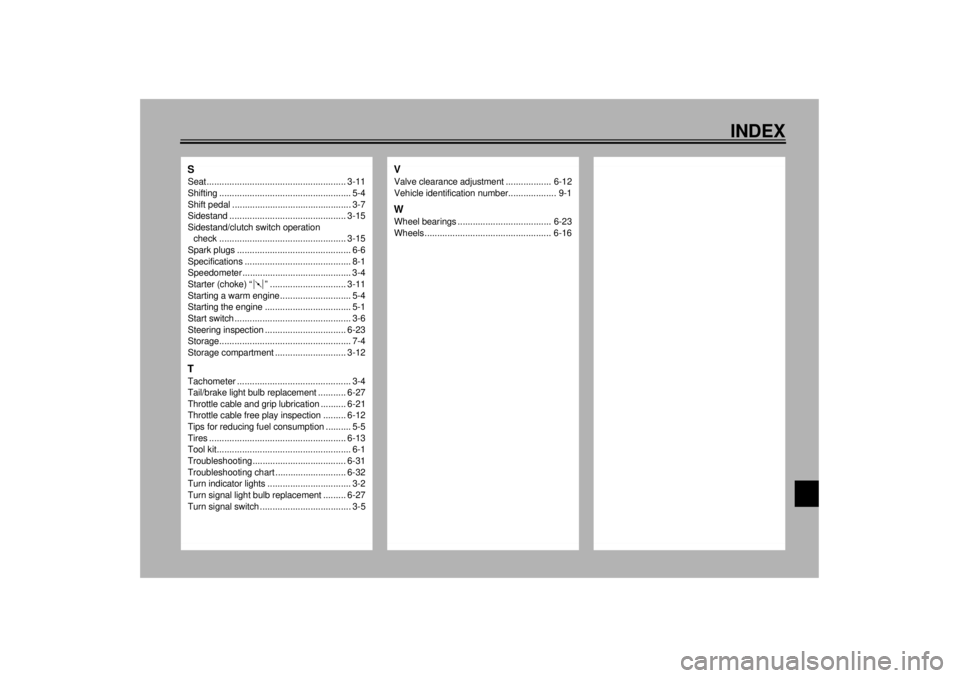
SSeat....................................................... 3-11
Shifting .................................................... 5-4
Shift pedal ............................................... 3-7
Sidestand .............................................. 3-15
Sidestand/clutch switch operation
check .................................................. 3-15
Spark plugs ............................................. 6-6
Specifications .......................................... 8-1
Speedometer ........................................... 3-4
Starter (choke) “ ” .............................. 3-11
Starting a warm engine ............................ 5-4
Starting the engine .................................. 5-1
Start switch .............................................. 3-6
Steering inspection ................................ 6-23
Storage.................................................... 7-4
Storage compartment ............................ 3-12TTachometer ............................................. 3-4
Tail/brake light bulb replacement ........... 6-27
Throttle cable and grip lubrication .......... 6-21
Throttle cable free play inspection ......... 6-12
Tips for reducing fuel consumption .......... 5-5
Tires ...................................................... 6-13
Tool kit..................................................... 6-1
Troubleshooting..................................... 6-31
Troubleshooting chart ............................ 6-32
Turn indicator lights ................................. 3-2
Turn signal light bulb replacement ......... 6-27
Turn signal switch .................................... 3-5
VValve clearance adjustment .................. 6-12
Vehicle identification number................... 9-1WWheel bearings ..................................... 6-23
Wheels .................................................. 6-16