ECU YAMAHA XL 1200 2001 Owners Manual
[x] Cancel search | Manufacturer: YAMAHA, Model Year: 2001, Model line: XL 1200, Model: YAMAHA XL 1200 2001Pages: 131, PDF Size: 8.12 MB
Page 21 of 131
1-14
E
EJU00668a
Water-skiing
You can use the watercraft for water-ski-
ing if it has the seating capacity to carry the
operator, a rearward-facing spotter, and the
water-skier when he or she is not skiing.
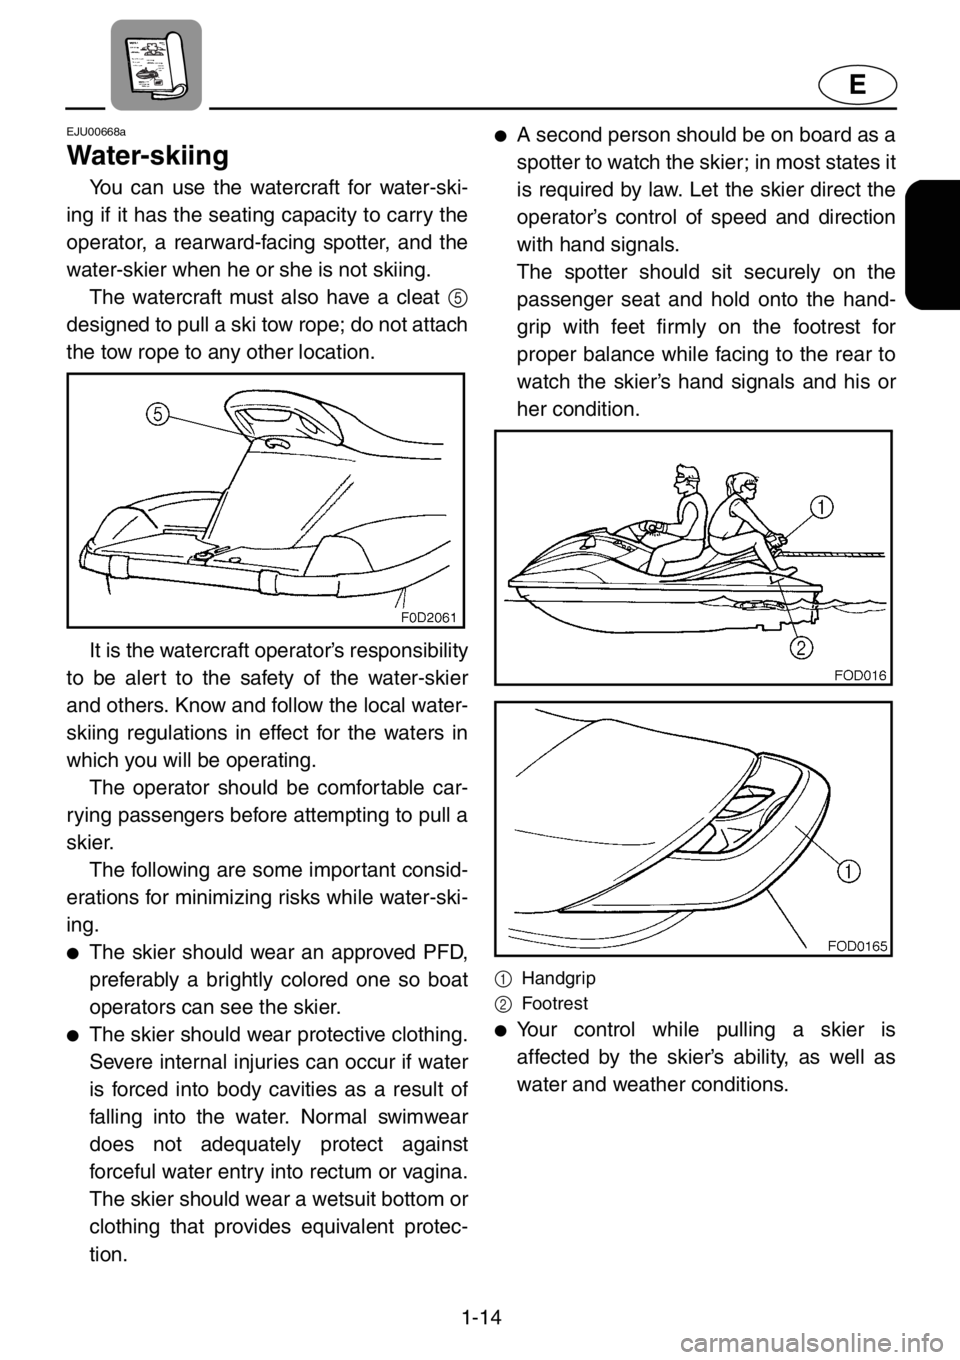
The watercraft must also have a cleat 5
designed to pull a ski tow rope; do not attach
the tow rope to any other location.
It is the watercraft operator’s responsibility
to be alert to the safety of the water-skier
and others. Know and follow the local water-
skiing regulations in effect for the waters in
which you will be operating.
The operator should be comfortable car-
rying passengers before attempting to pull a
skier.
The following are some important consid-
erations for minimizing risks while water-ski-
ing.
●The skier should wear an approved PFD,
preferably a brightly colored one so boat
operators can see the skier.
●The skier should wear protective clothing.
Severe internal injuries can occur if water
is forced into body cavities as a result of
falling into the water. Normal swimwear
does not adequately protect against
forceful water entry into rectum or vagina.
The skier should wear a wetsuit bottom or
clothing that provides equivalent protec-
tion.
●A second person should be on board as a
spotter to watch the skier; in most states it
is required by law. Let the skier direct the
operator’s control of speed and direction
with hand signals.
The spotter should sit securely on the
passenger seat and hold onto the hand-
grip with feet firmly on the footrest for
proper balance while facing to the rear to
watch the skier’s hand signals and his or
her condition.
1Handgrip
2Footrest
●Your control while pulling a skier is
affected by the skier’s ability, as well as
water and weather conditions.
Page 30 of 131
2-5
E
EJU00328
Operation of controls and
other functions
EJU00335a
Rear seat
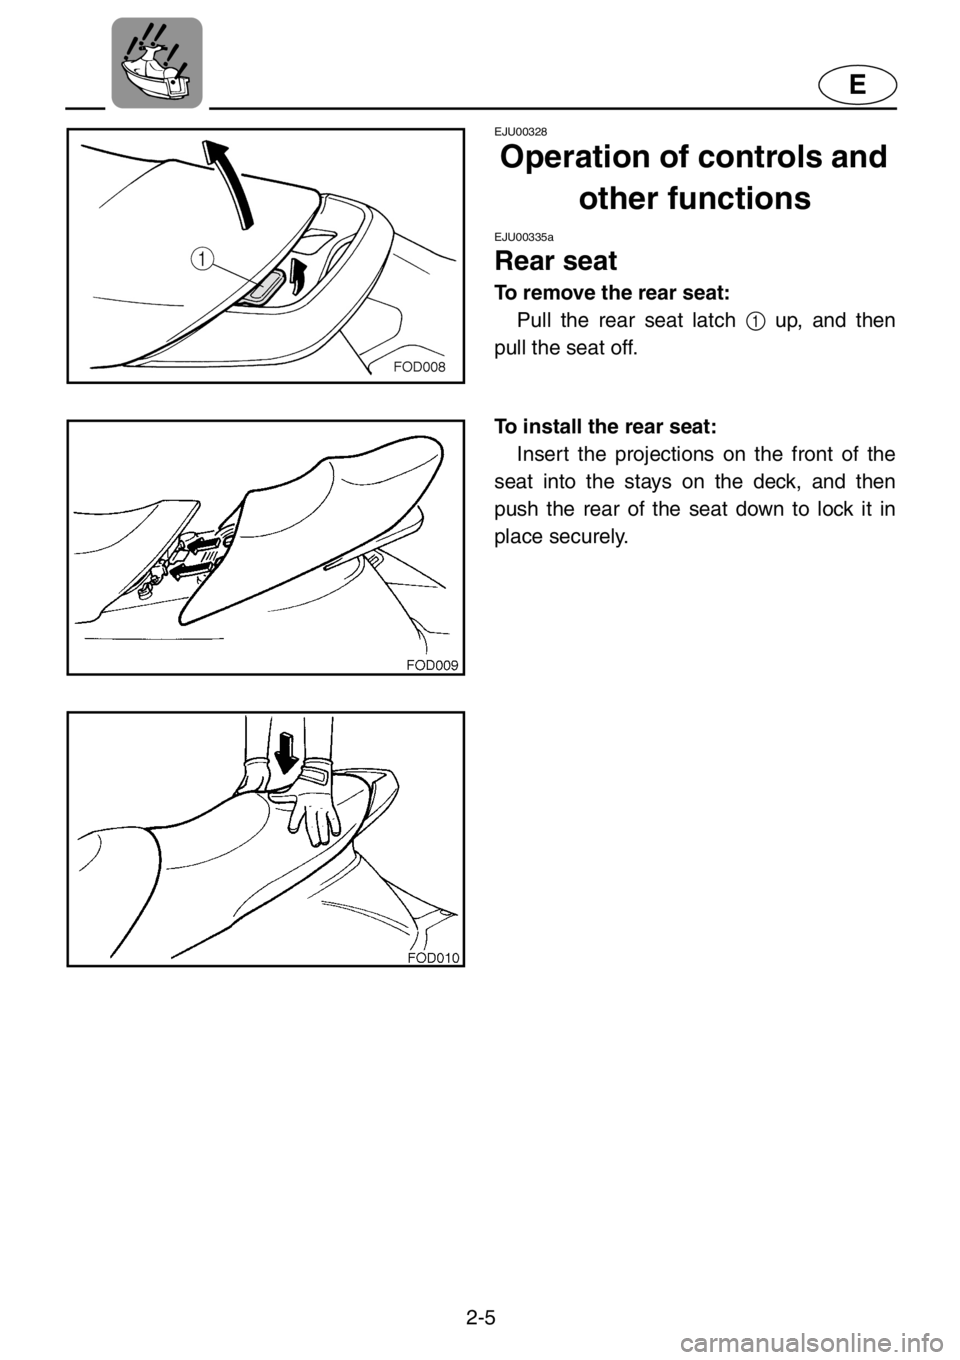
To remove the rear seat:
Pull the rear seat latch 1 up, and then
pull the seat off.
To install the rear seat:
Insert the projections on the front of the
seat into the stays on the deck, and then
push the rear of the seat down to lock it in
place securely.
Page 31 of 131
2-6
E
EJU00714
Front seat
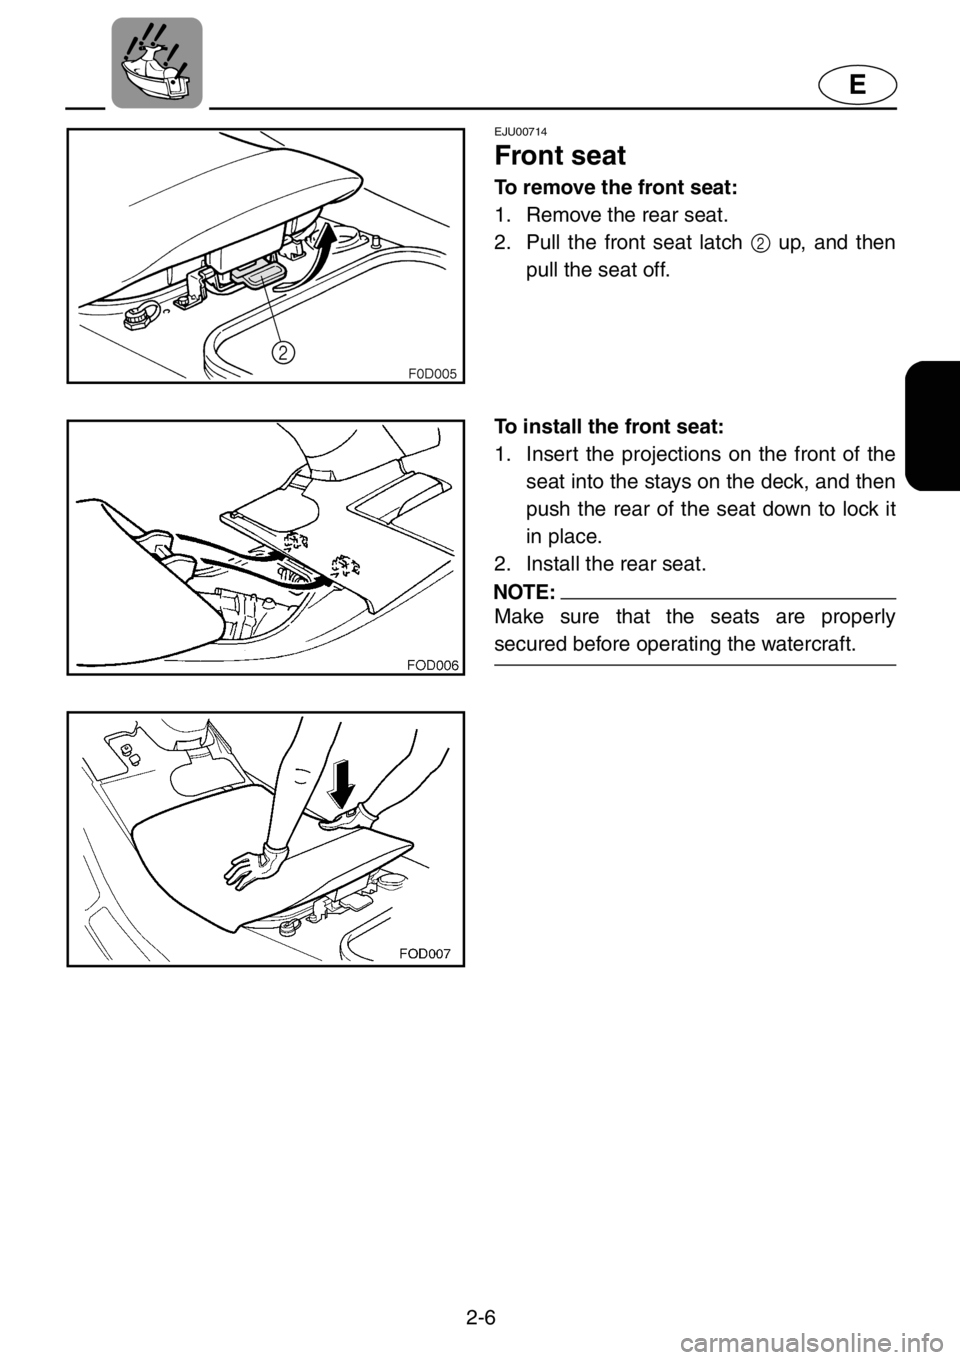
To remove the front seat:
1. Remove the rear seat.
2. Pull the front seat latch 2 up, and then
pull the seat off.
To install the front seat:
1. Insert the projections on the front of the
seat into the stays on the deck, and then
push the rear of the seat down to lock it
in place.
2. Install the rear seat.
NOTE:
Make sure that the seats are properly
secured before operating the watercraft.
Page 32 of 131
2-7
E
EJU00703
Hood
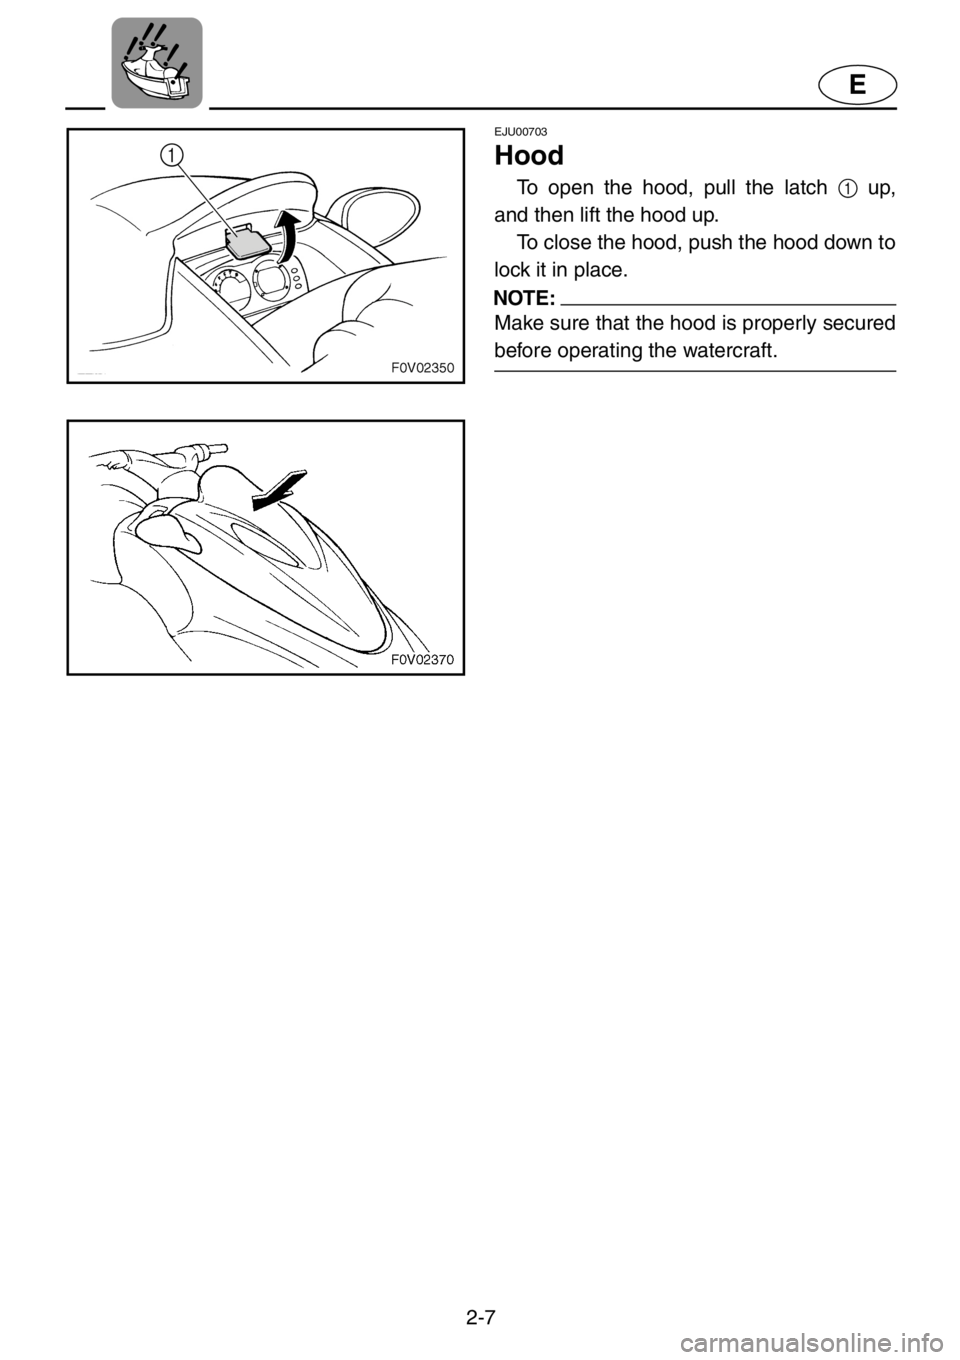
To open the hood, pull the latch 1 up,
and then lift the hood up.
To close the hood, push the hood down to
lock it in place.
NOTE:
Make sure that the hood is properly secured
before operating the watercraft.
Page 33 of 131
2-8
E
EJU00347
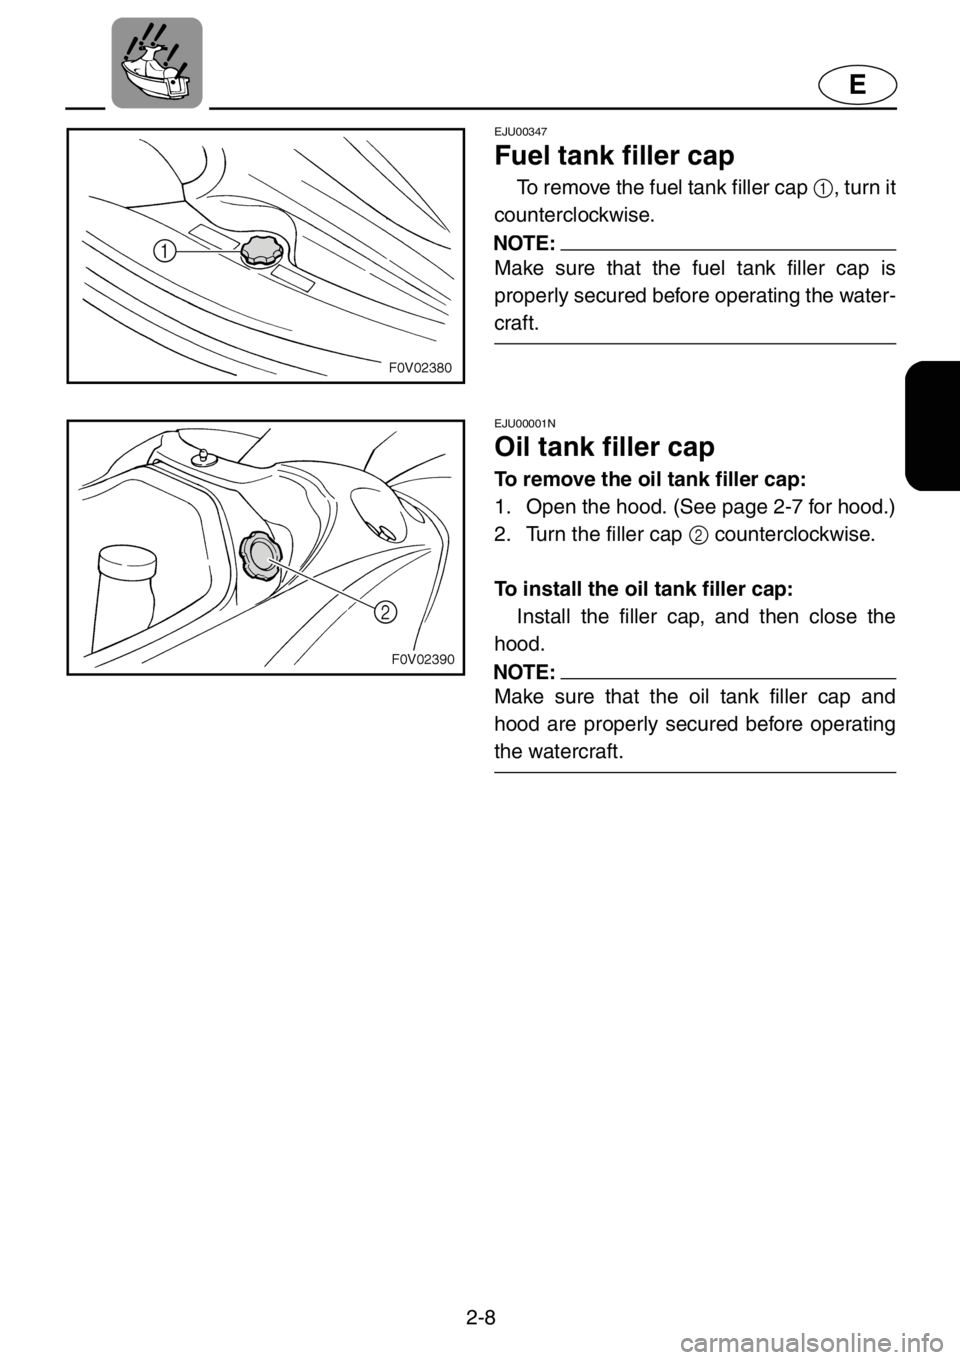
Fuel tank filler cap
To remove the fuel tank filler cap 1, turn it
counterclockwise.
NOTE:
Make sure that the fuel tank filler cap is
properly secured before operating the water-
craft.
EJU00001N
Oil tank filler cap
To remove the oil tank filler cap:
1. Open the hood. (See page 2-7 for hood.)
2. Turn the filler cap 2 counterclockwise.
To install the oil tank filler cap:
Install the filler cap, and then close the
hood.
NOTE:
Make sure that the oil tank filler cap and
hood are properly secured before operating
the watercraft.
Page 55 of 131
2-30
E
EJU00672a
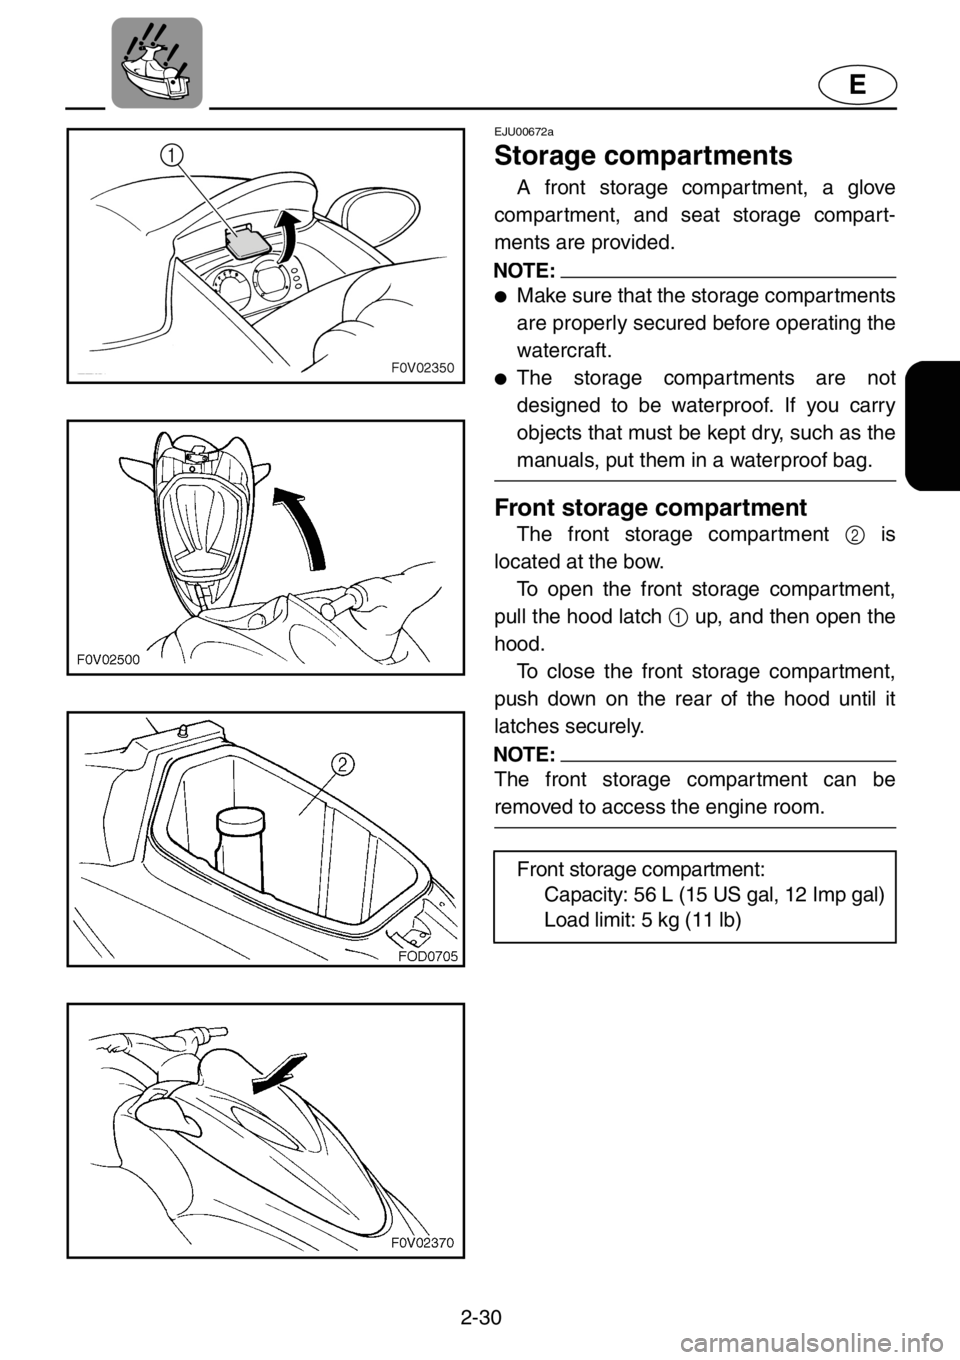
Storage compartments
A front storage compartment, a glove
compartment, and seat storage compart-
ments are provided.
NOTE:
●Make sure that the storage compartments
are properly secured before operating the
watercraft.
●The storage compartments are not
designed to be waterproof. If you carry
objects that must be kept dry, such as the
manuals, put them in a waterproof bag.
Front storage compartment
The front storage compartment 2 is
located at the bow.
To open the front storage compartment,
pull the hood latch 1 up, and then open the
hood.
To close the front storage compartment,
push down on the rear of the hood until it
latches securely.
NOTE:
The front storage compartment can be
removed to access the engine room.
Front storage compartment:
Capacity: 56 L (15 US gal, 12 Imp gal)
Load limit: 5 kg (11 lb)
Page 56 of 131
2-31
E
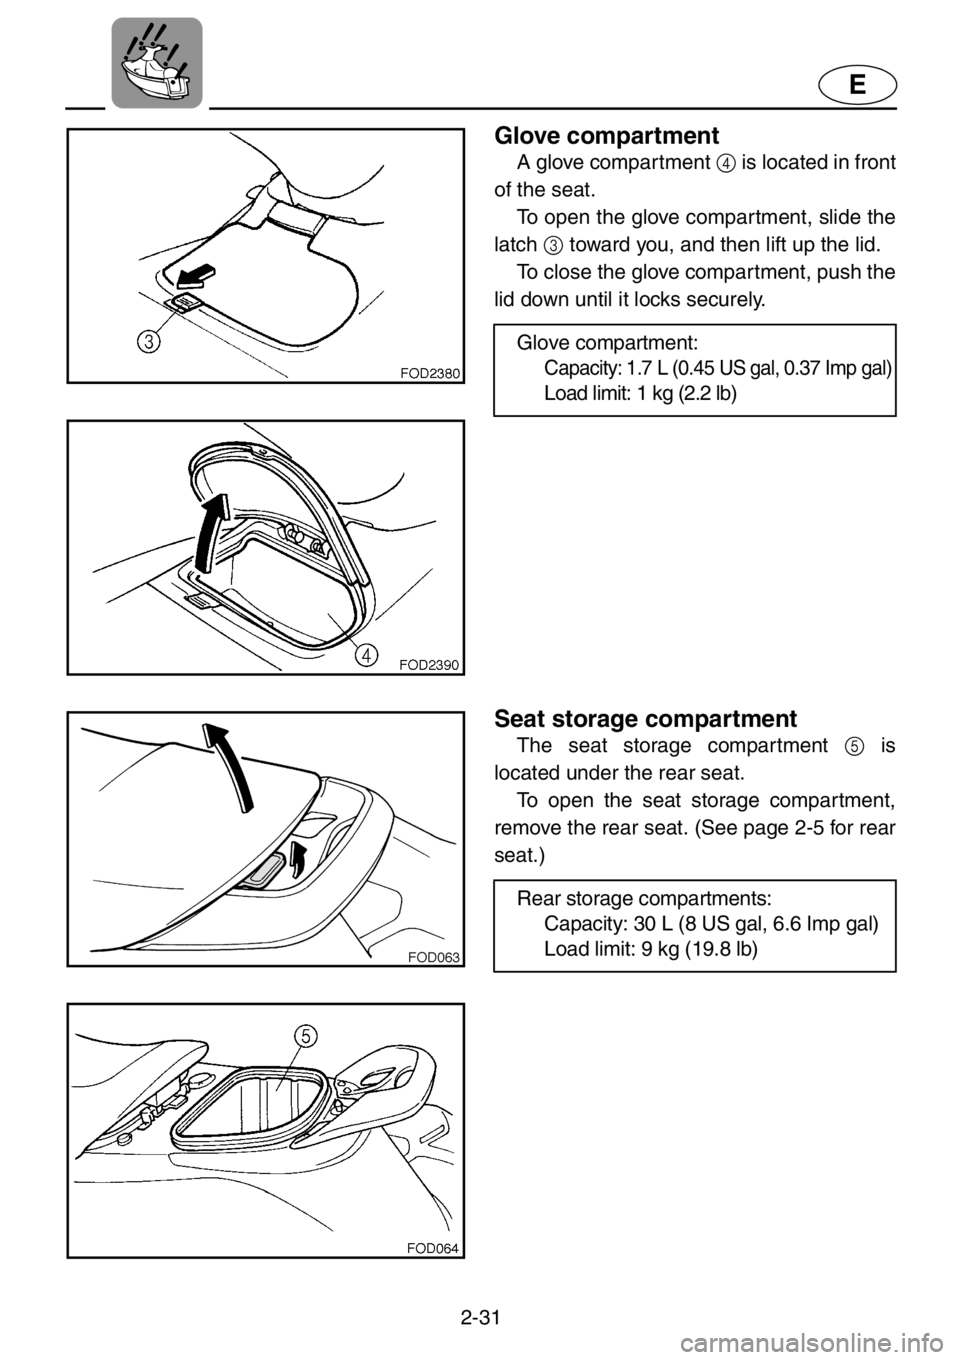
Glove compartment
A glove compartment 4 is located in front
of the seat.
To open the glove compartment, slide the
latch 3 toward you, and then lift up the lid.
To close the glove compartment, push the
lid down until it locks securely.
Glove compartment:
Capacity: 1.7 L (0.45 US gal, 0.37 Imp gal)
Load limit: 1 kg (2.2 lb)
Seat storage compartment
The seat storage compartment 5 is
located under the rear seat.
To open the seat storage compartment,
remove the rear seat. (See page 2-5 for rear
seat.)
Rear storage compartments:
Capacity: 30 L (8 US gal, 6.6 Imp gal)
Load limit: 9 kg (19.8 lb)
Page 58 of 131
3-1
E
EJU00411a
Fuel and oil
This engine uses Yamaha’s oil injection
system, which provides superior lubrication
by ensuring the proper oil ratio for all operat-
ing conditions. No fuel premixing is neces-
sary except during the engine break-in
period. Simply pour gasoline into the fuel
tank and oil into the oil tank.
Gasoline
WARNING
GASOLINE AND ITS VAPORS ARE
HIGHLY FLAMMABLE AND EXPLOSIVE!
●Do not smoke when refueling, and
keep away from sparks, flames, or
other sources of ignition.
●Stop engine before refueling.
●Refuel in a well-ventilated area. Do not
stand or sit on the watercraft while
refueling in case of fire.
●Take care not to spill gasoline. If gaso-
line spills, wipe it up immediately with
dry rags. Always properly dispose of
gasoline-soaked rags.
●Avoid overfilling the fuel tank. Stop fill-
ing when the fuel level just reaches the
bottom of the filler tube. Do not fill up
the filler tube because fuel expands as
it warms up and could overflow.
●Tighten the filler cap securely after
refueling.
●If you should swallow some gasoline,
inhale a lot of gasoline vapor, or get
gasoline in your eyes, get immediate
medical attention.
●If any gasoline spills onto your skin,
immediately wash with soap and
water. Change clothing if gasoline
spills on it.
Page 62 of 131
3-5
E
EJU00422
Pre-operation checks
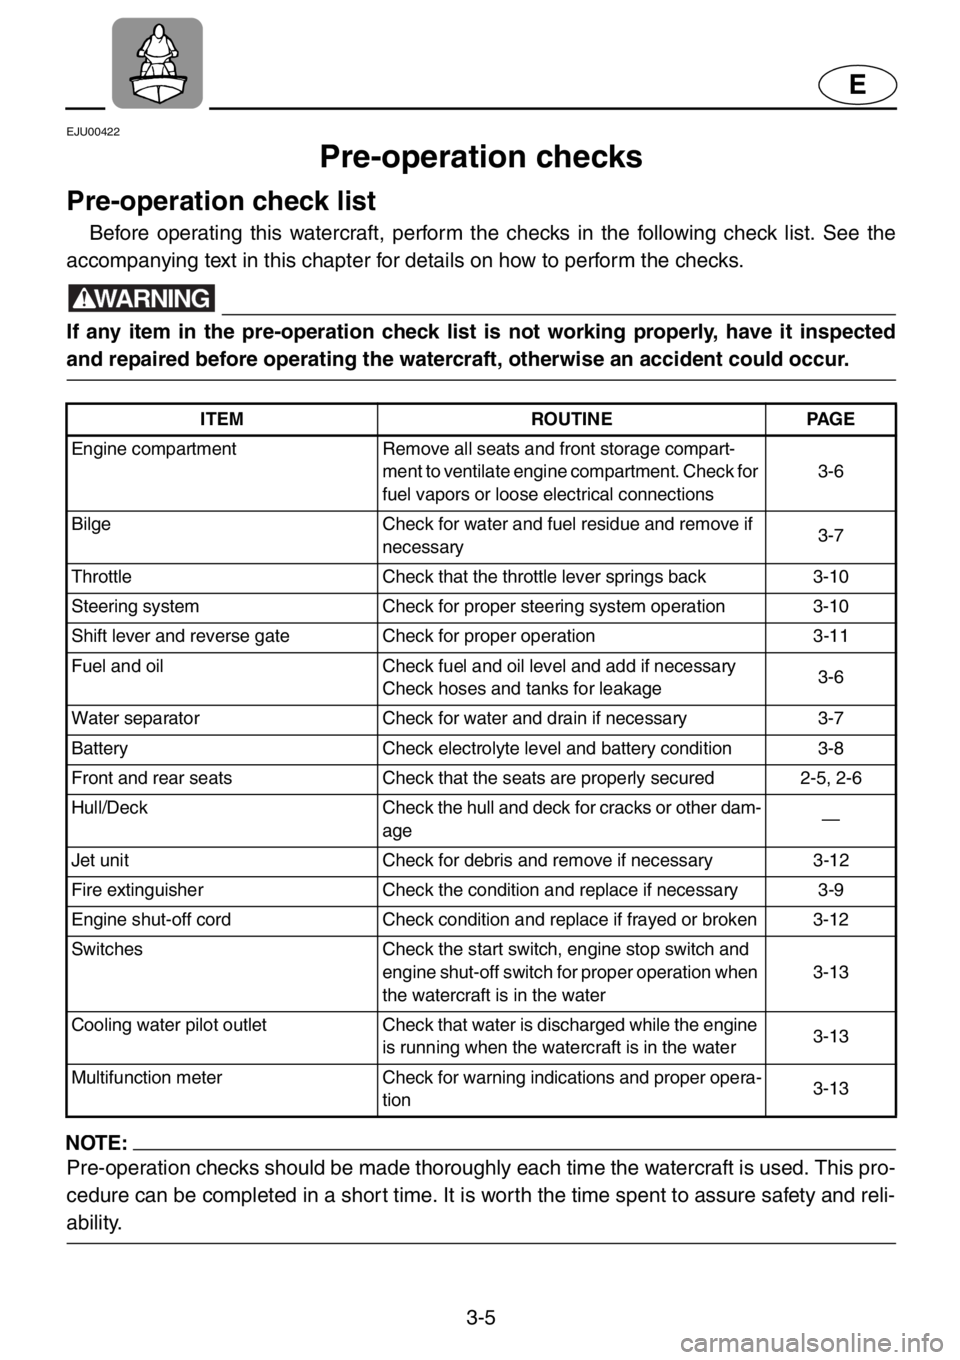
Pre-operation check list
Before operating this watercraft, perform the checks in the following check list. See the
accompanying text in this chapter for details on how to perform the checks.
WARNING
If any item in the pre-operation check list is not working properly, have it inspected
and repaired before operating the watercraft, otherwise an accident could occur.
NOTE:
Pre-operation checks should be made thoroughly each time the watercraft is used. This pro-
cedure can be completed in a short time. It is worth the time spent to assure safety and reli-
ability.
ITEM ROUTINE PAGE
Engine compartment Remove all seats and front storage compart-
ment to ventilate engine compartment. Check for
fuel vapors or loose electrical connections3-6
Bilge Check for water and fuel residue and remove if
necessary3-7
Throttle Check that the throttle lever springs back 3-10
Steering system Check for proper steering system operation 3-10
Shift lever and reverse gate Check for proper operation 3-11
Fuel and oil Check fuel and oil level and add if necessary
Check hoses and tanks for leakage3-6
Water separator Check for water and drain if necessary 3-7
Battery Check electrolyte level and battery condition 3-8
Front and rear seats Check that the seats are properly secured 2-5, 2-6
Hull/Deck Check the hull and deck for cracks or other dam-
age—
Jet unit Check for debris and remove if necessary 3-12
Fire extinguisher Check the condition and replace if necessary 3-9
Engine shut-off cord Check condition and replace if frayed or broken 3-12
Switches Check the start switch, engine stop switch and
engine shut-off switch for proper operation when
the watercraft is in the water3-13
Cooling water pilot outlet Check that water is discharged while the engine
is running when the watercraft is in the water3-13
Multifunction meter Check for warning indications and proper opera-
tion3-13
Page 64 of 131
3-7
E
EJU00432a
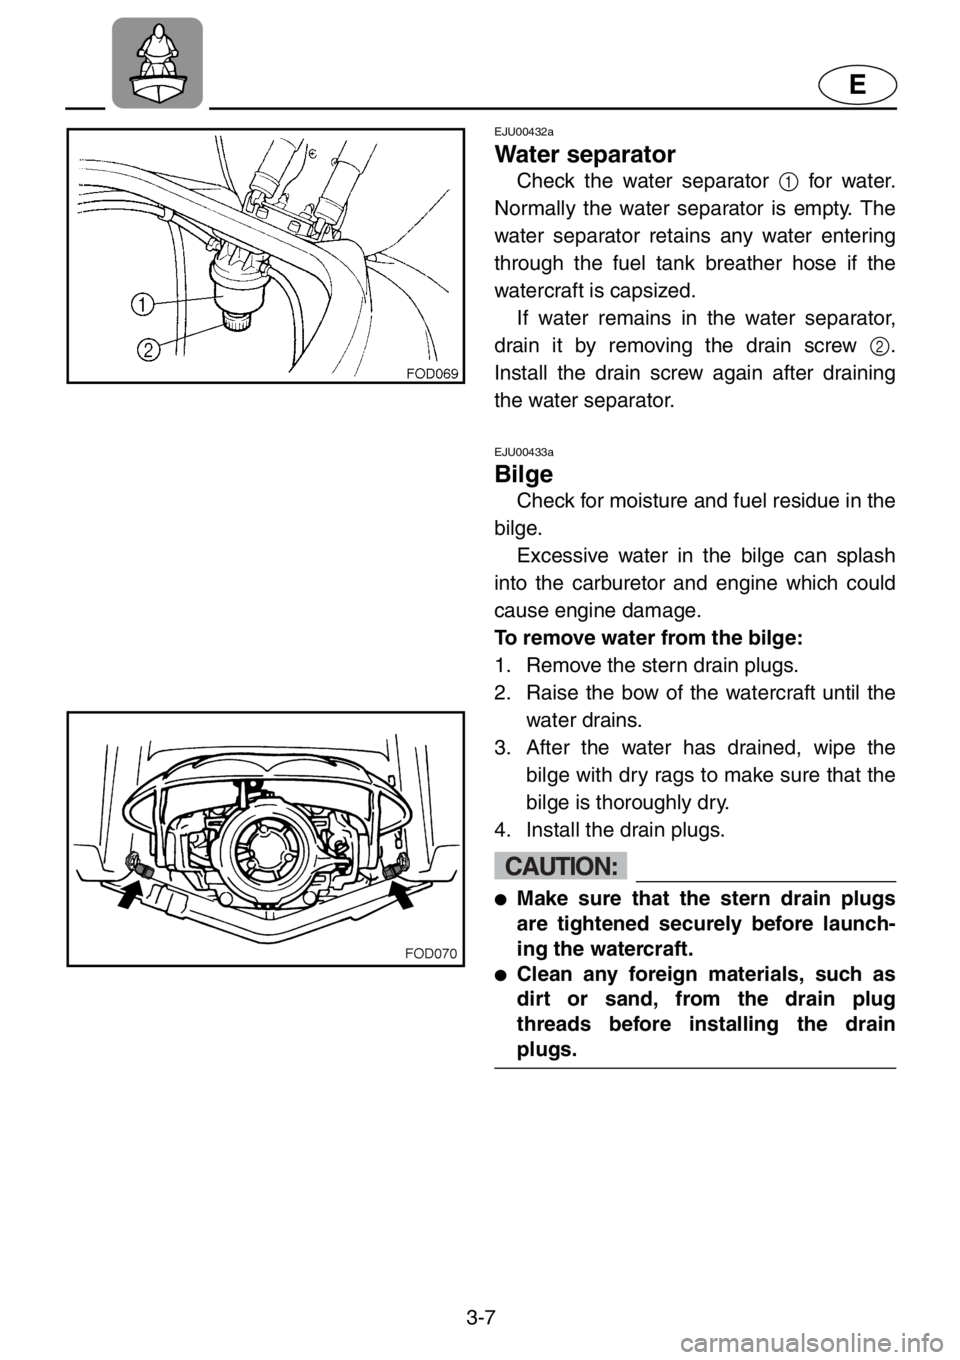
Water separator
Check the water separator 1 for water.
Normally the water separator is empty. The
water separator retains any water entering
through the fuel tank breather hose if the
watercraft is capsized.
If water remains in the water separator,
drain it by removing the drain screw 2.
Install the drain screw again after draining
the water separator.
EJU00433a
Bilge
Check for moisture and fuel residue in the
bilge.
Excessive water in the bilge can splash
into the carburetor and engine which could
cause engine damage.
To remove water from the bilge:
1. Remove the stern drain plugs.
2. Raise the bow of the watercraft until the
water drains.
3. After the water has drained, wipe the
bilge with dry rags to make sure that the
bilge is thoroughly dry.
4. Install the drain plugs.
CAUTION:
●Make sure that the stern drain plugs
are tightened securely before launch-
ing the watercraft.
●Clean any foreign materials, such as
dirt or sand, from the drain plug
threads before installing the drain
plugs.