steering wheel YAMAHA XT660R 2004 Owners Manual
[x] Cancel search | Manufacturer: YAMAHA, Model Year: 2004, Model line: XT660R, Model: YAMAHA XT660R 2004Pages: 90, PDF Size: 3.05 MB
Page 6 of 90

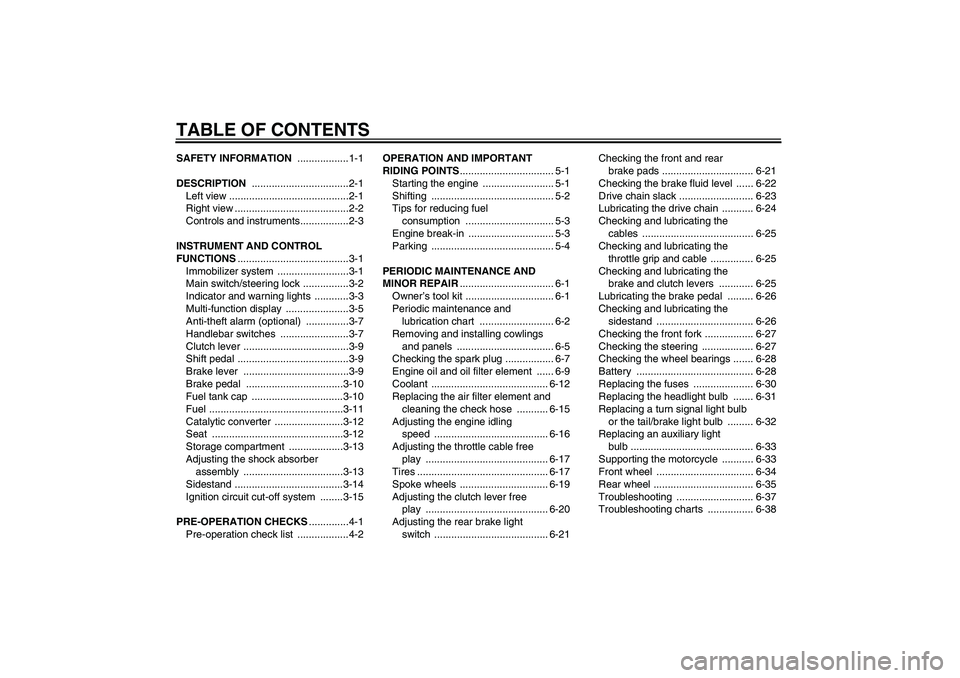
TABLE OF CONTENTSSAFETY INFORMATION ..................1-1
DESCRIPTION ..................................2-1
Left view ..........................................2-1
Right view ........................................2-2
Controls and instruments.................2-3
INSTRUMENT AND CONTROL
FUNCTIONS.......................................3-1
Immobilizer system .........................3-1
Main switch/steering lock ................3-2
Indicator and warning lights ............3-3
Multi-function display ......................3-5
Anti-theft alarm (optional) ...............3-7
Handlebar switches ........................3-7
Clutch lever .....................................3-9
Shift pedal .......................................3-9
Brake lever .....................................3-9
Brake pedal ..................................3-10
Fuel tank cap ................................3-10
Fuel ...............................................3-11
Catalytic converter ........................3-12
Seat ..............................................3-12
Storage compartment ...................3-13
Adjusting the shock absorber
assembly ...................................3-13
Sidestand ......................................3-14
Ignition circuit cut-off system ........3-15
PRE-OPERATION CHECKS..............4-1
Pre-operation check list ..................4-2OPERATION AND IMPORTANT
RIDING POINTS................................. 5-1
Starting the engine ......................... 5-1
Shifting ........................................... 5-2
Tips for reducing fuel
consumption ............................... 5-3
Engine break-in .............................. 5-3
Parking ........................................... 5-4
PERIODIC MAINTENANCE AND
MINOR REPAIR................................. 6-1
Owner’s tool kit ............................... 6-1
Periodic maintenance and
lubrication chart .......................... 6-2
Removing and installing cowlings
and panels .................................. 6-5
Checking the spark plug ................. 6-7
Engine oil and oil filter element ...... 6-9
Coolant ......................................... 6-12
Replacing the air filter element and
cleaning the check hose ........... 6-15
Adjusting the engine idling
speed ........................................ 6-16
Adjusting the throttle cable free
play ........................................... 6-17
Tires .............................................. 6-17
Spoke wheels ............................... 6-19
Adjusting the clutch lever free
play ........................................... 6-20
Adjusting the rear brake light
switch ........................................ 6-21Checking the front and rear
brake pads ................................ 6-21
Checking the brake fluid level ...... 6-22
Drive chain slack .......................... 6-23
Lubricating the drive chain ........... 6-24
Checking and lubricating the
cables ....................................... 6-25
Checking and lubricating the
throttle grip and cable ............... 6-25
Checking and lubricating the
brake and clutch levers ............ 6-25
Lubricating the brake pedal ......... 6-26
Checking and lubricating the
sidestand .................................. 6-26
Checking the front fork ................. 6-27
Checking the steering .................. 6-27
Checking the wheel bearings ....... 6-28
Battery ......................................... 6-28
Replacing the fuses ..................... 6-30
Replacing the headlight bulb ....... 6-31
Replacing a turn signal light bulb
or the tail/brake light bulb ......... 6-32
Replacing an auxiliary light
bulb ........................................... 6-33
Supporting the motorcycle ........... 6-33
Front wheel .................................. 6-34
Rear wheel ................................... 6-35
Troubleshooting ........................... 6-37
Troubleshooting charts ................ 6-38
Page 41 of 90

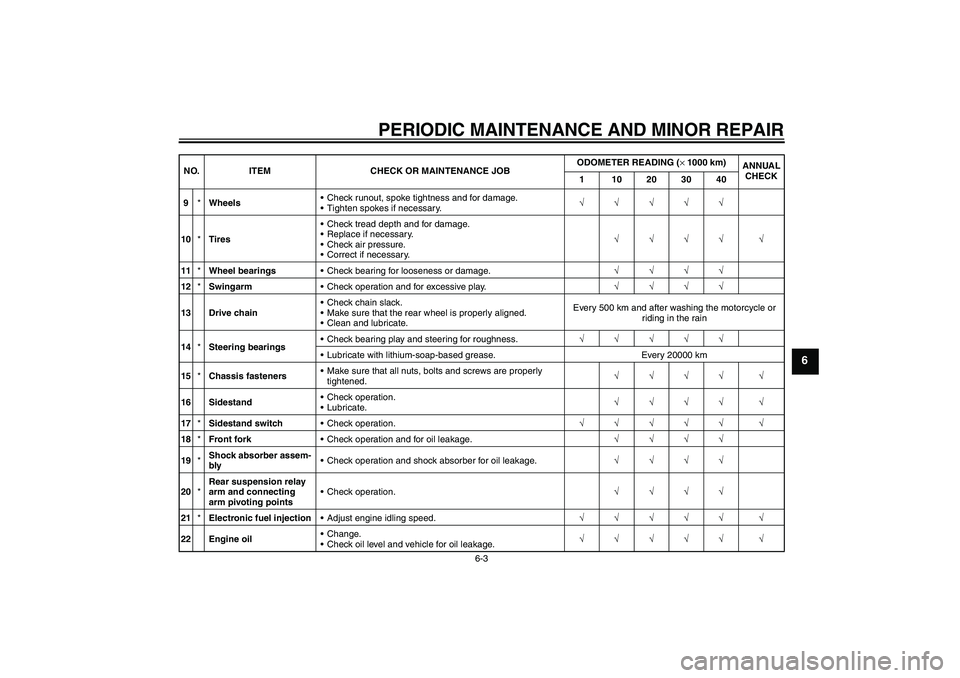
PERIODIC MAINTENANCE AND MINOR REPAIR
6-3
6
9*WheelsCheck runout, spoke tightness and for damage.
Tighten spokes if necessary.√√√√√
10*TiresCheck tread depth and for damage.
Replace if necessary.
Check air pressure.
Correct if necessary.√√√√ √
11*Wheel bearingsCheck bearing for looseness or damage.√√√√
12*SwingarmCheck operation and for excessive play.√√√√
13 Drive chainCheck chain slack.
Make sure that the rear wheel is properly aligned.
Clean and lubricate.Every 500 km and after washing the motorcycle or
riding in the rain
14*Steering bearingsCheck bearing play and steering for roughness.√√√√√
Lubricate with lithium-soap-based grease. Every 20000 km
15*Chassis fastenersMake sure that all nuts, bolts and screws are properly
tightened.√√√√ √
16 SidestandCheck operation.
Lubricate.√√√√ √
17*Sidestand switchCheck operation.√√√√√ √
18*Front forkCheck operation and for oil leakage.√√√√
19*Shock absorber assem-
blyCheck operation and shock absorber for oil leakage.√√√√
20*Rear suspension relay
arm and connecting
arm pivoting pointsCheck operation.√√√√
21*Electronic fuel injectionAdjust engine idling speed.√√√√√ √
22 Engine oilChange.
Check oil level and vehicle for oil leakage.√√√√√ √ NO. ITEM CHECK OR MAINTENANCE JOBODOMETER READING (× 1000 km)
ANNUAL
CHECK
1 10203040
Page 65 of 90

PERIODIC MAINTENANCE AND MINOR REPAIR
6-27
6
EAU23271
Checking the front fork The condition and operation of the front
fork must be checked as follows at the
intervals specified in the periodic main-
tenance and lubrication chart.
To check the condition
WARNING
EWA10750
Securely support the vehicle so thatthere is no danger of it falling over.
Check the inner tubes for scratches,
damage and excessive oil leakage.
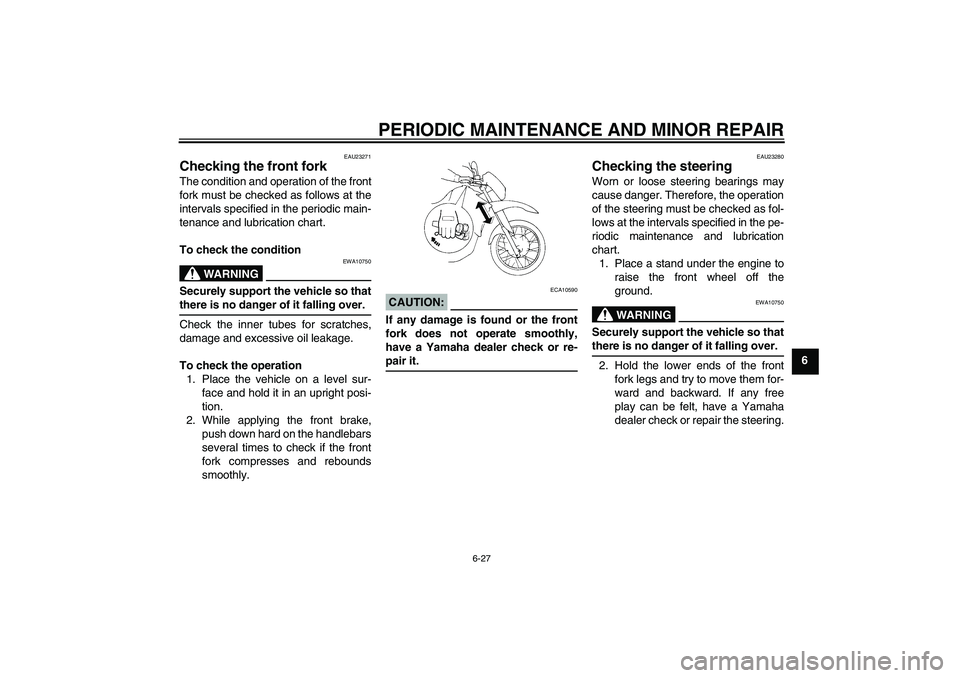
To check the operation
1. Place the vehicle on a level sur-
face and hold it in an upright posi-
tion.
2. While applying the front brake,
push down hard on the handlebars
several times to check if the front
fork compresses and rebounds
smoothly.
CAUTION:
ECA10590
If any damage is found or the front
fork does not operate smoothly,
have a Yamaha dealer check or re-pair it.
EAU23280
Checking the steering Worn or loose steering bearings may
cause danger. Therefore, the operation
of the steering must be checked as fol-
lows at the intervals specified in the pe-
riodic maintenance and lubrication
chart.
1. Place a stand under the engine to
raise the front wheel off the
ground.
WARNING
EWA10750
Securely support the vehicle so thatthere is no danger of it falling over.
2. Hold the lower ends of the front
fork legs and try to move them for-
ward and backward. If any free
play can be felt, have a Yamaha
dealer check or repair the steering.