wheel bolts YAMAHA XVS650A 2002 Owners Manual
[x] Cancel search | Manufacturer: YAMAHA, Model Year: 2002, Model line: XVS650A, Model: YAMAHA XVS650A 2002Pages: 108, PDF Size: 9.03 MB
Page 39 of 108

PRE-OPERATION CHECKS
4-2
4
NOTE:@ Pre-operation checks should be made each time the motorcycle is used. Such an inspection can be accomplished in a very
short time; and the added safety it assures is more than worth the time involved. @
EWA00033
WARNING
@ If any item in the Pre-operation check list is not working properly, have it inspected and repaired before operating
the motorcycle. @Control cablesMake sure that operation is smooth.
Lubricate if necessary.6-25
Wheels and tiresCheck for damage.
Check tire condition and tread depth.
Check air pressure.
Correct if necessary.6-16–6-19
Brake and shift pedalsMake sure that operation is smooth.
Lubricate pedal pivoting points if necessary.6-26
Brake and clutch leversMake sure that operation is smooth.
Lubricate lever pivoting points if necessary.6-26
SidestandMake sure that operation is smooth.
Lubricate pivot if necessary.6-27
Chassis fastenersMake sure that all nuts, bolts and screws are properly tightened.
Tighten if necessary.—
Instruments, lights, signals
and switchesCheck operation.
Correct if necessary.—
Sidestand switchCheck operation of ignition circuit cut-off system.
If system is defective, have Yamaha dealer check vehicle.3-17 ITEM CHECKS PAGE
U5SCE0.book Page 2 Thursday, June 7, 2001 11:24 AM
Page 50 of 108

PERIODIC MAINTENANCE AND MINOR REPAIR
6-3
6
10
*WheelsCheck runout, spoke tightness and for damage.
Tighten spokes if necessary.√√√√
11*TiresCheck tread depth and for damage.
Replace if necessary.
Check air pressure.
Correct if necessary.√√√√ √
12*Wheel bearingsCheck bearing for looseness or damage.√√√√
13*SwingarmCheck operation and for excessive play.√√√√
Lubricate with lithium-soap-based grease. Every 50,000 km
14*Steering bearingsCheck bearing play and steering for roughness.√√√√√
Lubricate with lithium-soap-based grease. Every 20,000 km
15*Chassis fastenersMake sure that all nuts, bolts and screws are properly tightened.√√√√ √
16 SidestandCheck operation.
Lubricate.√√√√ √
17*Sidestand switchCheck operation.√√√√√ √
18*Front forkCheck operation and for oil leakage.√√√√
19*Shock absorber
assemblyCheck operation and shock absorber for oil leakage.√√√√
20*CarburetorsCheck starter (choke) operation.
Adjust engine idling speed and synchronization.√√√√√ √
21 Engine oilChange.√√√√√ √
Check oil level and vehicle for oil leakage.√√√√√ √
22 Engine oil filter elementReplace.√√√
23 Final gear oilCheck oil level and vehicle for oil leakage.√√ √
Change.√√√
24*Front and rear brake
switchesCheck operation.√√√√√ √ NO. ITEM CHECK OR MAINTENANCE JOBODOMETER READING (×1,000 km)
ANNUAL
CHECK
1 10203040
U5SCE0.book Page 3 Thursday, June 7, 2001 11:24 AM
Page 84 of 108

PERIODIC MAINTENANCE AND MINOR REPAIR
6-37
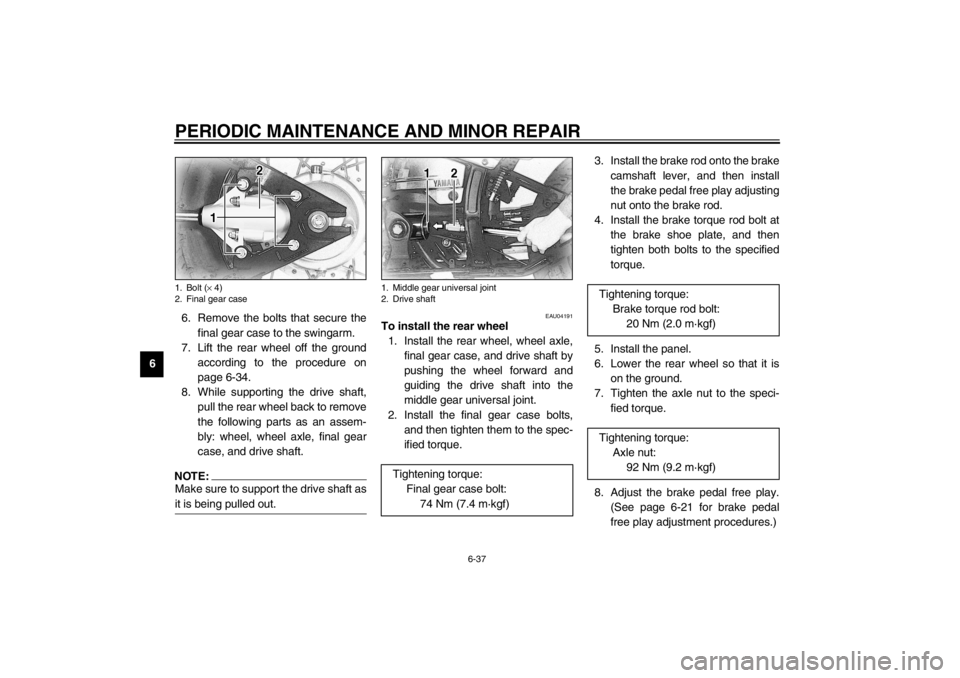
66. Remove the bolts that secure the
final gear case to the swingarm.
7. Lift the rear wheel off the ground
according to the procedure on
page 6-34.
8. While supporting the drive shaft,
pull the rear wheel back to remove
the following parts as an assem-
bly: wheel, wheel axle, final gear
case, and drive shaft.
NOTE:@ Make sure to support the drive shaft as
it is being pulled out. @
EAU04191
To install the rear wheel
1. Install the rear wheel, wheel axle,
final gear case, and drive shaft by
pushing the wheel forward and
guiding the drive shaft into the
middle gear universal joint.
2. Install the final gear case bolts,
and then tighten them to the spec-
ified torque.3. Install the brake rod onto the brake
camshaft lever, and then install
the brake pedal free play adjusting
nut onto the brake rod.
4. Install the brake torque rod bolt at
the brake shoe plate, and then
tighten both bolts to the specified
torque.
5. Install the panel.
6. Lower the rear wheel so that it is
on the ground.
7. Tighten the axle nut to the speci-
fied torque.
8. Adjust the brake pedal free play.
(See page 6-21 for brake pedal
free play adjustment procedures.)
1. Bolt (× 4)
2. Final gear case
1. Middle gear universal joint
2. Drive shaft
Tightening torque:
Final gear case bolt:
74 Nm (7.4 m·kgf)
Tightening torque:
Brake torque rod bolt:
20 Nm (2.0 m·kgf)
Tightening torque:
Axle nut:
92 Nm (9.2 m·kgf)
U5SCE0.book Page 37 Thursday, June 7, 2001 11:24 AM