speed YAMAHA XVS950 2015 Owners Manual
[x] Cancel search | Manufacturer: YAMAHA, Model Year: 2015, Model line: XVS950, Model: YAMAHA XVS950 2015Pages: 88, PDF Size: 2.28 MB
Page 9 of 88

SAFETY INFORMATION
1-2
1
Many accidents involve inexperi-
enced operators. In fact, many op-
erators who have been involved in
accidents do not even have a cur-
rent motorcycle license.
• Make sure that you are qualified and that you only lend your mo-
torcycle to other qualified oper-
ators.
• Know your skills and limits. Staying within your limits may
help you to avoid an accident.
• We recommend that you prac- tice riding your motorcycle
where there is no traffic until you
have become thoroughly famil-
iar with the motorcycle and all of
its controls.
Many accidents have been
caused by error of the motorcycle
operator. A typical error made by
the operator is veering wide on a
turn due to excessive speed or un-
dercornering (insufficient lean an-
gle for the speed).
• Always obey the speed limit and never travel faster than warrant-
ed by road and traffic condi-
tions. • Always signal before turning or
changing lanes. Make sure that
other motorists can see you.
The posture of the operator and
passenger is important for proper
control.
• The operator should keep both hands on the handlebar and
both feet on the operator foot-
rests during operation to main-
tain control of the motorcycle.
• The passenger should always hold onto the operator, the seat
strap or grab bar, if equipped,
with both hands and keep both
feet on the passenger footrests.
Never carry a passenger unless
he or she can firmly place both
feet on the passenger footrests.
Never ride under the influence of
alcohol or other drugs.
This motorcycle is designed for
on-road use only. It is not suitable
for off-road use. Protective Apparel
The majority of fatalities from motorcy-
cle accidents are the result of head in-
juries. The use of a safety helmet is the
single most critical factor in the pre-
vention or reduction of head injuries.
Always wear an approved helmet.
Wear a face shield or goggles.
Wind in your unprotected eyes
could contribute to an impairment
of vision that could delay seeing a
hazard.
The use of a jacket, heavy boots,
trousers, gloves, etc., is effective
in preventing or reducing abra-
sions or lacerations.
Never wear loose-fitting clothes,
otherwise they could catch on the
control levers, footrests, or wheels
and cause injury or an accident.
Always wear protective clothing
that covers your legs, ankles, and
feet. The engine or exhaust sys-
tem become very hot during or af-
ter operation and can cause
burns.
A passenger should also observe
the above precautions.
UB33E0E0.book Page 2 Monday, December 1, 2014 4:49 PM
Page 19 of 88

INSTRUMENT AND CONTROL FUNCTIONS
3-4
3
TIPEven if the oil level is sufficient, the
warning light may flicker when rid-
ing on a slope or during sudden
acceleration or deceleration, but
this is not a malfunction.
This model is also equipped with a
self-diagnosis device for the oil
level detection circuit. If a problem
is detected in the oil level detec-
tion circuit, the following cycle will
be repeated until the malfunction
is corrected: The oil level warning
light will flash ten times, then go
off for 2.5 seconds. If this occurs,
have a Yamaha dealer check the
vehicle.
EAU11367
Fuel level warnin g li ght “ ”
This warning light comes on when the
fuel level drops below approximately
2.8 L (0.74 US gal, 0.62 Imp.gal). When
this occurs, refuel as soon as possible.
The electrical circuit of the warning
light can be checked by turning the key
to “ON”. The warning light should
come on for a few seconds, and then
go off. If the warning light does not come on
initially when the key is turned to “ON”,
or if the warning light remains on, have
a Yamaha dealer check the electrical
circuit.
TIPThis model is also equipped with a self-
diagnosis device for the fuel level de-
tection circuit. If a problem is detected
in the fuel level detection circuit, the
following cycle will be repeated until
the malfunction is corrected: The fuel
level warning light will flash eight times,
and then go off for 3.0 seconds. If this
occurs, have a Yamaha dealer check
the vehicle.
EAU46443
En
gine trou ble warnin g li ght “ ”
This warning light comes on if a prob-
lem is detected in the electrical circuit
monitoring the engine. If this occurs,
have a Yamaha dealer check the self-
diagnosis system. (See page 3-7 for an
explanation of the self-diagnosis de-
vice.) The electrical circuit of the warning
light can be checked by turning the key
to “ON”. The warning light should
come on for a few seconds, and then
go off.
If the warning light does not come on
initially when the key is turned to “ON”,
or if the warning light remains on, have
a Yamaha dealer check the electrical
circuit.
TIPThis warning light will come on when
the key is turned to “ON” and the start
switch is pushed, but this does not in-
dicate a malfunction.
EAU51662
ABS warnin
g lig ht “ ”
In normal operation, the ABS warning
light comes on when the key is turned
to “ON”, and goes off after traveling at
a speed of 10 km/h (6 mi/h) or higher.
If the ABS warning light: does not come on when the key is
turned to “ON”
comes on or flashes while riding
does not go off after traveling at a
speed of 10 km/h (6 mi/h) or high-
er
ABS
UB33E0E0.book Page 4 Monday, December 1, 2014 4:49 PM
Page 20 of 88
INSTRUMENT AND CONTROL FUNCTIONS
3-5
3The ABS may not work correctly. If any
of the above occurs, have a Yamaha
dealer check the system as soon as
possible. (See page 3-11 for an expla-
nation of the ABS.)
WARNING
EWA16041
If the ABS warnin
g li ght does not go
off after travelin g at a speed of 10
km/h (6 mi/h) or hi gher, or if the
warnin g li ght comes on or flashes
while ri din g, the b rake system re-
verts to conventional brakin g. If ei-
ther of the ab ove occurs, or if the
warnin g li ght does not come on at
all, use extra caution to avoi d possi-
b le wheel lock during emer gency
b rakin g. Have a Yamaha d ealer
check the brake system an d electri-
cal circuits as soon as possi ble.TIPIf the start switch is pushed while the
engine is running, the ABS warning
light will come on, but this is not a mal-
function.
EAU54682
Immo bilizer system in dicator
li g ht “ ”
When the key is turned to “OFF” and
30 seconds have passed, the indicator
light will start flashing indicating the im-
mobilizer system is enabled. After 24
hours have passed, the indicator light
will stop flashing, however the immobi-
lizer system is still enabled.
The electrical circuit of the indicator
light can be checked by turning the key
to “ON”. The indicator light should
come on for a few seconds, and then
go off.
If the indicator light does not come on
initially when the key is turned to “ON”,
or if the indicator light remains on, have
a Yamaha dealer check the electrical
circuit.
The self-diagnosis device also detects
problems in the immobilizer system
circuits. (See page 3-7 for an explana-
tion of the self-diagnosis device.)
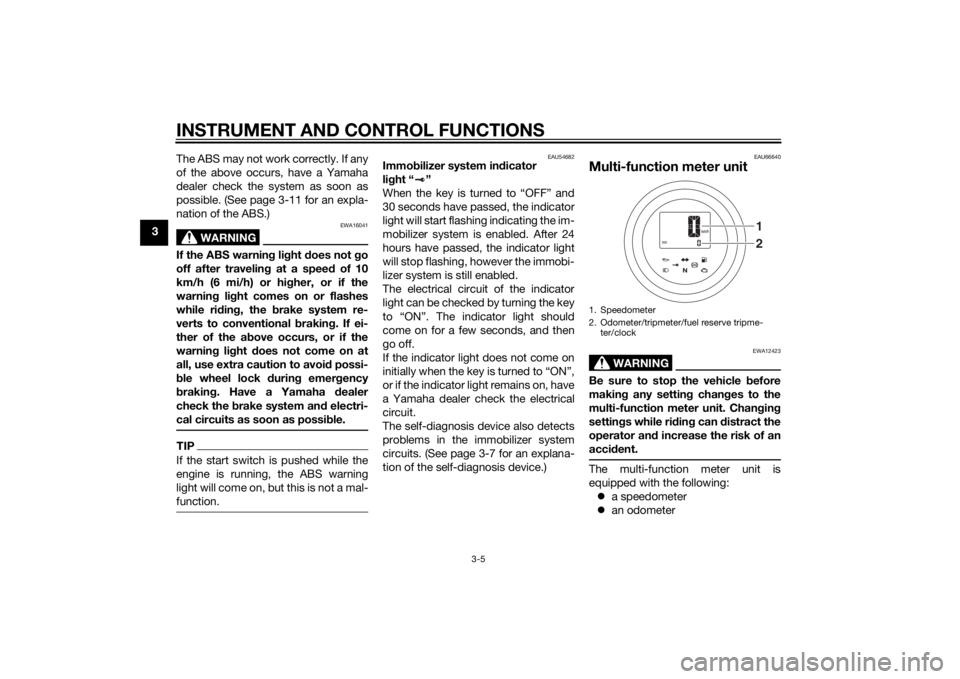
EAU66640
Multi-function meter unit
WARNING
EWA12423
Be sure to stop the vehicle before
makin g any settin g chan ges to the
multi-function meter unit. Chan gin g
settin gs while ri din g can distract the
operator an d increase the risk of an
acci dent.The multi-function meter unit is
equipped with the following:
a speedometer
an odometer1. Speedometer
2. Odometer/tripmeter/fuel reserve tripme-
ter/clock
21
UB33E0E0.book Page 5 Monday, December 1, 2014 4:49 PM
Page 21 of 88
INSTRUMENT AND CONTROL FUNCTIONS
3-6
3
two tripmeters (which show the
distance traveled since they were
last set to zero)
a fuel reserve tripmeter (which
shows the distance traveled on
the fuel reserve)
a clock
a self-diagnosis device
TIPBe sure to turn the key to “ON” be-
fore using the “SELECT” switch.
For the UK only: To switch the
speedometer and odometer/trip-
meter displays between kilome-
ters and miles, select the
odometer mode, and then push
the “SELECT” switch for at least 5
seconds.
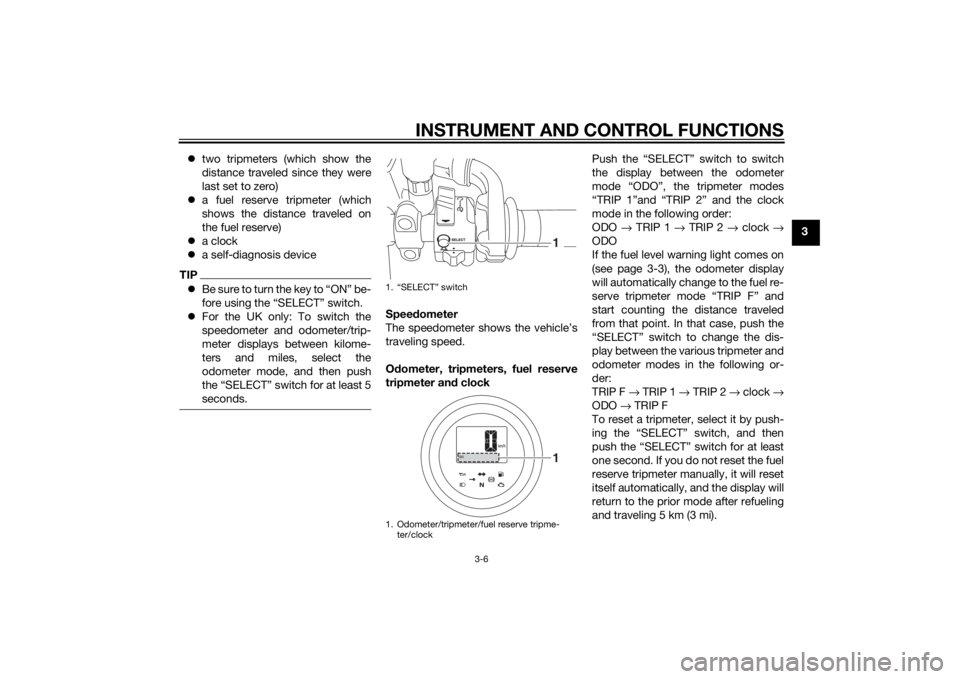
Speed ometer
The speedometer shows the vehicle’s
traveling speed.
O dometer, tripmeters, fuel reserve
tripmeter an d clock Push the “SELECT” switch to switch
the display between the odometer
mode “ODO”, the tripmeter modes
“TRIP 1”and “TRIP 2” and the clock
mode in the following order:
ODO
→ TRIP 1 → TRIP 2 → clock →
ODO
If the fuel level warning light comes on
(see page 3-3), the odometer display
will automatically change to the fuel re-
serve tripmeter mode “TRIP F” and
start counting the distance traveled
from that point. In that case, push the
“SELECT” switch to change the dis-
play between the various tripmeter and
odometer modes in the following or-
der:
TRIP F → TRIP 1 → TRIP 2 → clock →
ODO → TRIP F
To reset a tripmeter, select it by push-
ing the “SELECT” switch, and then
push the “SELECT” switch for at least
one second. If you do not reset the fuel
reserve tripmeter manually, it will reset
itself automatically, and the display will
return to the prior mode after refueling
and traveling 5 km (3 mi).1. “SELECT” switch
1. Odometer/tripmeter/fuel reserve tripme- ter/clock
11
UB33E0E0.book Page 6 Monday, December 1, 2014 4:49 PM
Page 25 of 88
INSTRUMENT AND CONTROL FUNCTIONS
3-10
3
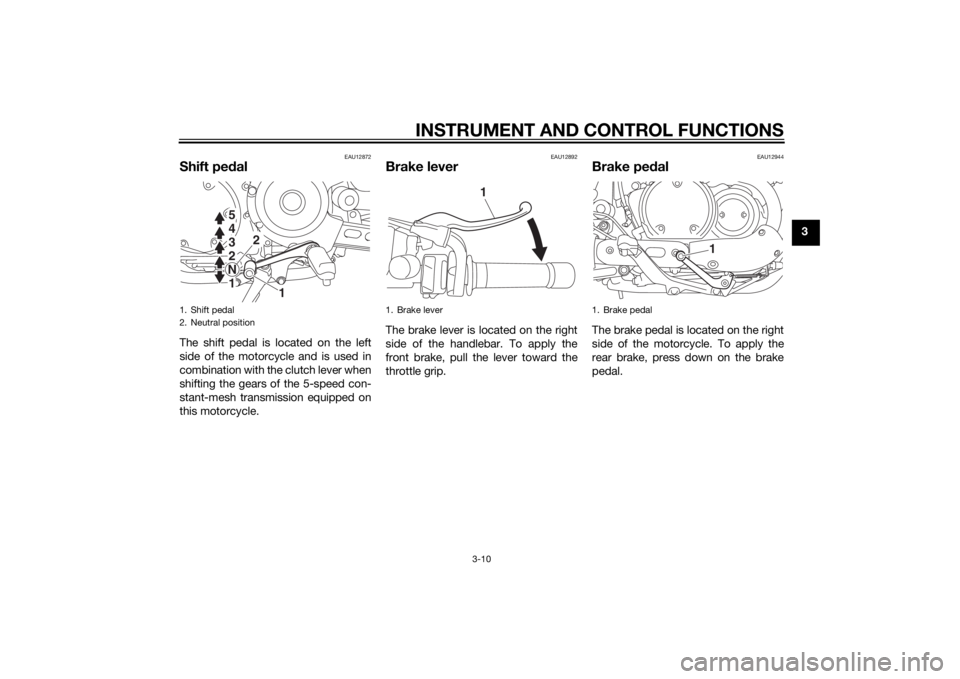
EAU12872
Shift pedalThe shift pedal is located on the left
side of the motorcycle and is used in
combination with the clutch lever when
shifting the gears of the 5-speed con-
stant-mesh transmission equipped on
this motorcycle.
EAU12892
Brake leverThe brake lever is located on the right
side of the handlebar. To apply the
front brake, pull the lever toward the
throttle grip.
EAU12944
Brake pe dalThe brake pedal is located on the right
side of the motorcycle. To apply the
rear brake, press down on the brake
pedal.
1. Shift pedal
2. Neutral position
1
2
5
4
3
2
N 1 5
4
3
2
N 1
1. Brake lever
1
1. Brake pedal
1
UB33E0E0.book Page 10 Monday, December 1, 2014 4:49 PM
Page 26 of 88

INSTRUMENT AND CONTROL FUNCTIONS
3-11
3
EAU67580
ABSThe Yamaha ABS (Anti-lock Brake
System) features a dual electronic con-
trol system, which acts on the front and
rear brakes independently.
Operate the brakes with ABS as you
would conventional brakes. If the ABS
is activated, a pulsating sensation may
be felt at the brake lever or brake ped-
al. In this situation, continue to apply
the brakes and let the ABS work; do
not “pump” the brakes as this will re-
duce braking effectiveness.
WARNING
EWA16051
Always keep a sufficient distance
from the vehicle ahea d to match the
ri din g speed even with ABS.
The ABS performs best with
lon g b rakin g d istances.
On certain surfaces, such as
rou gh or g ravel roa ds, the b rak-
in g d istance may b e longer with
the ABS than without.The ABS is monitored by an ECU,
which will revert the system to conven-
tional braking if a malfunction occurs.
TIP The ABS performs a self-diagno-
sis test each time the vehicle first
starts off after the key is turned to
“ON” and the vehicle has traveled
at a speed of 10 km/h (6 mi/h) or
higher. During this test, a “click-
ing” noise can be heard from the
hydraulic control unit, and if the
brake lever or brake pedal is even
slightly applied, a vibration can be
felt at the lever and pedal, but
these do not indicate a malfunc-
tion.
This ABS has a test mode which
allows the owner to experience
the pulsation at the brake lever or
brake pedal when the ABS is op-
erating. However, special tools are
required, so please consult your
Yamaha dealer.NOTICE
ECA20100
Be careful not to damag e the wheel
sensor or wheel sensor rotor; other-
wise, improper performance of the
ABS will result.
1. Rear wheel hub
2. Front wheel hub1
2
UB33E0E0.book Page 11 Monday, December 1, 2014 4:49 PM
Page 39 of 88
OPERATION AND IMPORTANT RIDING POINTS
5-2
5
d
icator li ght remains on, see pa ge
3-3 for the correspon din g warnin g
an d in dicator li ght circuit check.
The ABS warning light should
come on when the key is turned to
“ON” and then go off after travel-
ing at a speed of 10 km/h (6 mi/h)
or higher.
NOTICE
ECA17682
If the ABS warnin g li ght does not
come on an d then go off as ex-
plaine d a bove, see pa ge 3-3 for the
warnin g li ght circuit check.2. Shift the transmission into the
neutral position. The neutral indi-
cator light should come on. If not,
ask a Yamaha dealer to check the
electrical circuit.
3. Start the engine by pushing the “ ” side of the start/engine
stop switch.
If the engine fails to start, release
the start/engine stop switch, wait
a few seconds, and then try again.
Each starting attempt should be
as short as possible to preserve the battery. Do not crank the en-
gine more than 10 seconds on any
one attempt.
NOTICE
ECA11043
For maximum en
gine life, never ac-
celerate har d when the en gine is
col d!
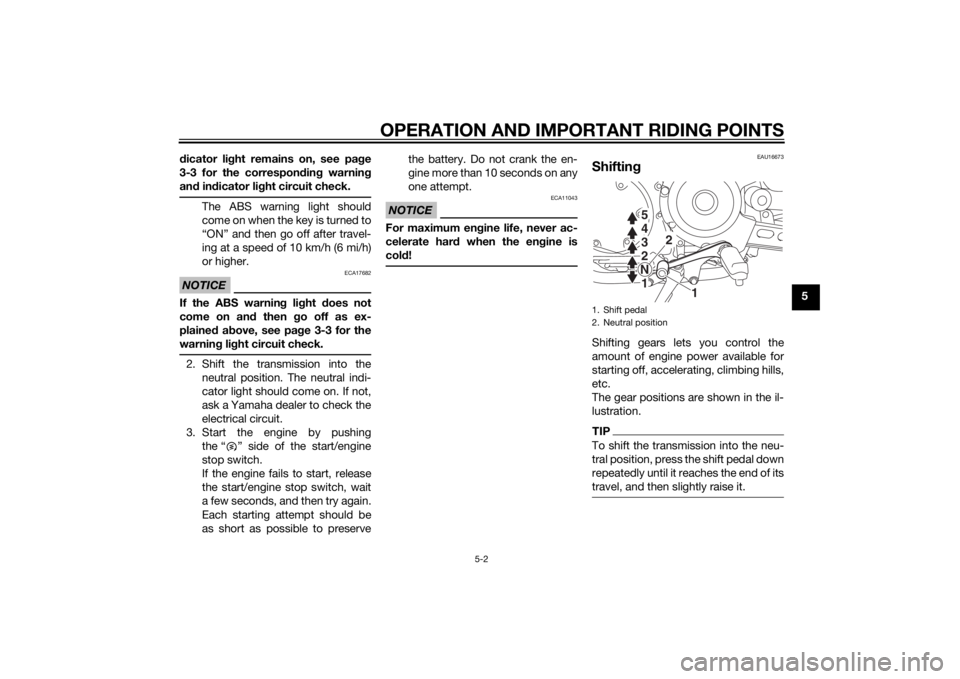
EAU16673
Shiftin gShifting gears lets you control the
amount of engine power available for
starting off, accelerating, climbing hills,
etc.
The gear positions are shown in the il-
lustration.TIPTo shift the transmission into the neu-
tral position, press the shift pedal down
repeatedly until it reaches the end of its
travel, and then slightly raise it.1. Shift pedal
2. Neutral position
1
2
5
4
3
2
N 1 5
4
3
2
N 1
UB33E0E0.book Page 2 Monday, December 1, 2014 4:49 PM
Page 41 of 88

OPERATION AND IMPORTANT RIDING POINTS
5-4
5
EAU16811
Tips for reducin g fuel con-
sumptionFuel consumption depends largely on
your riding style. Consider the follow-
ing tips to reduce fuel consumption:
Shift up swiftly, and avoid high en-
gine speeds during acceleration.
Do not rev the engine while shift-
ing down, and avoid high engine
speeds with no load on the en-
gine.
Turn the engine off instead of let-
ting it idle for an extended length
of time (e.g., in traffic jams, at traf-
fic lights or at railroad crossings).
EAU16842
Engine break-inThere is never a more important period
in the life of your engine than the period
between 0 and 1600 km (1000 mi). For
this reason, you should read the fol-
lowing material carefully.
Since the engine is brand new, do not
put an excessive load on it for the first
1600 km (1000 mi). The various parts in
the engine wear and polish themselves
to the correct operating clearances.
During this period, prolonged full-throt-
tle operation or any condition that
might result in engine overheating
must be avoided.
EAU17024
0–1000 km (0–600 mi)
Avoid prolonged operation above 1/3
throttle. NOTICE: After 1000 km (600
mi) of operation, the en gine oil must
b e chan ged , an d the oil filter car-
tri dge or element replace d.
[ECA11283]
1000–1600 km (600–1000 mi)
Avoid prolonged operation above 1/2
throttle. 1600 km (1000 mi) an
d b eyon d
The vehicle can now be operated nor-
mally.
NOTICE
ECA10271
If any en gine trou ble shoul d occur
d urin g the en gine break-in perio d,
imme diately have a Yamaha dealer
check the vehicle.
UB33E0E0.book Page 4 Monday, December 1, 2014 4:49 PM
Page 56 of 88
PERIODIC MAINTENANCE AND ADJUSTMENT
6-14
6wei
ght of ri der, passen ger, car-
g o, an d accessories approve d
for this mo del.
WARNING
EWA10512
Never overloa d your vehicle. Opera-
tion of an overloa ded vehicle coul d
cause an acci dent.
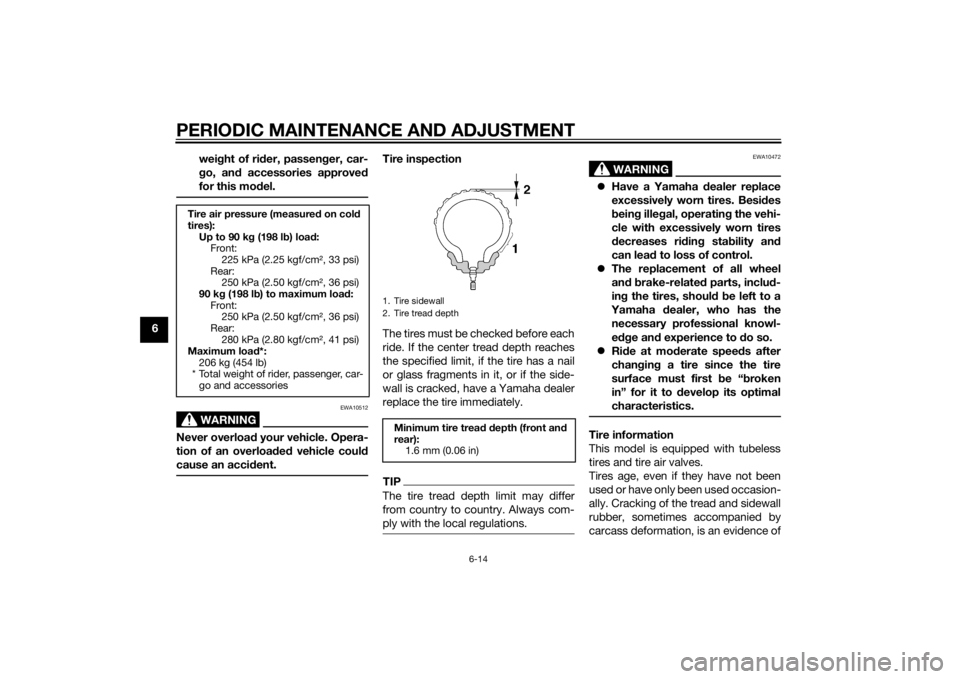
Tire inspection
The tires must be checked before each
ride. If the center tread depth reaches
the specified limit, if the tire has a nail
or glass fragments in it, or if the side-
wall is cracked, have a Yamaha dealer
replace the tire immediately.TIPThe tire tread depth limit may differ
from country to country. Always com-
ply with the local regulations.
WARNING
EWA10472
Have a Yamaha dealer replace
excessively worn tires. Besi des
b ein g ille gal, operatin g the vehi-
cle with excessively worn tires
d ecreases rid ing sta bility an d
can lead to loss of control.
The replacement of all wheel
and b rake-relate d parts, inclu d-
in g the tires, shoul d b e left to a
Yamaha dealer, who has the
necessary professional knowl-
e dge an d experience to do so.
Ride at mo derate speed s after
chan gin g a tire since the tire
surface must first be “ broken
in” for it to develop its optimal
characteristics.Tire information
This model is equipped with tubeless
tires and tire air valves.
Tires age, even if they have not been
used or have only been used occasion-
ally. Cracking of the tread and sidewall
rubber, sometimes accompanied by
carcass deformation, is an evidence of
Tire air pressure (measure d on col d
tires): Up to 90 k g (198 l b) loa d:
Front:
225 kPa (2.25 kgf/cm², 33 psi)
Rear: 250 kPa (2.50 kgf/cm², 36 psi)
90 k g (198 l b) to maximum load :
Front: 250 kPa (2.50 kgf/cm², 36 psi)
Rear: 280 kPa (2.80 kgf/cm², 41 psi)
Maximum loa d*:
206 kg (454 lb)
* Total weight of rider, passenger, car- go and accessories
1. Tire sidewall
2. Tire tread depthMinimum tire trea d d epth (front an d
rear): 1.6 mm (0.06 in)
UB33E0E0.book Page 14 Monday, December 1, 2014 4:49 PM
Page 79 of 88
SPECIFICATIONS
8-1
8
Dimensions:Overall length:2295 mm (90.4 in)
Overall width:
775 mm (30.5 in)
Overall height: 1160 mm (45.7 in)
Seat height: 765 mm (30.1 in)
Wheelbase:
1570 mm (61.8 in)
Ground clearance: 135 mm (5.3 in)
Minimum turning radius: 3300 mm (129.9 in)Wei ght:Curb weight:
251 kg (553 lb)Engine:Engine type:
Air cooled 4-stroke, SOHC
Cylinder arrangement: V-type 2-cylinder
Displacement: 942 cm³
Bore × stroke:
85.0 × 83.0 mm (3.35 × 3.27 in)
Compression ratio: 9.0 : 1
Starting system: Electric starter
Lubrication system:
Wet sump
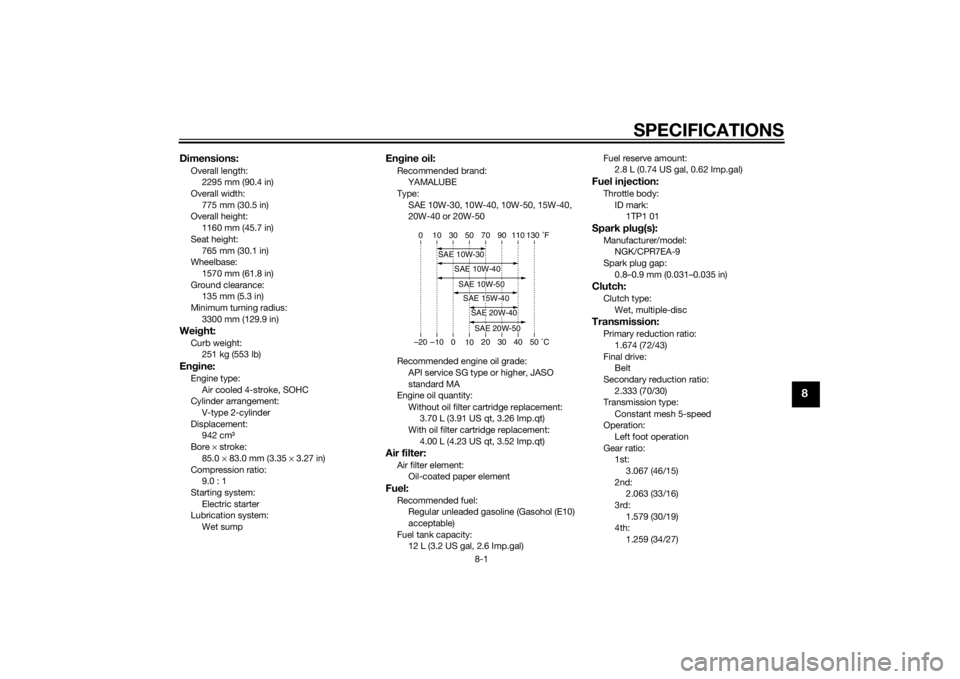
Engine oil:Recommended brand:
YAMALUBE
Type:
SAE 10W-30, 10W-40, 10W-50, 15W-40,
20W-40 or 20W-50
Recommended engine oil grade: API service SG type or higher, JASO
standard MA
Engine oil quantity:
Without oil filter cartridge replacement:3.70 L (3.91 US qt, 3.26 Imp.qt)
With oil filter cartridge replacement:
4.00 L (4.23 US qt, 3.52 Imp.qt)Air filter:Air filter element:Oil-coated paper elementFuel:Recommended fuel:Regular unleaded gasoline (Gasohol (E10)
acceptable)
Fuel tank capacity: 12 L (3.2 US gal, 2.6 Imp.gal) Fuel reserve amount:
2.8 L (0.74 US gal, 0.62 Imp.gal)
Fuel injection:Throttle body:
ID mark:1TP1 01Spark plu g(s):Manufacturer/model:
NGK/CPR7EA-9
Spark plug gap: 0.8–0.9 mm (0.031–0.035 in)Clutch:Clutch type:Wet, multiple-discTransmission:Primary reduction ratio:
1.674 (72/43)
Final drive: Belt
Secondary reduction ratio: 2.333 (70/30)
Transmission type:
Constant mesh 5-speed
Operation: Left foot operation
Gear ratio: 1st:3.067 (46/15)
2nd: 2.063 (33/16)
3rd:
1.579 (30/19)
4th: 1.259 (34/27)
–20 –10 0 1020 30 40 50 C
10 30 50 70 90 110
0 130 F
SAE 10W-30
SAE 15W-40SAE 20W-40SAE 20W-50
SAE 10W-40SAE 10W-50
UB33E0E0.book Page 1 Monday, December 1, 2014 4:49 PM