engine YAMAHA YBR125 2004 Owner's Guide
[x] Cancel search | Manufacturer: YAMAHA, Model Year: 2004, Model line: YBR125, Model: YAMAHA YBR125 2004Pages: 83, PDF Size: 3.16 MB
Page 53 of 83
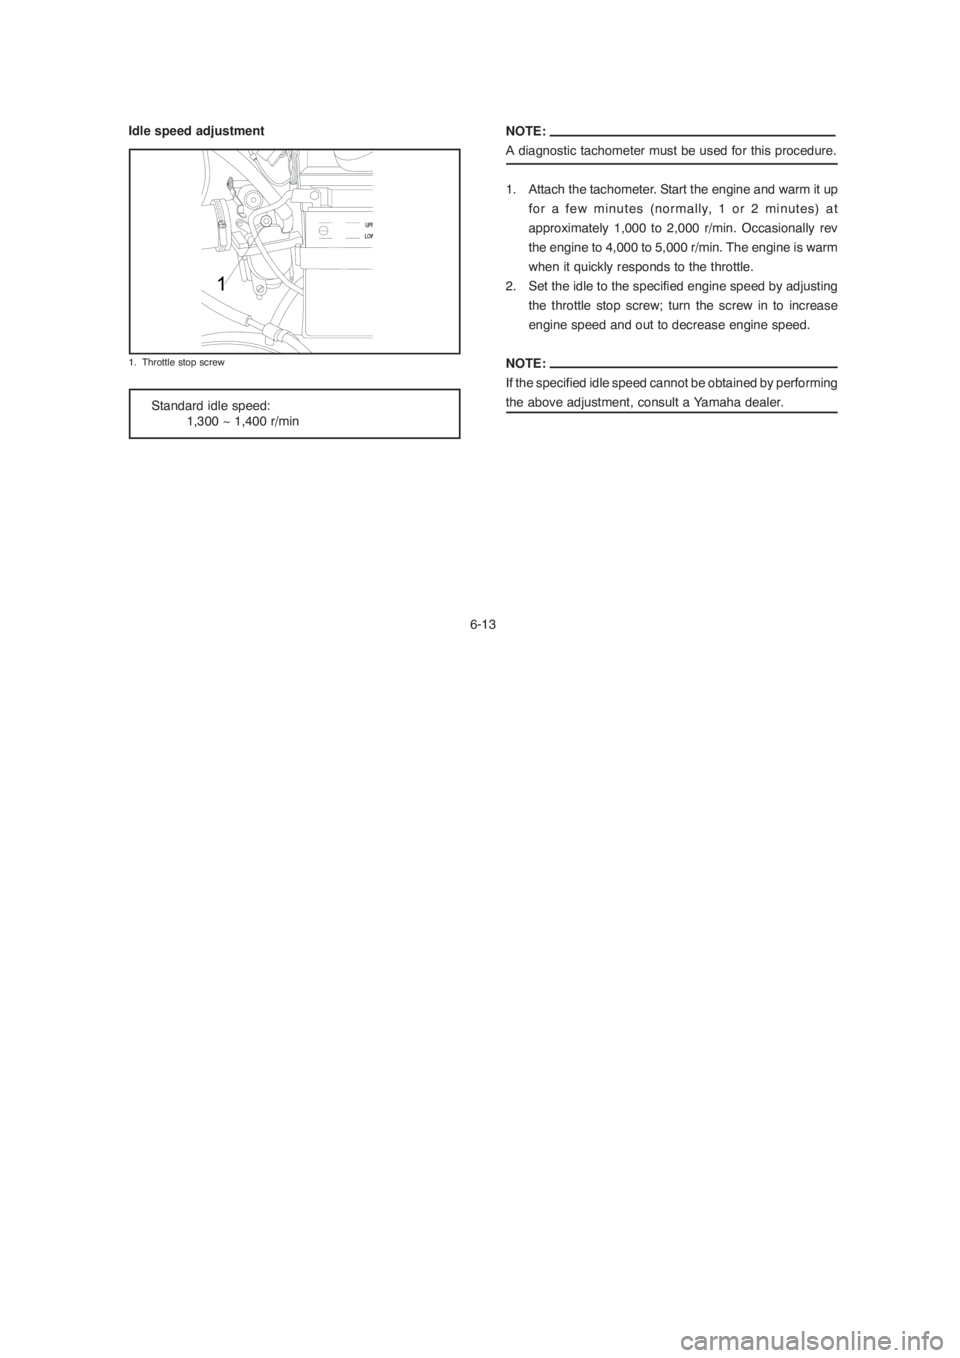
NOTE:
A diagnostic tachometer must be used for this procedure.
1. Attach the tachometer. Start the engine and warm it up
for a few minutes (normally, 1 or 2 minutes) at
approximately 1,000 to 2,000 r/min. Occasionally rev
the engine to 4,000 to 5,000 r/min. The engine is warm
when it quickly responds to the throttle.
2. Set the idle to the specified engine speed by adjusting
the throttle stop screw; turn the screw in to increase
engine speed and out to decrease engine speed.
NOTE:
If the specified idle speed cannot be obtained by performing
the above adjustment, consult a Yamaha dealer.
6-13
Standard idle speed:
1,300 ~ 1,400 r/min
1. Throttle stop screw
Idle speed adjustment
NOTE:
A diagnostic tachometer must be used for this procedure.
1. Attach the tachometer. Start the engine and warm it up
for a few minutes (normally, 1 or 2 minutes) at
approximately 1,000 to 2,000 r/min. Occasionally rev
the engine to 4,000 to 5,000 r/min. The engine is warm
when it quickly responds to the throttle.
2. Set the idle to the specified engine speed by adjusting
the throttle stop screw; turn the screw in to increase
engine speed and out to decrease engine speed.
NOTE:
If the specified idle speed cannot be obtained by performing
the above adjustment, consult a Yamaha dealer.
6-13
Standard idle speed:
1,300 ~ 1,400 r/min
1. Throttle stop screw
Idle speed adjustment
Page 54 of 83
NOTE:
Before checking the throttle cable free play, the engine
idling speed should be adjusted.
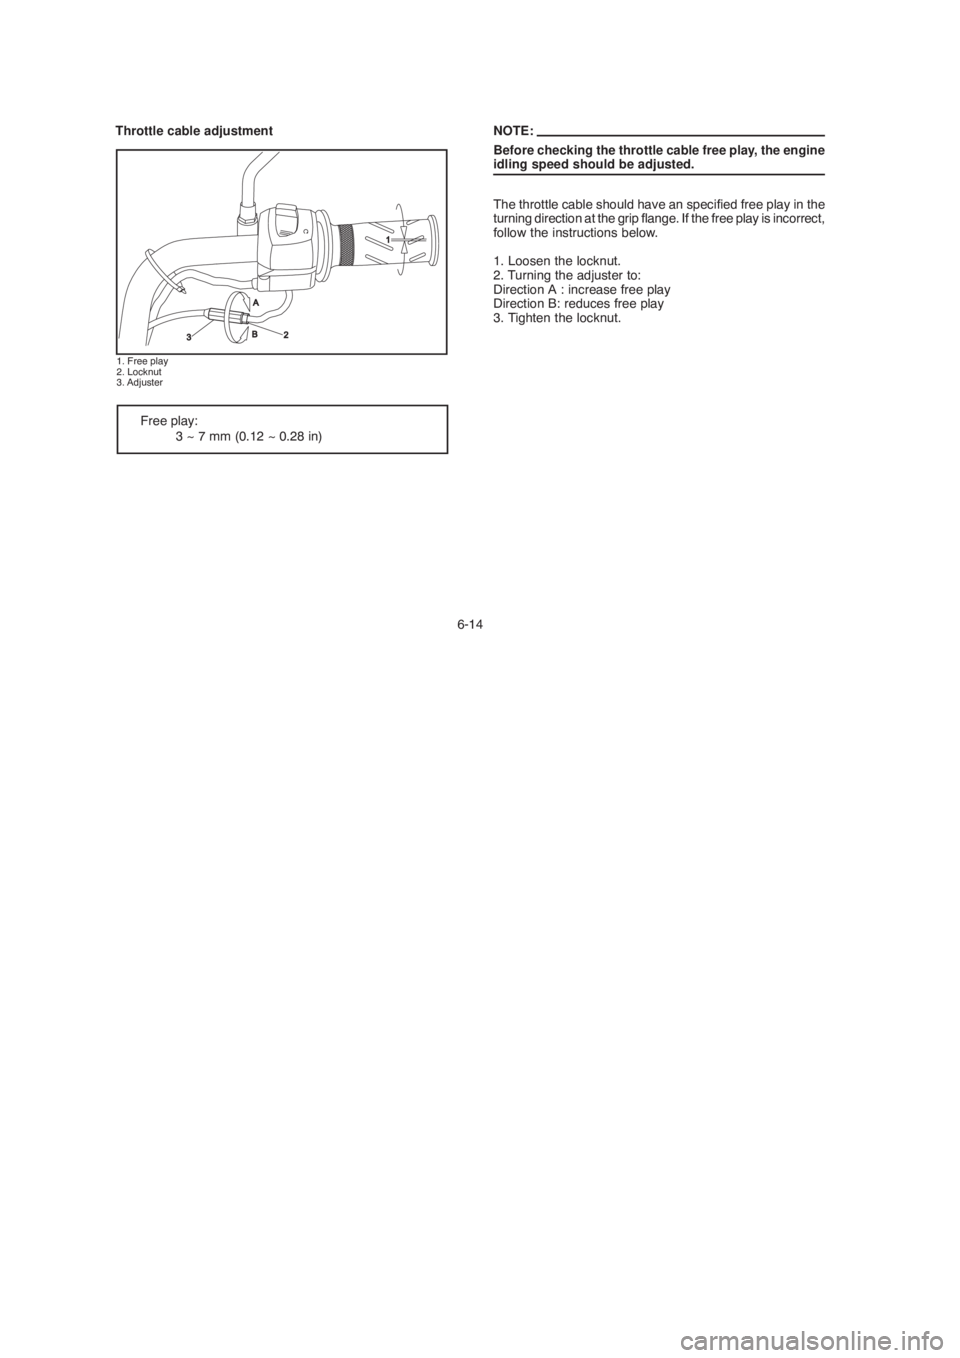
The throttle cable should have an specified free play in the
turning direction at the grip flange. If the free play is incorrect,
follow the instructions below.
1. Loosen the locknut.
2. Turning the adjuster to:
Direction A : increase free play
Direction B: reduces free play
3. Tighten the locknut.
6-14
Free play:
3 ~ 7 mm (0.12 ~ 0.28 in) Throttle cable adjustment
1. Free play
2. Locknut
3. Adjuster
Page 55 of 83
6-15
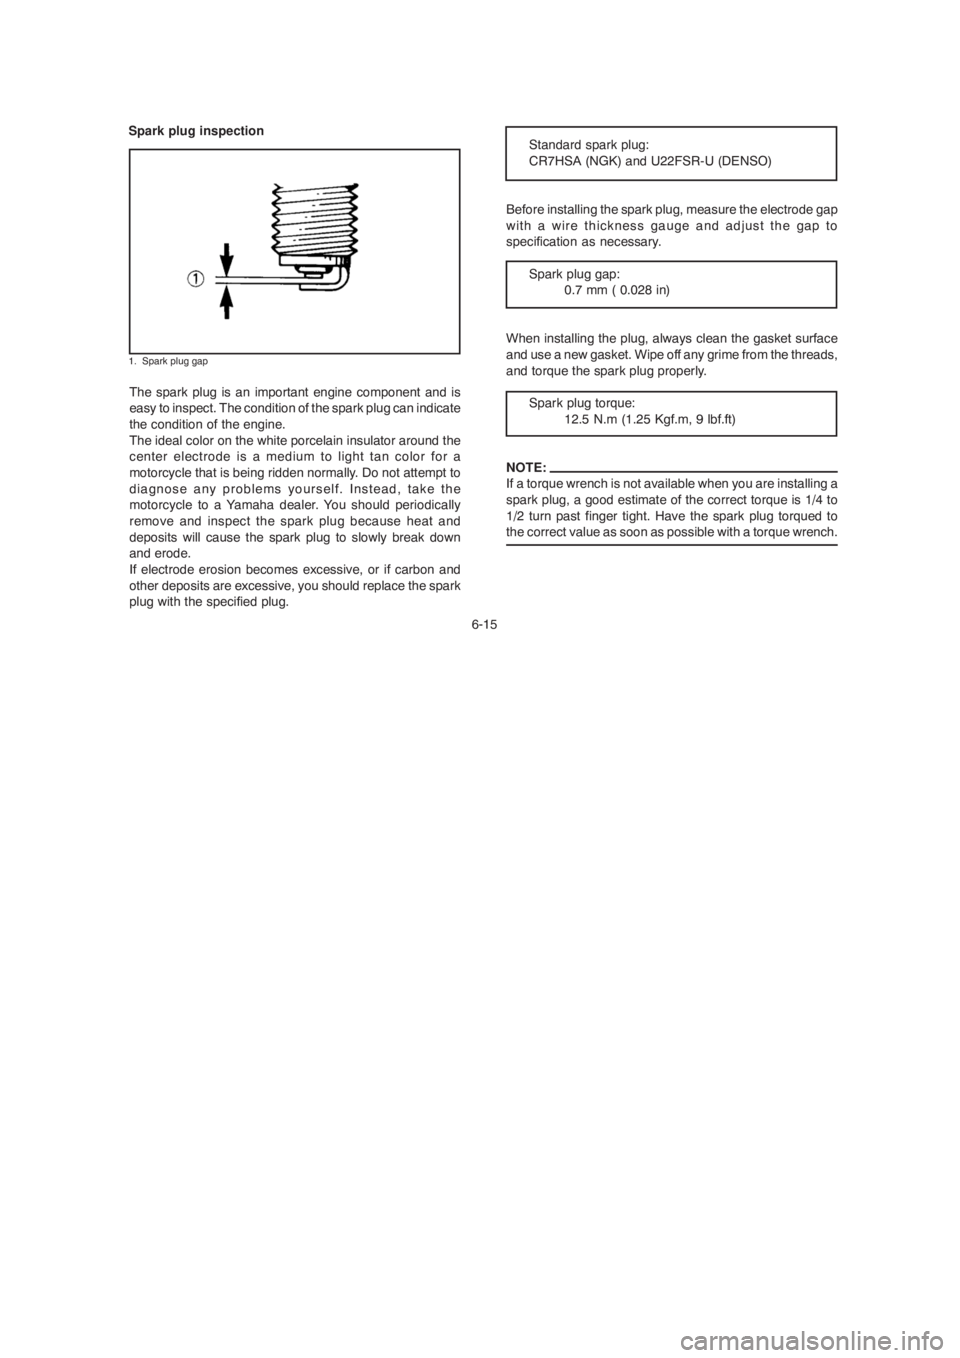
1. Spark plug gap
Spark plug inspection
The spark plug is an important engine component and is
easy to inspect. The condition of the spark plug can indicate
the condition of the engine.
The ideal color on the white porcelain insulator around the
center electrode is a medium to light tan color for a
motorcycle that is being ridden normally. Do not attempt to
diagnose any problems yourself. Instead, take the
motorcycle to a Yamaha dealer. You should periodically
remove and inspect the spark plug because heat and
deposits will cause the spark plug to slowly break down
and erode.
If electrode erosion becomes excessive, or if carbon and
other deposits are excessive, you should replace the spark
plug with the specified plug.Standard spark plug:
CR7HSA (NGK) and U22FSR-U (DENSO)
Before installing the spark plug, measure the electrode gap
with a wire thickness gauge and adjust the gap to
specification as necessary.
Spark plug gap:
0.7 mm ( 0.028 in)
When installing the plug, always clean the gasket surface
and use a new gasket. Wipe off any grime from the threads,
and torque the spark plug properly.
Spark plug torque:
12.5 N.m (1.25 Kgf.m, 9 lbf.ft)
NOTE:
If a torque wrench is not available when you are installing a
spark plug, a good estimate of the correct torque is 1/4 to
1/2 turn past finger tight. Have the spark plug torqued to
the correct value as soon as possible with a torque wrench.
Page 60 of 83
6-20
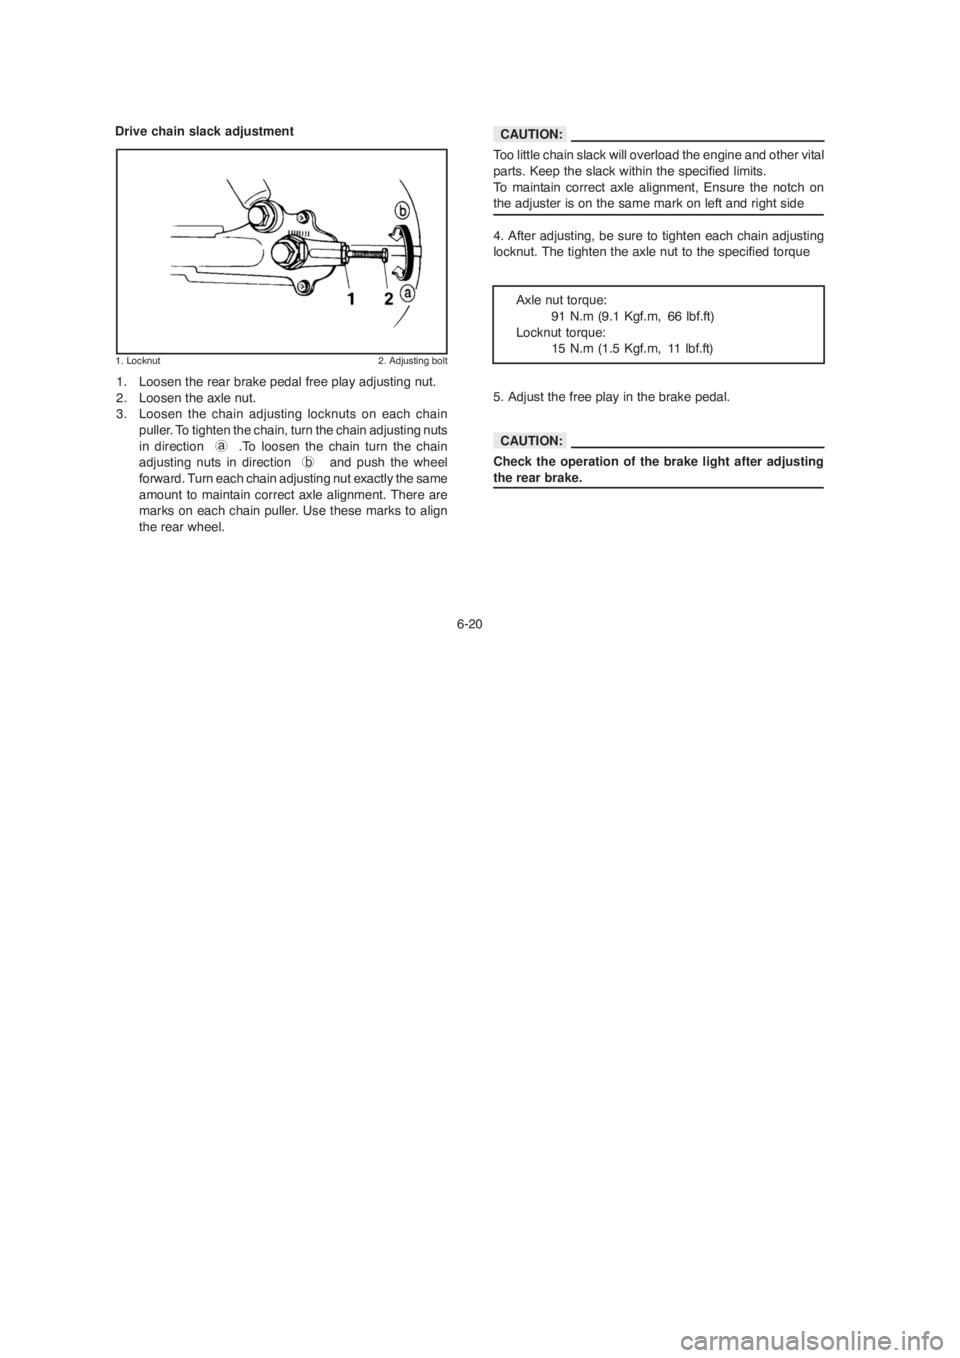
Drive chain slack adjustment
1. Locknut 2. Adjusting bolt
1. Loosen the rear brake pedal free play adjusting nut.
2. Loosen the axle nut.
3. Loosen the chain adjusting locknuts on each chain
puller. To tighten the chain, turn the chain adjusting nuts
in direction a .To loosen the chain turn the chain
adjusting nuts in direction b and push the wheel
forward. Turn each chain adjusting nut exactly the same
amount to maintain correct axle alignment. There are
marks on each chain puller. Use these marks to align
the rear wheel.Too little chain slack will overload the engine and other vital
parts. Keep the slack within the specified limits.
To maintain correct axle alignment, Ensure the notch on
the adjuster is on the same mark on left and right side
4. After adjusting, be sure to tighten each chain adjusting
locknut. The tighten the axle nut to the specified torque
Axle nut torque:
91 N.m (9.1 Kgf.m, 66 lbf.ft)
Locknut torque:
15 N.m (1.5 Kgf.m, 11 lbf.ft)
5. Adjust the free play in the brake pedal.
Check the operation of the brake light after adjusting
the rear brake.
CAUTION:
CAUTION:
Page 61 of 83
6-21 Drive chain lubrication
The chain consists of many parts which work with each
other. If the chain is not maintained properly, it will wear out
quickly. Therefore, the chain must be serviced regularly.
This service is especially necessary when riding in dusty
areas.
1. Use Yamaha Chain and Cable Lube or any
brands of spray-type chain lubricant. First,
remove all dirt and mud from the chain with a
brush or cloth, then spray lubricant between both
rows of side plates and on all center rollers. The
chain should be lubricated every 500 km (300 mi).
2. To clean the chain, remove it from the machine,
dip it in solvent, and clean out as much dirt as
possible. Take the chain out of the solvent and
dry it. Immediately lubricate the chain to prevent
it from rusting.Cable inspection and lubrication
Damage to the outer housing of cables may allow
internal rusting and cause interfere with cable
movement. Replace damaged cables as soon as
possible to prevent unsafe conditions.
Lubricate the inner cable and the cable end. If it does not
operate smoothly, ask a Yamaha dealer to replace them.
RECOMMENDED LUBRICANT:
Engine oil SAE 20W50
WARNING:
Page 62 of 83
6-22
Throttle cable and grip lubrication
The throttle twist grip assembly should be greased at the
time the cable is lubricated, since the grip must be removed
to get at the end of the throttle cable.
After removing the screws, hold the end of the cable up in
the air and put in several drops of lubricant. With the throttle
grip disassembled, coat the metal surface of the grip
assembly with a suitable all-purpose grease.Brake and shift pedals
Lubricate the pivoting parts.
RECOMMENDED LUBRICANT:
Engine oil SAE 20W50
Brake and clutch levers
Lubricate the pivoting parts.
RECOMMENDED LUBRICANT:
Engine oil SAE 20W50
Sidestand
Lubricate the pivoting parts. Check to see that the sidestand
moves up and down smoothly.
RECOMMENDED LUBRICANT:
Engine oil SAE 20W50
WARNING:
If the sidestand does not move smoothly, consult a
Yamaha dealer.
CAUTION:
Page 64 of 83
6-24
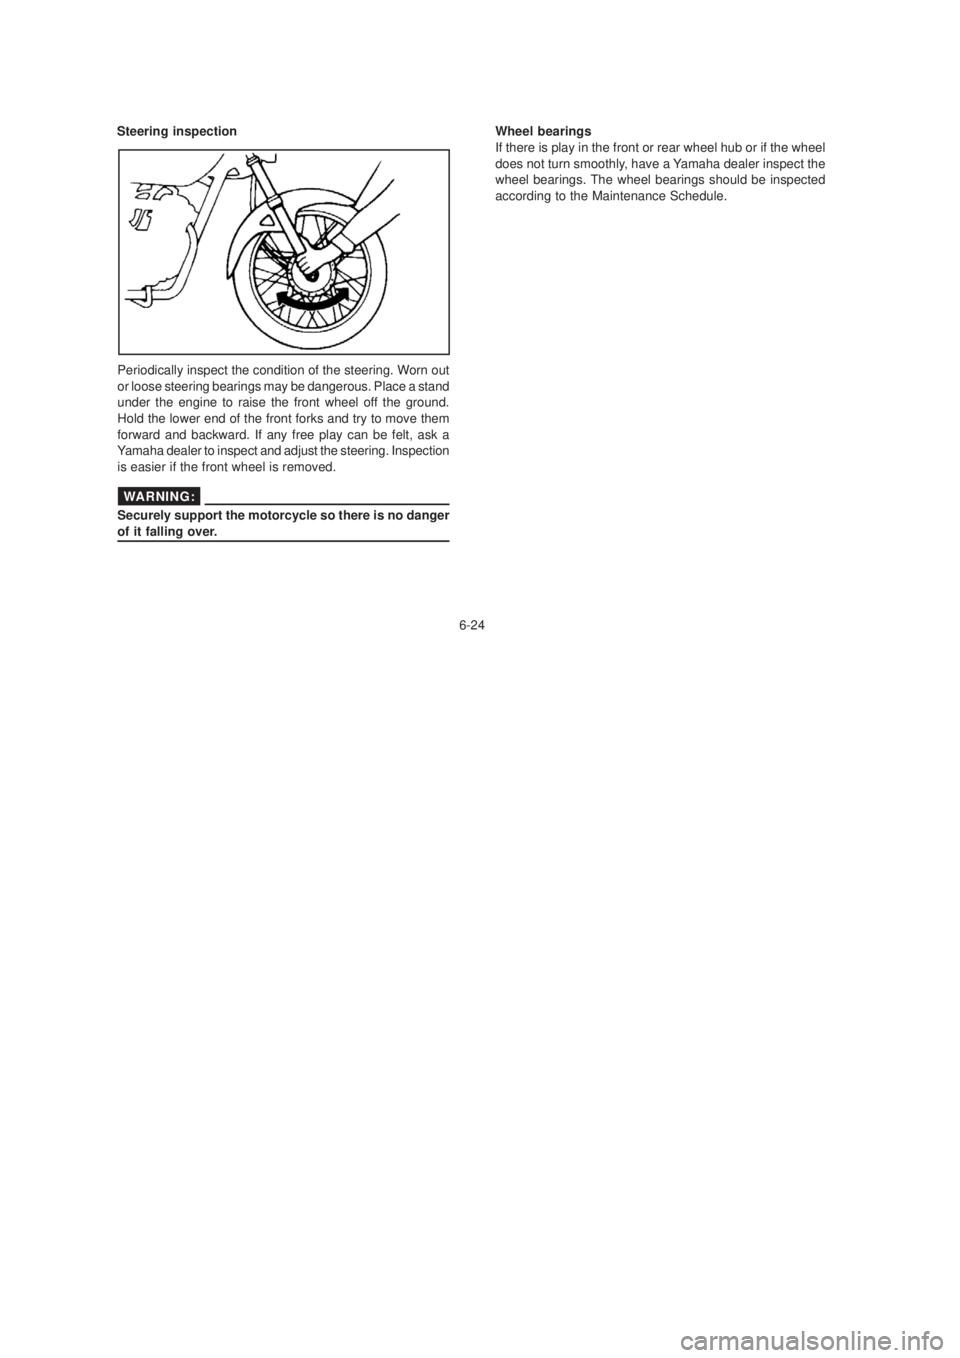
Periodically inspect the condition of the steering. Worn out
or loose steering bearings may be dangerous. Place a stand
under the engine to raise the front wheel off the ground.
Hold the lower end of the front forks and try to move them
forward and backward. If any free play can be felt, ask a
Yamaha dealer to inspect and adjust the steering. Inspection
is easier if the front wheel is removed.
Securely support the motorcycle so there is no danger
of it falling over.Wheel bearings
If there is play in the front or rear wheel hub or if the wheel
does not turn smoothly, have a Yamaha dealer inspect the
wheel bearings. The wheel bearings should be inspected
according to the Maintenance Schedule.
Steering inspection
WARNING:
6-24
Periodically inspect the condition of the steering. Worn out
or loose steering bearings may be dangerous. Place a stand
under the engine to raise the front wheel off the ground.
Hold the lower end of the front forks and try to move them
forward and backward. If any free play can be felt, ask a
Yamaha dealer to inspect and adjust the steering. Inspection
is easier if the front wheel is removed.
Securely support the motorcycle so there is no danger
of it falling over. Wheel bearings
If there is play in the front or rear wheel hub or if the wheel
does not turn smoothly, have a Yamaha dealer inspect the
wheel bearings. The wheel bearings should be inspected
according to the Maintenance Schedule.
Steering inspection
WARNING:
Page 75 of 83
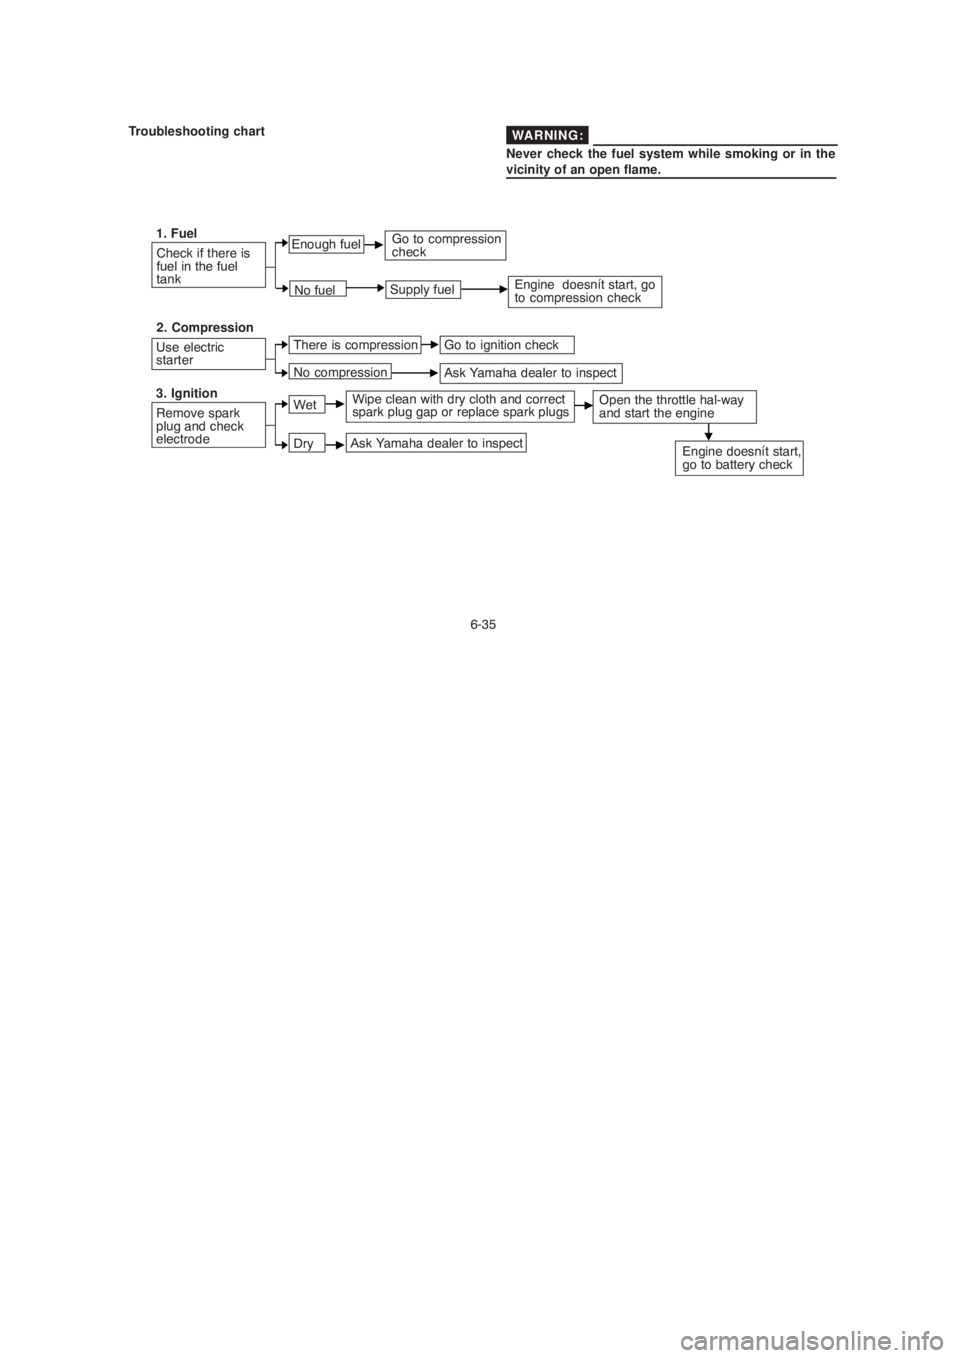
6-35Never check the fuel system while smoking or in the
vicinity of an open flame.
Check if there is
fuel in the fuel
tank
Use electric
starter
Remove spark
plug and check
electrode 1. Fuel
2. Compression
3. IgnitionEnough fuel
No fuel
There is compression
No compression
Wet
DrySupply fuel
Go to ignition check
Ask Yamaha dealer to inspect
Wipe clean with dry cloth and correct
spark plug gap or replace spark plugs
Ask Yamaha dealer to inspect
Troubleshooting chart
Go to compression
check
Engine doesnít start, go
to compression check
Open the throttle hal-way
and start the engine
Engine doesnít start,
go to battery check
WARNING:
Page 76 of 83
7-1 CLEANING AND STORAGE
A. CLEANING
Frequent, thorough cleaning of your motorcycle will not only
enhance its appearance but will improve its general
performance and extend the useful life of many components.
1. Before cleaning the motorcycle:
a. Block off the end of the exhaust pipe to prevent water
entry; a plastic bag and strong rubber band may be
used.
b. Make sure the spark plug and all filler caps are properly
installed.
2. If the engine case is excessively greasy, apply
degreaser with a paint brush. Do not apply degreaser
to the chain, sprockets, or wheel axles.
3. Rinse the dirt and degreaser off with a garden hose,
Use only enough pressure to do the job.
Excessive hose pressure may cause water seepage and
deterioration of wheel bearings, front fork, brakes,
transmission seals and electrical parts.Many expensive repair bills have resulted from improper
high pressure detergent applications such as those
available in coin-operated car washers.
4. Once the majority of the dirt has been hosed off, wash
all surfaces with warm water and mild, detergent-type
soap. An old toothbrush or bottle brush is handy for
hard-to-get-at places.
5. Rinse the motorcycle off immediately with clean water
and dry all surfaces with a chamois, clean towel, or
soft absorbent cloth.
6. Dry the chain and lubricate it to prevent rust.
7. Clean the seat with a vinyl upholstery cleaner to keep
the cover pliable and glossy.
8. Automotive-type wax may be applied to all painted and
chrome-plated surfaces. Avoid combination cleaner-
waxes. Many contain abrasives which may mar the paint
or protective finish. When finished, start the engine and
let it idle for several minutes.
CAUTION:
CAUTION:
Page 77 of 83
7-2 B. STORAGE
Long term storage (30 days or more) of your machine will
require some preventive procedures to guard against
deterioration. After thoroughly cleaning the machine,
prepare for storage as follows:
1. Drain the fuel tank, fuel lines, and carburetor float
bowl(s).
2. Remove the spark plug(s), pour about one tablespoon
of SAE 20W50 motor oil in the spark plug hole(s) and
reinstall the spark plug(s).
Kick the engine over several times (with the
ignition off) to coat the cylinder walls with oil.
3. Remove the drive chain. Clean it thoroughly with
solvent and lubricate it.
Reinstall the chain or store it in a plastic bag
(tied to frame for safe-keeping).
4. Lubricate all control cables.
5. Block up the frame to raise both wheels off the
ground.
6. Tie a plastic bag over the exhaust pipe outlet to
prevent moisture from entering.7. If storing in a humid or salt-air atmosphere, coat
all exposed metal surfaces with a light film of
oil. Do not apply oil to any rubber parts or the
seat cover.
8. Remove the battery and charge it. Store it in a dry place
and recharge it once a month. Do not store the battery
in an excessively warm or cold place (less than 0∫C
(30∫F) or more than 30∫C (90∫F).
NOTE:
Make any necessary repairs before storing the machine.