check engine YAMAHA YFM700R 2006 Owners Manual
[x] Cancel search | Manufacturer: YAMAHA, Model Year: 2006, Model line: YFM700R, Model: YAMAHA YFM700R 2006Pages: 424, PDF Size: 3.86 MB
Page 14 of 424
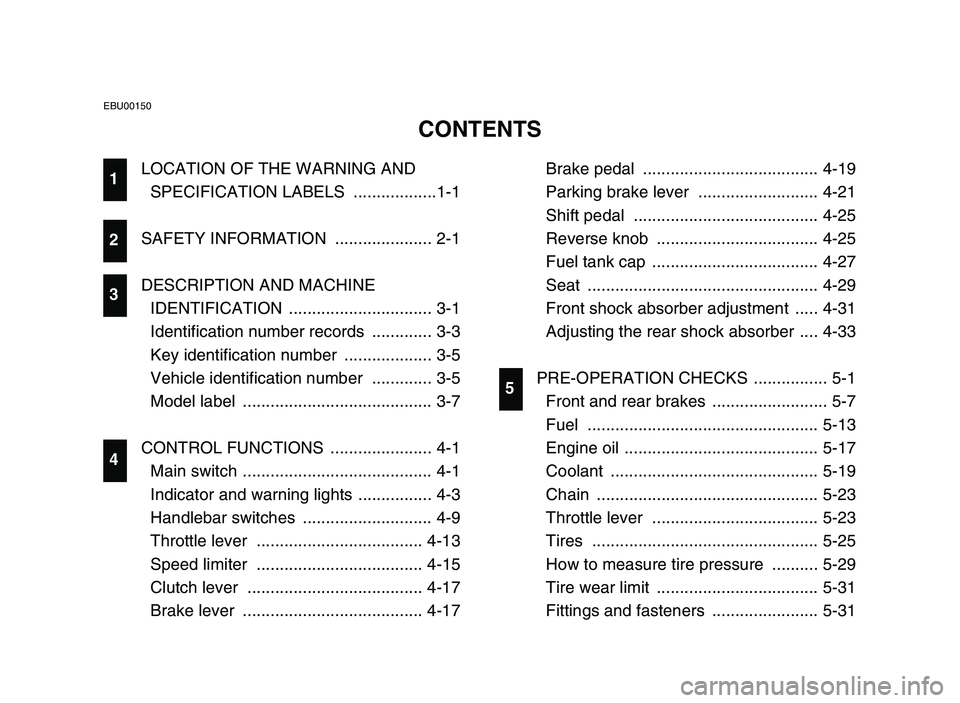
LOCATION OF THE WARNING AND
SPECIFICATION LABELS ..................1-1
SAFETY INFORMATION ..................... 2-1
DESCRIPTION AND MACHINE
IDENTIFICATION ............................... 3-1
Identification number records ............. 3-3
Key identification number ................... 3-5
Vehicle identification number ............. 3-5
Model label ......................................... 3-7
CONTROL FUNCTIONS ...................... 4-1
Main switch ......................................... 4-1
Indicator and warning lights ................ 4-3
Handlebar switches ............................ 4-9
Throttle lever .................................... 4-13
Speed limiter .................................... 4-15
Clutch lever ...................................... 4-17
Brake lever ....................................... 4-17Brake pedal ...................................... 4-19
Parking brake lever .......................... 4-21
Shift pedal ........................................ 4-25
Reverse knob ................................... 4-25
Fuel tank cap .................................... 4-27
Seat .................................................. 4-29
Front shock absorber adjustment ..... 4-31
Adjusting the rear shock absorber .... 4-33
PRE-OPERATION CHECKS ................ 5-1
Front and rear brakes ......................... 5-7
Fuel .................................................. 5-13
Engine oil .......................................... 5-17
Coolant ............................................. 5-19
Chain ................................................ 5-23
Throttle lever .................................... 5-23
Tires ................................................. 5-25
How to measure tire pressure .......... 5-29
Tire wear limit ................................... 5-31
Fittings and fasteners ....................... 5-31
EBU00150
CONTENTS
1
2
3
4
5
1S3-9-60 1-3 4/27/05 3:11 PM Page 12
Page 62 of 424
4-5
EBU16010
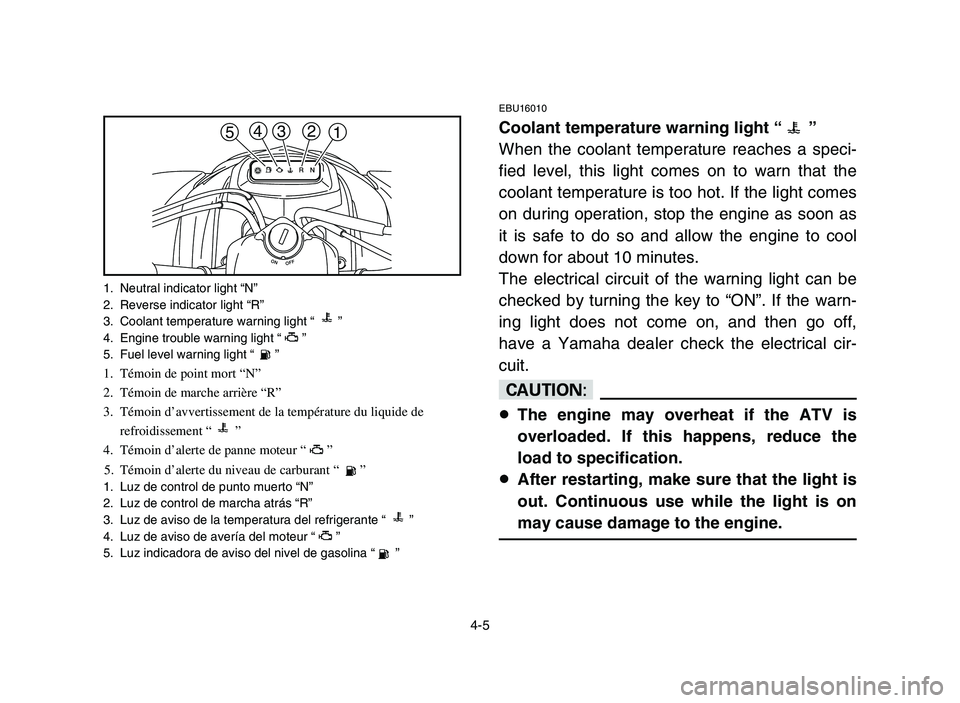
Coolant temperature warning light “ ”
When the coolant temperature reaches a speci-
fied level, this light comes on to warn that the
coolant temperature is too hot. If the light comes
on during operation, stop the engine as soon as
it is safe to do so and allow the engine to cool
down for about 10 minutes.
The electrical circuit of the warning light can be
checked by turning the key to “ON”. If the warn-
ing light does not come on, and then go off,
have a Yamaha dealer check the electrical cir-
cuit.
cC
8The engine may overheat if the ATV is
overloaded. If this happens, reduce the
load to specification.
8After restarting, make sure that the light is
out. Continuous use while the light is on
may cause damage to the engine.
1 2 3 4
5
1. Neutral indicator light “N”
2. Reverse indicator light “R”
3. Coolant temperature warning light “ ”
4. Engine trouble warning light “ ”
5. Fuel level warning light “ ”
1. Témoin de point mort “N”
2. Témoin de marche arrière “R”
3. Témoin d’avvertissement de la température du liquide de
refroidissement “ ”
4. Témoin d’alerte de panne moteur “ ”
5. Témoin d’alerte du niveau de carburant “ ”
1. Luz de control de punto muerto “N”
2. Luz de control de marcha atrás “R”
3. Luz de aviso de la temperatura del refrigerante “ ”
4. Luz de aviso de avería del moteur “ ”
5. Luz indicadora de aviso del nivel de gasolina “ ”
1S3-9-60 4 6/7/05 9:37 AM Page 4-5
Page 64 of 424
4-7
EBU15881
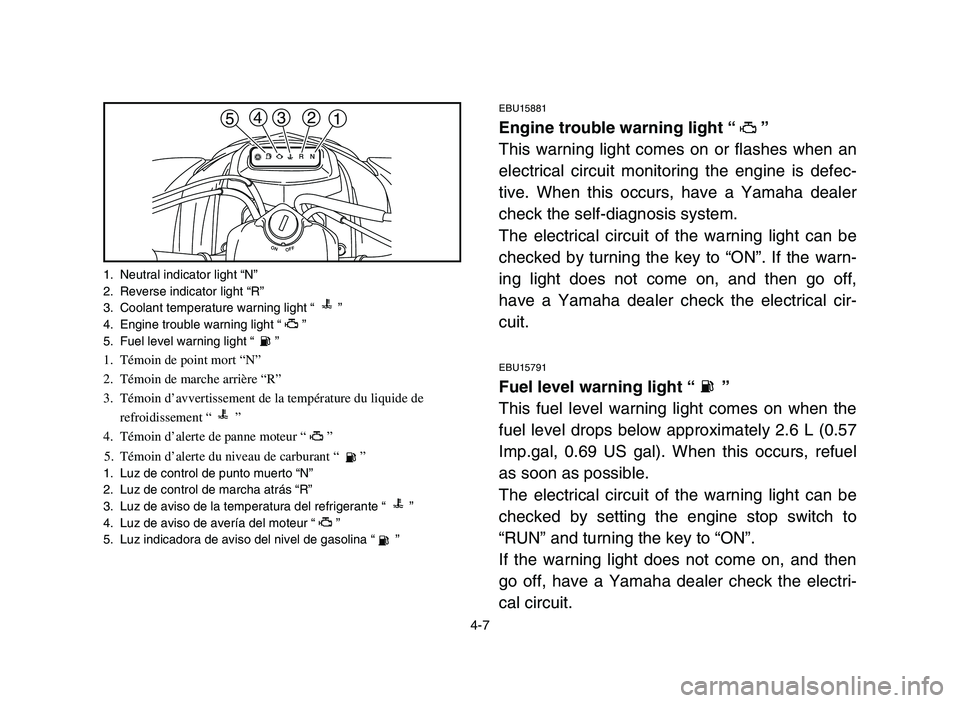
Engine trouble warning light “ ”
This warning light comes on or flashes when an
electrical circuit monitoring the engine is defec-
tive. When this occurs, have a Yamaha dealer
check the self-diagnosis system.
The electrical circuit of the warning light can be
checked by turning the key to “ON”. If the warn-
ing light does not come on, and then go off,
have a Yamaha dealer check the electrical cir-
cuit.
EBU15791
Fuel level warning light “ ”
This fuel level warning light comes on when the
fuel level drops below approximately 2.6 L (0.57
Imp.gal, 0.69 US gal). When this occurs, refuel
as soon as possible.
The electrical circuit of the warning light can be
checked by setting the engine stop switch to
“RUN” and turning the key to “ON”.
If the warning light does not come on, and then
go off, have a Yamaha dealer check the electri-
cal circuit.
1 2 3 4
5
1. Neutral indicator light “N”
2. Reverse indicator light “R”
3. Coolant temperature warning light “ ”
4. Engine trouble warning light “ ”
5. Fuel level warning light “ ”
1. Témoin de point mort “N”
2. Témoin de marche arrière “R”
3. Témoin d’avvertissement de la température du liquide de
refroidissement “ ”
4. Témoin d’alerte de panne moteur “ ”
5. Témoin d’alerte du niveau de carburant “ ”
1. Luz de control de punto muerto “N”
2. Luz de control de marcha atrás “R”
3. Luz de aviso de la temperatura del refrigerante “ ”
4. Luz de aviso de avería del moteur “ ”
5. Luz indicadora de aviso del nivel de gasolina “ ”
1S3-9-60 4 6/7/05 9:37 AM Page 4-7
Page 70 of 424

4-13
1. Throttle lever1. Levier d’accélération1. Palanca del aceleración
EBU00630
Throttle lever
Once the engine is running, movement of the
throttle lever will increase the engine speed.
Regulate the speed of the machine by varying
the throttle position. Because the throttle is
spring-loaded, the machine will decelerate, and
the engine will return to an idle any time the
hand is removed from the throttle lever.
Before starting the engine, check the throttle to
be sure it is operating smoothly. Make sure it
returns to the idle position as soon as the lever
is released.
w
Malfunction of the throttle could make it diffi-
cult to speed up or slow down when you
need to. This could cause an accident.
Check the operation of the throttle lever
before you start the engine. If the throttle
does not work smoothly, check for the
cause. Correct the problem before riding the
ATV or consult a Yamaha dealer.
1S3-9-60 4 6/7/05 9:37 AM Page 4-13
Page 100 of 424
5-1
EBU01130
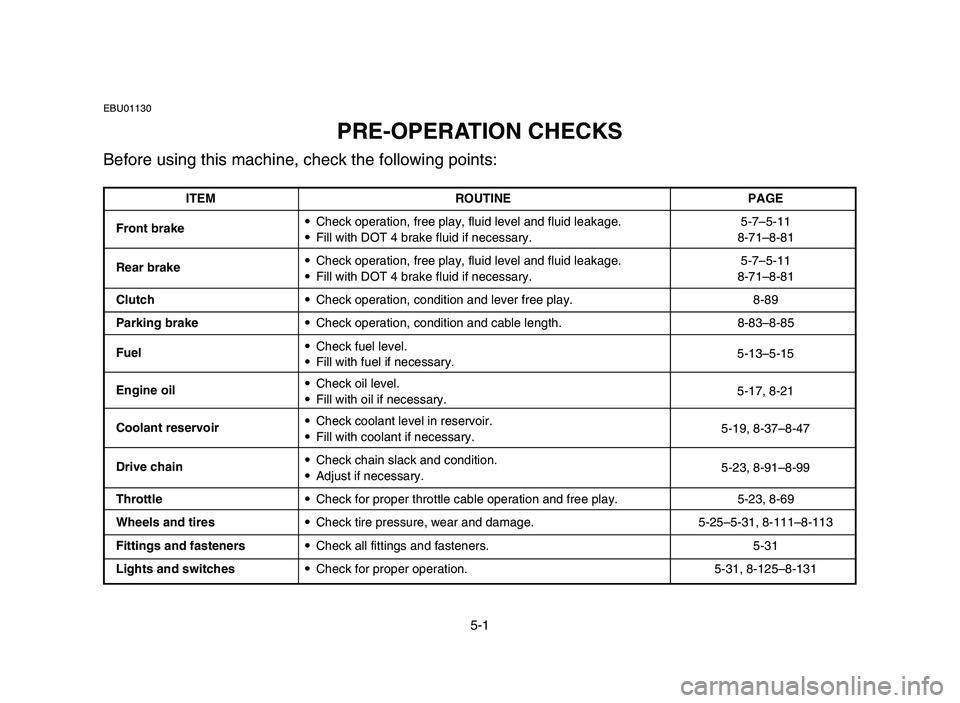
PRE-OPERATION CHECKS
Before using this machine, check the following points:
ITEM ROUTINE PAGE
Front brake9Check operation, free play, fluid level and fluid leakage. 5-7–5-11
9Fill with DOT 4 brake fluid if necessary. 8-71–8-81
Rear brake9Check operation, free play, fluid level and fluid leakage. 5-7–5-11
9Fill with DOT 4 brake fluid if necessary. 8-71–8-81
Clutch9Check operation, condition and lever free play. 8-89
Parking brake9Check operation, condition and cable length. 8-83–8-85
Fuel 9Check fuel level.
9Fill with fuel if necessary.5-13–5-15
Engine oil9Check oil level.
9Fill with oil if necessary.5-17, 8-21
Coolant reservoir 9Check coolant level in reservoir.
9Fill with coolant if necessary.5-19, 8-37–8-47
Drive chain9Check chain slack and condition.
9Adjust if necessary.5-23, 8-91–8-99
Throttle9Check for proper throttle cable operation and free play. 5-23, 8-69
Wheels and tires9Check tire pressure, wear and damage. 5-25–5-31, 8-111–8-113
Fittings and fasteners9Check all fittings and fasteners. 5-31
Lights and switches9Check for proper operation. 5-31, 8-125–8-131
1S3-9-60 5-6 6/7/05 10:22 AM Page 5-1
Page 118 of 424
5-19
EBU13160
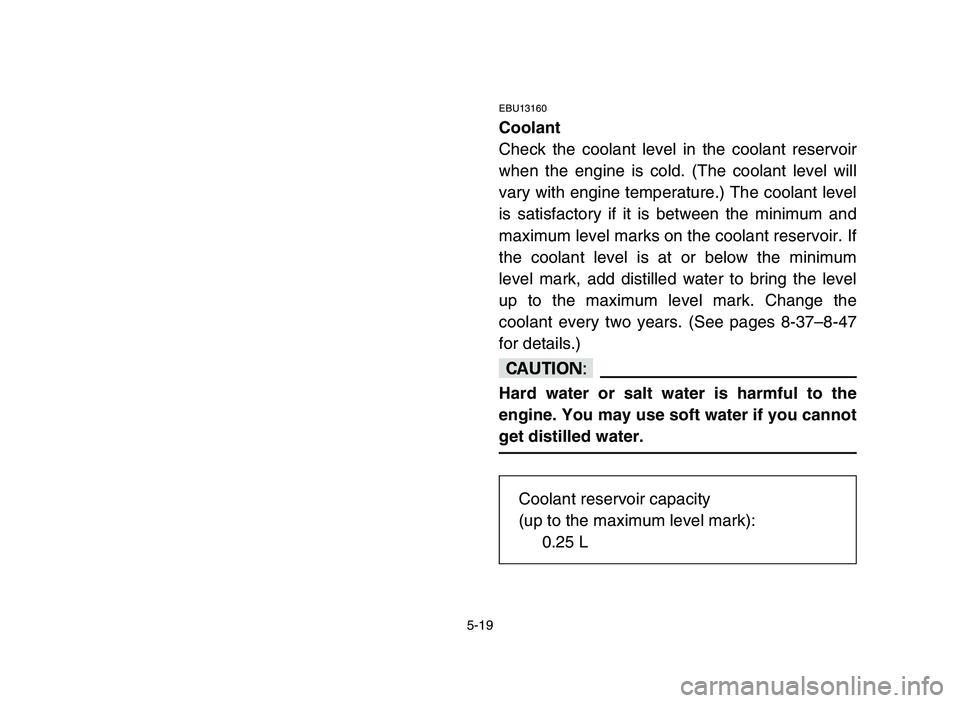
Coolant
Check the coolant level in the coolant reservoir
when the engine is cold. (The coolant level will
vary with engine temperature.) The coolant level
is satisfactory if it is between the minimum and
maximum level marks on the coolant reservoir. If
the coolant level is at or below the minimum
level mark, add distilled water to bring the level
up to the maximum level mark. Change the
coolant every two years. (See pages 8-37–8-47
for details.)
cC
Hard water or salt water is harmful to the
engine. You may use soft water if you cannot
get distilled water.
Coolant reservoir capacity
(up to the maximum level mark):
0.25 L
1S3-9-60 5-6 6/7/05 10:22 AM Page 5-19
Page 134 of 424
6-3
EBU15901
Starting the engine
w
Always make sure all control cables work
smoothly before you begin riding in cold
weather. If the control cables are frozen or
do not work smoothly, you could be unable
to control the ATV, which could lead to an
accident or collision.
1. Set the parking brake.
2. Turn the main switch to “ON” and the
engine stop switch to “RUN”.
cC
The engine trouble warning light and the fuel
level warning light should come on, and then
go off.
If a warning light does not go off, see page
4-7 for the corresponding warning light cir-
cuit check.
3. Shift the transmission into neutral.
1S3-9-60 5-6 6/7/05 10:22 AM Page 6-3
Page 256 of 424

8-7
EBU02622
PERIODIC MAINTENANCE/LUBRICATION
NOTE:8For ATVs not equipped with an odometer or an hour meter, follow the month maintenance intervals.
8For ATVs equipped with an odometer or an hour meter, follow the km (mi) or hours maintenance intervals. However, keep in mind
that if the ATV isn’t used for a long period of time, the month maintenance intervals should be followed.
8Items marked with an asterisk should be performed by a Yamaha dealer as they require special tools, data and technical skills.
INITIAL EVERY
month 1 3 6 6 12
ITEM ROUTINEWhichever
km 320 1200 2400 2400 4800 comes first
(mi) (200) (750) (1500) (1500) (3000)
hours 20 75 150 150 300
Fuel line*9Check fuel hose for cracks or damage.
222
9Replace if necessary.
9Check condition.
Spark plug9Adjust gap and clean.22222
9Replace if necessary.
Valves*9Check valve clearance.
2 222
9Adjust if necessary.
Fuel injection*9Check and adjust engine idle speed.22222
Crankcase breather9Check breather hose for cracks or damage.
222
system*9Replace if necessary.
9Check for leakage.
Exhaust system*9Tighten if necessary.222
9Replace gasket if necessary.
1S3-9-60 8 6/7/05 10:25 AM Page 8-7
Page 258 of 424
8-9
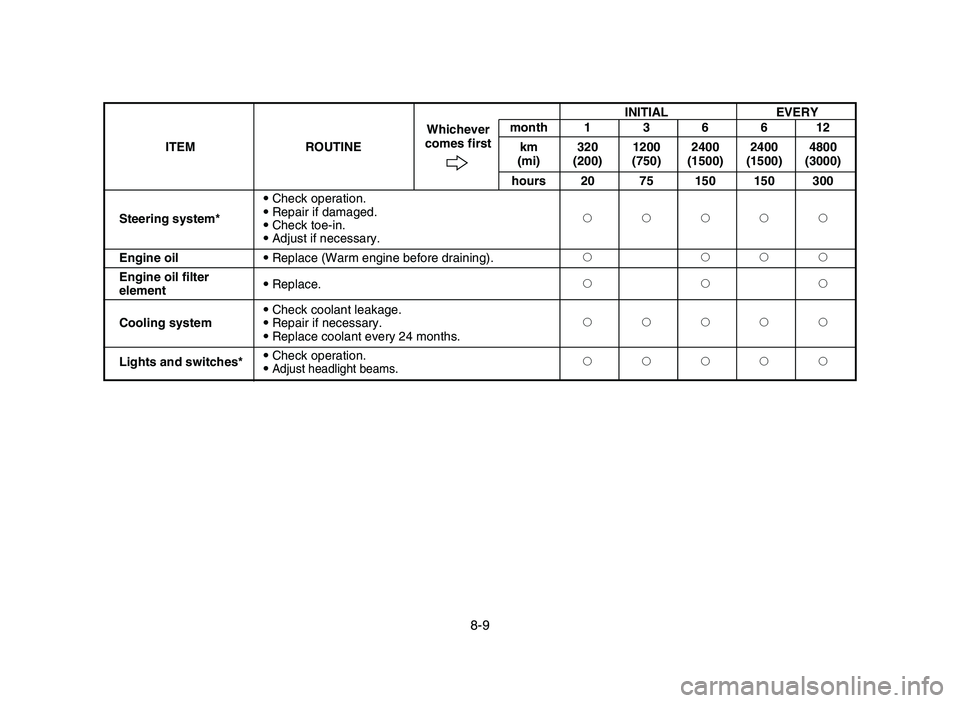
INITIAL EVERY
month 1 3 6 6 12
ITEM ROUTINEWhichever
km 320 1200 2400 2400 4800 comes first
(mi) (200) (750) (1500) (1500) (3000)
hours 20 75 150 150 300
9Check operation.
Steering system*9Repair if damaged.
22222
9Check toe-in.
9Adjust if necessary.
Engine oil9Replace (Warm engine before draining).2 222
Engine oil filter
9Replace.222
element
9Check coolant leakage.
Cooling system9Repair if necessary.22222
9Replace coolant every 24 months.
9Check operation.
Lights and switches*
9
Adjust headlight beams.22222
1S3-9-60 8 6/7/05 10:25 AM Page 8-9
Page 270 of 424

8-21
EBU15913
Engine oil and oil filter element
The engine oil level should be checked before
each ride. In addition, the oil must be changed
and the oil filter element replaced at the intervals
specified in the periodic maintenance and lubri-
cation chart.
To check the engine oil level
1. Place the ATV on a level surface.
2. Start the engine, warm it up until the
engine oil has reached a normal tempera-
ture of 60 ° C, let it continue to idle for ten
seconds or more, and then turn the engine
off.
NOTE:
To achieve the proper engine oil temperature for
an accurate oil level reading, the engine must
have first completely cooled down, and then
warmed up again for several minutes to normal
operating temperature.
1S3-9-60 8 6/7/05 10:25 AM Page 8-21