torque YAMAHA YFM700R 2006 Owners Manual
[x] Cancel search | Manufacturer: YAMAHA, Model Year: 2006, Model line: YFM700R, Model: YAMAHA YFM700R 2006Pages: 424, PDF Size: 3.86 MB
Page 92 of 424

4-35
b1
a
2
3
A
1. Locknut 2. Spring preload adjusting nut
3. Special wrench
1. Contre-ûˋcrou 2. ûcrou de rûˋglage de la
prûˋcontrainte du ressort
3. Clûˋ spûˋciale
1. Contratuerca 2. Tuerca de ajuste de la
precarga del muelle
3. Llave especial
A. Spring length
A. Longueur du ressortA. Longitud del resorte
Adjust the spring preload as follows.
1. Loosen the locknut.
2. Turn the adjusting nut in direction ato
increase the spring preload and in direction
bto decrease the spring preload.
3. The length of the spring (installed)
changes 1.5 mm per turn of the adjusting
nut.
NOTE:
A special wrench can be obtained at a Yamaha
dealer to make this adjustment.
4. Tighten the locknut to the specified torque.Measurement A:
Installed length:
Minimum (hard): 228 mm
Standard: 236 mm
Maximum (soft): 243 mm
Tightening torque:
42 Nm (4.2 m0kgf)
1S3-9-60 4 6/7/05 9:37 AM Page 4-35
Page 94 of 424

4-37
1. Rebound damping force adjusting screw1. Molette de rûˋglage de la force dãamortissement de dûˋtente1. Dial de ajuste de la amortiguaciû°n de rebote
cC
Always tighten the locknut against the
adjusting nut, then tighten it to the specified
torque.
Adjust the rebound damping force as follows.
Turn the rebound damping force adjusting screw
in direction ato increase the rebound damping
force and in direction bto decrease the
rebound damping force.
From the fully turned-in position
Minimum (soft): 20 clicks out
Standard: 12 clicks out
Maximum (hard): 3 clicks out
1S3-9-60 4 6/7/05 9:37 AM Page 4-37
Page 130 of 424
5-31
EBU01600
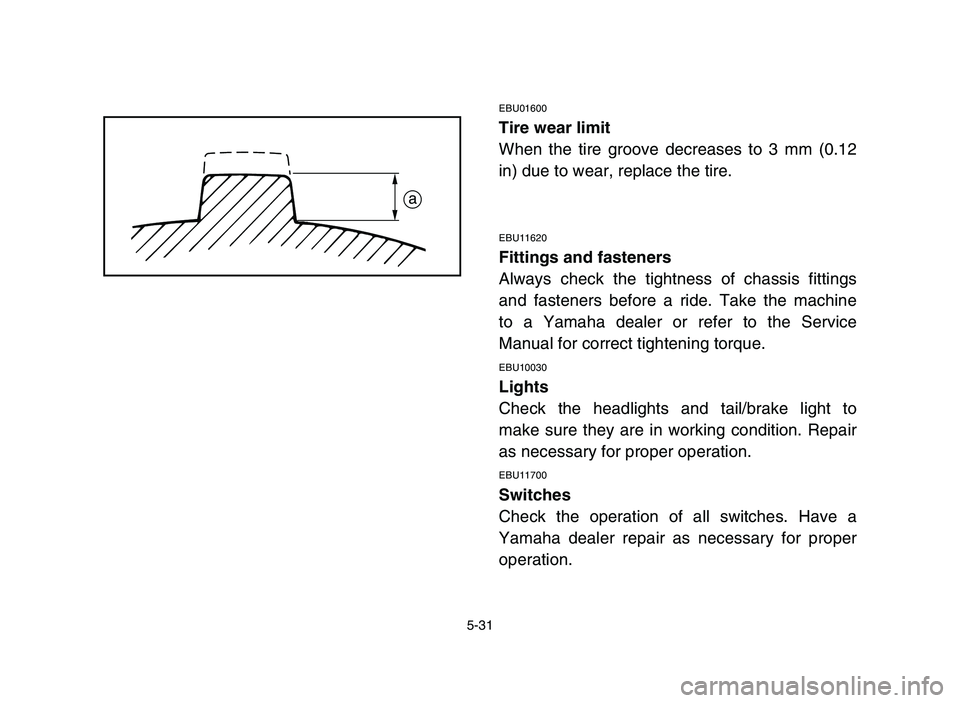
Tire wear limit
When the tire groove decreases to 3 mm (0.12
in) due to wear, replace the tire.
EBU11620
Fittings and fasteners
Always check the tightness of chassis fittings
and fasteners before a ride. Take the machine
to a Yamaha dealer or refer to the Service
Manual for correct tightening torque.
EBU10030
Lights
Check the headlights and tail/brake light to
make sure they are in working condition. Repair
as necessary for proper operation.
EBU11700
Switches
Check the operation of all switches. Have a
Yamaha dealer repair as necessary for proper
operation.
a
1S3-9-60 5-6 6/7/05 10:22 AM Page 5-31
Page 252 of 424
8-3
EBU12220
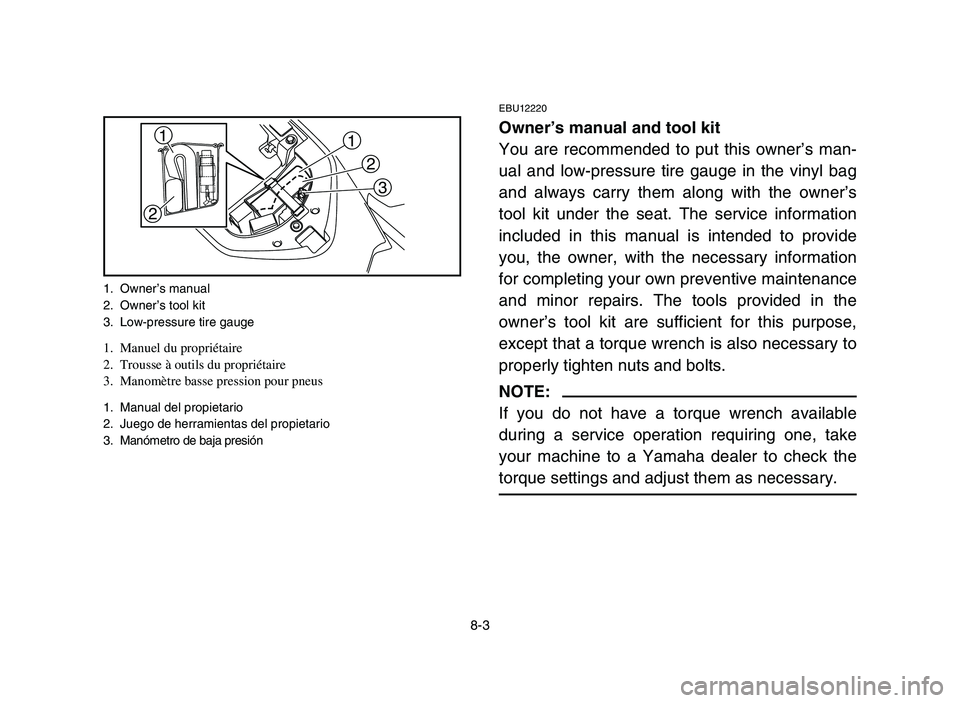
Ownerãs manual and tool kit
You are recommended to put this ownerãs man-
ual and low-pressure tire gauge in the vinyl bag
and always carry them along with the ownerãs
tool kit under the seat. The service information
included in this manual is intended to provide
you, the owner, with the necessary information
for completing your own preventive maintenance
and minor repairs. The tools provided in the
ownerãs tool kit are sufficient for this purpose,
except that a torque wrench is also necessary to
properly tighten nuts and bolts.
NOTE:
If you do not have a torque wrench available
during a service operation requiring one, take
your machine to a Yamaha dealer to check the
torque settings and adjust them as necessary.
1
2
31
2
1. Ownerãs manual
2. Ownerãs tool kit
3. Low-pressure tire gauge
1. Manuel du propriûˋtaire
2. Trousse û outils du propriûˋtaire
3. Manomû´tre basse pression pour pneus
1. Manual del propietario
2. Juego de herramientas del propietario
3. Manû°metro de baja presiû°n
1S3-9-60 8 6/7/05 10:25 AM Page 8-3
Page 280 of 424
8-31
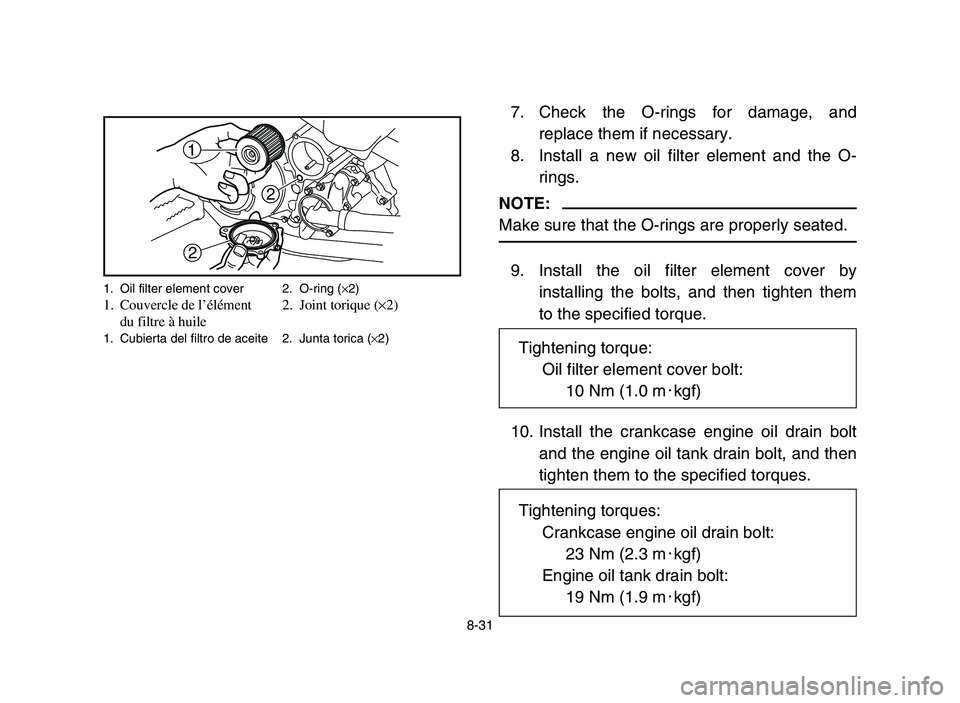
7. Check the O-rings for damage, and
replace them if necessary.
8. Install a new oil filter element and the O-
rings.
NOTE:
Make sure that the O-rings are properly seated.
9. Install the oil filter element cover by
installing the bolts, and then tighten them
to the specified torque.
10. Install the crankcase engine oil drain bolt
and the engine oil tank drain bolt, and then
tighten them to the specified torques.
1
2
2
1. Oil filter element cover 2. O-ring (û2)1. Couvercle de lãûˋlûˋment 2. Joint torique (û2)
du filtre û huile
1. Cubierta del filtro de aceite 2. Junta torica (û2)Tightening torque:
Oil filter element cover bolt:
10 Nm (1.0 m0kgf)
Tightening torques:
Crankcase engine oil drain bolt:
23 Nm (2.3 m0kgf)
Engine oil tank drain bolt:
19 Nm (1.9 m0kgf)
1S3-9-60 8 6/7/05 10:25 AM Page 8-31
Page 282 of 424
8-33
11. Install the crankcase engine oil filler cap,
and then tighten it to the specified torque.
12. Pour only 1.3 L (1.37 Imp qt, 1.16 US qt) of
the specified amount of recommended
engine oil through the engine oil tank filler
hole, insert the dipstick, and then tighten
the oil tank filler cap.
13. Start the engine, rev it several times, and
then turn it off.
14. Remove the engine oil tank filler cap, and
then gradually fill the oil tank with the
remaining oil quantity while regularly
checking the oil level on the dipstick.
Recommended engine oil:
See page 10-2.
Oil quantity:
Without oil filter element replacement:
1.75 L
With oil filter element replacement:
1.85 L
Tightening torque:
Crankcase engine oil filler cap:
12 Nm (1.2 m0kgf)
1S3-9-60 8 6/7/05 10:25 AM Page 8-33
Page 292 of 424
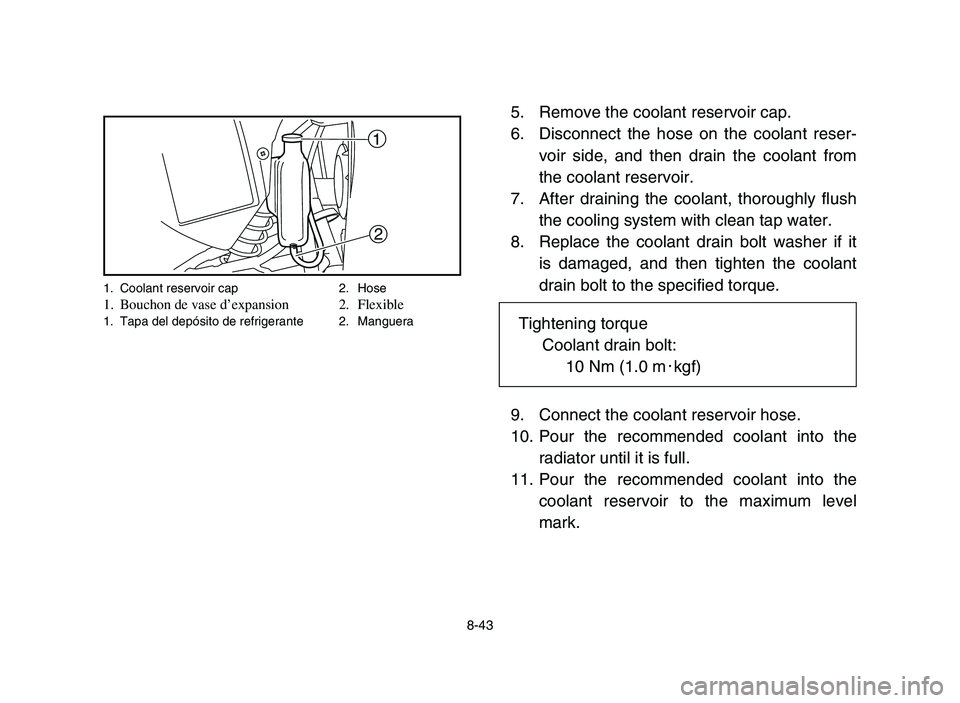
8-43
5. Remove the coolant reservoir cap.
6. Disconnect the hose on the coolant reser-
voir side, and then drain the coolant from
the coolant reservoir.
7. After draining the coolant, thoroughly flush
the cooling system with clean tap water.
8. Replace the coolant drain bolt washer if it
is damaged, and then tighten the coolant
drain bolt to the specified torque.
9. Connect the coolant reservoir hose.
10. Pour the recommended coolant into the
radiator until it is full.
11. Pour the recommended coolant into the
coolant reservoir to the maximum level
mark.
1
2
1. Coolant reservoir cap 2. Hose1. Bouchon de vase dãexpansion 2. Flexible1. Tapa del depû°sito de refrigerante 2. MangueraTightening torque
Coolant drain bolt:
10 Nm (1.0 m0kgf)
1S3-9-60 8 6/7/05 10:25 AM Page 8-43
Page 300 of 424

8-51
Installation
1. Measure the electrode gap with a wire
thickness gauge and, if necessary, adjust
the gap to specification.
2. Clean the surface of the spark plug gasket
and its mating surface, and then wipe off
any grime from the spark plug threads.
3. Install the spark plug and tighten it to the
specified torque.
a
a. Spark plug gapa. ûcartement des ûˋlectrodesa. Separaciû°n entre electrodos de la bujûÙa
Standard spark plug:
CR8E (NGK)
Spark plug gap:
0.7ã0.8 mm
Tightening torque:
Spark plug:
12.5 Nm (1.25 m0kgf)
1S3-9-60 8 6/7/05 10:25 AM Page 8-51
Page 302 of 424

8-53
NOTE:
If a torque wrench is not available when you are
installing a spark plug, a good estimate of the
correct torque is 1/4 to 1/2 turn past finger tight.
Have the spark plug tightened to the specified
torque as soon as possible.
4. Install the spark plug cap.
1S3-9-60 8 6/7/05 10:25 AM Page 8-53
Page 344 of 424

8-95
5. Tighten the rear axle pinch bolts in the
order shown to the specified torque.
3
124
Tightening torque:
Rear axle pinch bolt:
21 Nm (2.1 m0kgf)
1S3-9-60 9-11 4/27/05 2:13 PM Page 8-95