tire pressure YAMAHA YFM700R 2015 Owners Manual
[x] Cancel search | Manufacturer: YAMAHA, Model Year: 2015, Model line: YFM700R, Model: YAMAHA YFM700R 2015Pages: 160, PDF Size: 3.78 MB
Page 15 of 160

1-5
1
**.* kPa
*.** kgf/cm²*.* psi **.* kPa
*.** kgf/cm²
*.* psi
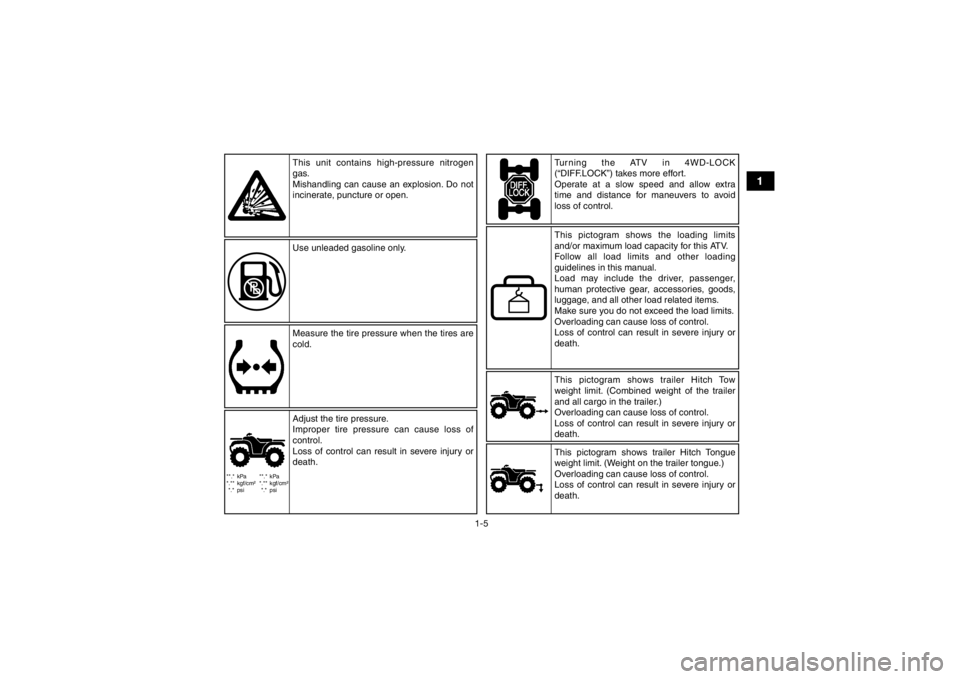
This pictogram shows trailer Hitch Tow
weight limit. (Combined weight of the trailer
and all cargo in the trailer.)
Overloading can cause loss of control.
Loss of control can result in severe injury or
death.
This unit contains high-pressure nitrogen
gas.
Mishandling can cause an explosion. Do not
incinerate, puncture or open.
Use unleaded gasoline only.
Measure the tire pressure when the tires are
cold. Turning the ATV in 4WD-LOCK
(“DIFF.LOCK”) takes more effort.
Operate at a slow speed and allow extra
time and distance for maneuvers to avoid
loss of control.
Adjust the tire pressure.
Improper tire pressure can cause loss of
control.
Loss of control can result in severe injury or
death. This pictogram shows the loading limits
and/or maximum load capacity for this ATV.
Follow all load limits and other loading
guidelines in this manual.
Load may include the driver, passenger,
human protective gear, accessories, goods,
luggage, and all other load related items.
Make sure you do not exceed the load limits.
Overloading can cause loss of control.
Loss of control can result in severe injury or
death.
This pictogram shows trailer Hitch Tongue
weight limit. (Weight on the trailer tongue.)
Overloading can cause loss of control.
Loss of control can result in severe injury or
death.
U2LS60E0.book Page 5 Wednesday, June 18, 2014 11:12 AM
Page 19 of 160

1-9
1
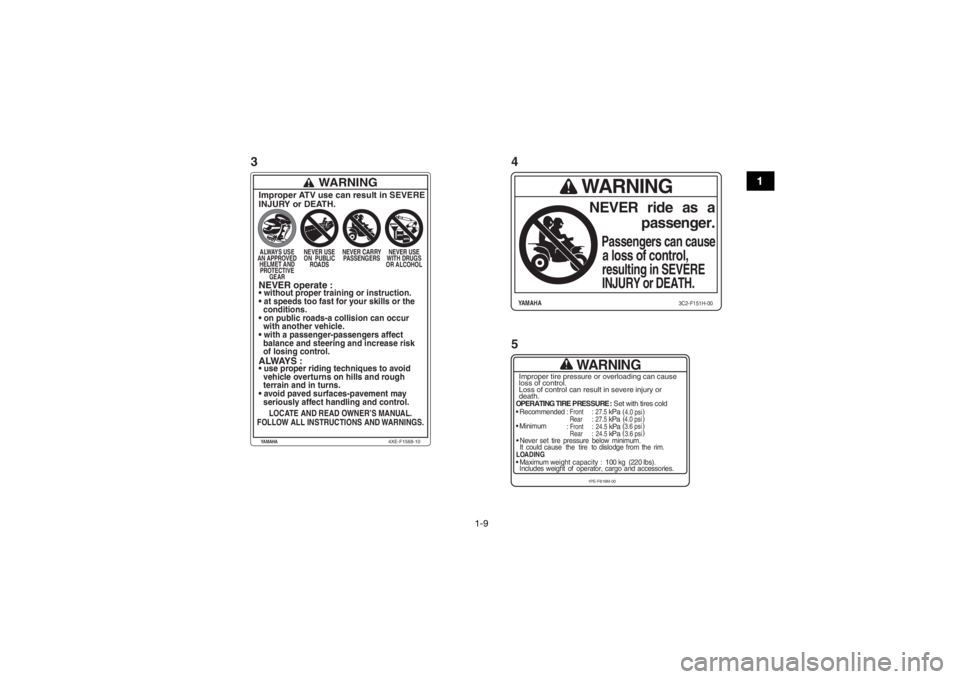
WARNING
OPERATING TIRE PRESSURE : Set with tires cold
Recommended
: Front
: 27.5
kPa
Rear
: 27.5
kPa
Minimum
: Front
: 24.5
kPa
Rear
: 24.5
kPa
Never set tire pressure below minimum.
It could cause the tire to dislodge from the rim.LOADINGMaximum weight capacity :
100 kg (220 lbs).
Includes weight of operator, cargo and accessories.Improper tire pressure or overloading can cause
loss of control.
Loss of control can result in severe injury or
death.
4.0 psi
4.0 psi 3.6 psi
3.6 psi(
( )
() () )
1PE-F816M-00WARNINGNEVER ride as a
passenger.
Passengers can causea loss of control,resulting in SEVEREINJURY or DEATH.
3C2-F151H-00
YAMAHA
WARNING
Improper ATV use can result in SEVERE
INJURY or DEATH.ALWAYS USE
AN APPROVED HELMET AND PROTECTIVE GEAR NEVER USE
ON PUBLIC ROADS NEVER CARRY
PASSENGERS NEVER USE
WITH DRUGS
OR ALCOHOLNEVER operate :
ALWAYS :
conditions.
with another vehicle.
balance and steering and increase risk
of losing control.
vehicle overturns on hills and rough
terrain and in turns.
seriously affect handling and control.LOCATE AND READ OWNER’S MANUAL.
FOLLOW ALL INSTRUCTIONS AND WARNINGS.
4XE-F1568-10
YAMAHA
5 4
3
U2LS60E0.book Page 9 Wednesday, June 18, 2014 11:12 AM
Page 22 of 160

2-3
2technique described in this manual on level
ground. Avoid crossing the side of a steep hill if
possible.
Always use proper procedures if you stall or roll
backwards when climbing a hill. To avoid stall-
ing, use the proper gear and maintain a steady
speed when climbing a hill. If you stall or roll
backwards, follow the special procedure for
braking described in this manual. Dismount on
the uphill side or to a side if pointed straight up-
hill. Turn the ATV around and remount, following
the procedure described in this manual.
Always check for obstacles before operating in
a new area.
Never attempt to operate over large obstacles,
such as large rocks or fallen trees. Always follow
proper procedures when operating over obsta-
cles as described in this manual.
Always be careful when skidding or sliding.
Learn to safely control skidding or sliding by
practicing at low speeds and on level, smooth
terrain. On extremely slippery surfaces, such as
ice, go slowly and be very cautious in order to
reduce the chance of skidding or sliding out of
control.
Never operate an ATV in fast flowing water or in
water deeper than that recommended in this
manual. Remember that wet brakes may have
reduced stopping ability. Test your brakes after
leaving water. If necessary, apply them several
times to let friction dry out the linings.
Always be sure there are no obstacles or people
behind you when you operate in reverse. When
it is safe to proceed in reverse, go slowly.
Always use the size and type of tires specified in
this manual.
Always maintain proper tire pressure as de-
scribed in this manual.
Never exceed the stated load capacity for an
ATV. Cargo should be properly distributed and
securely attached. Reduce speed and follow in-
structions in this manual for carrying cargo or
pulling a trailer. Allow greater distance for brak-
ing.
Do not operate your ATV during darkness un-
less it is equipped with a properly functioning
headlight. Off-road riding is inherently danger-
ous and additionally, off-road trails do not have
streetlights to guide you.
U2LS60E0.book Page 3 Wednesday, June 18, 2014 11:12 AM
Page 43 of 160

4-15
4
Do not tamper with or attempt to open the
cylinder assemblies.
Do not subject the shock absorber assem-
blies to an open flame or other high heat
source. This may cause the unit to explode
due to excessive gas pressure.
Do not deform or damage the cylinders in
any way. Cylinder damage will result in poor
damping performance.
Do not dispose of a damaged or worn out
shock absorber assembly yourself. Take the
shock absorber assembly to a Yamaha deal-
er for any service.
EBU30981Adjusting the front shock absorber as-
semblies (YFM700RSF)These shock absorber assemblies are equipped
with a spring preload adjusting nut, a rebound
damping force adjusting screw, with a compres-
sion damping force adjusting bolt (for fast com-
pression damping), and a compression damping
force adjusting screw (for slow compression
damping).
WARNING
EWB02492Suspension components become hot during
operation. Never touch the compression
damping force adjusting bolt and screw, the
rebound damping force adjusting screw or
the oil reservoir with your bare hand or skin
until suspension components have cooled.
Always adjust the shock absorber assem-
blies on the left and right side to the same
setting. Uneven adjustment can cause poor
handling and loss of stability, which could
lead to an accident. NOTICEECB00091Never turn an adjusting mechanism beyond
the minimum and maximum settings. TIPAlthough the total number of clicks or turns of a
damping force adjusting mechanism may not ex-
actly match the following specifications due to
small differences in production, the actual number
of clicks or turns always represents the entire ad-
justing range. To obtain a precise adjustment, it
U2LS60E0.book Page 15 Wednesday, June 18, 2014 11:12 AM
Page 56 of 160

5-2
5
Front brake• Check operation. If soft or spongy, have Yamaha dealer bleed hy-
draulic system.
• Check brake pads for wear, and replace if necessary.
• Check brake fluid level in reservoir, and add specified brake fluid to specified level if necessary.
• Check hydraulic system for leakage. Correct if necessary. 5-4, 8-29, 8-31, 8-33
Rear brake • Check operation. If soft or spongy, have Yamaha dealer bleed hy-
draulic system.
• Check brake pads for wear, and replace if necessary.
• Check brake fluid level in reservoir, and add specified brake fluid to specified level if necessary.
• Check hydraulic system for leakage. Correct if necessary. 5-4, 8-29, 8-31, 8-34
Clutch • Check operation, and correct if necessary.
• Lubricate cable if necessary.
• Check lever free play, and adjust if necessary. 8-36
Throttle lever • Make sure that operation is smooth. Lubricate cable and lever
housing if necessary.
• Check lever free play, and adjust if necessary. 5-5, 8-28
Control cables • Make sure that operation is smooth. Lubricate if necessary. 8-40
Drive chain • Check chain slack, and adjust if necessary.
• Check chain condition. Lubricate if necessary. 5-5, 8-38, 8-40
Wheels and tires • Check wheel condition, and replace if damaged.
• Check tire condition and tread depth. Replace if necessary.
• Check air pressure. Correct if necessary. 5-5
Shift pedal • Make sure that operation is smooth.
• Correct if necessary.
8-41
Brake pedal • Make sure that operation is smooth. Lubricate pedal pivoting point
if necessary. 8-41
ITEM ROUTINE PAGEU2LS60E0.book Page 2 Wednesday, June 18, 2014 11:12 AM
Page 59 of 160

5-5
5
Brake operation
Test the brakes at slow speed after starting out to
make sure they are working properly. If the brakes
do not provide proper braking performance,
check the brake pads for wear. (See page 8-29.)
EBU19762Throttle leverCheck the operation of the throttle lever. It must
open smoothly and spring back to the idle position
when released. Have a Yamaha dealer correct if
necessary.EBU19771Drive chainCheck the condition of the drive chain and check
the drive chain slack. Lubricate and adjust the
drive chain as necessary. (See page 8-38.)EBU19815TiresCheck tire pressure regularly to make sure it is at
the recommended specifications. Also check for
wear and damage. Tire pressure
Use the low-pressure tire gauge to check and ad-
just tire pressures when the tires are cold. Tire
pressures must be equal on both sides.
WARNING! Operation of this vehicle with im- proper tire pressure may cause severe injury or
death from loss of control or rollover. Tire
pressure below the minimum specified could
also cause the tire to dislodge from the rim un-
der severe riding conditions.
[EWB02542]
Set tire
pressures to the following specifications:
U2LS60E0.book Page 5 Wednesday, June 18, 2014 11:12 AM
Page 60 of 160

5-6
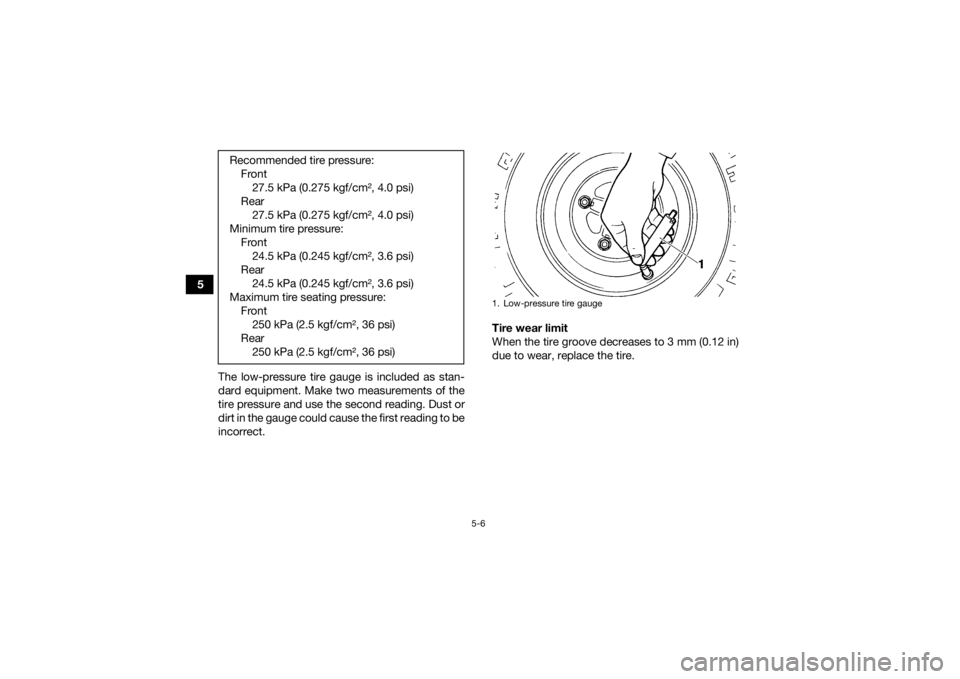
5The low-pressure tire gauge is included as stan-
dard equipment. Make two measurements of the
tire pressure and use the second reading. Dust or
dirt in the gauge could cause the first reading to be
incorrect. Tire wear limit
When the tire groove decreases to 3 mm (0.12 in)
due to wear, replace the tire.
Recommended tire pressure:
Front27.5 kPa (0.275 kgf/cm², 4.0 psi)
Rear 27.5 kPa (0.275 kgf/cm², 4.0 psi)
Minimum tire pressure: Front24.5 kPa (0.245 kgf/cm², 3.6 psi)
Rear 24.5 kPa (0.245 kgf/cm², 3.6 psi)
Maximum tire seating pressure: Front250 kPa (2.5 kgf/cm², 36 psi)
Rear 250 kPa (2.5 kgf/cm², 36 psi)
1. Low-pressure tire gauge
U2LS60E0.book Page 6 Wednesday, June 18, 2014 11:12 AM
Page 94 of 160

8-2
8
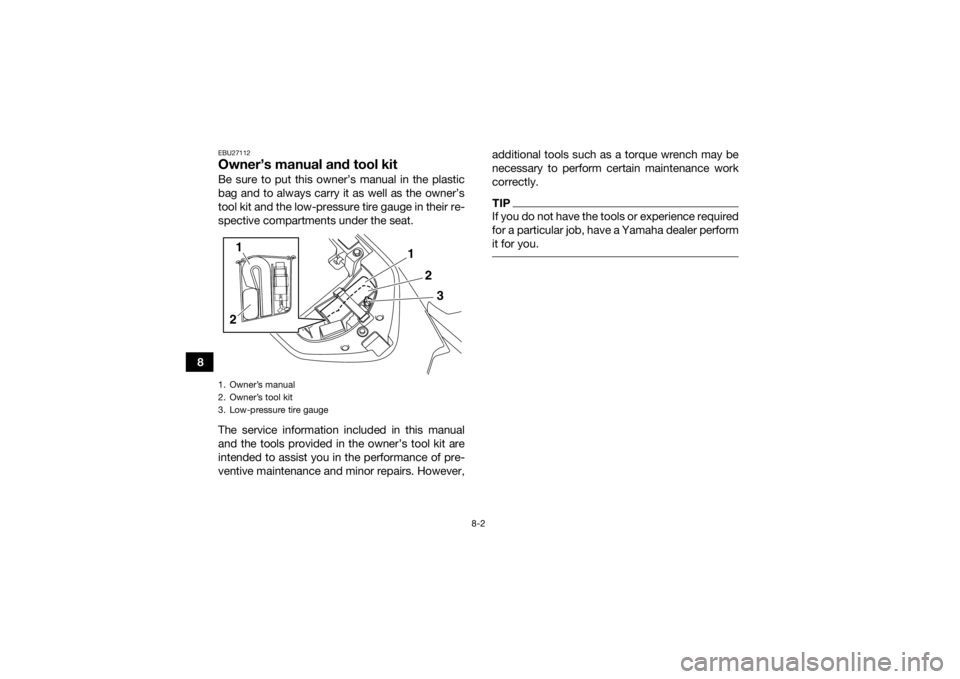
EBU27112Owner’s manual and tool kitBe sure to put this owner’s manual in the plastic
bag and to always carry it as well as the owner’s
tool kit and the low-pressure tire gauge in their re-
spective compartments under the seat.
The service information included in this manual
and the tools provided in the owner’s tool kit are
intended to assist you in the performance of pre-
ventive maintenance and minor repairs. However,additional tools such as a torque wrench may be
necessary to perform certain maintenance work
correctly.
TIPIf you do not have the tools or experience required
for a particular job, have a Yamaha dealer perform
it for you.
1. Owner’s manual
2. Owner’s tool kit
3. Low-pressure tire gauge
1
2 1
23
U2LS60E0.book Page 2 Wednesday, June 18, 2014 11:12 AM
Page 98 of 160

8-6
8
5*Brake hoses • Check for cracks or other damage, and replace if
necessary. √√√√
• Replace. Every 4 years
6 *Brake fluid • Replace. Every 2 years
7 *Parking brake • Check operation and adjust if necessary. √√√√√
8 *Wheels • Check runout and for damage, and replace if nec-
essary. √ √√√
9 *Tires • Check tread depth and for damage, and replace if
necessary.
• Check air pressure and balance, and correct if necessary. √ √√√
10 *Wheel hub bearings • Check for looseness or damage, and replace if
necessary. √ √√√
11 *Swingarm pivots • Check operation and for excessive play, and re-
place bearings if necessary.
• Lubricate with lithium-soap-based grease. √√√
12 *Upper and lower
arm pivots • Lubricate with lithium-soap-based grease.
√√√
13 Drive chain • Check chain slack and adjust if necessary.
• Check rear wheel alignment and correct if neces-
sary.
• Clean and lubricate. √√√√√
NO. ITEM
CHECK OR MAINTENANCE
JOB INITIAL EVERY
Whichev-
er comes first month136612
km (mi) 320
(200) 1300
(800) 2500
(1600) 2500
(1600) 5000
(3200)
hours 20 80 160 160 320U2LS60E0.book Page 6 Wednesday, June 18, 2014 11:12 AM
Page 149 of 160

9-2
9
abrasives which may mar the paint or protec-
tive finish. When finished cleaning, start the
engine and let it idle for several minutes.
EBU27262StorageShort-term
Always store your ATV in a cool, dry place and, if
necessary, protect it against dust with a porous
cover.
NOTICE: Storing the ATV in a poorly ven-
tilated room or covering it with a tarp while it is
still wet, will allow water and humidity to seep
in and cause rust. To prevent corrosion, avoid
damp cellars, stables (because of the presence
of ammonia) and areas where strong chemi-
cals are stored.
[ECB00722]
Long-term
Before storing your ATV for several months: 1. Follow all the instructions in the “Cleaning” section of this chapter.
2. Fill up the fuel tank and add fuel stabilizer (if available) to prevent the fuel from deteriorat-
ing. 3. Perform the following steps to protect the cyl-
inder, piston rings, etc. from corrosion.a. Remove the spark plug cap and spark plug.
b. Pour a teaspoonful of engine oil into the spark plug bore.
c. Install the spark plug cap onto the spark plug, and then place the spark plug on the
cylinder head so that the electrodes are
grounded. (This will limit sparking during
the next step.)
d. Turn the engine over several times with the starter. (This will coat the cylinder wall
with oil.)
e. Remove the spark plug cap from the spark plug, and then install the spark plug and
the spark plug cap.
4. Lubricate all control cables and the pivoting points of all levers and pedals.
5. Check and, if necessary, correct the tire air pressure, and then block up the ATV so that
all of its wheels are off the ground. Alterna-
Specified amount:
7.5 ml of stabilizer to each liter of fuel (or 1
oz of stabilizer to each gallon of fuel)U2LS60E0.book Page 2 Wednesday, June 18, 2014 11:12 AM