check engine YAMAHA YFM700R 2016 User Guide
[x] Cancel search | Manufacturer: YAMAHA, Model Year: 2016, Model line: YFM700R, Model: YAMAHA YFM700R 2016Pages: 160, PDF Size: 3.75 MB
Page 67 of 160
6-5
6
TIPWhen in reverse, the reverse indicator light should
come on. If the indicator light does not come on,
have a Yamaha dealer check the electrical circuit. 4. Check behind you for people or obstacles,and then release the brake pedal.
5. Open the throttle lever gradually and release the clutch lever slowly. Continue to watch to
the rear while backing.EBU20673Engine break-inTIPFor ATVs equipped with an odometer or an hour
meter, follow the figures given in km (mi) or the
figures given in hours.
For ATVs not equipped with an odometer or
hour meter, follow the figures given in hours. There is never a more important period in the life
of your engine than the first 320 km (200 mi) or 20
hours of riding. For this reason, you should read
the following material carefully. Since the engine is brand new, do not put an ex-
cessive load on it for the first 320 km (200 mi) or
20 hours. The various parts in the engine wear and
polish themselves to the correct operating clear-
ances. During this period, prolonged full-throttle
operation or any condition that might result in en-
gine overheating must be avoided.
0–160 km (0–100 mi) or 0–10 hours
Avoid prolonged operation above 1/2 throttle.
Vary the speed of the ATV regularly. Do not oper-
ate it at one set throttle position.
160–320 km (100–200 mi) or 10–20 hours
Avoid prolonged operation above 3/4 throttle. Rev
the engine through the gears freely, but do not use
full throttle at any time.
320 km (200 mi) or 20 hours and beyond
The ATV can now be operated normally.
NOTICEECB00221If any engine trouble should occur during the
engine break-in period, immediately have a
Yamaha dealer check the ATV.
U2LS61E0.book Page 5 Friday, April 17, 2015 8:25 AM
Page 75 of 160
7-5
7
Pre-operation checks
Always inspect your ATV each time you use it to
make sure the ATV is in safe operating condition.
Perform the pre-operation checks listed on page
5-1. Always follow the inspection and mainte-
nance procedures and schedules described in the
Owner’s Manual.
WARNING! Failure to inspect
the ATV before riding it or failure to maintain it
properly increases the possibility of an acci-
dent and equipment damage.
[EWB01433]
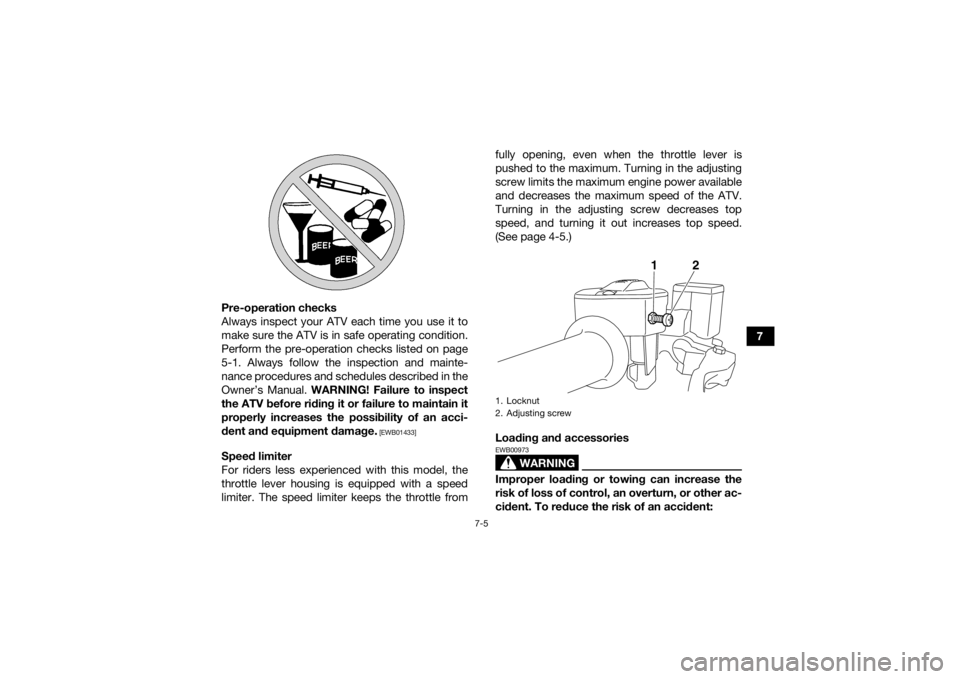
Speed limiter
For riders less experienced with this model, the
throttle lever housing is equipped with a speed
limiter. The speed limiter keeps the throttle from fully opening, even when the throttle lever is
pushed to the maximum. Turning in the adjusting
screw limits the maximum engine power available
and decreases the maximum speed of the ATV.
Turning in the adjusting screw decreases top
speed, and turning it out increases top speed.
(See page 4-5.)
Loading and accessories
WARNING
EWB00973Improper loading or towing can increase the
risk of loss of control, an overturn, or other ac-
cident. To reduce the risk of an accident:1. Locknut
2. Adjusting screw
12
U2LS61E0.book Page 5 Friday, April 17, 2015 8:25 AM
Page 77 of 160
7-7
7
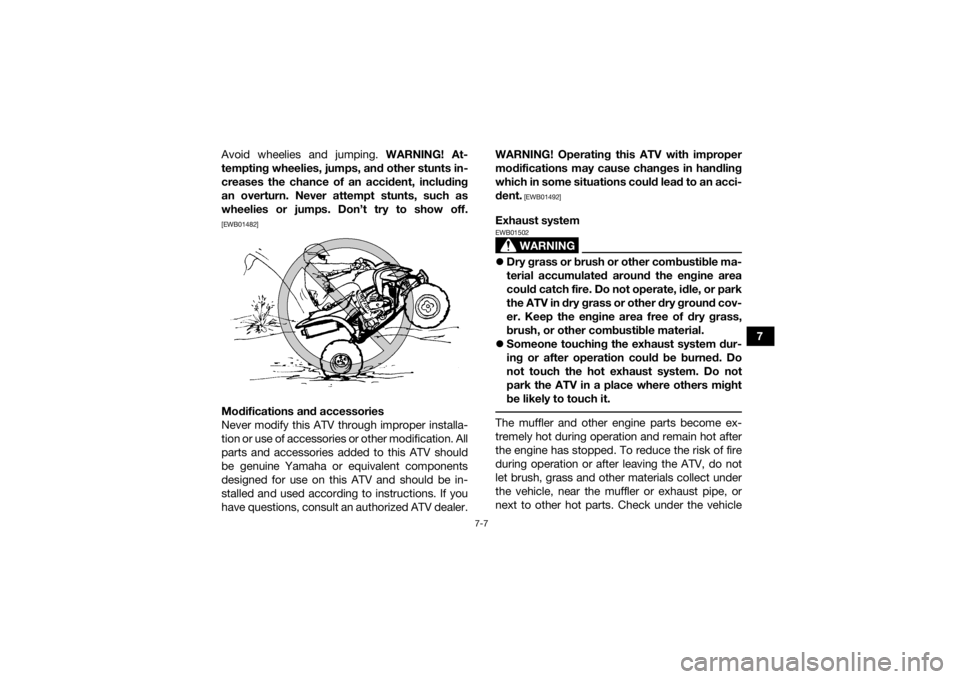
Avoid wheelies and jumping.
WARNING! At-
tempting wheelies, jumps, and other stunts in-
creases the chance of an accident, including
an overturn. Never attempt stunts, such as
wheelies or jumps. Don’t try to show off.
[EWB01482]Modifications and accessories
Never modify this ATV through improper installa-
tion or use of accessories or other modification. All
parts and accessories added to this ATV should
be genuine Yamaha or equivalent components
designed for use on this ATV and should be in-
stalled and used according to instructions. If you
have questions, consult an authorized ATV dealer. WARNING! Operating this ATV with improper
modifications may cause changes in handling
which in some situations could lead to an acci-
dent.
[EWB01492]
Exhaust system
WARNING
EWB01502 Dry grass or brush or other combustible ma-
terial accumulated around the engine area
could catch fire. Do not operate, idle, or park
the ATV in dry grass or other dry ground cov-
er. Keep the engine area free of dry grass,
brush, or other combustible material.
Someone touching the exhaust system dur-
ing or after operation could be burned. Do
not touch the hot exhaust system. Do not
park the ATV in a place where others might
be likely to touch it. The muffler and other engine parts become ex-
tremely hot during operation and remain hot after
the engine has stopped. To reduce the risk of fire
during operation or after leaving the ATV, do not
let brush, grass and other materials collect under
the vehicle, near the muffler or exhaust pipe, or
next to other hot parts. Check under the vehicle
U2LS61E0.book Page 7 Friday, April 17, 2015 8:25 AM
Page 86 of 160
7-16
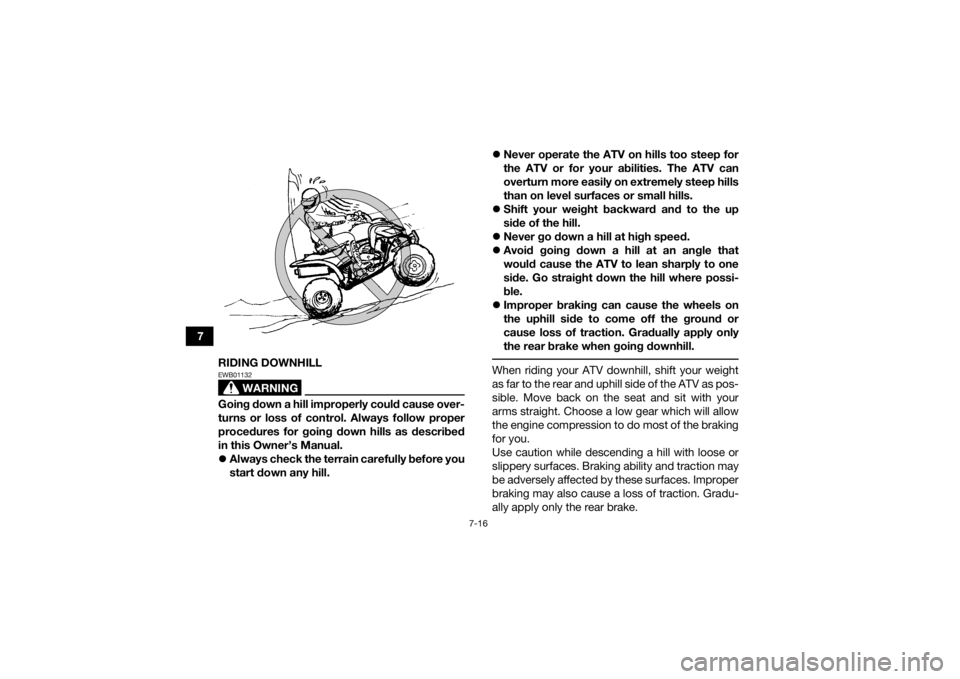
7RIDING DOWNHILL
WARNING
EWB01132Going down a hill improperly could cause over-
turns or loss of control. Always follow proper
procedures for going down hills as described
in this Owner’s Manual.
Always check the terrain carefully before you
start down any hill.
Never operate the ATV on hills too steep for
the ATV or for your abilities. The ATV can
overturn more easily on extremely steep hills
than on level surfaces or small hills.
Shift your weight backward and to the up
side of the hill.
Never go down a hill at high speed.
Avoid going down a hill at an angle that
would cause the ATV to lean sharply to one
side. Go straight down the hill where possi-
ble.
Improper braking can cause the wheels on
the uphill side to come off the ground or
cause loss of traction. Gradually apply only
the rear brake when going downhill.
When riding your ATV downhill, shift your weight
as far to the rear and uphill side of the ATV as pos-
sible. Move back on the seat and sit with your
arms straight. Choose a low gear which will allow
the engine compression to do most of the braking
for you.
Use caution while descending a hill with loose or
slippery surfaces. Braking ability and traction may
be adversely affected by these surfaces. Improper
braking may also cause a loss of traction. Gradu-
ally apply only the rear brake.
U2LS61E0.book Page 16 Friday, April 17, 2015 8:25 AM
Page 95 of 160
8-3
8
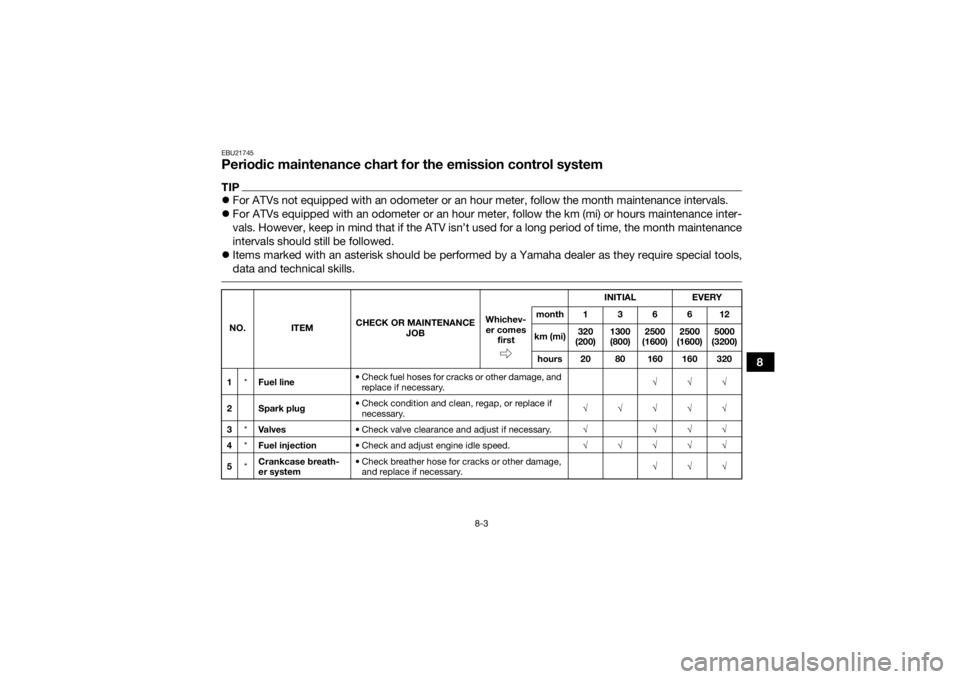
EBU21745Periodic maintenance chart for the emission control systemTIPFor ATVs not equipped with an odometer or an hour meter, follow the month maintenance intervals.
For ATVs equipped with an odometer or an hour meter, follow the km (mi) or hours maintenance inter-
vals. However, keep in mind that if the ATV isn’t used for a long period of time, the month maintenance
intervals should still be followed.
Items marked with an asterisk should be performed by a Yamaha dealer as they require special tools,
data and technical skills. NO. ITEM CHECK OR MAINTENANCE
JOB INITIAL
EVERY
Whichev- er comes first month136612
km (mi) 320
(200) 1300
(800) 2500
(1600) 2500
(1600) 5000
(3200)
hours 20 80 160 160 320
1 *Fuel line • Check fuel hoses for cracks or other damage, and
replace if necessary. √√√
2Spark plug • Check condition and clean, regap, or replace if
necessary. √√√√√
3 *Va l v e s • Check valve clearance and adjust if necessary. √ √√√
4 *Fuel injection • Check and adjust engine idle speed. √√√√√
5 *Crankcase breath-
er system • Check breather hose for cracks or other damage,
and replace if necessary. √√√
U2LS61E0.book Page 3 Friday, April 17, 2015 8:25 AM
Page 99 of 160

8-7
8
14*Drive chain roller • Check for wear and replace if necessary. √√√
15 *Chassis fasteners • Make sure that all nuts, bolts, and screws are
properly tightened. √√√√√
16 *Shock absorber as-
semblies • Check operation and correct if necessary.
• Check for oil leakage and replace if necessary.
√√√
17 *Rear suspension re-
lay arm and con-
necting arm
pivoting points • Check operation and correct if necessary.
• Lubricate with lithium-soap-based grease.
√√√√
18 *Steering shaft • Lubricate with lithium-soap-based grease. √√√
19 *Steering system • Check operation and repair or replace if dam-
aged.
• Check toe-in and adjust if necessary. √√√√√
20 *Engine mount • Check for cracks or other damage, and replace if
necessary. √√√
21 Engine oil • Change.
• Check ATV for oil leakage, and correct if neces-
sary. √ √√√
22 Engine oil filter ele-
ment • Replace.
√√√
NO. ITEM
CHECK OR MAINTENANCE
JOB INITIAL EVERY
Whichev- er comes first month136612
km (mi) 320
(200) 1300
(800) 2500
(1600) 2500
(1600) 5000
(3200)
hours 20 80 160 160 320U2LS61E0.book Page 7 Friday, April 17, 2015 8:25 AM
Page 102 of 160
8-10
8
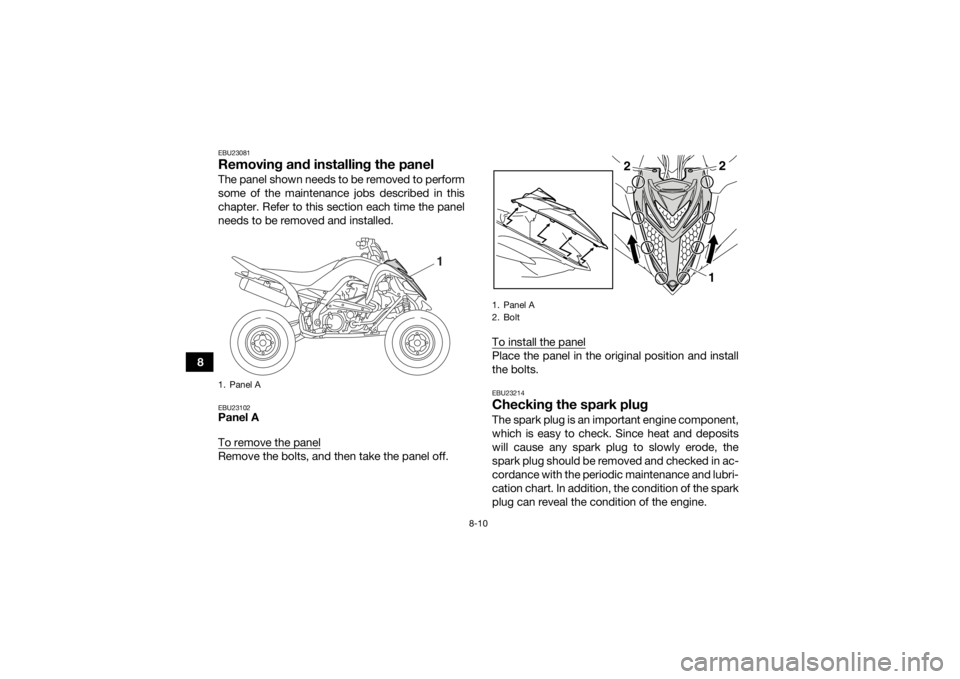
EBU23081Removing and installing the panelThe panel shown needs to be removed to perform
some of the maintenance jobs described in this
chapter. Refer to this section each time the panel
needs to be removed and installed.EBU23102Panel A
To remove the panelRemove the bolts, and then take the panel off.To install the panel
Place the panel in the original position and install
the bolts.EBU23214Checking the spark plugThe spark plug is an important engine component,
which is easy to check. Since heat and deposits
will cause any spark plug to slowly erode, the
spark plug should be removed and checked in ac-
cordance with the periodic maintenance and lubri-
cation chart. In addition, the condition of the spark
plug can reveal the condition of the engine.
1. Panel A
1
1. Panel A
2. Bolt
2
2
1
U2LS61E0.book Page 10 Friday, April 17, 2015 8:25 AM
Page 103 of 160
8-11
8
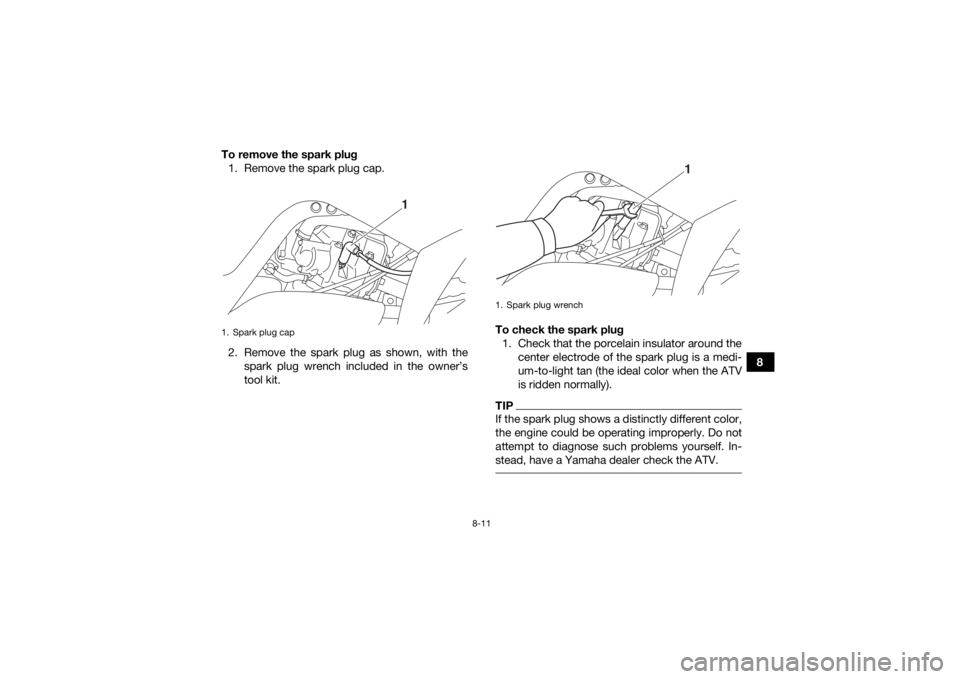
To remove the spark plug
1. Remove the spark plug cap.
2. Remove the spark plug as shown, with the spark plug wrench included in the owner’s
tool kit. To check the spark plug
1. Check that the porcelain insulator around the center electrode of the spark plug is a medi-
um-to-light tan (the ideal color when the ATV
is ridden normally).
TIPIf the spark plug shows a distinctly different color,
the engine could be operating improperly. Do not
attempt to diagnose such problems yourself. In-
stead, have a Yamaha dealer check the ATV.
1. Spark plug cap
1
1. Spark plug wrench
1
U2LS61E0.book Page 11 Friday, April 17, 2015 8:25 AM
Page 105 of 160
8-13
8
EBU26788Engine oil and oil filter elementThe engine oil level should be checked before
each ride. In addition, the oil must be changed and
the oil filter element replaced at the intervals spec-
ified in the periodic maintenance and lubrication
chart.
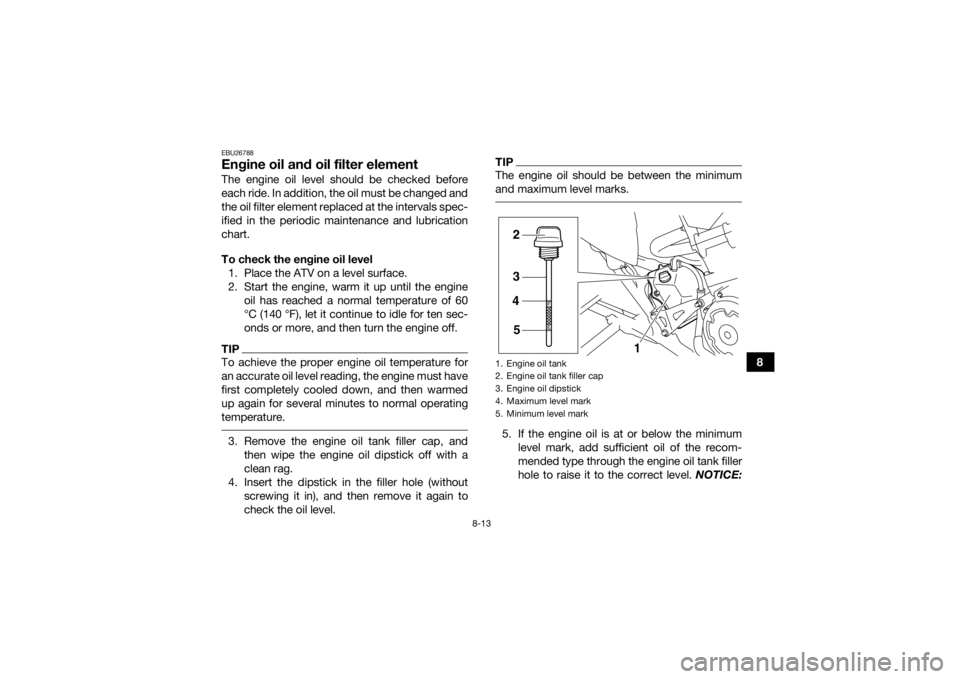
To check the engine oil level1. Place the ATV on a level surface.
2. Start the engine, warm it up until the engine oil has reached a normal temperature of 60
°C (140 °F), let it continue to idle for ten sec-
onds or more, and then turn the engine off.TIPTo achieve the proper engine oil temperature for
an accurate oil level reading, the engine must have
first completely cooled down, and then warmed
up again for several minutes to normal operating
temperature. 3. Remove the engine oil tank filler cap, andthen wipe the engine oil dipstick off with a
clean rag.
4. Insert the dipstick in the filler hole (without screwing it in), and then remove it again to
check the oil level.
TIPThe engine oil should be between the minimum
and maximum level marks. 5. If the engine oil is at or below the minimumlevel mark, add sufficient oil of the recom-
mended type through the engine oil tank filler
hole to raise it to the correct level. NOTICE:1. Engine oil tank
2. Engine oil tank filler cap
3. Engine oil dipstick
4. Maximum level mark
5. Minimum level mark
2
3
4
5 1
U2LS61E0.book Page 13 Friday, April 17, 2015 8:25 AM
Page 109 of 160
8-17
8
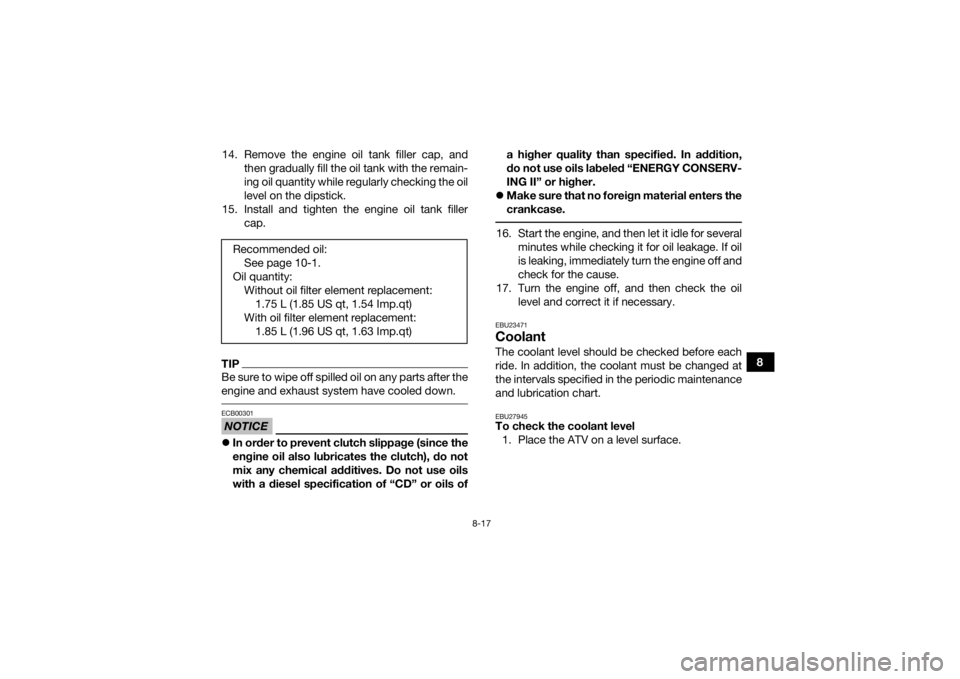
14. Remove the engine oil tank filler cap, and
then gradually fill the oil tank with the remain-
ing oil quantity while regularly checking the oil
level on the dipstick.
15. Install and tighten the engine oil tank filler cap.
TIPBe sure to wipe off spilled oil on any parts after the
engine and exhaust system have cooled down. NOTICEECB00301In order to prevent clutch slippage (since the
engine oil also lubricates the clutch), do not
mix any chemical additives. Do not use oils
with a diesel specification of “CD” or oils of a higher quality than specified. In addition,
do not use oils labeled “ENERGY CONSERV-
ING II” or higher.
Make sure that no foreign material enters the
crankcase.
16. Start the engine, and then let it idle for several
minutes while checking it for oil leakage. If oil
is leaking, immediately turn the engine off and
check for the cause.
17. Turn the engine off, and then check the oil level and correct it if necessary.EBU23471CoolantThe coolant level should be checked before each
ride. In addition, the coolant must be changed at
the intervals specified in the periodic maintenance
and lubrication chart.EBU27945To check the coolant level1. Place the ATV on a level surface.
Recommended oil:
See page 10-1.
Oil quantity: Without oil filter element replacement:1.75 L (1.85 US qt, 1.54 Imp.qt)
With oil filter element replacement: 1.85 L (1.96 US qt, 1.63 Imp.qt)
U2LS61E0.book Page 17 Friday, April 17, 2015 8:25 AM