parking brake YAMAHA YFM700R 2018 Owners Manual
[x] Cancel search | Manufacturer: YAMAHA, Model Year: 2018, Model line: YFM700R, Model: YAMAHA YFM700R 2018Pages: 158, PDF Size: 3.7 MB
Page 8 of 158

EBU17421
TABLE OF CONTENTS
LOCATION OF THE WARNING AND
SPECIFICATION LABELS .............................. 1-1
SAFETY INFORMATION ................................ 2-1
DESCRIPTION................................................ 3-1Left view ...................................................... 3-1
Right view.................................................... 3-1
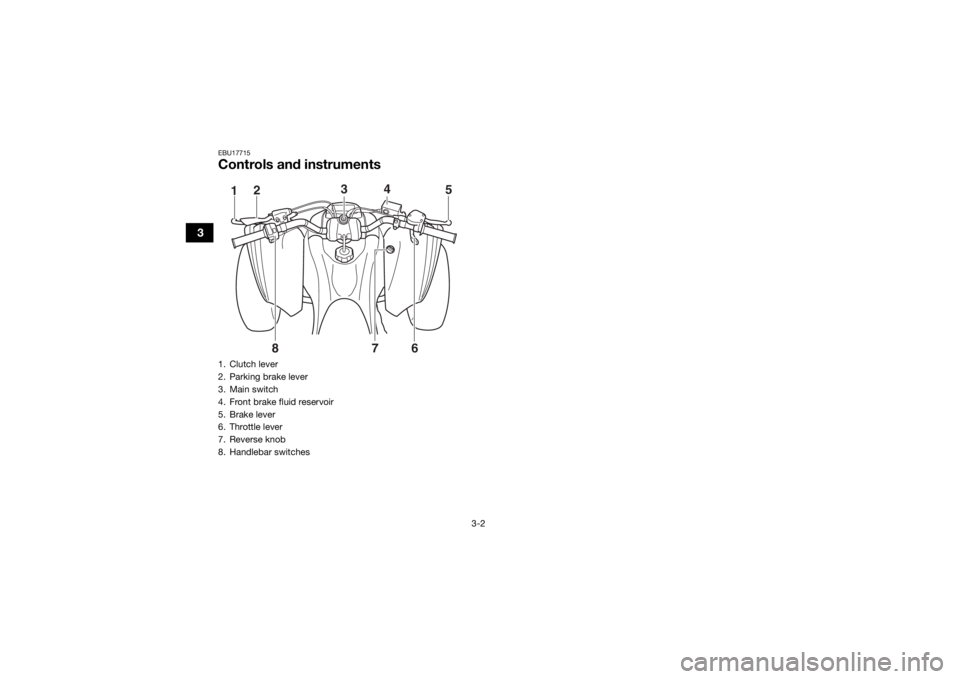
Controls and instruments............................ 3-2
INSTRUMENT AND CONTROL
FUNCTIONS ................................................... 4-1 Main switch ................................................. 4-1
Indicator lights and warning lights .............. 4-1
Self-diagnosis device .................................. 4-3
Handlebar switches .................................... 4-3
Throttle lever ............................................... 4-4
Speed limiter ............................................... 4-5
Clutch lever ................................................. 4-5
Brake lever .................................................. 4-6
Brake pedal ................................................. 4-7
Parking brake lever ..................................... 4-7
Shift pedal ................................................... 4-8
Reverse knob “REV” ................................... 4-9 Fuel tank cap .............................................. 4-9
Fuel ............................................................. 4-9
Seat .......................................................... 4-11
Front shock absorbers (YFM70RSBJ) ...... 4-12
Front shock absorbers (YFM70RSXJ) ...... 4-14
Rear shock absorber (YFM70RSBJ) ......... 4-19
Rear shock absorber (YFM70RSXJ) ......... 4-21
PRE-OPERATION CHECKS .......................... 5-1 Fuel ............................................................. 5-4
Engine oil .................................................... 5-4
Coolant ....................................................... 5-4
Front and rear brakes ................................. 5-4
Throttle lever ............................................... 5-5
Drive chain .................................................. 5-5
Tires ............................................................ 5-5
Chassis fasteners ....................................... 5-7
Instruments, lights and switches ................ 5-7
OPERATION .................................................. 6-1 Starting the engine ..................................... 6-1
Shifting........................................................ 6-2
Operating the reverse knob and driving in reverse ...................................................... 6-4U2LS63E0.book Page 1 Friday, March 31, 2017 8:42 AM
Page 9 of 158

Engine break-in ........................................... 6-5
Parking ........................................................ 6-5
Parking on a slope ...................................... 6-6
Accessories and loading ............................. 6-6
RIDING YOUR ATV ........................................ 7-1 GETTING TO KNOW YOUR ATV ................ 7-2
RIDE WITH CARE AND GOOD JUDGMENT .............................................. 7-2
BE CAREFUL WHERE YOU RIDE ............... 7-8
TURNING YOUR ATV................................ 7-11
CLIMBING UPHILL ................................... 7-13
RIDING DOWNHILL .................................. 7-16
CROSSING A SLOPE................................ 7-17
CROSSING THROUGH SHALLOW WATER .................................................... 7-18
RIDING OVER ROUGH TERRAIN ............. 7-20
SLIDING AND SKIDDING.......................... 7-20
WHAT TO DO IF... ..................................... 7-21
WHAT TO DO... ......................................... 7-22
PERIODIC MAINTENANCE AND
ADJUSTMENT................................................ 8-1 Owner’s manual and tool kit ....................... 8-2
Periodic maintenance chart: Emission control system .......................................... 8-3 Periodic maintenance chart: General
maintenance and lubrication .................... 8-5
Removing and installing the panel............ 8-10
Checking the spark plug........................... 8-10
Engine oil and oil filter element................. 8-13
Coolant ..................................................... 8-18
Cleaning the air filter element ................... 8-22
Cleaning the spark arrester ...................... 8-26
Adjusting the engine idling speed ............ 8-28
Adjusting the throttle lever free play ......... 8-29
Valve clearance......................................... 8-29
Adjusting the reverse lock release cable ....................................................... 8-30
Brakes....................................................... 8-30
Checking the front and rear brake pads... 8-30
Checking the brake fluid level .................. 8-31
Changing the brake fluid .......................... 8-34
Checking the front brake lever free play... 8-34
Checking the brake pedal height.............. 8-35
Adjusting the parking brake free play ....... 8-35
Brake light switches ................................. 8-37
Adjusting the clutch lever free play .......... 8-37
Drive chain slack....................................... 8-39
Lubricating the drive chain ....................... 8-41
Checking and lubricating the cables ........ 8-41
Checking and lubricating the brake and clutch levers ........................................... 8-42
U2LS63E0.book Page 2 Friday, March 31, 2017 8:42 AM
Page 26 of 158
3-2
3
EBU17715Controls and instruments1. Clutch lever
2. Parking brake lever
3. Main switch
4. Front brake fluid reservoir
5. Brake lever
6. Throttle lever
7. Reverse knob
8. Handlebar switches
12 3
4
5
67
8
U2LS63E0.book Page 2 Friday, March 31, 2017 8:42 AM
Page 33 of 158
4-7
4
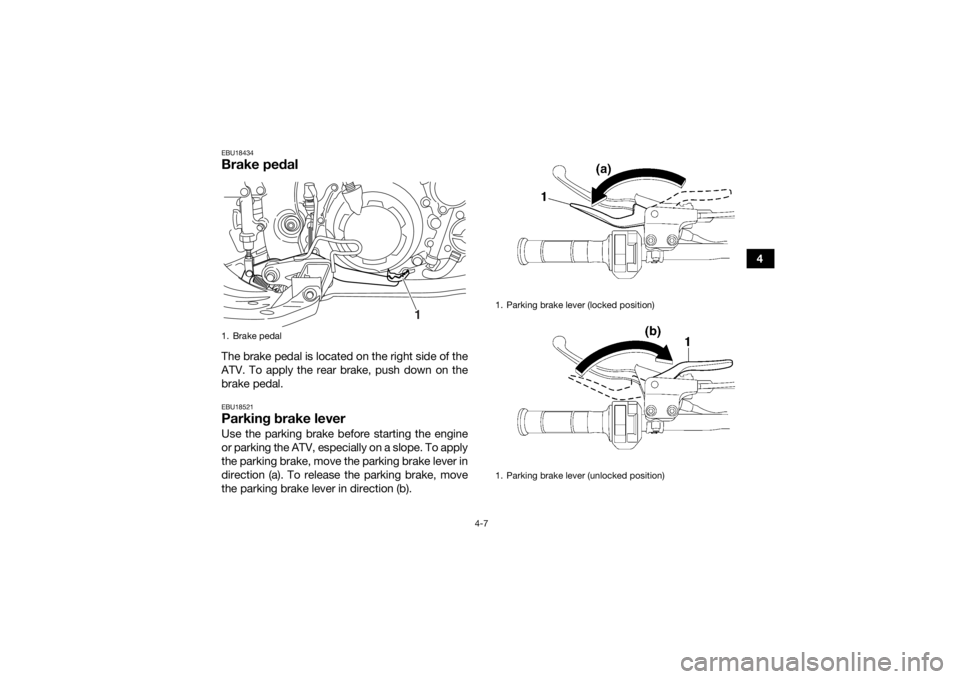
EBU18434Brake pedalThe brake pedal is located on the right side of the
ATV. To apply the rear brake, push down on the
brake pedal.EBU18521Parking brake leverUse the parking brake before starting the engine
or parking the ATV, especially on a slope. To apply
the parking brake, move the parking brake lever in
direction (a). To release the parking brake, move
the parking brake lever in direction (b).1. Brake pedal
1
1. Parking brake lever (locked position)
1. Parking brake lever (unlocked position)
U2LS63E0.book Page 7 Friday, March 31, 2017 8:42 AM
Page 34 of 158
4-8
4
WARNING
EWB00221Always set the parking brake before starting
the engine. The ATV could start moving un-
expectedly if the parking brake is not ap-
plied. This could cause loss of control or a
collision.
Always be sure you have released the park-
ing brake before you begin to ride. The brake
could overheat if you ride the ATV without re-
leasing the parking brake. You could lose
braking performance which could cause an
accident. You could also wear out the brakes
prematurely.
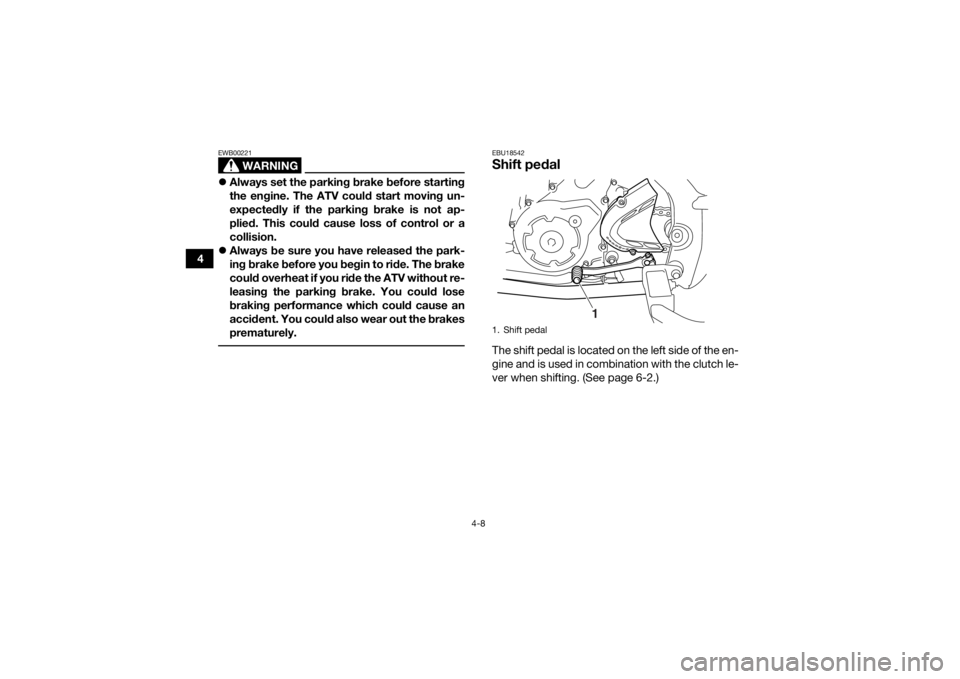
EBU18542Shift pedalThe shift pedal is located on the left side of the en-
gine and is used in combination with the clutch le-
ver when shifting. (See page 6-2.)1. Shift pedal
1
U2LS63E0.book Page 8 Friday, March 31, 2017 8:42 AM
Page 59 of 158
6-1
6
EBU19882
OPERATION
EBU19902Read the Owner’s Manual carefully before riding
the ATV. If there is a control or function you do not
understand, ask your Yamaha dealer.
WARNING
EWB00632Read the Owner’s Manual carefully to become
familiar with all controls in order to help pre-
vent any loss of control, which could cause an
accident or injury. EBU29954Starting the engineNOTICEECB00151See the “Engine break-in” section on page 6-5
prior to operating the engine for the first time. 1. Set the parking brake.
2. Turn the key to “ ” (on) and the engine stopswitch to “ ”.
The following warning lights should come on
for a few seconds, then go off.
Coolant temperature warning light
Fuel level warning light
Engine trouble warning light
NOTICEECB00826To avoid possible damage, do not operate the
ATV if a warning light does not work as de-
scribed above. 3. Shift the transmission into neutral. The neutral
indicator light should come on, if it does not
come on, have a Yamaha dealer check the
electrical circuit.TIPThis model is equipped with an ignition circuit cut-
off system. The engine can be started under the
following conditions.
The transmission is in neutral.
The clutch is disengaged with the transmission
in gear. However, it is recommended to shift
into neutral before starting the engine. 4. Completely close the throttle lever and start
the engine by pushing the start switch.
U2LS63E0.book Page 1 Friday, March 31, 2017 8:42 AM
Page 60 of 158

6-2
6
TIPIf the engine fails to start, release the start switch,
then push it again. Pause a few seconds before
the next attempt. Each cranking should be as
short as possible to preserve battery energy. Do
not crank the engine more than 10 seconds on
each attempt. NOTICEECB00164For maximum engine life, never accelerate
hard when the engine is cold! EBU20535ShiftingThis ATV has a 5-speed forward and 1-speed re-
verse transmission. The transmission allows you
to control the amount of power you have available
at a given speed or for starting, accelerating,
climbing hills, etc.
To shift into neutral, release the throttle lever, ap-
ply the clutch, and then repeatedly depress the
shift pedal until it stops.
When it stops, it will be in first gear. Raise the ped-
al slightly to reach the neutral position, and then
release the clutch.
EBU20595To start out and accelerate1. Release the throttle lever, apply the front or rear brake, and then release the parking
brake.
2. Pull the clutch lever to disengage the clutch.
3. Shift into first gear, and then release the brake. NOTICE: Always close the throttle
before shifting gears, otherwise damage
to the engine and drive train may result.
[ECB01220]
1. Shift pedal
2. Neutral position
3. Reverse position
2 3
4 5N1R
1
23
U2LS63E0.book Page 2 Friday, March 31, 2017 8:42 AM
Page 63 of 158
6-5
6
5. Open the throttle lever gradually and release
the clutch lever slowly. Continue to watch to
the rear while backing.
EBU20674Engine break-inThere is never a more important period in the life
of your engine than the first 320 km (200 mi) or 20
hours of operation. For this reason, you should fol-
low the engine break-in instructions carefully.
Since the engine is brand new, do not put an ex-
cessive load on it for the first 320 km (200 mi) or
20 hours. During this period the various parts in
the engine wear and polish themselves to the cor-
rect operating clearances. Avoid prolonged full-
throttle operation or any condition that might re-
sult in engine overheating.
0–160 km (0–100 mi) or 0–10 hours
Avoid prolonged operation above 1/2 throttle.
Vary the speed of the ATV regularly. Do not oper-
ate it at one set throttle position.
160–320 km (100–200 mi) or 10–20 hours
Avoid prolonged operation above 3/4 throttle. Rev
the engine through the gears freely, but do not use
full throttle at any time. 320 km (200 mi) or 20 hours and beyond
The ATV can now be operated normally.
NOTICEECB00221If any engine trouble should occur during the
engine break-in period, immediately have a
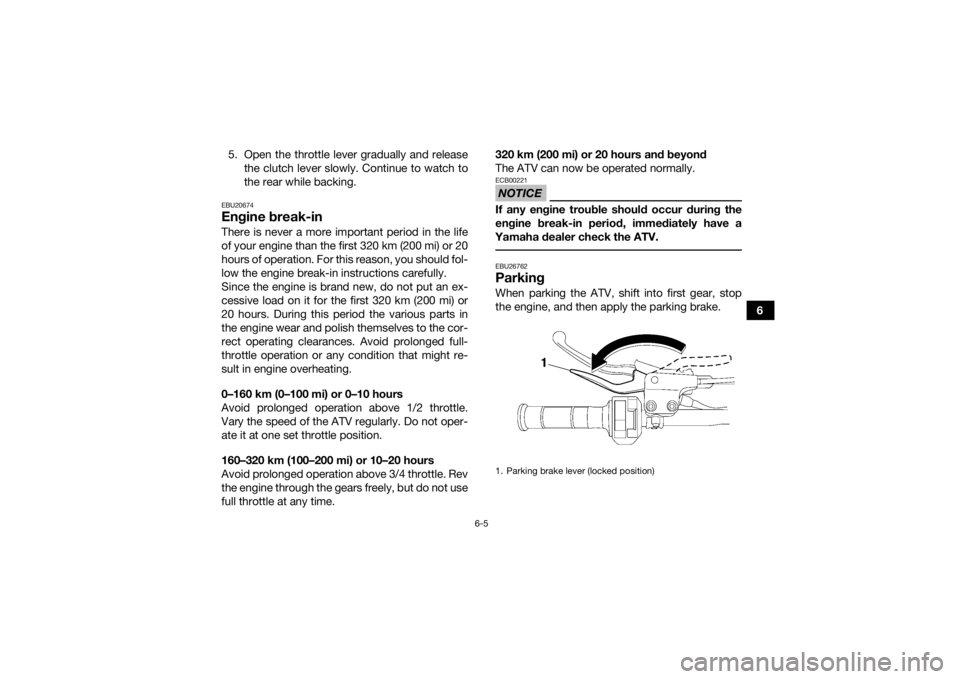
Yamaha dealer check the ATV. EBU26762ParkingWhen parking the ATV, shift into first gear, stop
the engine, and then apply the parking brake.1. Parking brake lever (locked position)
U2LS63E0.book Page 5 Friday, March 31, 2017 8:42 AM
Page 64 of 158
6-6
6
EBU20907Parking on a slope
WARNING
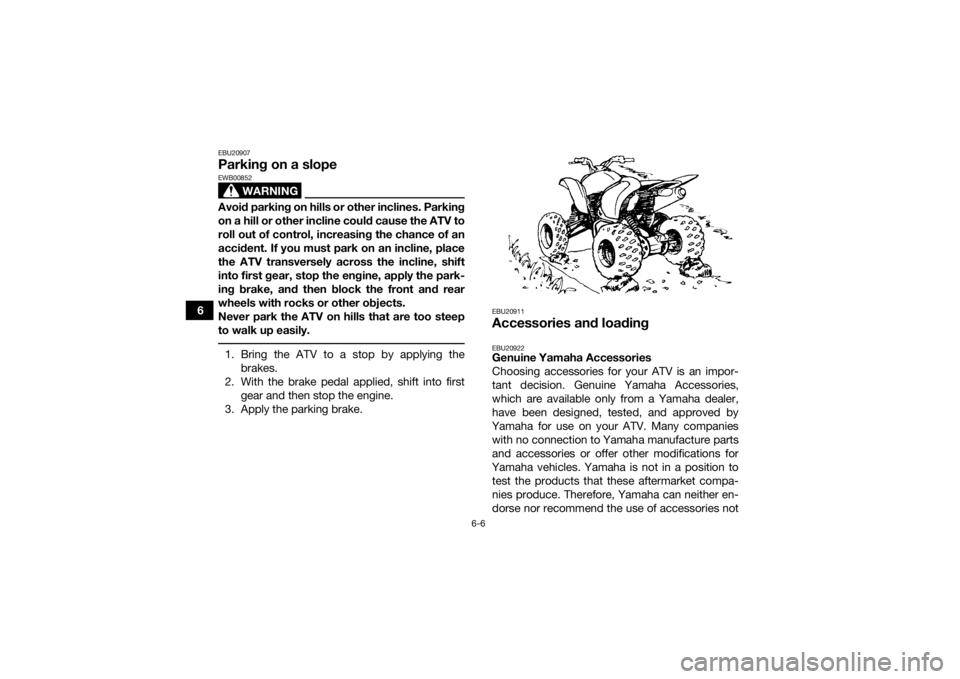
EWB00852Avoid parking on hills or other inclines. Parking
on a hill or other incline could cause the ATV to
roll out of control, increasing the chance of an
accident. If you must park on an incline, place
the ATV transversely across the incline, shift
into first gear, stop the engine, apply the park-
ing brake, and then block the front and rear
wheels with rocks or other objects.
Never park the ATV on hills that are too steep
to walk up easily. 1. Bring the ATV to a stop by applying thebrakes.
2. With the brake pedal applied, shift into first gear and then stop the engine.
3. Apply the parking brake.
EBU20911Accessories and loadingEBU20922Genuine Yamaha Accessories
Choosing accessories for your ATV is an impor-
tant decision. Genuine Yamaha Accessories,
which are available only from a Yamaha dealer,
have been designed, tested, and approved by
Yamaha for use on your ATV. Many companies with no connection to Yamaha manufacture parts
and accessories or offer other modifications for
Yamaha vehicles. Yamaha is not in a position to test the products that these aftermarket compa-
nies produce. Therefore, Yamaha can neither en-
dorse nor recommend the use of accessories not
U2LS63E0.book Page 6 Friday, March 31, 2017 8:42 AM
Page 77 of 158

7-11
7
Select a large, flat, unpaved area to become famil-
iar with your ATV. Make sure that this area is free
of obstacles and other riders. You should practice
control of the throttle, brakes, shifting procedures,
and turning techniques in this area before trying
more difficult terrain.
Set the parking brake and follow the instruction on
page 6-1 to start the engine. Once it has warmed
up you are ready to begin riding your ATV. As you
get on the ATV, be sure not to accidentally move
the shift pedal. With the engine idling, pull the
clutch lever to disengage the clutch and shift into
1st gear, and then release the parking brake.
Open the throttle gradually, and at the same time,
release the clutch lever slowly. Once the ATV has
attained adequate speed, release the throttle lever
and at the same time, quickly pull in the clutch le-
ver and shift into 2nd gear. Open the throttle part
way and gradually release the clutch.
WARNING!
If the throttle is applied too abruptly or if the
throttle is not released during shifting, or if the
shift pedal is not released before applying the
throttle, the front wheels may lift off the
ground, resulting in a loss of directional con- trol.
[EWB02632]
NOTICE: Do not shift gears without
releasing the throttle. Damage to the engine or
drive train may occur.
[ECB01072]
Use this same procedure as you move into the
higher gears. Be sure to coordinate the use of the
throttle and shift pedal properly.
Avoid higher speeds until you are thoroughly fa-
miliar with the operation of your ATV.
When slowing down or stopping, release the
throttle and apply the brakes smoothly and evenly.
As you slow down, shift to a lower gear. Be sure
that the engine has sufficiently slowed before en-
gaging a lower gear. Improper use of the brakes or
shifting can cause the tires to lose traction, reduc-
ing control and increasing the possibility of an ac-
cident.
TURNING YOUR ATV
WARNING
EWB01772Always follow proper procedures for turning as
described in this Owner’s Manual. Practice
turning at low speeds before attempting to turn
at faster speeds. Do not turn at speeds too fast
for your skills or the conditions. ATV could go
out of control, causing a collision or overturn.
U2LS63E0.book Page 11 Friday, March 31, 2017 8:42 AM