brake YAMAHA YFM80R 2004 Owner's Manual
[x] Cancel search | Manufacturer: YAMAHA, Model Year: 2004, Model line: YFM80R, Model: YAMAHA YFM80R 2004Pages: 342, PDF Size: 5.92 MB
Page 211 of 342
7-55
w
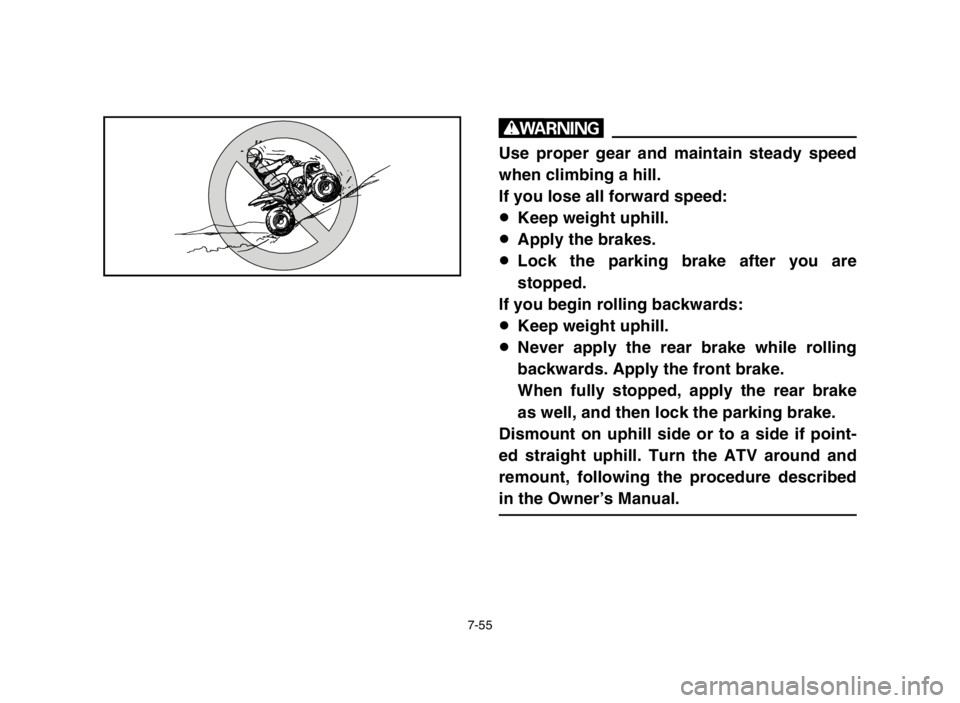
Use proper gear and maintain steady speed
when climbing a hill.
If you lose all forward speed:
8Keep weight uphill.
8Apply the brakes.
8Lock the parking brake after you are
stopped.
If you begin rolling backwards:
8Keep weight uphill.
8Never apply the rear brake while rolling
backwards. Apply the front brake.
When fully stopped, apply the rear brake
as well, and then lock the parking brake.
Dismount on uphill side or to a side if point-
ed straight uphill. Turn the ATV around and
remount, following the procedure described
in the Owner’s Manual.
5TH-9-62 7 4/8/03 6:10 PM Page 198
Page 221 of 342
7-65
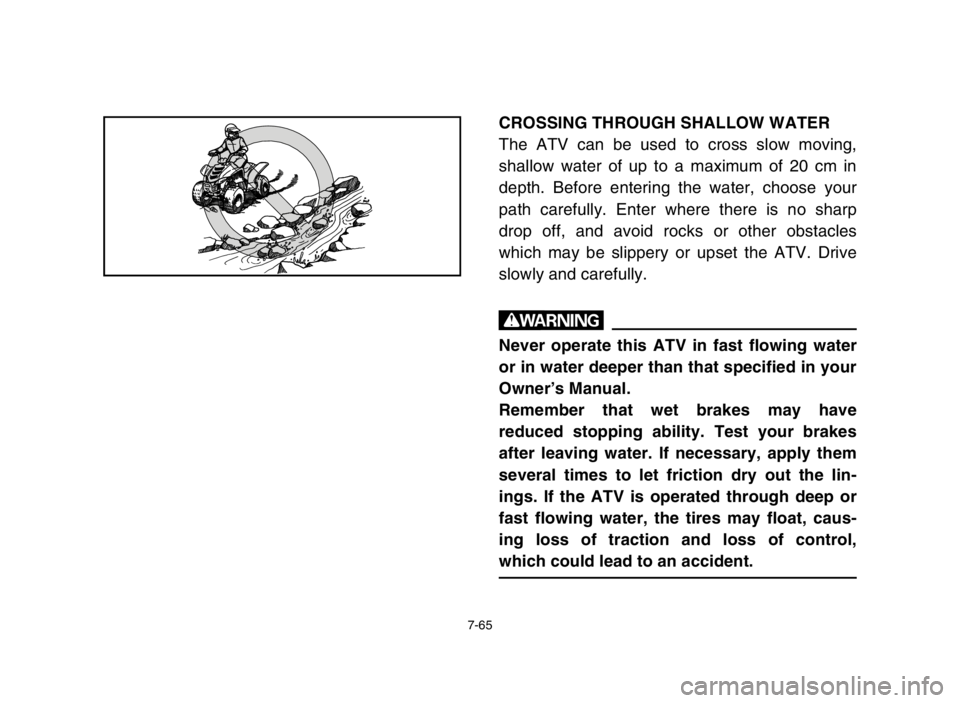
CROSSING THROUGH SHALLOW WATER
The ATV can be used to cross slow moving,
shallow water of up to a maximum of 20 cm in
depth. Before entering the water, choose your
path carefully. Enter where there is no sharp
drop off, and avoid rocks or other obstacles
which may be slippery or upset the ATV. Drive
slowly and carefully.
w
Never operate this ATV in fast flowing water
or in water deeper than that specified in your
Owner’s Manual.
Remember that wet brakes may have
reduced stopping ability. Test your brakes
after leaving water. If necessary, apply them
several times to let friction dry out the lin-
ings. If the ATV is operated through deep or
fast flowing water, the tires may float, caus-
ing loss of traction and loss of control,
which could lead to an accident.
5TH-9-62 7 4/8/03 6:10 PM Page 208
Page 223 of 342
7-67
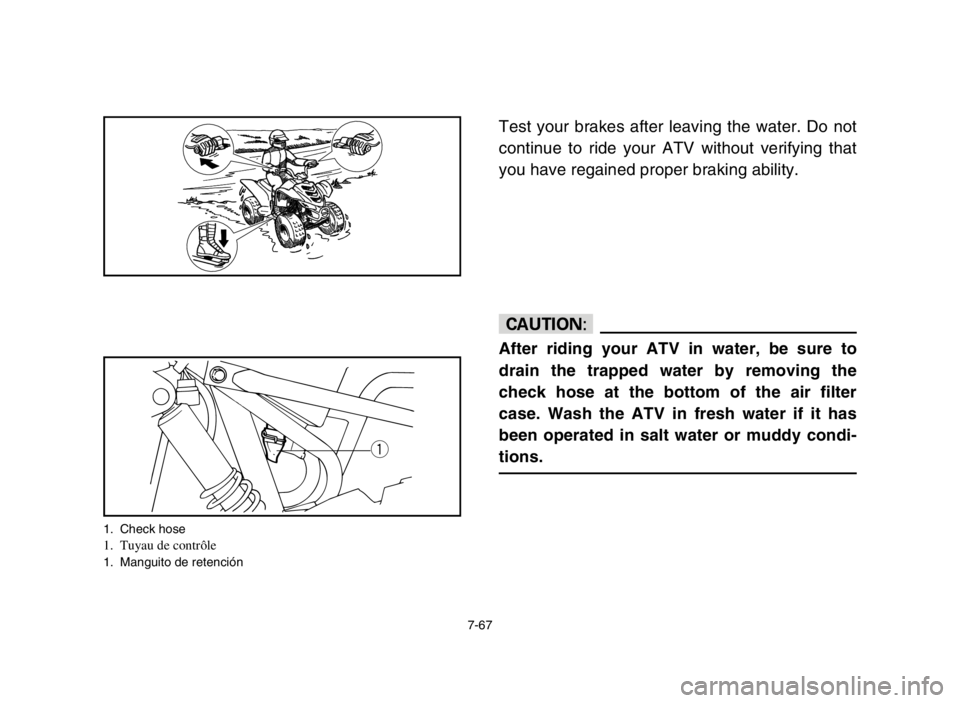
Test your brakes after leaving the water. Do not
continue to ride your ATV without verifying that
you have regained proper braking ability.
cC
After riding your ATV in water, be sure to
drain the trapped water by removing the
check hose at the bottom of the air filter
case. Wash the ATV in fresh water if it has
been operated in salt water or muddy condi-
tions.
q
1. Check hose1. Tuyau de contrôle1. Manguito de retención
5TH-9-62 7 4/8/03 6:10 PM Page 210
Page 227 of 342
7-71
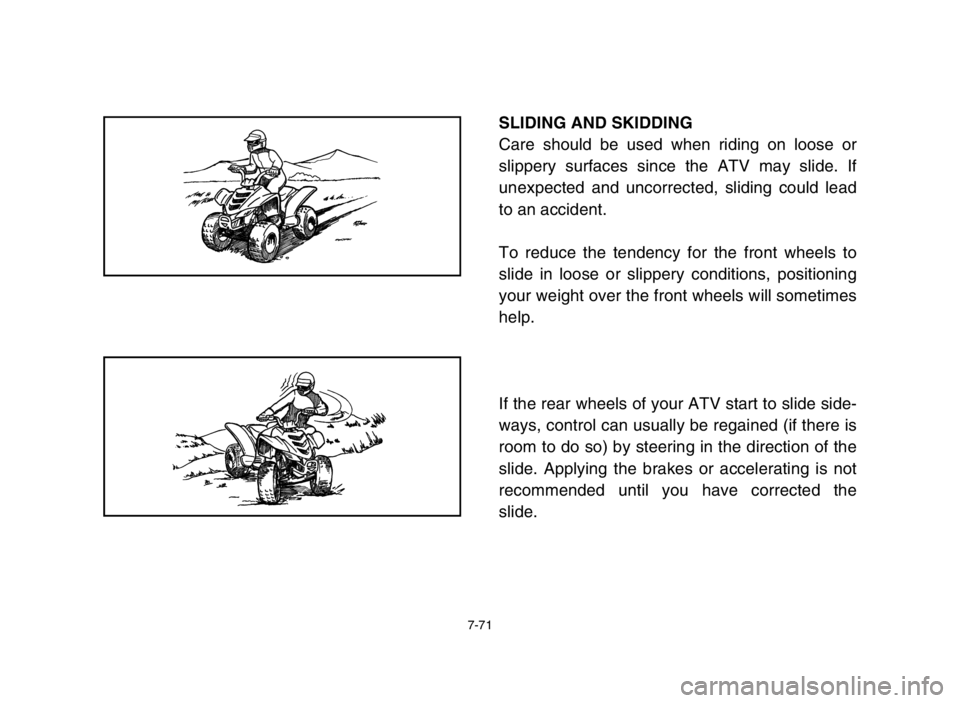
SLIDING AND SKIDDING
Care should be used when riding on loose or
slippery surfaces since the ATV may slide. If
unexpected and uncorrected, sliding could lead
to an accident.
To reduce the tendency for the front wheels to
slide in loose or slippery conditions, positioning
your weight over the front wheels will sometimes
help.
If the rear wheels of your ATV start to slide side-
ways, control can usually be regained (if there is
room to do so) by steering in the direction of the
slide. Applying the brakes or accelerating is not
recommended until you have corrected the
slide.
5TH-9-62 7 4/8/03 6:10 PM Page 214
Page 233 of 342

7-77
8If your ATV starts to slide sideways:
Steer in the direction of the slide if you have
the room.
Applying the brakes or accelerating is not rec-
ommended until you have corrected the slide.
(See pages 7-71–7-73.)
8If your ATV can’t make it up a hill you are try-
ing to climb:
Turn the ATV around if you still have forward
speed. If not, stop, dismount on the uphill side
of the ATV and physically turn the ATV
around. If the ATV starts to slip backwards
DO NOT USE THE REAR BRAKE - the ATV
may tip over on top of you. Instead, apply the
front brake or dismount the ATV on the uphill
side. (See pages 7-45–7-55.)
5TH-9-62 7 4/8/03 6:10 PM Page 220
Page 235 of 342

7-79
8If your ATV is traversing a sloping surface:
Be sure to ride with your weight positioned
towards the uphill side of the ATV to maintain
proper balance. If the ATV starts to tip, steer
down the hill (if there are no obstacles in your
way) to regain balance. If you discover that
the ATV is going to tip over, dismount on the
uphill side. (See pages 7-61–7-63.)
8If your ATV encounters shallow water:
Ride slowly and carefully through slow mov-
ing water, watching for obstacles. Be sure to
let water drain from the ATV and CHECK
YOUR BRAKES FOR PROPER OPERATION
when you come out of the water. Do not con-
tinue to ride your ATV until you have regained
adequate braking ability. (See pages 7-65–
7-67.)
5TH-9-62 7 4/8/03 6:10 PM Page 222
Page 243 of 342

8-7
EBU00262
PERIODIC MAINTENANCE/LUBRICATION
INITIAL EVERY
ITEM ROUTINE 1 3 6 6 1
month months months months year
Valves*9Check valve clearance.
9Adjust if necessary.2 222
Cam chain*9Check chain tension.
9Adjust if necessary.2 222
9Check condition.
Spark plug9Adjust gap and clean.22222
9Replace if necessary.
Air filter element9Clean. Every 20–40 hours.
9Replace if necessary. (more often in wet or dusty areas)
Carburetor*9Check idle speed/choke lever operation.
2222
9Adjust if necessary.
Crankcase breather9Check breather hose for cracks or damage.
system*9Replace if necessary.222
9Check for leakage.
Exhaust system*9Tighten if necessary.222
9Replace gasket if necessary.
Fuel line*9Check fuel hose for cracks or damage.
222
9Replace if necessary.
Engine oil9Replace (warm engine before draining).2 222
Final gear oil9Check oil level/oil leakage.
22
9Replace every 12 months.
Brakes*9Check operation.
22222
9Adjust if necessary.
5TH-9-62 8 4/8/03 9:05 PM Page 8-7
Page 277 of 342
8-41
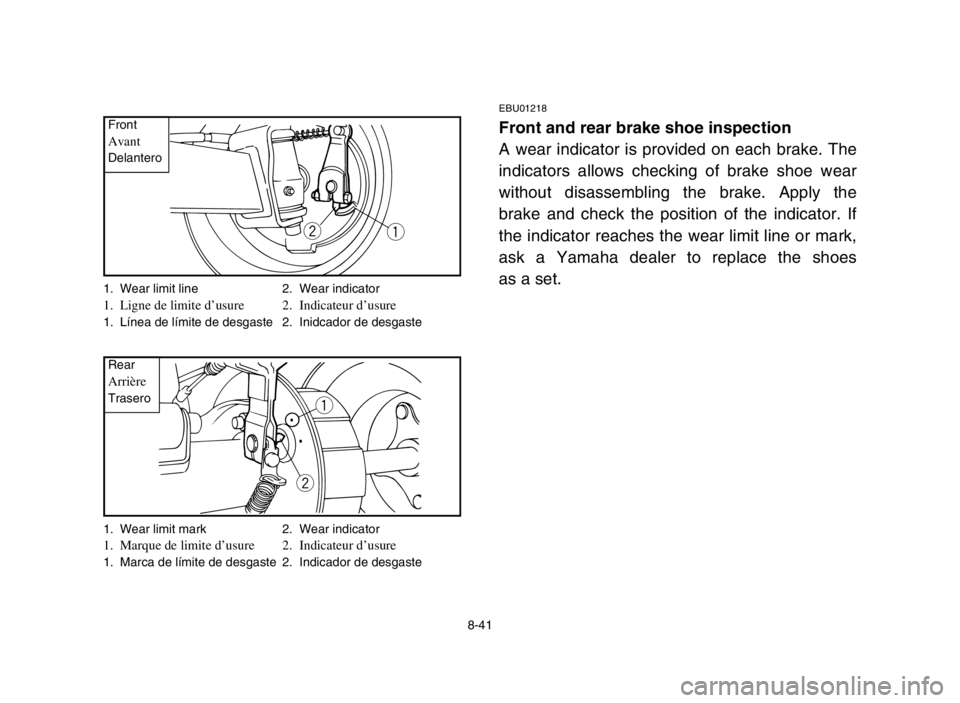
EBU01218
Front and rear brake shoe inspection
A wear indicator is provided on each brake. The
indicators allows checking of brake shoe wear
without disassembling the brake. Apply the
brake and check the position of the indicator. If
the indicator reaches the wear limit line or mark,
ask a Yamaha dealer to replace the shoes
as a set.
wq
w
q
1. Wear limit line 2. Wear indicator1. Ligne de limite d’usure 2. Indicateur d’usure1. Línea de límite de desgaste 2. Inidcador de desgaste
1. Wear limit mark 2. Wear indicator
1. Marque de limite d’usure 2. Indicateur d’usure1. Marca de límite de desgaste 2. Indicador de desgasteFront
AvantDelantero
RearArrièreTrasero
5TH-9-62 8 4/8/03 9:05 PM Page 8-41
Page 279 of 342
wq
re
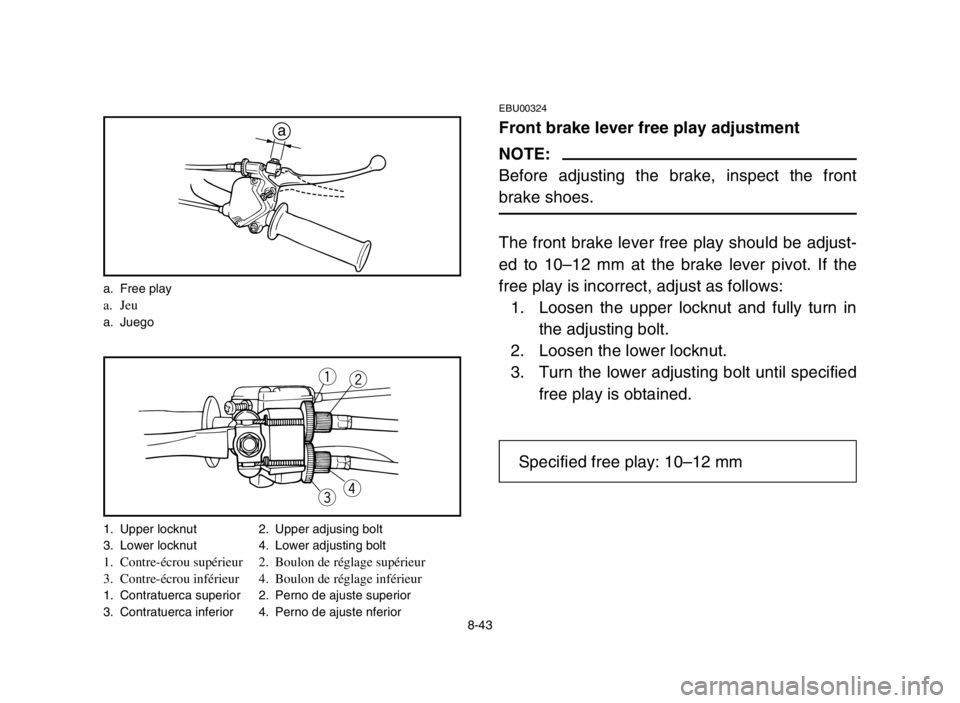
1. Upper locknut 2. Upper adjusing bolt
3. Lower locknut 4. Lower adjusting bolt
1. Contre-écrou supérieur 2. Boulon de réglage supérieur
3. Contre-écrou inférieur 4. Boulon de réglage inférieur
1. Contratuerca superior 2. Perno de ajuste superior
3. Contratuerca inferior 4. Perno de ajuste nferior
8-43
EBU00324
Front brake lever free play adjustment
NOTE:
Before adjusting the brake, inspect the front
brake shoes.
The front brake lever free play should be adjust-
ed to 10–12 mm at the brake lever pivot. If the
free play is incorrect, adjust as follows:
1. Loosen the upper locknut and fully turn in
the adjusting bolt.
2. Loosen the lower locknut.
3. Turn the lower adjusting bolt until specified
free play is obtained.
a
a. Free playa. Jeua. Juego
Specified free play: 10–12 mm
5TH-9-62 8 4/8/03 9:05 PM Page 8-43
Page 281 of 342
8-45
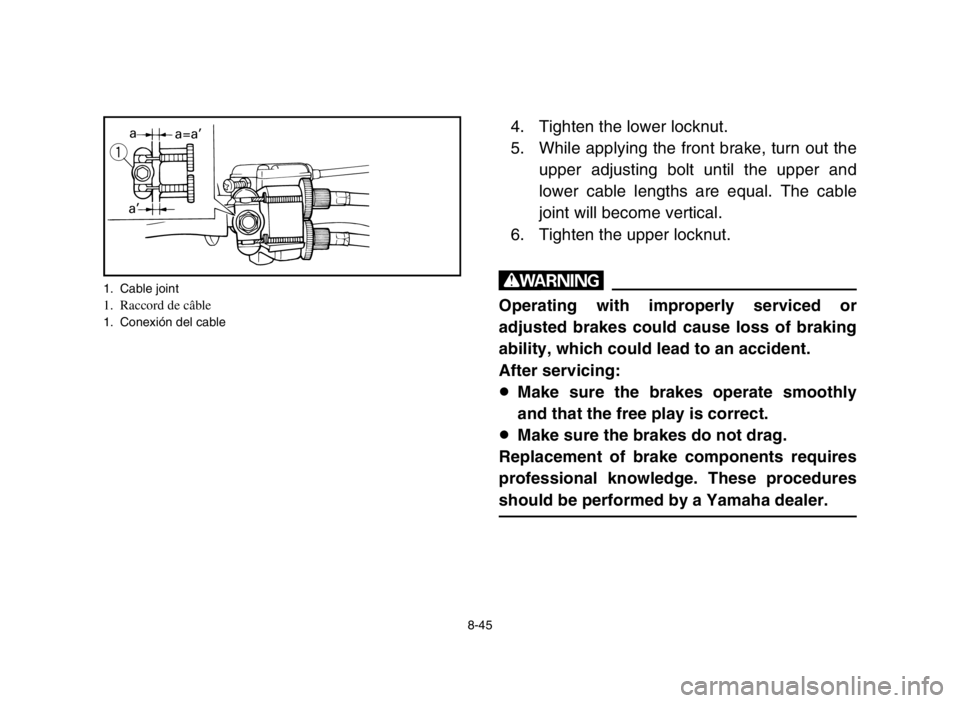
4. Tighten the lower locknut.
5. While applying the front brake, turn out the
upper adjusting bolt until the upper and
lower cable lengths are equal. The cable
joint will become vertical.
6. Tighten the upper locknut.
w
Operating with improperly serviced or
adjusted brakes could cause loss of braking
ability, which could lead to an accident.
After servicing:
8Make sure the brakes operate smoothly
and that the free play is correct.
8Make sure the brakes do not drag.
Replacement of brake components requires
professional knowledge. These procedures
should be performed by a Yamaha dealer.
q
a
a=a’
a’
1. Cable joint1. Raccord de câble1. Conexión del cable
5TH-9-62 8 4/8/03 9:05 PM Page 8-45