wheel YAMAHA YFM90R 2020 User Guide
[x] Cancel search | Manufacturer: YAMAHA, Model Year: 2020, Model line: YFM90R, Model: YAMAHA YFM90R 2020Pages: 126, PDF Size: 5.66 MB
Page 73 of 126
7-18
7
Never attempt to turn the ATV around on any
hill until you have mastered the turning tech-
nique as described in the Owner’s Manual on
level ground. Be very careful when turning
on any hill.
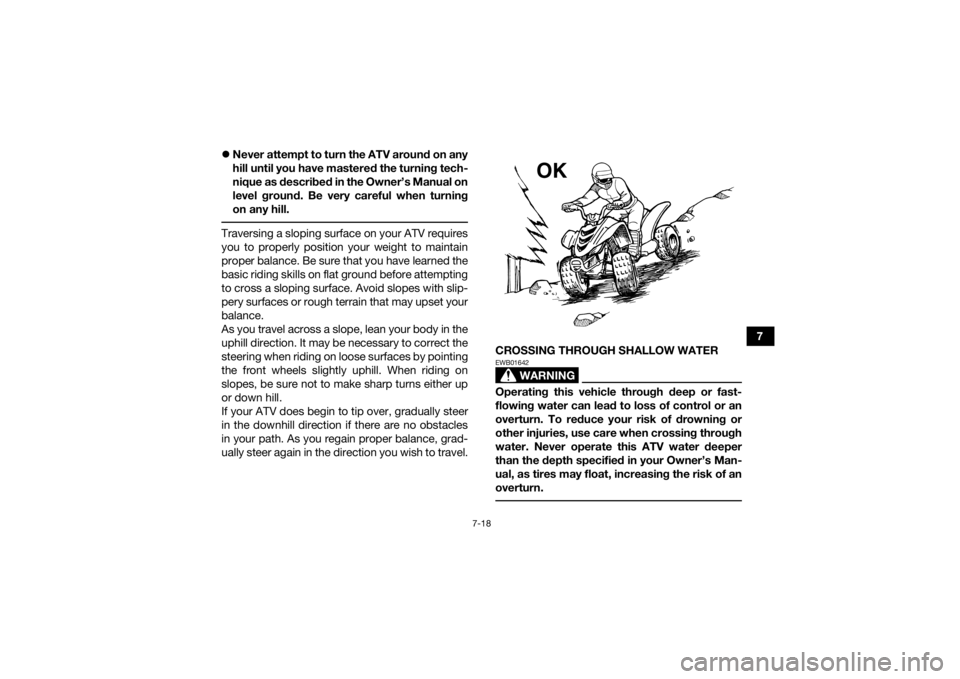
Traversing a sloping surface on your ATV requires
you to properly position your weight to maintain
proper balance. Be sure that you have learned the
basic riding skills on flat ground before attempting
to cross a sloping surface. Avoid slopes with slip-
pery surfaces or rough terrain that may upset your
balance.
As you travel across a slope, lean your body in the
uphill direction. It may be necessary to correct the
steering when riding on loose surfaces by pointing
the front wheels slightly uphill. When riding on
slopes, be sure not to make sharp turns either up
or down hill.
If your ATV does begin to tip over, gradually steer
in the downhill direction if there are no obstacles
in your path. As you regain proper balance, grad-
ually steer again in the direction you wish to travel. CROSSING THROUGH SHALLOW WATER
WARNING
EWB01642Operating this vehicle through deep or fast-
flowing water can lead to loss of control or an
overturn. To reduce your risk of drowning or
other injuries, use care when crossing through
water. Never operate this ATV water deeper
than the depth specified in your Owner’s Man-
ual, as tires may float, increasing the risk of an
overturn.
OK
UBD364E0.book Page 18 Monday, January 28, 2019 9:30 AM
Page 76 of 126
7-21
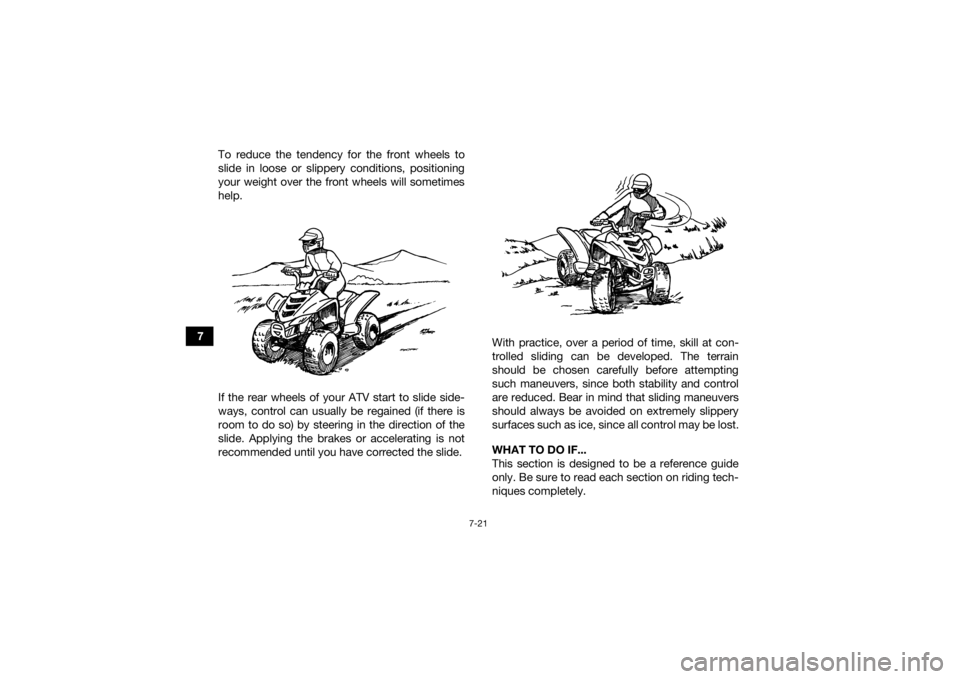
7To reduce the tendency for the front wheels to
slide in loose or slippery conditions, positioning
your weight over the front wheels will sometimes
help.
If the rear wheels of your ATV start to slide side-
ways, control can usually be regained (if there is
room to do so) by steering in the direction of the
slide. Applying the brakes or accelerating is not
recommended until you have corrected the slide.
With practice, over a period of time, skill at con-
trolled sliding can be developed. The terrain
should be chosen carefully before attempting
such maneuvers, since both stability and control
are reduced. Bear in mind that sliding maneuvers
should always be avoided on extremely slippery
surfaces such as ice, since all control may be lost.
WHAT TO DO IF...
This section is designed to be a reference guide
only. Be sure to read each section on riding tech-
niques completely.
UBD364E0.book Page 21 Monday, January 28, 2019 9:30 AM
Page 77 of 126

7-22
7
WHAT TO DO...
If your ATV doesn’t turn when you want it to:
Bring the ATV to a stop and practice the turning
maneuvers again. Be sure you are putting your
weight on the footboard to the outside of the
turn. Position your weight over the front wheels
for better control. (See page 7-12.)
If your ATV begins to tip while turning:
Lean more into the turn to regain balance. If
necessary, gradually let off the throttle and/or
steer to the outside of the turn. (See page 7-12.)
If your ATV starts to slide sideways:
Steer in the direction of the slide if you have the
room. Applying the brakes or accelerating is not
recommended until you have corrected the
slide. (See page 7-20.)
If your ATV can’t make it up a hill you are trying
to climb:
Turn the ATV around if you still have forward
speed. If not, stop, dismount on the uphill side
of the ATV and physically turn the ATV around.
If the ATV starts to slip backwards, DO NOT
USE THE REAR BRAKE – the ATV may tip over
on top of you. Dismount the ATV on the uphill
side. (See page 7-13.)
If your ATV is traversing a sloping surface:
Be sure to ride with your weight positioned to-
wards the uphill side of the ATV to maintain
proper balance. If the ATV starts to tip, steer
down the hill (if there are no obstacles in your
way) to regain balance. If you discover that the
ATV is going to tip over, dismount on the uphill
side. (See page 7-17.)
If your ATV encounters shallow water:
Ride slowly and carefully through slow moving
water, watching for obstacles. Be sure to let wa-
ter drain from the ATV and CHECK YOUR
BRAKES FOR PROPER OPERATION when you
come out of the water. Do not continue to ride
your ATV until you have regained adequate
braking ability. (See page 7-18.)
UBD364E0.book Page 22 Monday, January 28, 2019 9:30 AM
Page 83 of 126

8-6
8
5*Wheels • Check runout and for damage, and replace if nec-
essary. √ √√√
6 *Tires • Check tread depth and for damage, and replace if
necessary.
• Check air pressure and balance, and correct if necessary. √ √√√
7 *Wheel hub bearings • Check for looseness or damage, and replace if
necessary. √ √√√
8 *Front arm pivots • Lubricate with lithium-soap-based grease. √√√
9 Drive chain • Check chain slack and adjust if necessary.
• Check rear wheel alignment and correct if neces-
sary.
• Clean and lubricate. √√√√√
10 *Drive chain rollers • Check for wear and replace if necessary. √√√
11 *V- b e l t • Check for wear, cracks or other damage, and re-
place if necessary. √ √√√
12 *Chassis fasteners • Make sure that all nuts, bolts, and screws are
properly tightened. √√√√√
13 *Shock absorber as-
semblies • Check operation and correct if necessary.
• Check for oil leakage and replace if necessary.
√√√
14 *Front knuckle piv-
ots • Lubricate with lithium-soap-based grease.
√√√
NO. ITEM
CHECK OR MAINTENANCE
JOB INITIAL EVERY
Whichev- er comes first month136612
km (mi) 320
(200) 1300
(800) 2500
(1600) 2500
(1600) 5000
(3200)
hours 20 80 160 160 320
UBD364E0.book Page 6 Monday, January 28, 2019 9:30 AM
Page 104 of 126
8-27
84. To tighten the drive chain, turn the drive chain
slack adjusting nut in direction (a). To loosen
the drive chain, turn the adjusting nut in direc-
tion (b) and push the rear wheels forward.
NOTICE: Improper drive chain slack will
overload the engine as well as other vital
parts of the ATV and can lead to drive
chain slippage or breakage. To prevent
this from occurring, keep the drive chain
slack within the specified limits.
[ECB00543]
5. Tighten the locknut, and then the bolts and nuts to their specified torques.
6. Adjust the rear brake lever free play. (See page 8-24.)
EBU24883Lubricating the drive chainThe drive chain must be cleaned and lubricated at
the intervals specified in the periodic maintenance
and lubrication chart, otherwise it will quickly wear
out, especially when riding in dusty or wet areas.
Service the drive chain as follows.NOTICEECB00562The drive chain must be lubricated after wash-
ing the ATV or riding in the rain or wet areas. 1. Clean the drive chain with kerosene and asmall soft brush. NOTICE: To prevent dam-
aging the O-rings, do not clean the drive
chain with steam cleaners, high-pressure
washers or inappropriate solvents.
[ECB00572]
Tightening torques: Locknut:22 N·m (2.2 kgf·m, 16 lb·ft)
Bolt: 45 N·m (4.5 kgf·m, 33 lb·ft)
Nut: 54 N·m (5.4 kgf·m, 40 lb·ft)
UBD364E0.book Page 27 Monday, January 28, 2019 9:30 AM
Page 106 of 126
8-29
8
EBU28703Checking and lubricating the front and
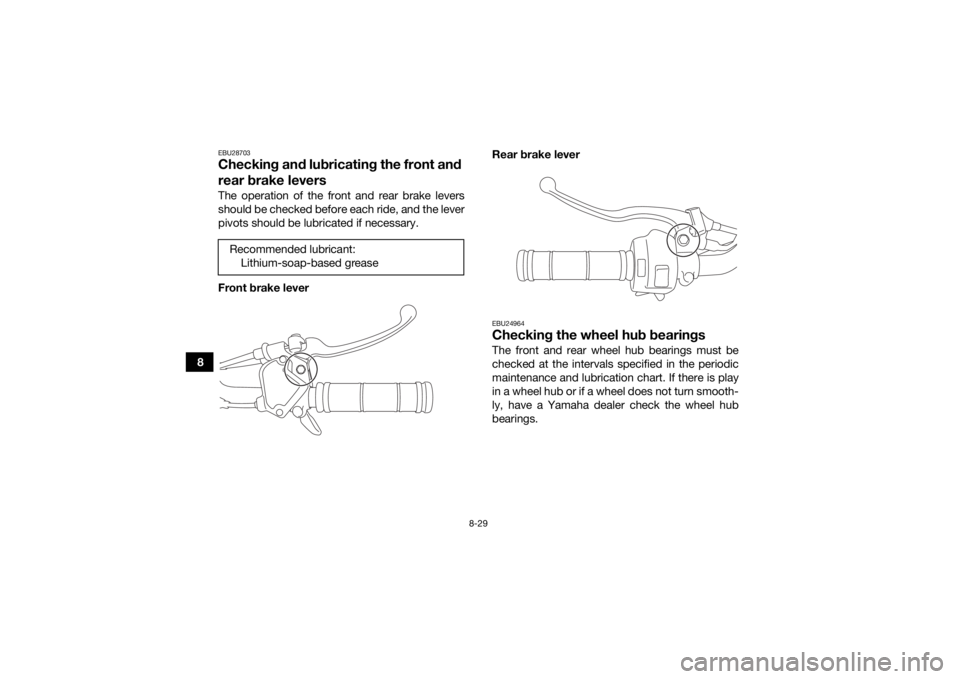
rear brake leversThe operation of the front and rear brake levers
should be checked before each ride, and the lever
pivots should be lubricated if necessary.
Front brake leverRear brake lever
EBU24964Checking the wheel hub bearingsThe front and rear wheel hub bearings must be
checked at the intervals specified in the periodic
maintenance and lubrication chart. If there is play
in a wheel hub or if a wheel does not turn smooth-
ly, have a Yamaha dealer check the wheel hub
bearings.
Recommended lubricant:
Lithium-soap-based grease
UBD364E0.book Page 29 Monday, January 28, 2019 9:30 AM
Page 112 of 126
8-35
83. Remove the blown fuse, and then install a
new fuse of the specified amperage.
WARNING! Always use a fuse of the spec-
ified rating, and never use a substitute ob-
ject in place of the proper fuse. An
improper fuse or a substitute object can
cause damage to the electrical system,
which could lead to a fire.
[EWB02173]
4. Turn on the main switch and start the engine.
5. Install the seat.
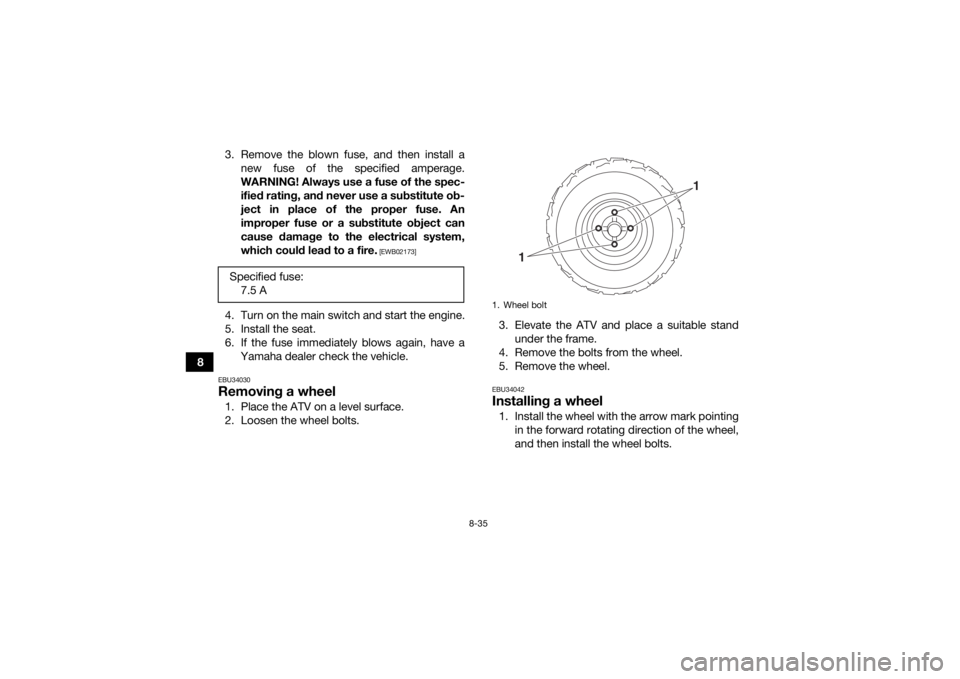
6. If the fuse immediately blows again, have aYamaha dealer check the vehicle.EBU34030Removing a wheel1. Place the ATV on a level surface.
2. Loosen the wheel bolts. 3. Elevate the ATV and place a suitable stand
under the frame.
4. Remove the bolts from the wheel.
5. Remove the wheel.
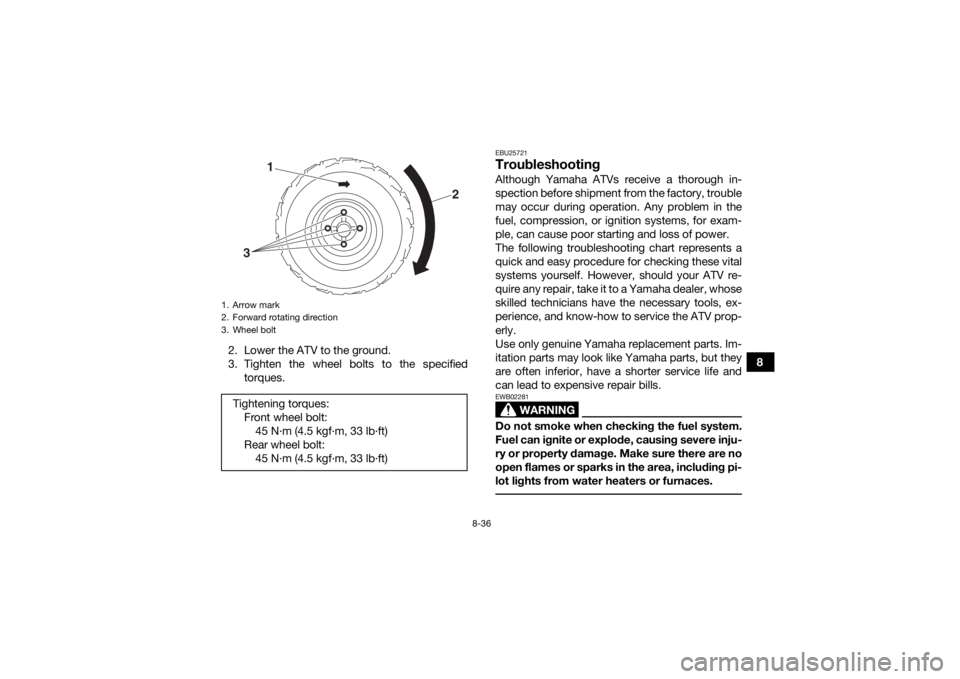
EBU34042Installing a wheel1. Install the wheel with the arrow mark pointing in the forward rotating direction of the wheel,
and then install the wheel bolts.
Specified fuse:
7.5 A1. Wheel bolt
1
1
UBD364E0.book Page 35 Monday, January 28, 2019 9:30 AM
Page 113 of 126
8-36
8
2. Lower the ATV to the ground.
3. Tighten the wheel bolts to the specified
torques.
EBU25721TroubleshootingAlthough Yamaha ATVs receive a thorough in-
spection before shipment from the factory, trouble
may occur during operation. Any problem in the
fuel, compression, or ignition systems, for exam-
ple, can cause poor starting and loss of power.
The following troubleshooting chart represents a
quick and easy procedure for checking these vital
systems yourself. However, should your ATV re-
quire any repair, take it to a Yamaha dealer, whose
skilled technicians have the necessary tools, ex-
perience, and know-how to service the ATV prop-
erly.
Use only genuine Yamaha replacement parts. Im-
itation parts may look like Yamaha parts, but they
are often inferior, have a shorter service life and
can lead to expensive repair bills.
WARNING
EWB02281Do not smoke when checking the fuel system.
Fuel can ignite or explode, causing severe inju-
ry or property damage. Make sure there are no
open flames or sparks in the area, including pi-
lot lights from water heaters or furnaces.
1. Arrow mark
2. Forward rotating direction
3. Wheel boltTightening torques:Front wheel bolt:45 N·m (4.5 kgf·m, 33 lb·ft)
Rear wheel bolt: 45 N·m (4.5 kgf·m, 33 lb·ft)3
1
2
UBD364E0.book Page 36 Monday, January 28, 2019 9:30 AM
Page 115 of 126

9-1
9
EBU25861
CLEANING AND STORAGE
EBU25903CleaningFrequent, thorough cleaning of your ATV will not
only enhance its appearance but will improve its
general performance and extend the useful life of
many components.1. Before cleaning the ATV: a. Block off the end of the exhaust pipe toprevent water entry. A plastic bag and
strong rubber band may be used.
b. Make sure the spark plug and all filler caps are properly installed.
2. If the engine case is excessively greasy, apply degreaser with a paint brush. Do not apply
degreaser to the chain, sprockets or wheel
axles.
3. Rinse the dirt and degreaser off with a garden hose. Use only enough pressure to do the
job. WARNING! Wet brakes may have re-
duced stopping ability, increasing the
chance of an accident. Test the brakes af-
ter washing. Apply the brakes several
times at slow speeds to let friction dry out
the linings.
[EWB02312]
NOTICE: Excessive wa- ter pressure may cause water seepage
and deterioration of wheel bearings,
brakes, transmission seals and electrical
devices. Many expensive repair bills have
resulted from improper high-pressure de-
tergent applications such as those avail-
able in coin-operated car washers.
[ECB00712]
4. Once most of the dirt has been hosed off,
wash all surfaces with warm water and mild,
detergent-type soap. An old toothbrush or
bottle brush is handy for hard-to-reach pla-
ces.
5. Rinse the ATV off immediately with clean wa- ter and dry all surfaces with a chamois, clean
towel or soft absorbing cloth.
6. Dry the chain and lubricate it to prevent it from rusting.
7. Clean the seat with a vinyl upholstery cleaner to keep the cover pliable and glossy.
8. Automotive type wax may be applied to all painted and chrome plated surfaces. Avoid
combination cleaner-waxes. Many contain
UBD364E0.book Page 1 Monday, January 28, 2019 9:30 AM
Page 117 of 126

9-3
9
e. Install the spark plug and the spark plug
cap.
6. Lubricate all control cables and the pivoting points of all levers.
7. Put the frame on stands or blocks to raise all wheels off the ground. (Alternatively, turn the
wheels each month to prevent the tires from
degrading in one spot.)
8. Cover the muffler outlet with a plastic bag to prevent moisture from entering it.
9. Remove the battery and fully charge it. (See page 8-31.)
UBD364E0.book Page 3 Monday, January 28, 2019 9:30 AM