warning YAMAHA YFM90R 2022 User Guide
[x] Cancel search | Manufacturer: YAMAHA, Model Year: 2022, Model line: YFM90R, Model: YAMAHA YFM90R 2022Pages: 126, PDF Size: 4.99 MB
Page 41 of 126
5-14
5
WARNING
EWB00401Always adjust the shock absorber assemblies
on the left and right side to the same setting.
Uneven adjustment can cause poor handling
and loss of stability, which could lead to an ac-
cident. NOTICEECB01091Never turn the adjusting mechanism beyond
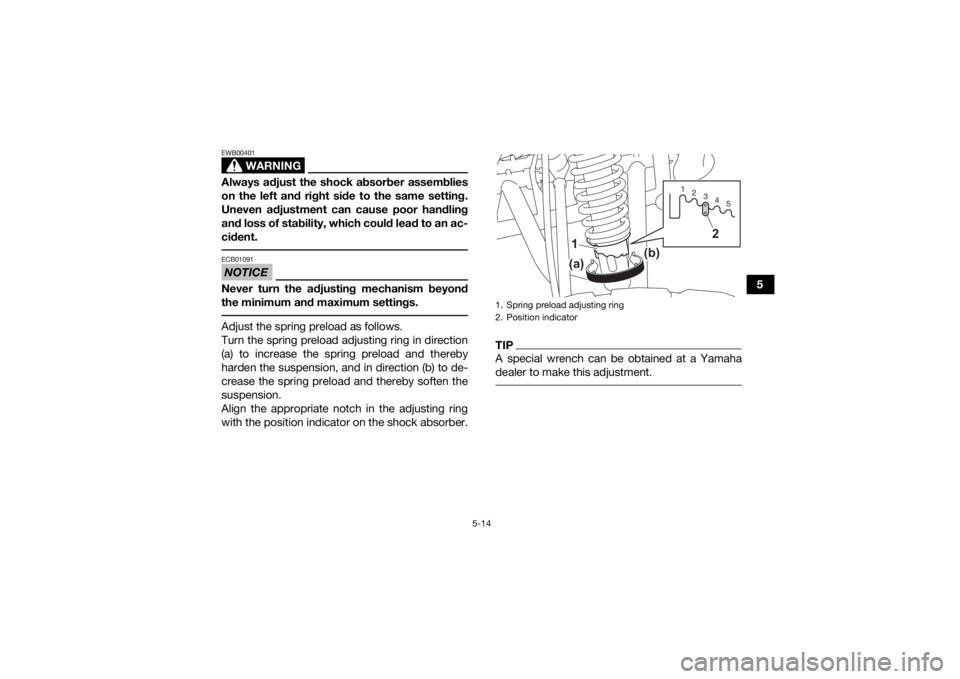
the minimum and maximum settings. Adjust the spring preload as follows.
Turn the spring preload adjusting ring in direction
(a) to increase the spring preload and thereby
harden the suspension, and in direction (b) to de-
crease the spring preload and thereby soften the
suspension.
Align the appropriate notch in the adjusting ring
with the position indicator on the shock absorber.
TIPA special wrench can be obtained at a Yamaha
dealer to make this adjustment. 1. Spring preload adjusting ring
2. Position indicator
123 45
2
1(a)
(b)
UBD366E0.book Page 14 Thursday, June 10, 2021 2:39 PM
Page 44 of 126
6-1
6
EBU19203
PRE-OPERATION CHECKS
EBU19227Inspect your vehicle each time you use it to make sure the vehicle is in safe operating condition. Always
follow the inspection and maintenance procedures and schedules described in the Owner’s Manual.
WARNING
EWB00482Failure to inspect or maintain the vehicle properly increases the possibility of an accident or equip-
ment damage. Do not operate the vehicle if you find any problem. If a problem cannot be corrected
by the procedures provided in this manual, have the vehicle inspected by a Yamaha dealer. Before using this vehicle, check the following points:
ITEMROUTINE PAGE
Fuel • Check fuel level in fuel tank,
and add recommended fuel if neces-
sary.
• Check fuel line for leakage. Correct if necessary. 5-9, 6-3
Engine oil • Check oil level in engine, and add recommended oil to specified
level if necessary.
• Check ATV for oil leakage. Correct if necessary. 6-3, 9-10
Transmission • Check transmission case for leakage. 6-3, 9-14
Front brake • Check operation, and correct if necessary.
• Lubricate cable if necessary.
• Check lever free play, and adjust if necessary. 6-3, 9-21, 9-23
Rear brake • Check operation, and correct if necessary.
• Lubricate cable if necessary.
• Check lever free play, and adjust if necessary. 6-3, 9-21, 9-24
UBD366E0.book Page 1 Thursday, June 10, 2021 2:39 PM
Page 47 of 126
6-4
6
Tire pressure
Use a tire pressure gauge to check and adjust tire
air pressure when the tires are cold. The tire air
pressure must be equal on both sides.
WARNING! Operation of this vehicle with im- proper tire pressure may cause severe injury or
death from loss of control or rollover. Tire
pressure below the minimum specified could
also cause the tire to dislodge from the rim un-
der severe riding conditions.
[EWB02542]
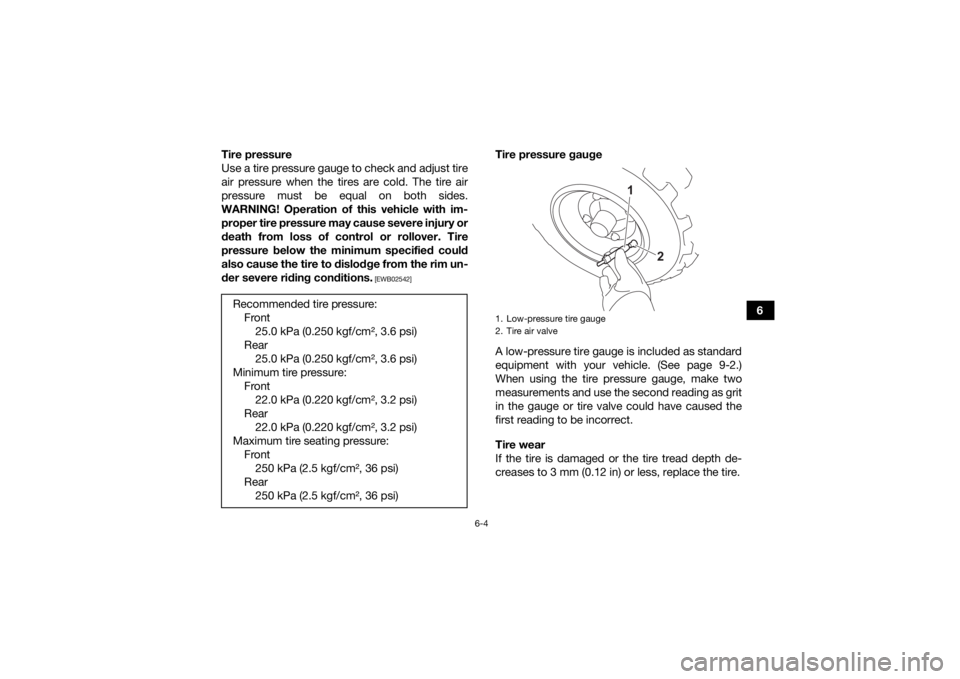
Tire pressure gauge
A low-pressure tire gauge is included as standard
equipment with your vehicle. (See page 9-2.)
When using the tire pressure gauge, make two
measurements and use the second reading as grit
in the gauge or tire valve could have caused the
first reading to be incorrect.
Tire wear
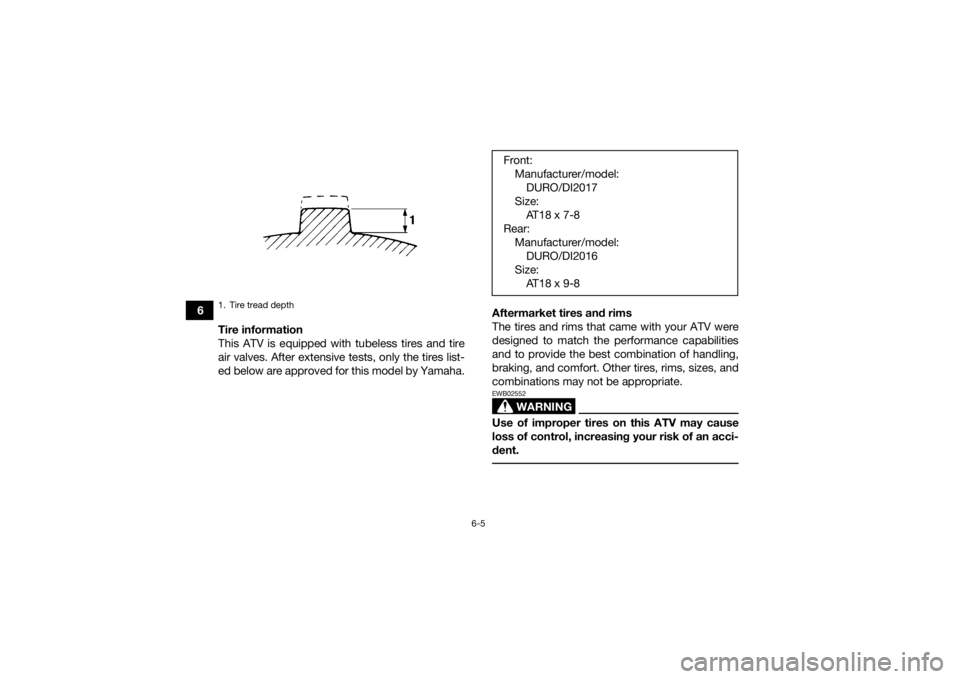
If the tire is damaged or the tire tread depth de-
creases to 3 mm (0.12 in) or less, replace the tire.
Recommended tire pressure:
Front25.0 kPa (0.250 kgf/cm², 3.6 psi)
Rear 25.0 kPa (0.250 kgf/cm², 3.6 psi)
Minimum tire pressure: Front22.0 kPa (0.220 kgf/cm², 3.2 psi)
Rear 22.0 kPa (0.220 kgf/cm², 3.2 psi)
Maximum tire seating pressure: Front250 kPa (2.5 kgf/cm², 36 psi)
Rear 250 kPa (2.5 kgf/cm², 36 psi)1. Low-pressure tire gauge
2. Tire air valve
1
2
UBD366E0.book Page 4 Thursday, June 10, 2021 2:39 PM
Page 48 of 126
6-5
6Tire information
This ATV is equipped with tubeless tires and tire
air valves. After extensive tests, only the tires list-
ed below are approved for this model by Yamaha. Aftermarket tires and rims
The tires and rims that came with your ATV were
designed to match the performance capabilities
and to provide the best combination of handling,
braking, and comfort. Other tires, rims, sizes, and
combinations may not be appropriate.
WARNING
EWB02552Use of improper tires on this ATV may cause
loss of control, increasing your risk of an acci-
dent.
1. Tire tread depth
Front:
Manufacturer/model:DURO/DI2017
Size: AT18 x 7-8
Rear: Manufacturer/model:DURO/DI2016
Size: AT18 x 9-8
UBD366E0.book Page 5 Thursday, June 10, 2021 2:39 PM
Page 50 of 126

7-1
7
EBU19882
OPERATION
EBU19902Read the Owner’s Manual carefully before riding
the ATV. If there is a control or function you do not
understand, ask your Yamaha dealer.
WARNING
EWB00632Read the Owner’s Manual carefully to become
familiar with all controls in order to help pre-
vent any loss of control, which could cause an
accident or injury. EBU33822Starting a cold engineNOTICEECB00151See the “Engine break-in” section on page 7-4
prior to operating the engine for the first time. 1. Set the parking brake. (The engine can bestarted only when the rear brake lever is ap-
plied.)
2. Turn the fuel cock to “ON”. 3. Turn the key to “ON” and set the engine stop
switch to “ ”.
4. Shift the drive select lever into the neutral po- sition. (The neutral indicator light should
come on.)
5. Position the starter (choke) lever according to the ambient temperature.
Position (1):
Cold engine start with ambient temperature
below 5 °C (40 °F).
Position (2):
Cold engine start with ambient temperature
between 0 °C (30 °F) and 30 °C (90 °F).
Position (3):
Cold engine start with ambient temperature
above 25 °C (80 °F).
UBD366E0.book Page 1 Thursday, June 10, 2021 2:39 PM
Page 52 of 126

7-3
7
EBU20292Starting a warm engineFollow the same procedure as for starting a cold
engine, with the exception that the starter (choke)
is not required when the engine is warm. Instead,
start the engine with the throttle slightly open.EBU33831Operating the drive select lever and
driving in reverseNOTICEECB00171Before shifting, stop the ATV, otherwise the
transmission may be damaged. Shifting: Forward1. Bring the ATV to a complete stop.
2. Apply the rear brake lever.
3. Shift from neutral to forward by moving the drive select lever along the shift guide.TIPMake sure that the drive select lever is completely
shifted into position.
4. Open the throttle lever gradually.
Shifting: Reverse
WARNING
EWB00721Improper operation in reverse could make you
hit an obstacle or even a person behind you,
resulting in serious injury. When you shift into
reverse, make sure there are no people or ob-
stacles behind you. When it is safe to proceed,
go slowly. 1. Drive select lever
2. F (Forward)
3. N (Neutral)
4. R (Reverse)
FNR
234
1
UBD366E0.book Page 3 Thursday, June 10, 2021 2:39 PM
Page 54 of 126

7-5
7240 km (150 mi) or 15 hours and beyond
The ATV can now be operated normally.
NOTICEECB00221If any engine trouble should occur during the
engine break-in period, immediately have a
Yamaha dealer check the ATV. EBU30021ParkingWhen parking the ATV, apply the rear brake lever,
shift the drive select lever into the forward posi-
tion, stop the engine, apply the parking brake, and
then turn the fuel cock to “OFF”.
EBU20765Parking on a slope
WARNING
EWB00832Avoid parking on hills or other inclines. Parking
on a hill or other incline could cause the ATV to
roll out of control, increasing the chance of an
accident. If you must park on an incline, place
the ATV transversely across the incline, shift
the drive select lever to the forward position,
stop the engine, apply the parking brake, and
then block the front and rear wheels with rocks
or other objects.
Never park the ATV on hills that are too steep
to walk up easily. 1. With the transmission in the forward position, bring the ATV to a stop by applying the
brakes.
2. Stop the engine.
3. With the rear brake lever applied, apply the parking brake, and then slowly release the
rear brake lever.
4. Turn the fuel cock to “OFF”.
1. Parking brake lock plate
1
UBD366E0.book Page 5 Thursday, June 10, 2021 2:39 PM
Page 56 of 126

7-7
7
Do not mount an accessory where it could inter-
fere with your ability to control the ATV. Exam-
ples include (but are not limited to) a heavy or
bulky object attached to the handlebars which
could make steering difficult, an accessory that
limits your ability to move around on the seat, or
one that limits your view.
Use extra caution when riding an ATV with ac-
cessories. The ATV may handle differently than
it does without accessories.
EBU33880Loading
WARNING
EWB00821Never exceed the stated load capacity for this
ATV. Overloading this ATV or carrying or tow-
ing cargo improperly could cause changes in
ATV handling which could lead to an accident.
Cargo should be properly distributed and se-
curely attached. Reduce speed when carrying
cargo or pulling a trailer. Allow greater dis-
tance for braking. As originally equipped, this ATV is not designed to
carry cargo or tow a trailer. If you choose to add
accessories so that you can carry cargo or tow a trailer, you must use common sense and good
judgment as the stability and handling of an ATV
can be changed. When adding accessories, keep
the following points in mind:
Never exceed the weight limits shown. An over-
loaded ATV can be unstable.
If you are carrying cargo and towing a trailer, in-
clude the tongue weight in the maximum ATV
load limit.
Load cargo on the carriers as close to the center
of the ATV as possible. Put cargo at the rear of
the front carrier, at the front of the rear carrier,
and center it.
Tie down cargo securely to the carriers. Make
sure cargo in the trailer cannot move around. A
shifting load can cause an accident.
Make sure the load does not interfere with con-
trols or your ability to see where you are going.
Ride more slowly than you would without a
load. The more weight you carry, the slower you
should go. MAXIMUM LOADING LIMIT
ATV loading limit (total weight of rider, car-
go, accessories, and tongue weight):82.0 kg (181 lb)UBD366E0.book Page 7 Thursday, June 10, 2021 2:39 PM
Page 59 of 126
8-2
8
EBU34101GETTING TO KNOW YOUR ATV
This ATV is intended for recreational use by young
operators under adult supervision. This section,
“Riding your ATV”, provides general riding instruc-
tions which are appropriate for all types of riding.
Riding your ATV requires special skills acquired
through practice over a period of time. Take the
time to learn the basic techniques well before at-
tempting more difficult maneuvers.
Riding your new ATV can be a very enjoyable ac-
tivity, providing you with hours of pleasure. But it
is essential to familiarize yourself with the opera-
tion of the ATV to achieve the skill necessary to
enjoy riding safely. Before you begin to ride, be
sure you have read this manual completely and
understand how to operate all of the ATV’s con-
trols. Pay particular attention to the safety infor-
mation on pages 3-1 to 3-7 and all notice and
warning labels on the vehicle.RIDE WITH CARE AND GOOD JUDGMENT
Beginning riders should get training from a
certified instructor.
WARNING
EWB01382
Do not operate this ATV or allow anyone else
to operate it without proper instruction. The
risk of an accident is greatly increased if the
operator does not know how to operate the
ATV properly in different situations and on
different types of terrain.
Do not operate this ATV at speeds too fast
for your skills or the conditions, as this in-
creases your chances of losing control of the
ATV and an accident. Always go at a speed
that is proper for the terrain, visibility and op-
erating conditions, and your experience. Riding your ATV requires skills acquired
through practice over a period of time.
Become familiar with riding this ATV by riding at
slow speeds first, even if you have experience rid-
ing other ATVs. Do not attempt to operate it at
higher performance levels until you are familiar
with this ATV’s handling and performance charac-
UBD366E0.book Page 2 Thursday, June 10, 2021 2:39 PM
Page 60 of 126
8-3
8teristics. Take the time to learn the basic tech-
niques well before attempting more difficult
maneuvers.
Not recommended for children under 10 years
of age.
WARNING
EWB03530A child under 10 should never operate an ATV
with engine size greater than 70 cc. Use by
children of ATVs that are not recommended for
their age can lead to severe injury or death of
the child.
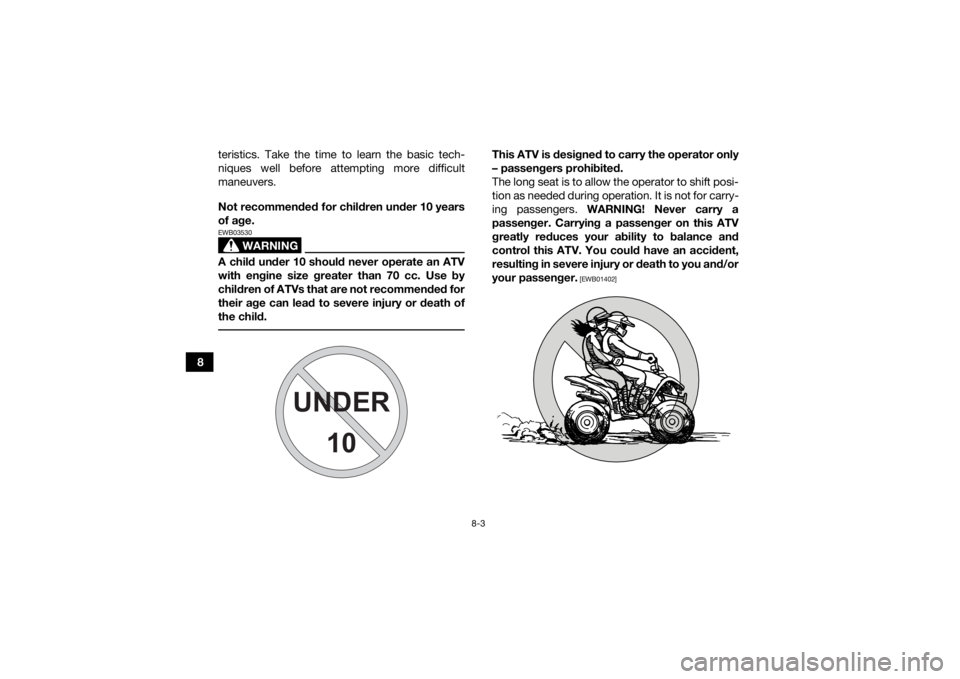
This ATV is designed to carry the operator only
– passengers prohibited.
The long seat is to allow the operator to shift posi-
tion as needed during operation. It is not for carry-
ing passengers.
WARNING! Never carry a
passenger. Carrying a passenger on this ATV
greatly reduces your ability to balance and
control this ATV. You could have an accident,
resulting in severe injury or death to you and/or
your passenger.
[EWB01402]
UNDER
10
UBD366E0.book Page 3 Thursday, June 10, 2021 2:39 PM