engine oil YAMAHA YZ85 2005 Notices Demploi (in French)
[x] Cancel search | Manufacturer: YAMAHA, Model Year: 2005, Model line: YZ85, Model: YAMAHA YZ85 2005Pages: 508, PDF Size: 10.47 MB
Page 8 of 508
6. GASOLINE CAN CAUSE INJURY.
If you should swallow some gasoline,
inhale excess gasoline vapors, or
allow any gasoline to get into your
eyes, contact a doctor immediately. If
any gasoline spills onto your skin or
clothing, immediately wash skin areas
with soap and water, and change your
clothes.
7. ONLY OPERATE THE MACHINE IN AN
AREA WITH ADEQUATE VENTILA-
TION.
Never start the engine or let it run for
any length of time in an enclosed area.
Exhaust fumes are poisonous. These
fumes contain carbon monoxide,
which by itself is odorless and color-
less. Carbon monoxide is a dangerous
gas which can cause unconscious-
ness or can be lethal.
8. PARK THE MACHINE CAREFULLY;
TURN OFF THE ENGINE.
Always turn off the engine if you are
going to leave the machine. Do not
park the machine on a slope or soft
ground as it may fall over.
9. THE ENGINE, EXHAUST PIPE, MUF-
FLER, AND OIL TANK WILL BE VERY
HOT AFTER THE ENGINE HAS BEEN
RUN.
Be careful not to touch them or to
allow any clothing item to contact
them during inspection or repair.
10. PROPERLY SECURE THE MACHINE
BEFORE TRANSPORTING IT.
When transporting the machine in
another vehicle, always be sure it is
properly secured and in an upright
position and that the fuel cock is in
the “OFF” position. Otherwise, fuel
may leak out of the carburetor or fuel
tank.
Page 16 of 508
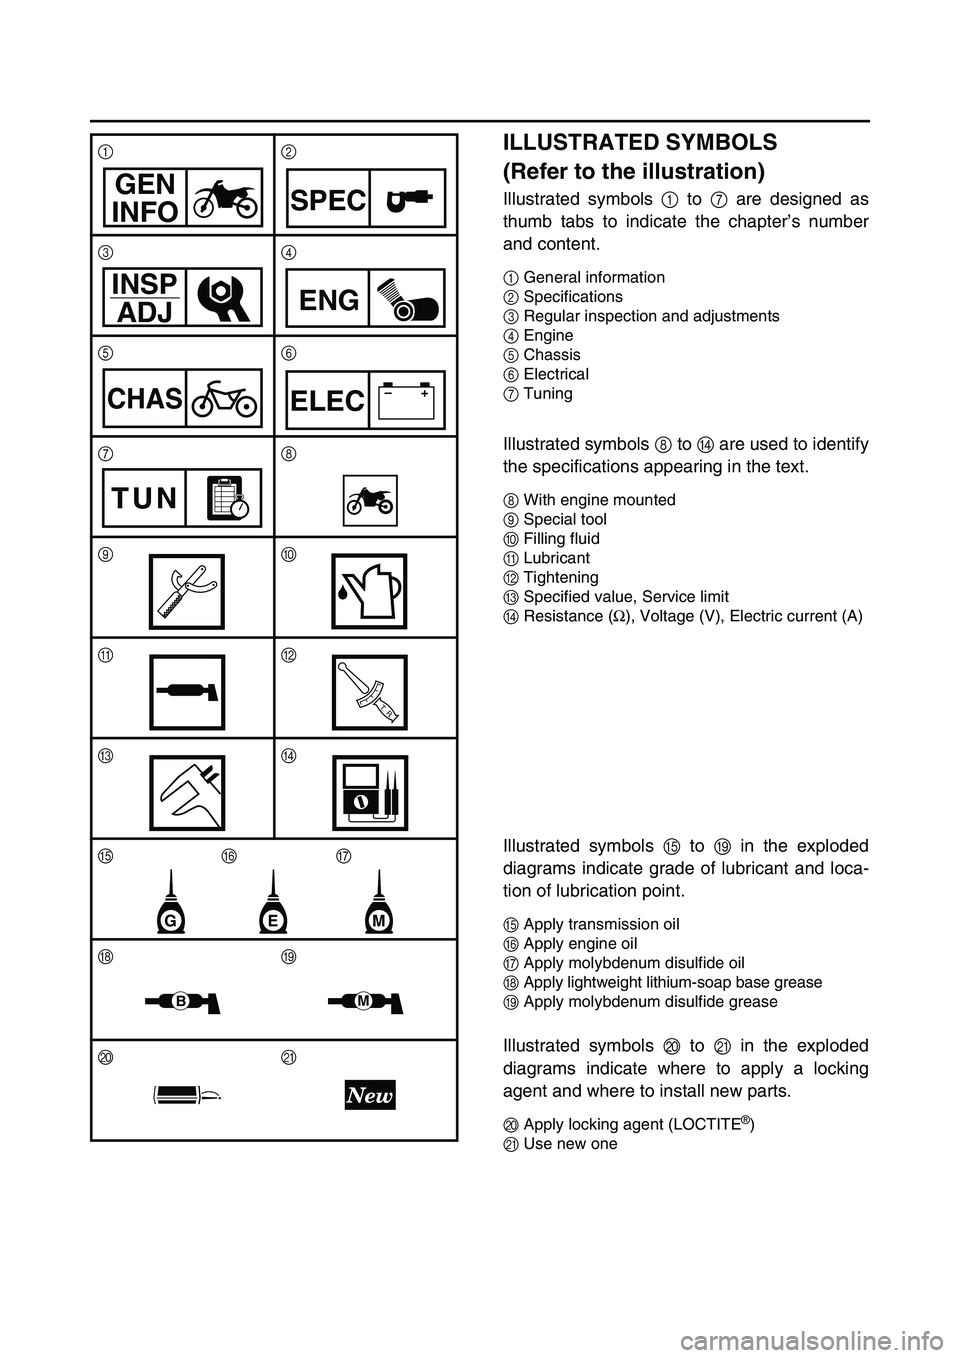
ILLUSTRATED SYMBOLS
(Refer to the illustration)
Illustrated symbols 1 to 7 are designed as
thumb tabs to indicate the chapter’s number
and content.
1General information
2Specifications
3Regular inspection and adjustments
4Engine
5Chassis
6Electrical
7Tuning
Illustrated symbols 8 to D are used to identify
the specifications appearing in the text.
8With engine mounted
9Special tool
0Filling fluid
ALubricant
BTightening
CSpecified value, Service limit
DResistance (
Ω), Voltage (V), Electric current (A)
Illustrated symbols E to I in the exploded
diagrams indicate grade of lubricant and loca-
tion of lubrication point.
EApply transmission oil
FApply engine oil
GApply molybdenum disulfide oil
HApply lightweight lithium-soap base grease
IApply molybdenum disulfide grease
Illustrated symbols J to K in the exploded
diagrams indicate where to apply a locking
agent and where to install new parts.
JApply locking agent (LOCTITE®)
KUse new one 12
34
56
78
90
AB
CD
EFG
HI
JK
GEN
INFO
SPEC
INSP
ADJ
ENG
CHAS–+ELEC
TUN
T R..
EMG
BM
Page 20 of 508

EC0A0000
CONTENTS
CHAPTER 1
GENERAL INFORMATION
DESCRIPTION
........................................... 1-1
MACHINE IDENTIFICATION
..................... 1-2
IMPORTANT INFORMATION
.................... 1-3
CHECKING OF CONNECTION
................. 1-6
SPECIAL TOOLS
...................................... 1-7
CONTROL FUNCTIONS
............................ 1-9
FUEL AND ENGINE MIXING OIL
............ 1-13
STARTING AND BREAK-IN
.................... 1-14
TORQUE-CHECK POINTS
...................... 1-17
CLEANING AND STORAGE
................... 1-18
CHAPTER 2
SPECIFICATIONS
GENERAL SPECIFICATIONS
................... 2-1
MAINTENANCE SPECIFICATIONS
.......... 2-4
ENGINE
................................................... 2-4
CHASSIS
................................................. 2-8
YZ85
..................................................... 2-8
YZ85LW
.............................................. 2-10
ELECTRICAL
........................................ 2-14
GENERAL TORQUE
SPECIFICATIONS
................................... 2-15
DEFINITION OF UNITS
........................... 2-15
CABLE ROUTING DIAGRAM
................. 2-16
Page 32 of 508
1 - 4
GEN
INFO
IMPORTANT INFORMATION
EC132000
ALL REPLACEMENT PARTS
1. We recommend to use Yamaha genuine
parts for all replacements. Use oil and/or
grease recommended by Yamaha for
assembly and adjustment.
EC133000
GASKETS, OIL SEALS AND O-RINGS
1. All gaskets, oil seals, and O-rings should
be replaced when an engine is overhauled.
All gasket surfaces, oil seal lips, and O-
rings must be cleaned.
2. Properly oil all mating parts and bearings
during reassembly. Apply grease to the oil
seal lips.
EC134000
LOCK WASHERS/PLATES AND COTTER
PINS
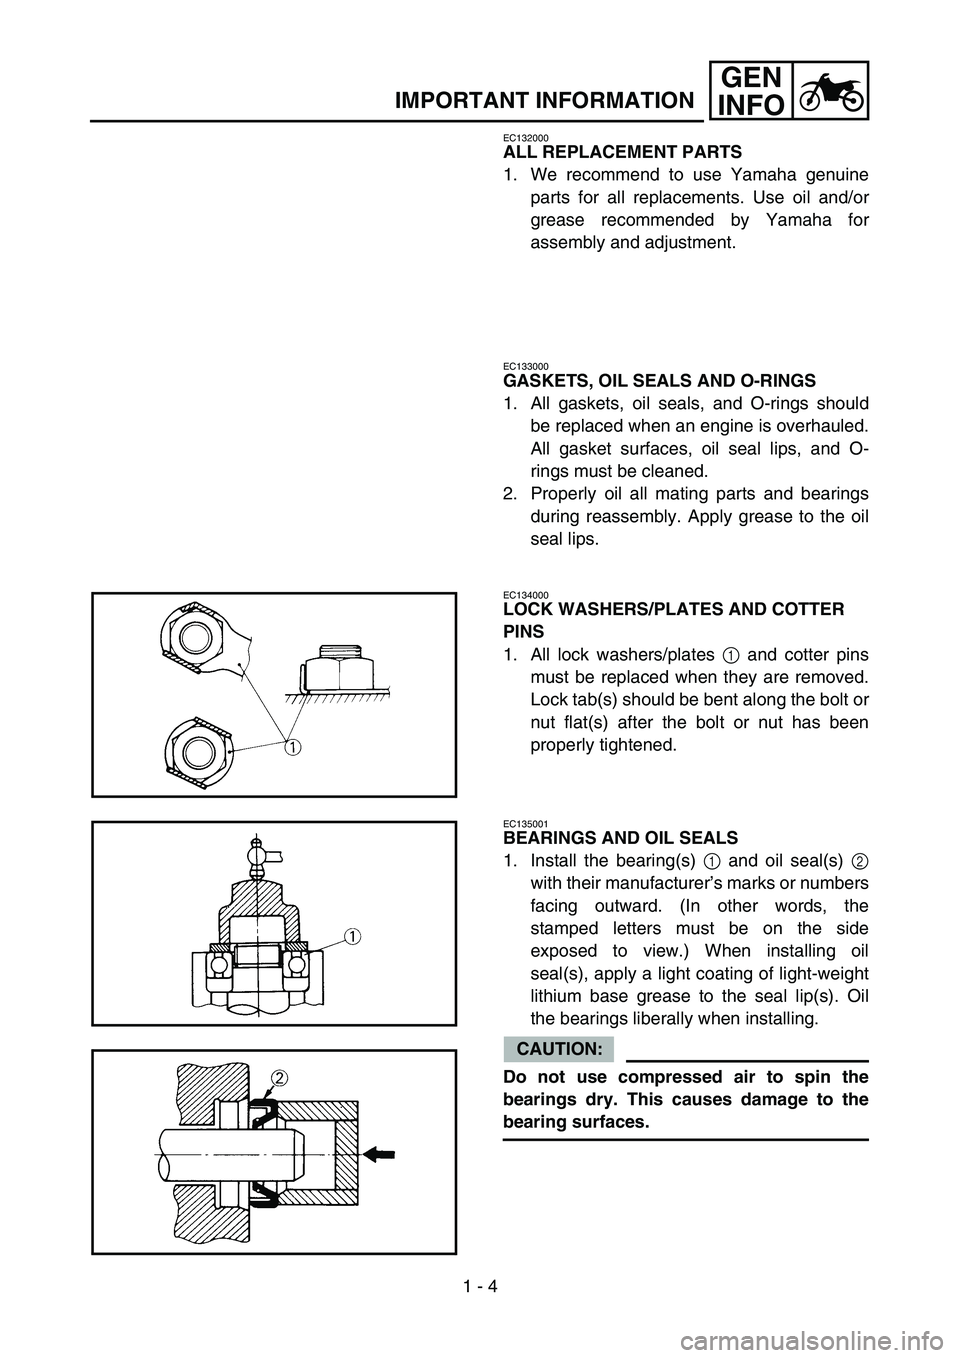
1. All lock washers/plates 1 and cotter pins
must be replaced when they are removed.
Lock tab(s) should be bent along the bolt or
nut flat(s) after the bolt or nut has been
properly tightened.
5PA10120
EC135001
BEARINGS AND OIL SEALS
1. Install the bearing(s) 1 and oil seal(s) 2
with their manufacturer’s marks or numbers
facing outward. (In other words, the
stamped letters must be on the side
exposed to view.) When installing oil
seal(s), apply a light coating of light-weight
lithium base grease to the seal lip(s). Oil
the bearings liberally when installing.
CAUTION:
Do not use compressed air to spin the
bearings dry. This causes damage to the
bearing surfaces.
5PA10130
5PA10140
Page 52 of 508
1 - 13
GEN
INFO
FUEL AND ENGINE MIXING OIL
FUEL AND ENGINE MIXING OIL
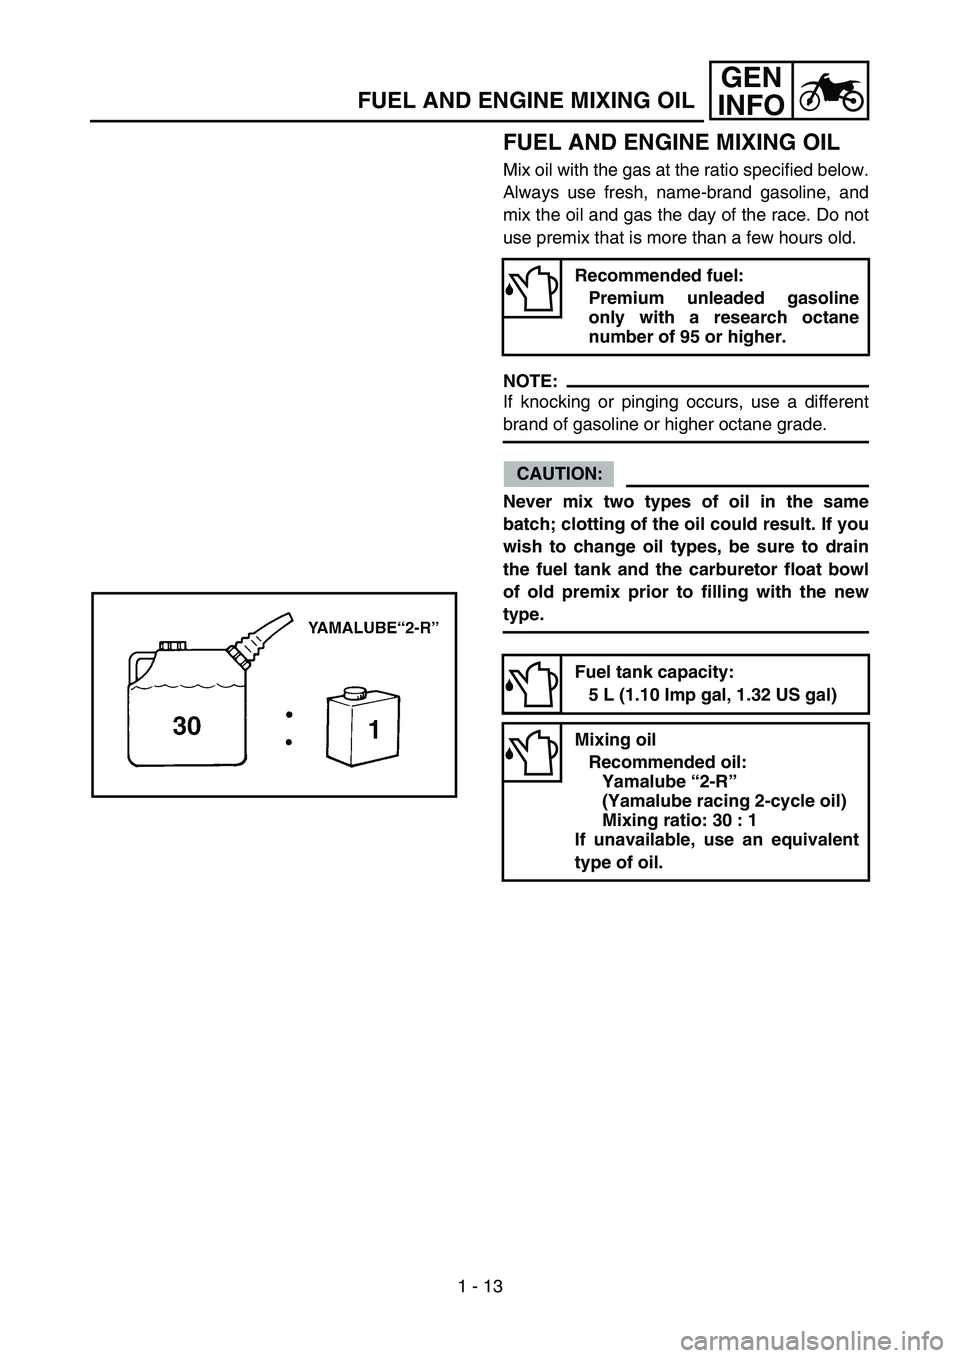
Mix oil with the gas at the ratio specified below.
Always use fresh, name-brand gasoline, and
mix the oil and gas the day of the race. Do not
use premix that is more than a few hours old.
NOTE:
If knocking or pinging occurs, use a different
brand of gasoline or higher octane grade.
CAUTION:
Never mix two types of oil in the same
batch; clotting of the oil could result. If you
wish to change oil types, be sure to drain
the fuel tank and the carburetor float bowl
of old premix prior to filling with the new
type.
Recommended fuel:
Premium unleaded gasoline
only with a research octane
number of 95 or higher.
Fuel tank capacity:
5 L (1.10 Imp gal, 1.32 US gal)
Mixing oil
Recommended oil:
Yamalube “2-R”
(Yamalube racing 2-cycle oil)
Mixing ratio: 30 : 1
If unavailable, use an equivalent
type of oil.
5PA10540
Page 56 of 508

1 - 15
GEN
INFO
STARTING AND BREAK-IN
BREAK-IN PROCEDURES
1. Before starting the engine, fill the fuel tank
with a break-in oil-fuel mixture as follows.
2. Perform the pre-operation checks on the
machine.
3. Start and warm up the engine. Check the
idle speed, and check the operation of the
controls and the engine stop switch.
4. Operate the machine in the lower gears at
moderate throttle openings for five to eight
minutes. Stop and check the spark plug
condition; it will show a rich condition dur-
ing break-in.
5. Allow the engine to cool. Restart the
engine and operate the machine as in the
step above for five minutes. Then, very
briefly shift to the higher gears and check
full-throttle response. Stop and check the
spark plug.
6. After again allowing the engine to cool,
restart and run the machine for five more
minutes. Full throttle and the higher gears
may be used, but sustained full-throttle
operation should be avoided. Check the
spark plug condition.
7. Allow the engine to cool, remove the top
end, and inspect the piston and cylinder.
Remove any high spots on the piston with
#600 grit wet sandpaper. Clean all compo-
nents and carefully reassemble the top
end.
8. Drain the break-in oil-fuel mixture from the
fuel tank and refill with the specified mix.
9. Restart the engine and check the operation
of the machine throughout its entire operat-
ing range. Stop and check the spark plug
condition. Restart the machine and operate
it for about 10 to 15 more minutes. The
machine will now be ready to race.
Mixing oil:
Yamalube “2-R”
Mixing ratio:
15 : 1
Page 66 of 508
1 - 19
GEN
INFO
CLEANING AND STORAGE
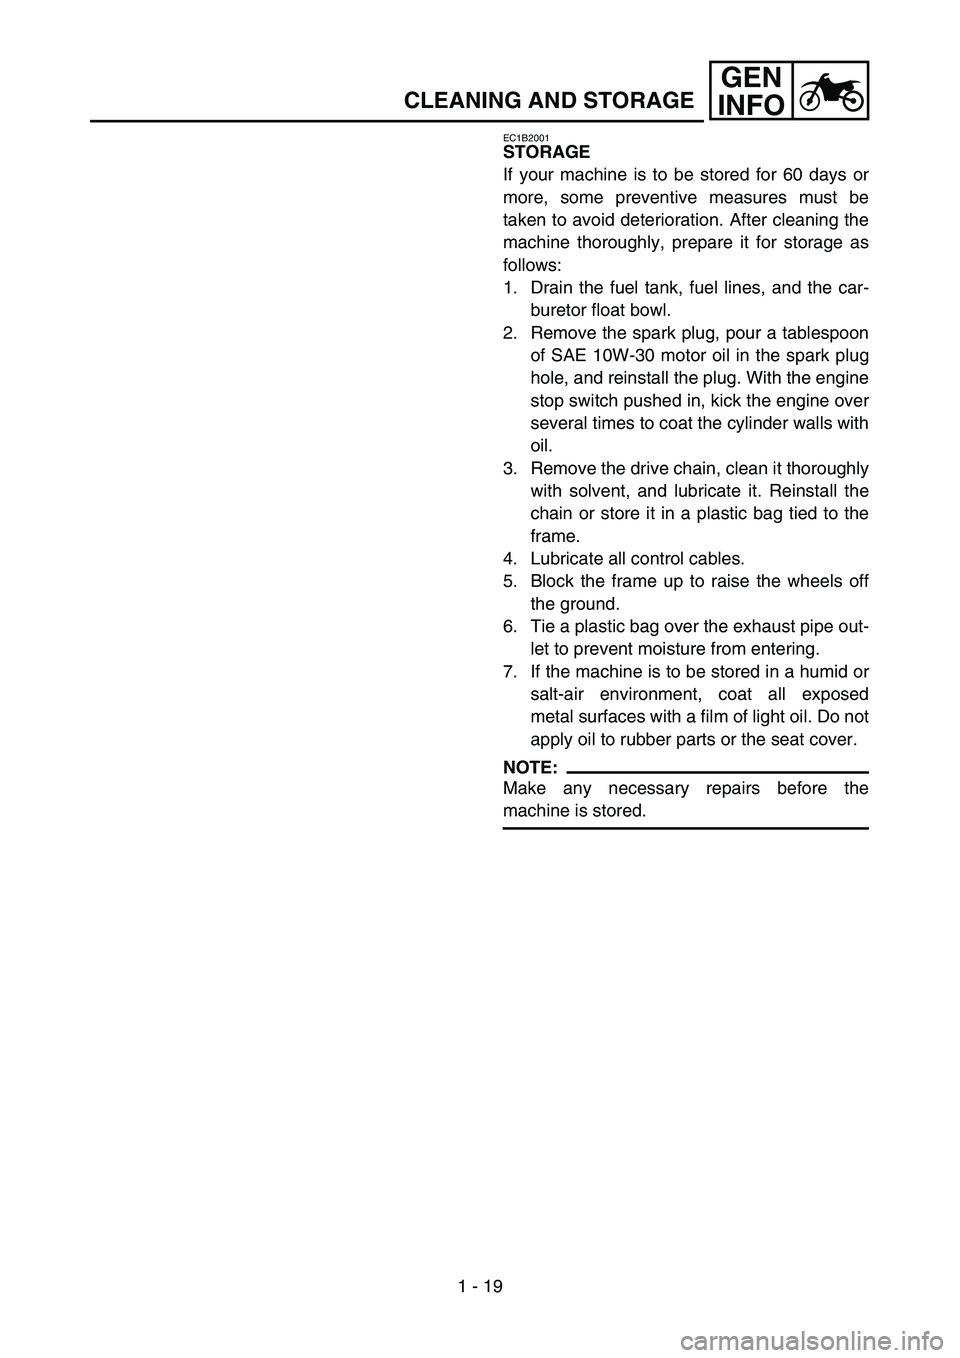
EC1B2001
STORAGE
If your machine is to be stored for 60 days or
more, some preventive measures must be
taken to avoid deterioration. After cleaning the
machine thoroughly, prepare it for storage as
follows:
1. Drain the fuel tank, fuel lines, and the car-
buretor float bowl.
2. Remove the spark plug, pour a tablespoon
of SAE 10W-30 motor oil in the spark plug
hole, and reinstall the plug. With the engine
stop switch pushed in, kick the engine over
several times to coat the cylinder walls with
oil.
3. Remove the drive chain, clean it thoroughly
with solvent, and lubricate it. Reinstall the
chain or store it in a plastic bag tied to the
frame.
4. Lubricate all control cables.
5. Block the frame up to raise the wheels off
the ground.
6. Tie a plastic bag over the exhaust pipe out-
let to prevent moisture from entering.
7. If the machine is to be stored in a humid or
salt-air environment, coat all exposed
metal surfaces with a film of light oil. Do not
apply oil to rubber parts or the seat cover.
NOTE:
Make any necessary repairs before the
machine is stored.
Page 68 of 508
SPEC
2 - 1
GENERAL SPECIFICATIONS
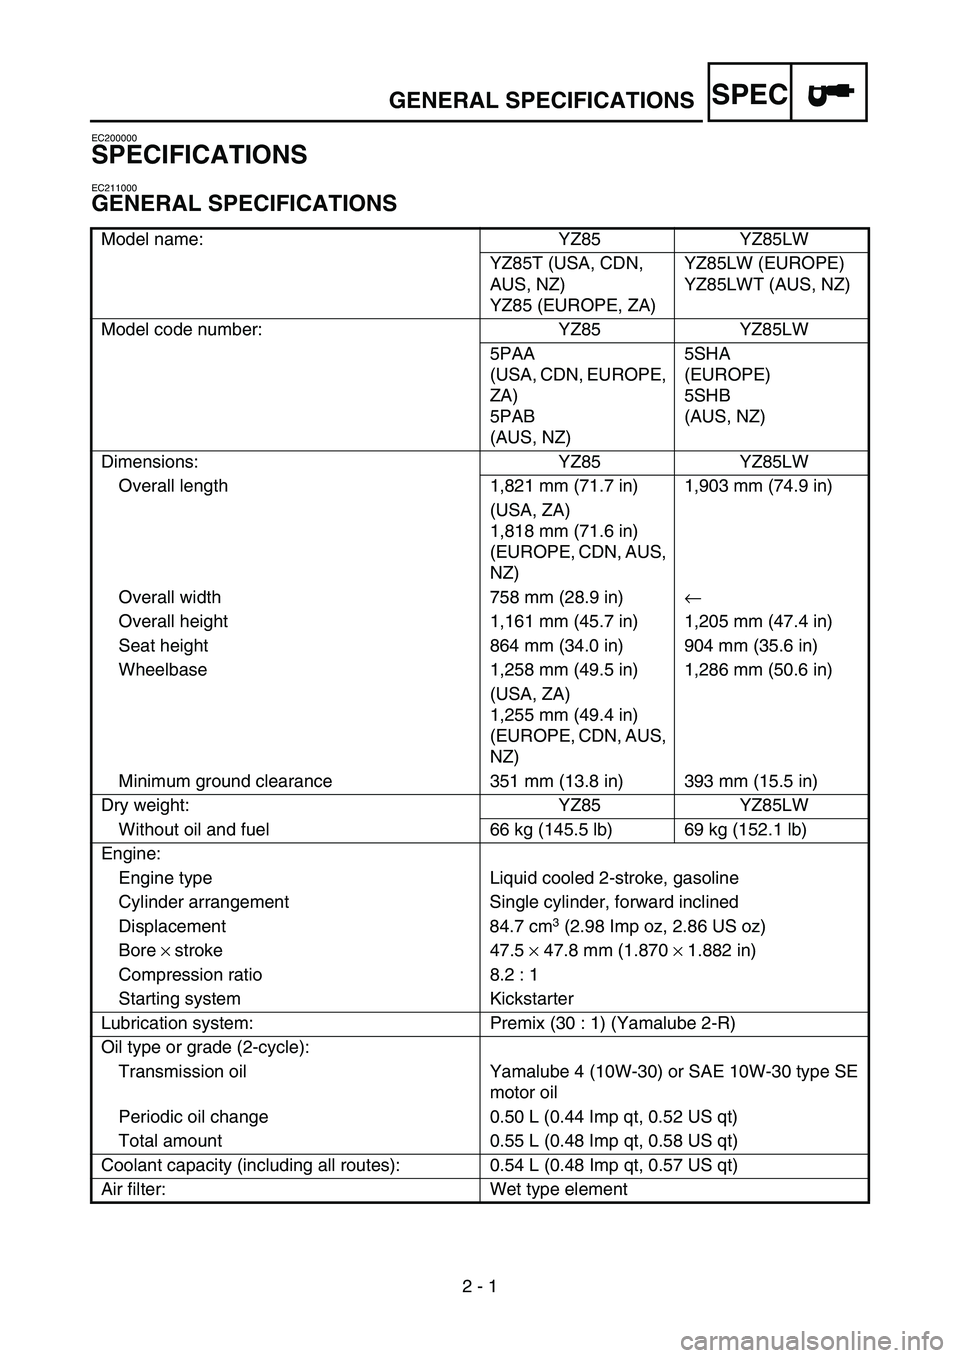
EC200000
SPECIFICATIONS
EC211000
GENERAL SPECIFICATIONS
Model name: YZ85 YZ85LW
YZ85T (USA, CDN,
AUS, NZ)
YZ85 (EUROPE, ZA)YZ85LW (EUROPE)
YZ85LWT (AUS, NZ)
Model code number: YZ85 YZ85LW
5PAA
(USA, CDN, EUROPE,
ZA)
5PAB
(AUS, NZ)5SHA
(EUROPE)
5SHB
(AUS, NZ)
Dimensions: YZ85 YZ85LW
Overall length 1,821 mm (71.7 in) 1,903 mm (74.9 in)
(USA, ZA)
1,818 mm (71.6 in)
(EUROPE, CDN, AUS,
NZ)
Overall width 758 mm (28.9 in)←
Overall height 1,161 mm (45.7 in) 1,205 mm (47.4 in)
Seat height 864 mm (34.0 in) 904 mm (35.6 in)
Wheelbase 1,258 mm (49.5 in) 1,286 mm (50.6 in)
(USA, ZA)
1,255 mm (49.4 in)
(EUROPE, CDN, AUS,
NZ)
Minimum ground clearance 351 mm (13.8 in) 393 mm (15.5 in)
Dry weight: YZ85 YZ85LW
Without oil and fuel 66 kg (145.5 lb) 69 kg (152.1 lb)
Engine:
Engine type Liquid cooled 2-stroke, gasoline
Cylinder arrangement Single cylinder, forward inclined
Displacement 84.7 cm
3 (2.98 Imp oz, 2.86 US oz)
Bore × stroke 47.5 × 47.8 mm (1.870 × 1.882 in)
Compression ratio 8.2 : 1
Starting system Kickstarter
Lubrication system: Premix (30 : 1) (Yamalube 2-R)
Oil type or grade (2-cycle):
Transmission oil Yamalube 4 (10W-30) or SAE 10W-30 type SE
motor oil
Periodic oil change 0.50 L (0.44 Imp qt, 0.52 US qt)
Total amount 0.55 L (0.48 Imp qt, 0.58 US qt)
Coolant capacity (including all routes): 0.54 L (0.48 Imp qt, 0.57 US qt)
Air filter: Wet type element
2
Page 114 of 508
2 - 16
SPEC
EC240000
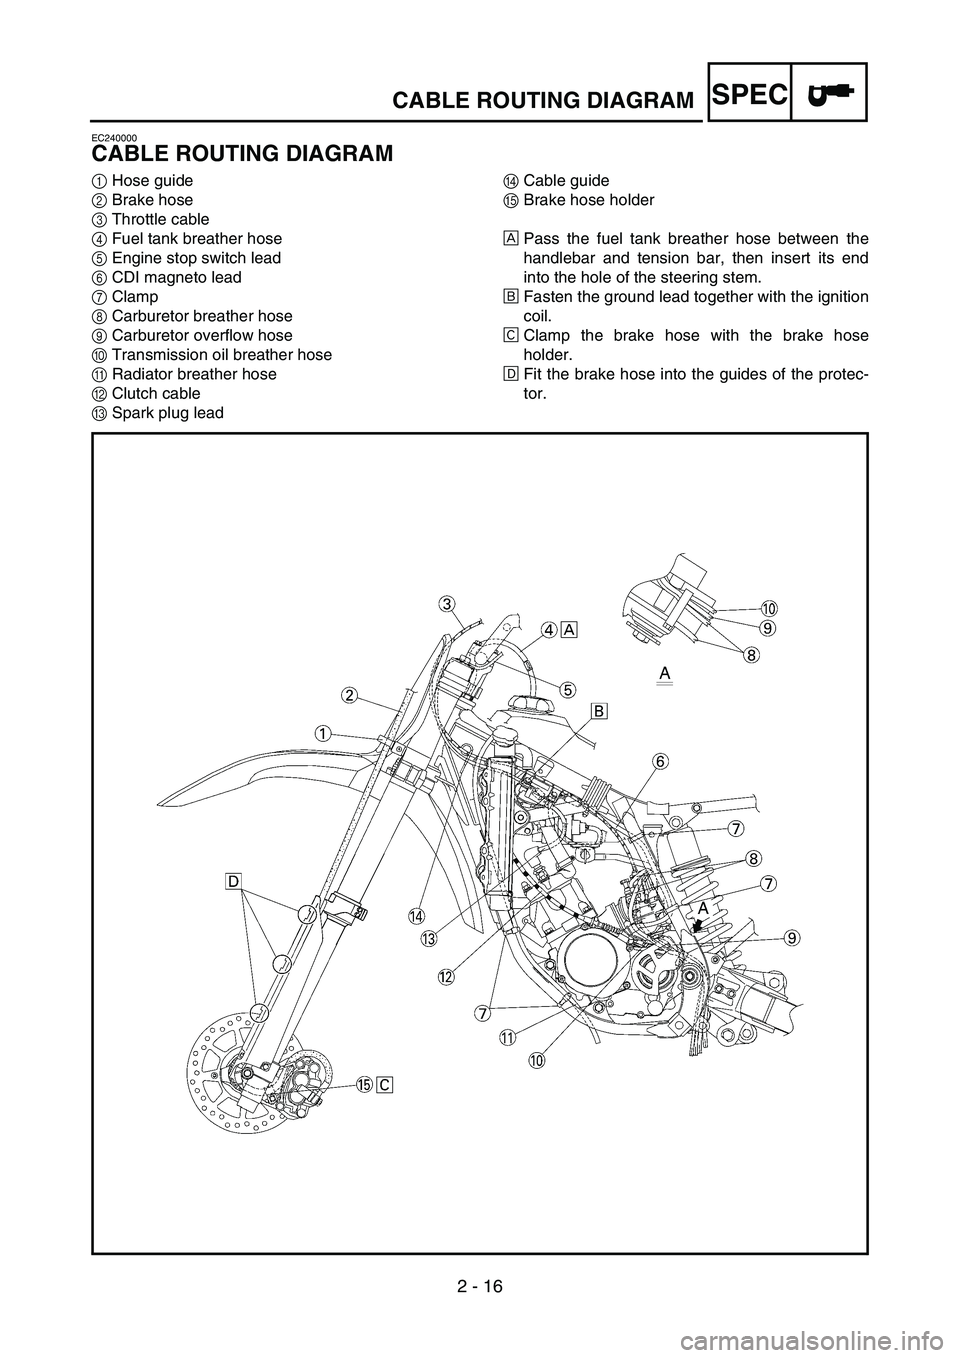
CABLE ROUTING DIAGRAM
1Hose guide
2Brake hose
3Throttle cable
4Fuel tank breather hose
5Engine stop switch lead
6CDI magneto lead
7Clamp
8Carburetor breather hose
9Carburetor overflow hose
0Transmission oil breather hose
ARadiator breather hose
BClutch cable
CSpark plug leadDCable guide
EBrake hose holder
ÈPass the fuel tank breather hose between the
handlebar and tension bar, then insert its end
into the hole of the steering stem.
ÉFasten the ground lead together with the ignition
coil.
ÊClamp the brake hose with the brake hose
holder.
ËFit the brake hose into the guides of the protec-
tor.
CABLE ROUTING DIAGRAM
Page 129 of 508

3 - 4
INSP
ADJ
PRE-OPERATION INSPECTION AND MAINTENANCE
EC320000
PRE-OPERATION INSPECTION AND MAINTENANCE
Before riding for break-in operation, practice or a race, make sure the machine is in good operating
condition.
Before using this machine, check the following points.
GENERAL INSPECTION AND MAINTENANCE
Item Routine Page
CoolantCheck that coolant is filled up to the radiator cap.
Check the cooling system for leakage.P.3-5 ~ 9
FuelCheck that a fresh mixture of oil and gasoline is filled in the fuel
tank. Check the fuel line for leakage.P.1-13
Transmission oilCheck that the oil level is correct. Check the crankcase for leak-
age.P.3-12 ~ 13
Gear shifter and clutchCheck that gears can be shifted correctly in order and that the
clutch operates smoothly.P.3-9
Throttle grip/HousingCheck that the throttle grip operation and free play are correctly
adjusted. Lubricate the throttle grip and housing, if necessary.P.3-10
Brakes Check the play of front brake and effect of front and rear brake. P.3-16 ~ 21
Drive chainCheck drive chain slack and alignment. Check that the drive
chain is lubricated properly.P.3-22 ~ 24
WheelsCheck for excessive wear and tire pressure. Check for loose
spokes and have no excessive play.P.3-31 ~ 32
SteeringCheck that the handlebar can be turned smoothly and have no
excessive play.P.3-32 ~ 34
Front forks and rear shock
absorberCheck that they operate smoothly and there is no oil leakage. P.3-24 ~ 30
Cables (wires)Check that the clutch and throttle cables move smoothly. Check
that they are not caught when the handlebars are turned or
when the front forks travel up and down.—
Exhaust pipe and silencerCheck that the exhaust pipe is tightly mounted and has no
cracks.P.4-2
Rear wheel sprocket Check that the rear wheel sprocket tightening bolt is not loose. P.3-22
Lubrication Check for smooth operation. Lubricate if necessary. P.3-35
Bolts and nuts Check the chassis and engine for loose bolts and nuts. P.1-17
Lead connectorsCheck that the CDI magneto, CDI unit, and ignition coil are con-
nected tightly.P.1-6
SettingsIs the machine set suitably for the condition of the racing course
and weather or by taking into account the results of test runs
before racing? Are inspection and maintenance completely
done?P.7-1 ~ 19