oil level YAMAHA YZ85 2022 Owners Manual
[x] Cancel search | Manufacturer: YAMAHA, Model Year: 2022, Model line: YZ85, Model: YAMAHA YZ85 2022Pages: 90, PDF Size: 2.63 MB
Page 9 of 90

Table of contents
Location of important la bels ............1-1
Safety information ............................2-1
Description ........................................3-1
Left view ..........................................3-1
Right view ........................................3-2
Controls and instruments ................3-3
Instrument an d control functions ....4-1
Handlebar switch ............................4-1
Clutch lever .....................................4-1
Shift pedal .......................................4-2
Brake lever ......................................4-2
Brake pedal .....................................4-3
Fuel tank cap ...................................4-3
Fuel ..................................................4-3
Fuel tank breather hose...................4-6
Fuel cock .........................................4-6
Starter (choke) knob ........................4-7
Kickstarter .......................................4-7
Seat .................................................4-7
Adjusting the front fork ....................4-8
Front fork bleeding ........................4-10
Adjusting the shock absorber assembly ....................................4-11
Removable sidestand ....................4-14
YPVS system .................................4-14 For your safety – pre-operation
checks
............................................... 5-1
Operation an d important ri din g
points ................................................. 6-1
Engine break-in............................... 6-1
Starting and warming up a cold engine .......................................... 6-2
Starting a warm engine................... 6-3
Shifting............................................ 6-3
Parking ............................................ 6-4
Perio dic maintenance an d
a d justment ........................................ 7-1
Periodic maintenance and lubrication chart .......................... 7-2
Checking the spark plug................. 7-7
Transmission oil .............................. 7-8
Coolant ........................................... 7-9
Cleaning the air filter element ....... 7-11
Adjusting the carburetor ............... 7-13
Adjusting the engine idling speed......................................... 7-13
Adjusting the throttle grip free play ............................................ 7-13
Tires .............................................. 7-14
Spoke wheels ............................... 7-16
Adjusting the clutch lever free play ............................................ 7-16
Checking the brake lever free play ............................................ 7-17 Checking the shift pedal ............... 7-18
Checking the front and rear brake
pads ........................................... 7-18
Checking the brake fluid level ....... 7-19
Changing the brake fluid ............... 7-20
Drive chain slack ........................... 7-20
Cleaning and lubricating the drive chain .......................................... 7-22
Checking and lubricating the cables ........................................ 7-22
Checking and lubricating the
throttle grip and cable ............... 7-23
Checking and lubricating the brake and clutch levers ............. 7-23
Checking and lubricating the brake pedal ................................ 7-24
Lubricating the rear suspension.... 7-24
Lubricating the swingarm pivots ... 7-24
Checking the front fork ................. 7-25
Checking the steering ................... 7-25
Checking the wheel bearings ........ 7-26
Supporting the motorcycle ........... 7-26
Front wheel ................................... 7-26
Rear wheel .................................... 7-27
Troubleshooting ............................ 7-29
Troubleshooting chart ................... 7-30
Motorcycle care an d stora ge .......... 8-1
Matte color caution ......................... 8-1
Care................................................. 8-1
Storage............................................ 8-3
UB4B83E0.book Page 1 Thursday, September 9, 2021 8:47 AM
Page 43 of 90

For your safety – pre-operation checks
5-1
5
EAU1559B
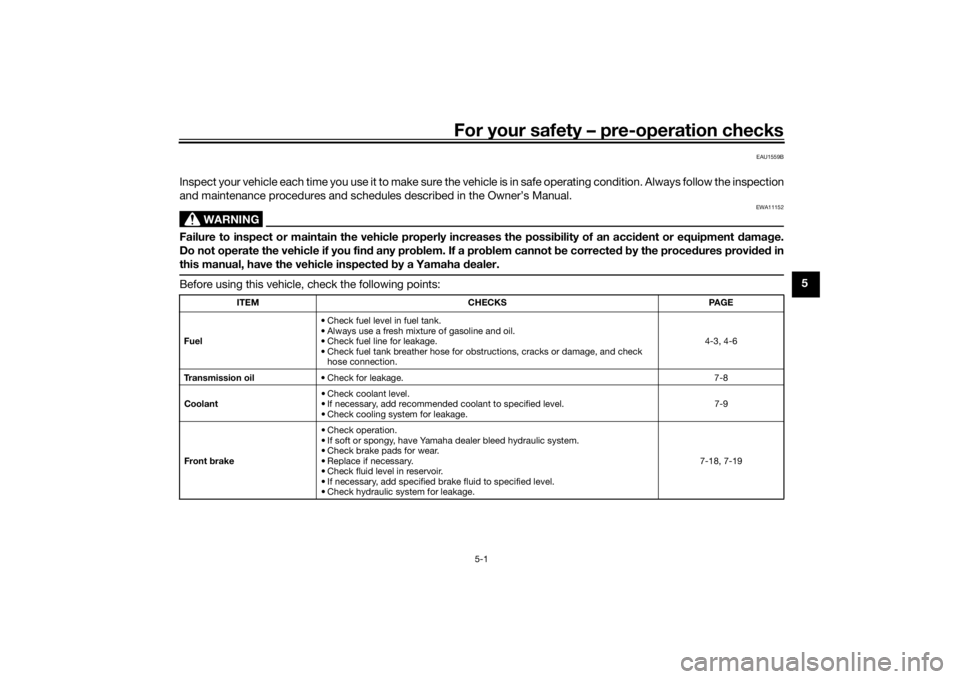
Inspect your vehicle each time you use it to make sure the vehicle is in safe operating condition. Always follow the inspection
and maintenance procedures and schedules described in the Owner’s Manual.
WARNING
EWA11152
Failure to inspect or maintain the vehicle properly increases the possibility of an accident or equipment d amage.
Do not operate the vehicle if you fin d any pro blem. If a pro blem cannot b e corrected b y the proce dures provi ded in
this manual, have the vehicle inspecte d b y a Yamaha dealer.Before using this vehicle, check the following points:
ITEM CHECKS PAGE
Fuel • Check fuel level in fuel tank.
• Always use a fresh mixture of gasoline and oil.
• Check fuel line for leakage.
• Check fuel tank breather hose for obstructions, cracks or damage, and check
hose connection. 4-3, 4-6
Transmission oil • Check for leakage. 7-8
Coolant • Check coolant level.
• If necessary, add recommended coolant to specified level.
• Check cooling system for leakage. 7-9
Front brake • Check operation.
• If soft or spongy, have Yamaha dealer bleed hydraulic system.
• Check brake pads for wear.
• Replace if necessary.
• Check fluid level in reservoir.
• If necessary, add specified brake fluid to specified level.
• Check hydraulic system for leakage. 7-18, 7-19
UB4B83E0.book Page 1 Thursday, September 9, 2021 8:47 AM
Page 57 of 90

Periodic maintenance an d a djustment
7-8
7
To install the spark plu
g
1. Clean the surface of the spark plug gasket and its mating sur-
face, and then wipe off any grime
from the spark plug threads.
2. Install the spark plug with the spark plug wrench, and then tight-
en it to the specified torque.
TIPIf a torque wrench is not available
when installing a spark plug, a good
estimate of the correct torque is 1/4…
1/2 turn past finger tight. However, the
spark plug should be tightened to the
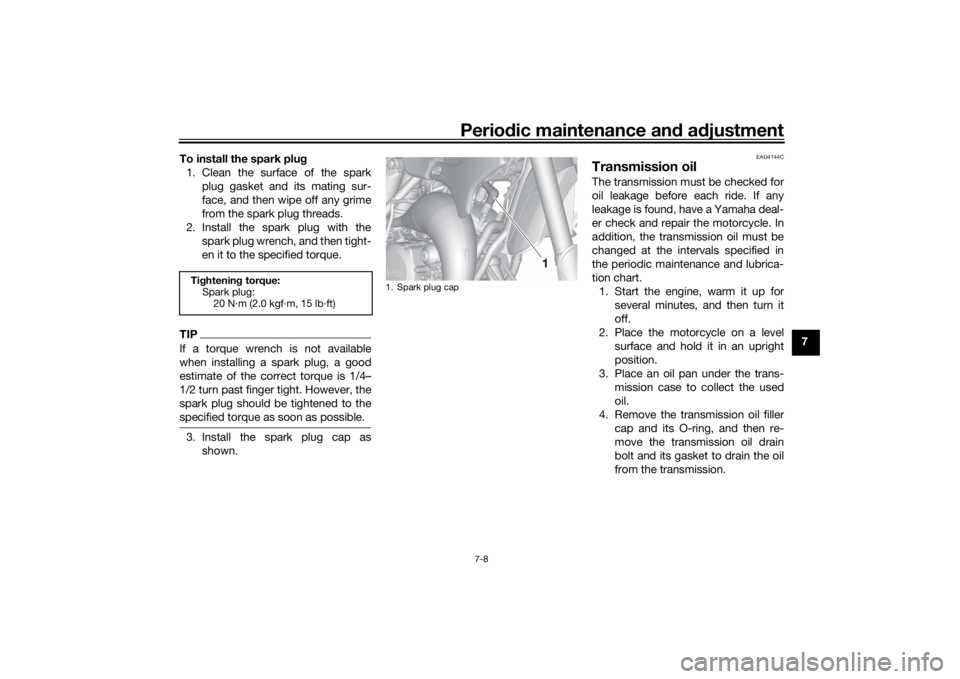
specified torque as soon as possible.3. Install the spark plug cap asshown.
EAU4144C
Transmission oilThe transmission must be checked for
oil leakage before each ride. If any
leakage is found, have a Yamaha deal-
er check and repair the motorcycle. In
addition, the transmission oil must be
changed at the intervals specified in
the periodic maintenance and lubrica-
tion chart.1. Start the engine, warm it up for several minutes, and then turn it
off.
2. Place the motorcycle on a level surface and hold it in an upright
position.
3. Place an oil pan under the trans- mission case to collect the used
oil.
4. Remove the transmission oil filler cap and its O-ring, and then re-
move the transmission oil drain
bolt and its gasket to drain the oil
from the transmission.
Tightenin g torque:
Spark plug: 20 N·m (2.0 kgf·m, 15 lb·ft)
1. Spark plug cap
1
UB4B83E0.book Page 8 Thursday, September 9, 2021 8:47 AM
Page 58 of 90

Periodic maintenance an d a djustment
7-9
7
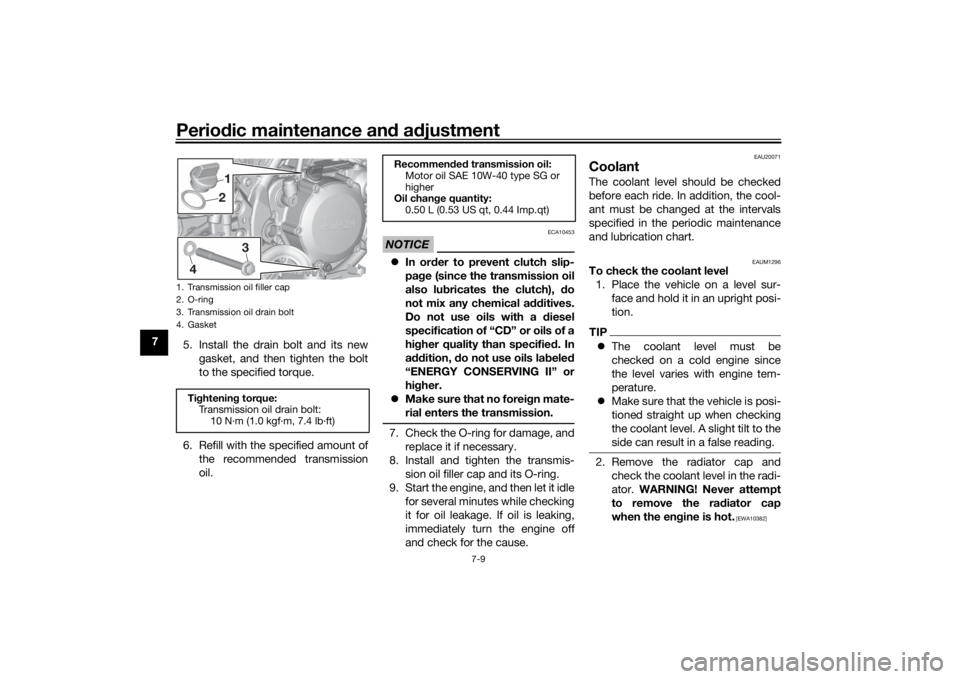
5. Install the drain bolt and its new
gasket, and then tighten the bolt
to the specified torque.
6. Refill with the specified amount of the recommended transmission
oil.
NOTICE
ECA10453
In or der to prevent clutch slip-
pa ge (since the transmission oil
also lu bricates the clutch), d o
not mix any chemical additives.
Do not use oils with a d iesel
specification of “CD” or oils of a
hi gher quality than specifie d. In
a ddition, do not use oils la beled
“ENERGY CONSERVING II” or
hi gher.
Make sure that no forei gn mate-
rial enters the transmission.7. Check the O-ring for damage, and replace it if necessary.
8. Install and tighten the transmis- sion oil filler cap and its O-ring.
9. Start the engine, and then let it idle for several minutes while checking
it for oil leakage. If oil is leaking,
immediately turn the engine off
and check for the cause.
EAU20071
CoolantThe coolant level should be checked
before each ride. In addition, the cool-
ant must be changed at the intervals
specified in the periodic maintenance
and lubrication chart.
EAUM1296
To check the coolant level1. Place the vehicle on a level sur- face and hold it in an upright posi-
tion.TIPThe coolant level must be
checked on a cold engine since
the level varies with engine tem-
perature.
Make sure that the vehicle is posi-
tioned straight up when checking
the coolant level. A slight tilt to the
side can result in a false reading.2. Remove the radiator cap and
check the coolant level in the radi-
ator. WARNING! Never attempt
to remove the ra diator cap
when the en gine is hot.
[EWA10382]
1. Transmission oil filler cap
2. O-ring
3. Transmission oil drain bolt
4. GasketTi ghtenin g torque:
Transmission oil drain bolt: 10 N·m (1.0 kgf·m, 7.4 lb·ft)
12
4
3
Recommen ded transmission oil:
Motor oil SAE 10W-40 type SG or
higher
Oil chan ge quantity:
0.50 L (0.53 US qt, 0.44 Imp.qt)
UB4B83E0.book Page 9 Thursday, September 9, 2021 8:47 AM
Page 74 of 90

Periodic maintenance an d a djustment
7-25
7
EAU23273
Checkin g the front forkThe condition and operation of the
front fork must be checked as follows
at the intervals specified in the periodic
maintenance and lubrication chart.
To check the con dition
Check the inner tubes for scratches,
damage and excessive oil leakage.
To check the operation 1. Place the vehicle on a level sur- face and hold it in an upright posi-
tion. WARNING! To avoi d injury,
securely support the vehicle so
there is no dan ger of it fallin g
over.
[EWA10752]
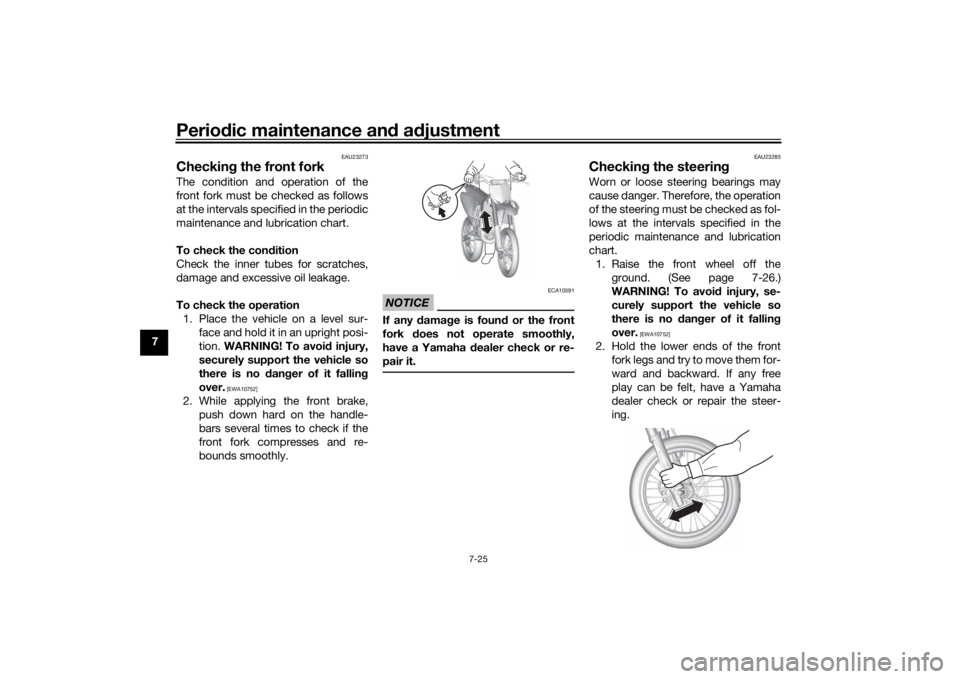
2. While applying the front brake, push down hard on the handle-
bars several times to check if the
front fork compresses and re-
bounds smoothly.
NOTICE
ECA10591
If any d amage is foun d or the front
fork does not operate smoothly,
have a Yamaha dealer check or re-
pair it.
EAU23285
Checkin g the steerin gWorn or loose steering bearings may
cause danger. Therefore, the operation
of the steering must be checked as fol-
lows at the intervals specified in the
periodic maintenance and lubrication
chart.
1. Raise the front wheel off the ground. (See page 7-26.)
WARNING! To avoi d injury, se-
curely support the vehicle so
there is no dan ger of it fallin g
over.
[EWA10752]
2. Hold the lower ends of the front fork legs and try to move them for-
ward and backward. If any free
play can be felt, have a Yamaha
dealer check or repair the steer-
ing.
UB4B83E0.book Page 25 Thursday, September 9, 2021 8:47 AM
Page 89 of 90

11-1
11
Index
AAir filter element, cleaning .................... 7-11BBrake and clutch levers, checking
and lubricating ................................... 7-23
Brake fluid, changing............................ 7-20
Brake fluid level, checking.................... 7-19
Brake lever.............................................. 4-2
Brake lever free play, checking ............ 7-17
Brake pedal ............................................ 4-3
Brake pedal, checking and lubricating........................................... 7-24CCables, checking and lubricating ......... 7-22
Carburetor, adjusting............................ 7-13
Care ........................................................ 8-1
Clutch lever............................................. 4-1
Clutch lever free play, adjusting ........... 7-16
Coolant ................................................... 7-9DDrive chain, cleaning and lubricating ... 7-22
Drive chain slack .................................. 7-20EEngine break-in ...................................... 6-1
Engine idling speed .............................. 7-13
Engine overheating ............................... 7-31
Engine serial number ............................ 10-1
Engine, starting a warm.......................... 6-3
Engine stop switch ................................. 4-1FFront and rear brake pads, checking ... 7-18
Front fork, adjusting ............................... 4-8
Front fork, bleeding .............................. 4-10
Front fork, checking ............................. 7-25 Fuel ........................................................ 4-3
Fuel cock................................................ 4-6
Fuel tank breather hose ......................... 4-6
Fuel tank cap.......................................... 4-3
HHandlebar switch ................................... 4-1IIdentification numbers ......................... 10-1KKickstarter .............................................. 4-7LLabels, location ...................................... 1-1MMatte color, caution ............................... 8-1PParking ................................................... 6-4
Part locations ......................................... 3-1
Periodic maintenance and lubrication
chart ..................................................... 7-2RRear suspension, lubricating................ 7-24SSafety defects, reporting (For CANADA customers) ......................... 10-2
Safety information .................................. 2-1
Seat ........................................................ 4-7
Shifting ................................................... 6-3
Shift pedal .............................................. 4-2
Shift pedal, checking ........................... 7-18
Shock absorber assembly, adjusting ... 4-11
Sidestand ............................................. 4-14
Spark plug, checking ............................. 7-7
Specifications......................................... 9-1
Starter (choke) knob............................... 4-7 Starting and warming up a cold
engine ................................................... 6-2
Steering, checking ................................ 7-25
Storage ................................................... 8-3
Supporting the motorcycle ................... 7-26
Swingarm pivots, lubricating ................ 7-24
TThrottle grip and cable, checking and lubricating ........................................... 7-23
Throttle grip free play, adjusting ........... 7-13
Tires ...................................................... 7-14
Transmission oil ...................................... 7-8
Troubleshooting .................................... 7-29
Troubleshooting chart........................... 7-30VVehicle identification number ............... 10-1WWheel bearings, checking .................... 7-26
Wheel (front).......................................... 7-26
Wheel (rear)........................................... 7-27
Wheels .................................................. 7-16YYPVS system ........................................ 4-14
UB4B83E0.book Page 1 Thursday, September 9, 2021 8:47 AM