window YAMAHA YZF-R1 2005 Owners Manual
[x] Cancel search | Manufacturer: YAMAHA, Model Year: 2005, Model line: YZF-R1, Model: YAMAHA YZF-R1 2005Pages: 104, PDF Size: 5.17 MB
Page 13 of 104

DESCRIPTION
2-2
2
EAU10420
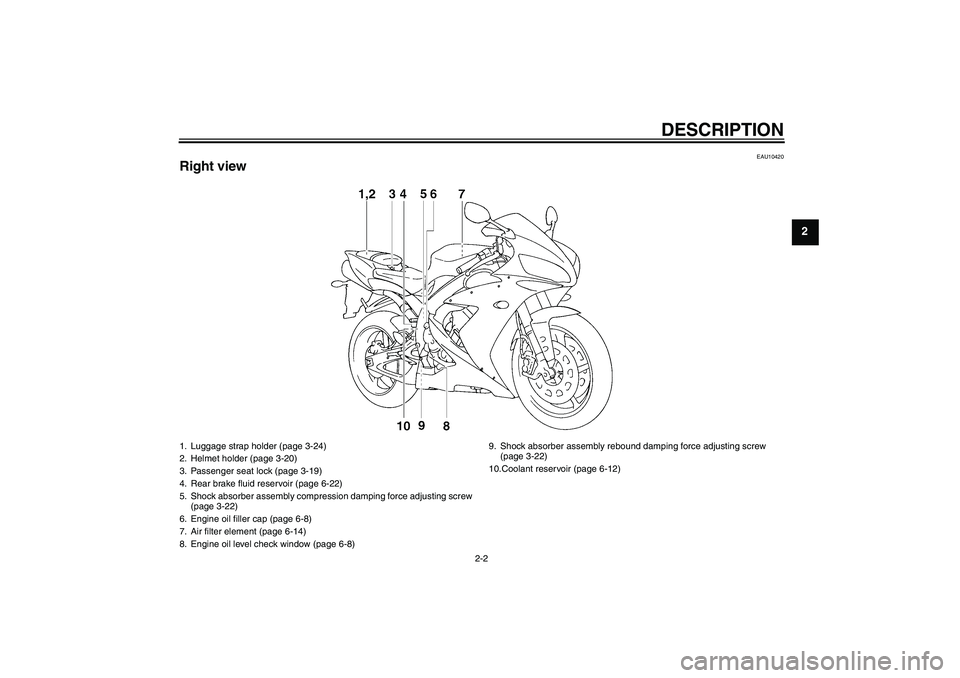
Right view1. Luggage strap holder (page 3-24)
2. Helmet holder (page 3-20)
3. Passenger seat lock (page 3-19)
4. Rear brake fluid reservoir (page 6-22)
5. Shock absorber assembly compression damping force adjusting screw
(page 3-22)
6. Engine oil filler cap (page 6-8)
7. Air filter element (page 6-14)
8. Engine oil level check window (page 6-8)9. Shock absorber assembly rebound damping force adjusting screw
(page 3-22)
10.Coolant reservoir (page 6-12)
U5VYE1E0.book Page 2 Tuesday, September 7, 2004 9:09 AM
Page 56 of 104

PERIODIC MAINTENANCE AND MINOR REPAIR
6-8
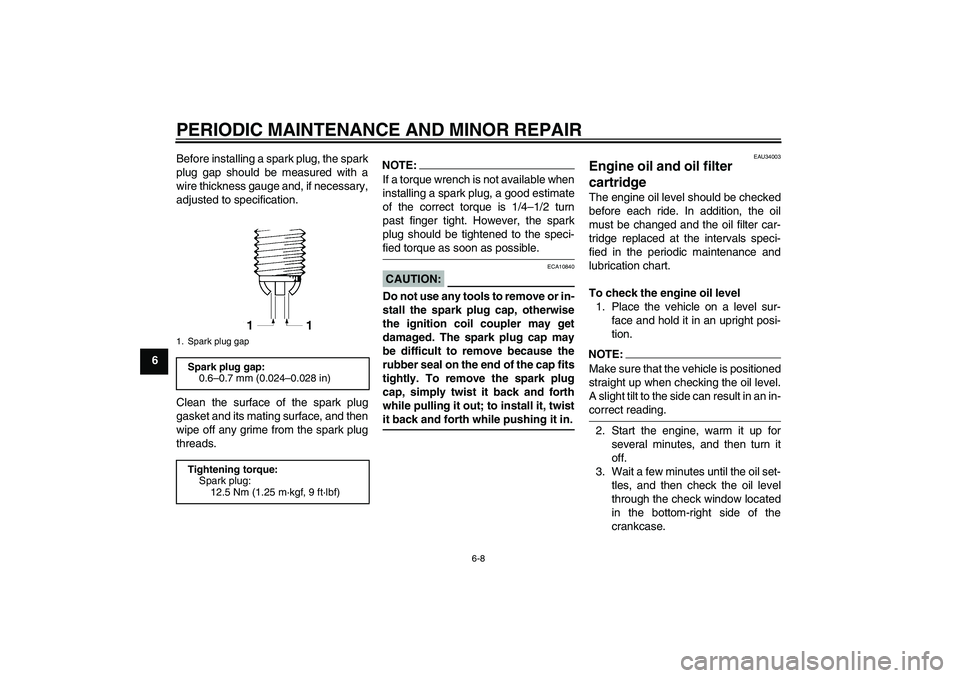
6Before installing a spark plug, the spark
plug gap should be measured with a
wire thickness gauge and, if necessary,
adjusted to specification.
Clean the surface of the spark plug
gasket and its mating surface, and then
wipe off any grime from the spark plug
threads.
NOTE:If a torque wrench is not available when
installing a spark plug, a good estimate
of the correct torque is 1/4–1/2 turn
past finger tight. However, the spark
plug should be tightened to the speci-fied torque as soon as possible.CAUTION:
ECA10840
Do not use any tools to remove or in-
stall the spark plug cap, otherwise
the ignition coil coupler may get
damaged. The spark plug cap may
be difficult to remove because the
rubber seal on the end of the cap fits
tightly. To remove the spark plug
cap, simply twist it back and forth
while pulling it out; to install it, twistit back and forth while pushing it in.
EAU34003
Engine oil and oil filter
cartridge The engine oil level should be checked
before each ride. In addition, the oil
must be changed and the oil filter car-
tridge replaced at the intervals speci-
fied in the periodic maintenance and
lubrication chart.
To check the engine oil level
1. Place the vehicle on a level sur-
face and hold it in an upright posi-
tion.NOTE:
Make sure that the vehicle is positioned
straight up when checking the oil level.
A slight tilt to the side can result in an in-correct reading.
2. Start the engine, warm it up for
several minutes, and then turn it
off.
3. Wait a few minutes until the oil set-
tles, and then check the oil level
through the check window located
in the bottom-right side of the
crankcase.
1. Spark plug gapSpark plug gap:
0.6–0.7 mm (0.024–0.028 in)
Tightening torque:
Spark plug:
12.5 Nm (1.25 m·kgf, 9 ft·lbf)
U5VYE1E0.book Page 8 Tuesday, September 7, 2004 9:09 AM
Page 57 of 104

PERIODIC MAINTENANCE AND MINOR REPAIR
6-9
6
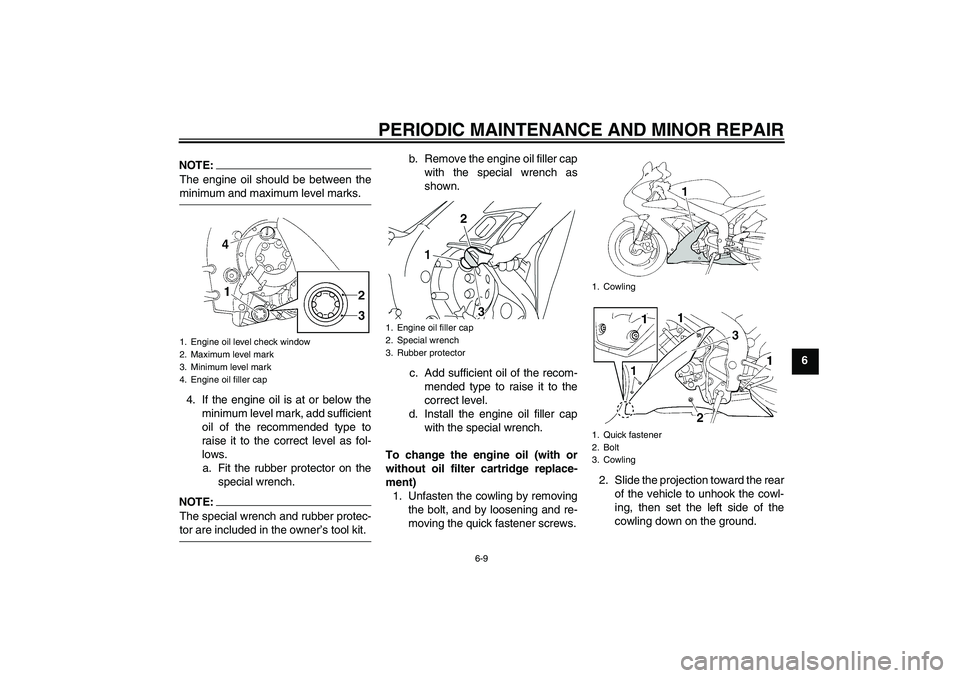
NOTE:The engine oil should be between theminimum and maximum level marks.
4. If the engine oil is at or below the
minimum level mark, add sufficient
oil of the recommended type to
raise it to the correct level as fol-
lows.
a. Fit the rubber protector on the
special wrench.NOTE:The special wrench and rubber protec-tor are included in the owner’s tool kit.b. Remove the engine oil filler cap
with the special wrench as
shown.
c. Add sufficient oil of the recom-
mended type to raise it to the
correct level.
d. Install the engine oil filler cap
with the special wrench.
To change the engine oil (with or
without oil filter cartridge replace-
ment)
1. Unfasten the cowling by removing
the bolt, and by loosening and re-
moving the quick fastener screws.2. Slide the projection toward the rear
of the vehicle to unhook the cowl-
ing, then set the left side of the
cowling down on the ground.1. Engine oil level check window
2. Maximum level mark
3. Minimum level mark
4. Engine oil filler cap
1. Engine oil filler cap
2. Special wrench
3. Rubber protector
1. Cowling
1. Quick fastener
2. Bolt
3. Cowling
U5VYE1E0.book Page 9 Tuesday, September 7, 2004 9:09 AM