oil change YAMAHA YZF-R1 2012 Owners Manual
[x] Cancel search | Manufacturer: YAMAHA, Model Year: 2012, Model line: YZF-R1, Model: YAMAHA YZF-R1 2012Pages: 112, PDF Size: 2.78 MB
Page 58 of 112

OPERATION AND IMPORTANT RIDING POINTS
5-3
5
EAU16810
Tips for reducing fuel con-
sumption Fuel consumption depends largely on
your riding style. Consider the following
tips to reduce fuel consumption:●
Shift up swiftly, and avoid high en-
gine speeds during acceleration.
●
Do not rev the engine while shifting
down, and avoid high engine
speeds with no load on the engine.
●
Turn the engine off instead of let-
ting it idle for an extended length of
time (e.g., in traffic jams, at traffic
lights or at railroad crossings).
EAU16841
Engine break-in There is never a more important period
in the life of your engine than the period
between 0 and 1600 km (1000 mi). For
this reason, you should read the follow-
ing material carefully.
Since the engine is brand new, do not
put an excessive load on it for the first
1600 km (1000 mi). The various parts in
the engine wear and polish themselves
to the correct operating clearances.
During this period, prolonged full-throt-
tle operation or any condition that might
result in engine overheating must be
avoided.
EAU17083
0–1000 km (0–600 mi)
Avoid prolonged operation above 6900
r/min. NOTICE: After 1000 km (600
mi) of operation, the engine oil must
be changed and the oil filter car-
tridge or element replaced.
[ECA10302]
1000–1600 km (600–1000 mi)
Avoid prolonged operation above 8300
r/min. 1600 km (1000 mi) and beyond
The vehicle can now be operated nor-
mally.
NOTICE
ECA10310
●
Keep the engine speed out of
the tachometer red zone.
●
If any engine trouble should oc-
cur during the engine break-in
period, immediately have a
Yamaha dealer check the vehi-
cle.
TIPDuring and after the engine break-in
period, the exhaust heat may cause
discoloration of the exhaust pipe, but
this is normal.
U1KBE0E0.book Page 3 Monday, July 25, 2011 5:03 PM
Page 65 of 112

PERIODIC MAINTENANCE AND ADJUSTMENT
6-6
6
18 Sidestand Check operation.
Lubricate with lithium-soap-based
grease. √√√√√
19 *Sidestand switch Check operation. √√√√√√
20 *Front fork Check operation and for oil leak-
age. √√√√
21 *Shock absorber as-
sembly Check operation and shock ab-
sorber for oil leakage. √√√√
22 *Rear suspension re-
lay arm and con-
necting arm
pivoting points
Check operation.
√√√√
23 Engine oil Change.
Check oil level and vehicle for oil
leakage. √√√√√√
24 Engine oil filter car-
tridge Replace.
√√√
25 *Cooling system Check coolant level and vehicle
for coolant leakage. √√√√√
Change with ethylene glycol anti- freeze coolant. Every 3 years
26 *Front and rear brake
switches Check operation.
√√√√√√
27 Moving parts and
cables
Lubricate.
√√√√√
NO. ITEM CHECK OR MAINTENANCE JOB
ODOMETER READING
ANNUAL
CHECK
1000 km
(600 mi) 10000 km
(6000 mi) 20000 km
(12000 mi) 30000 km
(18000 mi) 40000 km
(24000 mi)
U1KBE0E0.book Page 6 Monday, July 25, 2011 5:03 PM
Page 66 of 112

PERIODIC MAINTENANCE AND ADJUSTMENT
6-7
6
EAU18680
TIP●
Air filter This model’s air filter is equipped with a disposable oil-coated paper element, which must not be cleaned with com- pressed air to avoid damaging it.
The air filter element needs to be replaced more frequently when riding in unusually wet or dusty areas.
●
Hydraulic brake service Regularly check and, if necessary, correct the brake fluid level.
Every two years replace the internal components of the brake master cylinders and calipers, and change the brake fluid.
Replace the brake hoses every four years and if cracked or damaged.
28 *Throttle grip Check operation.
Check throttle grip free play, and
adjust if necessary.
Lubricate cable and grip housing. √√√√√
29 *Lights, signals and
switches Check operation.
Adjust headlight beam.
√√√√√√
NO. ITEM CHECK OR MAINTENANCE JOB
ODOMETER READING
ANNUAL
CHECK
1000 km
(600 mi) 10000 km
(6000 mi) 20000 km
(12000 mi) 30000 km
(18000 mi) 40000 km
(24000 mi)U1KBE0E0.book Page 7 Monday, July 25, 2011 5:03 PM
Page 70 of 112

PERIODIC MAINTENANCE AND ADJUSTMENT
6-11
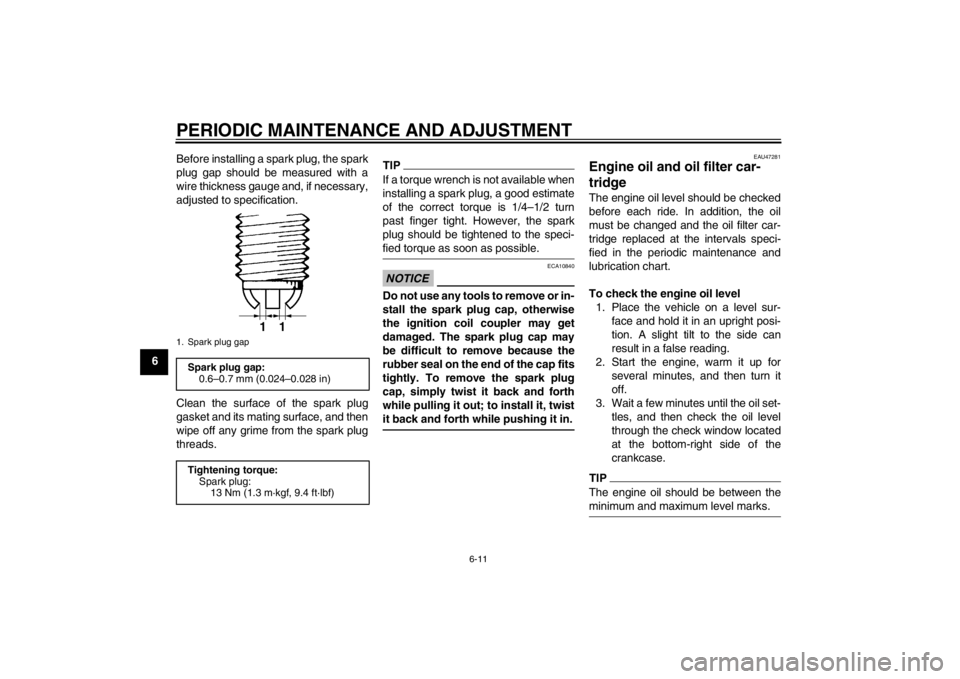
6Before installing a spark plug, the spark
plug gap should be measured with a
wire thickness gauge and, if necessary,
adjusted to specification.
Clean the surface of the spark plug
gasket and its mating surface, and then
wipe off any grime from the spark plug
threads.
TIPIf a torque wrench is not available when
installing a spark plug, a good estimate
of the correct torque is 1/4–1/2 turn
past finger tight. However, the spark
plug should be tightened to the speci-
fied torque as soon as possible.NOTICE
ECA10840
Do not use any tools to remove or in-
stall the spark plug cap, otherwise
the ignition coil coupler may get
damaged. The spark plug cap may
be difficult to remove because the
rubber seal on the end of the cap fits
tightly. To remove the spark plug
cap, simply twist it back and forth
while pulling it out; to install it, twist
it back and forth while pushing it in.
EAU47281
Engine oil and oil filter car-
tridge The engine oil level should be checked
before each ride. In addition, the oil
must be changed and the oil filter car-
tridge replaced at the intervals speci-
fied in the periodic maintenance and
lubrication chart.
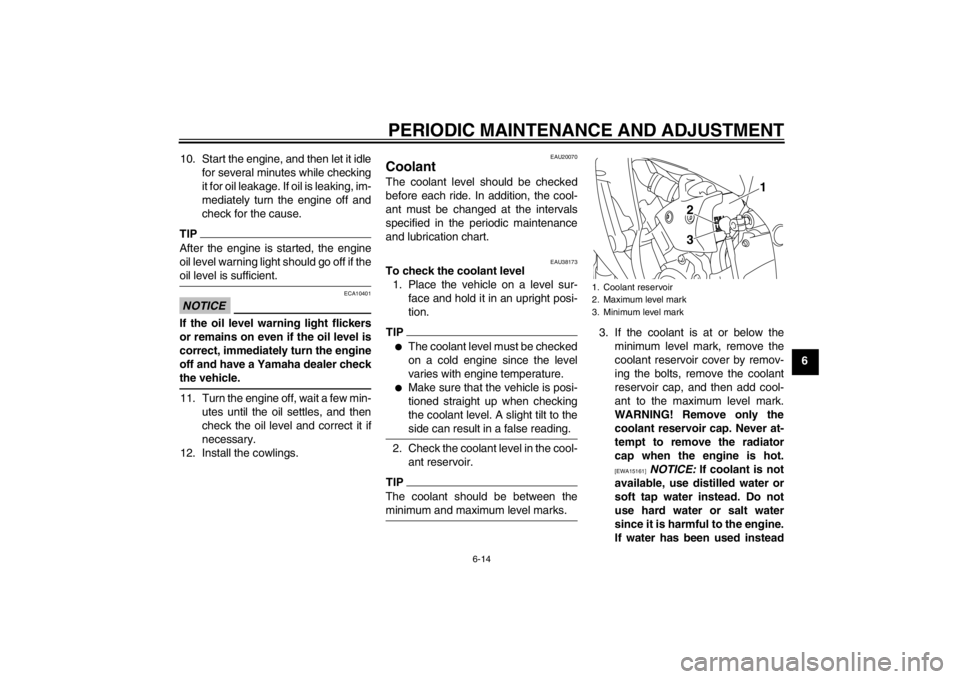
To check the engine oil level
1. Place the vehicle on a level sur- face and hold it in an upright posi-
tion. A slight tilt to the side can
result in a false reading.
2. Start the engine, warm it up for several minutes, and then turn it
off.
3. Wait a few minutes until the oil set- tles, and then check the oil level
through the check window located
at the bottom-right side of the
crankcase.TIPThe engine oil should be between the
minimum and maximum level marks.
1. Spark plug gapSpark plug gap:0.6–0.7 mm (0.024–0.028 in)
Tightening torque: Spark plug:13 Nm (1.3 m·kgf, 9.4 ft·lbf)
1
1
U1KBE0E0.book Page 11 Monday, July 25, 2011 5:03 PM
Page 71 of 112

PERIODIC MAINTENANCE AND ADJUSTMENT
6-12
6
4. If the engine oil is at or below the
minimum level mark, add sufficient
oil of the recommended type to
raise it to the correct level.
To change the engine oil (with or
without oil filter cartridge replace-
ment) 1. Remove cowlings C and D. (See page 6-8.)
2. Start the engine, warm it up for several minutes, and then turn it
off.
3. Place an oil pan under the engine to collect the used oil. 4. Remove the engine oil filler cap,
the engine oil drain bolt and its
gasket to drain the oil from the
crankcase.
TIPSkip steps 5–7 if the oil filter cartridge is
not being replaced.5. Remove the oil filter cartridge withan oil filter wrench.
TIPAn oil filter wrench is available at a
Yamaha dealer.6. Apply a thin coat of clean engineoil to the O-ring of the new oil filter
cartridge.
1. Engine oil level check window
2. Maximum level mark
3. Minimum level mark
4. Engine oil filler cap
2
4
1 3
1. Engine oil drain bolt
2. Gasket
12
1. Oil filter cartridge
2. Oil filter wrench
1
2
U1KBE0E0.book Page 12 Monday, July 25, 2011 5:03 PM
Page 73 of 112

PERIODIC MAINTENANCE AND ADJUSTMENT
6-14
6
10. Start the engine, and then let it idle
for several minutes while checking
it for oil leakage. If oil is leaking, im-
mediately turn the engine off and
check for the cause.
TIPAfter the engine is started, the engine
oil level warning light should go off if the
oil level is sufficient.NOTICE
ECA10401
If the oil level warning light flickers
or remains on even if the oil level is
correct, immediately turn the engine
off and have a Yamaha dealer check
the vehicle.11. Turn the engine off, wait a few min-utes until the oil settles, and then
check the oil level and correct it if
necessary.
12. Install the cowlings.
EAU20070
Coolant The coolant level should be checked
before each ride. In addition, the cool-
ant must be changed at the intervals
specified in the periodic maintenance
and lubrication chart.
EAU38173
To check the coolant level 1. Place the vehicle on a level sur- face and hold it in an upright posi-
tion.TIP●
The coolant level must be checked
on a cold engine since the level
varies with engine temperature.
●
Make sure that the vehicle is posi-
tioned straight up when checking
the coolant level. A slight tilt to the
side can result in a false reading.
2. Check the coolant level in the cool-ant reservoir.TIPThe coolant should be between the
minimum and maximum level marks.
3. If the coolant is at or below theminimum level mark, remove the
coolant reservoir cover by remov-
ing the bolts, remove the coolant
reservoir cap, and then add cool-
ant to the maximum level mark.
WARNING! Remove only the coolant reservoir cap. Never at-
tempt to remove the radiator
cap when the engine is hot.
[EWA15161]
NOTICE: If coolant is not
available, use distilled water or
soft tap water instead. Do not
use hard water or salt water
since it is harmful to the engine.
If water has been used instead
1. Coolant reservoir
2. Maximum level mark
3. Minimum level mark
1
3 2
U1KBE0E0.book Page 14 Monday, July 25, 2011 5:03 PM
Page 84 of 112

PERIODIC MAINTENANCE AND ADJUSTMENT
6-25
6
EAU22731
Changing the brake fluid Have a Yamaha dealer change the
brake fluid at the intervals specified in
the TIP after the periodic maintenance
and lubrication chart. In addition, have
the oil seals of the master cylinders and
calipers as well as the brake hoses re-
placed at the intervals listed below or
whenever they are damaged or leak-
ing.●
Oil seals: Replace every two
years.
●
Brake hoses: Replace every four
years.
EAU22760
Drive chain slack The drive chain slack should be
checked before each ride and adjusted
if necessary.
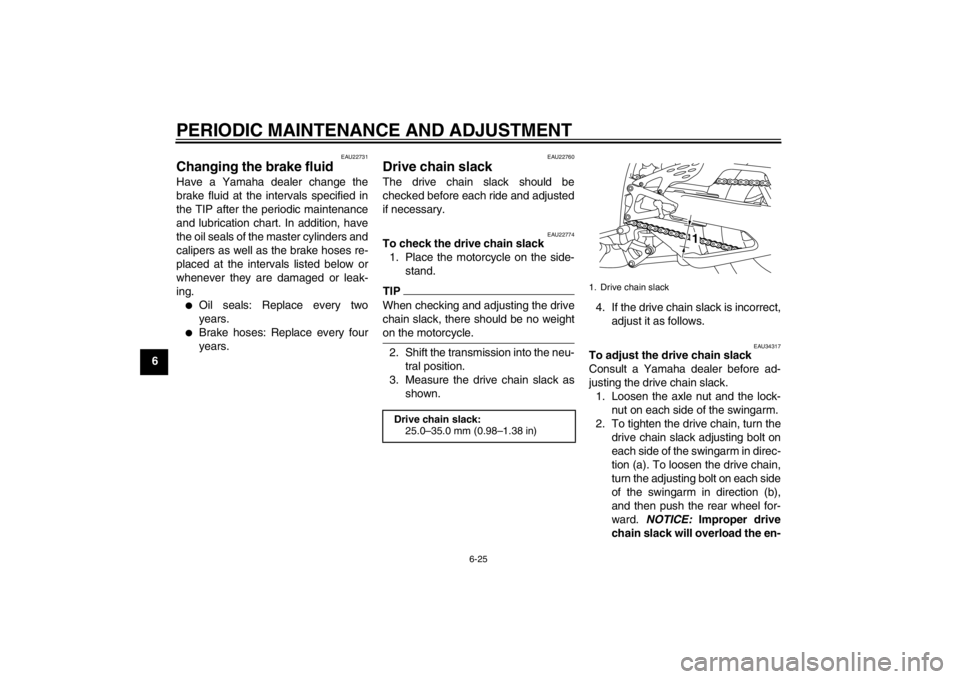
EAU22774
To check the drive chain slack1. Place the motorcycle on the side- stand.TIPWhen checking and adjusting the drive
chain slack, there should be no weight
on the motorcycle.2. Shift the transmission into the neu-tral position.
3. Measure the drive chain slack as shown. 4. If the drive chain slack is incorrect,
adjust it as follows.
EAU34317
To adjust the drive chain slack
Consult a Yamaha dealer before ad-
justing the drive chain slack.1. Loosen the axle nut and the lock- nut on each side of the swingarm.
2. To tighten the drive chain, turn the drive chain slack adjusting bolt on
each side of the swingarm in direc-
tion (a). To loosen the drive chain,
turn the adjusting bolt on each side
of the swingarm in direction (b),
and then push the rear wheel for-
ward. NOTICE: Improper drive
chain slack will overload the en-
Drive chain slack: 25.0–35.0 mm (0.98–1.38 in)
1. Drive chain slack
1
U1KBE0E0.book Page 25 Monday, July 25, 2011 5:03 PM