warning YAMAHA YZF-R1 2017 Owner's Guide
[x] Cancel search | Manufacturer: YAMAHA, Model Year: 2017, Model line: YZF-R1, Model: YAMAHA YZF-R1 2017Pages: 130, PDF Size: 9.99 MB
Page 97 of 130

Periodic maintenance and adjustment7-21
1
2
3
4
5
678
9
10
11
12
Ride at moderate speeds after
changing a tire since the tire
surface must first be “broken
in” for it to develop its optimalcharacteristics.
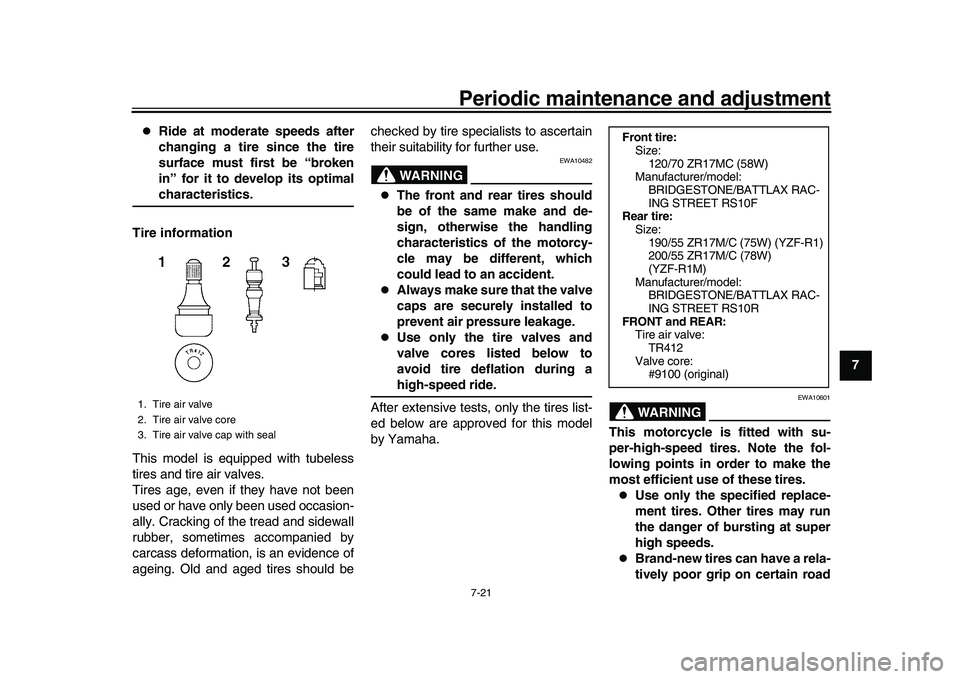
Tire information
This model is equipped with tubeless
tires and tire air valves.
Tires age, even if they have not been
used or have only been used occasion-
ally. Cracking of the tread and sidewall
rubber, sometimes accompanied by
carcass deformation, is an evidence of
ageing. Old and aged tires should be checked by tire specialists to ascertain
their suitability for further use.
WARNING
EWA10482
The front and rear tires should
be of the same make and de-
sign, otherwise the handling
characteristics of the motorcy-
cle may be different, which
could lead to an accident.
Always make sure that the valve
caps are securely installed to
prevent air pressure leakage.
Use only the tire valves and
valve cores listed below to
avoid tire deflation during ahigh-speed ride.
After extensive tests, only the tires list-
ed below are approved for this model
by Yamaha.
WARNING
EWA10601
This motorcycle is fitted with su-
per-high-speed tires. Note the fol-
lowing points in order to make the
most efficient use of these tires.
Use only the specified replace-
ment tires. Other tires may run
the danger of bursting at super
high speeds.
Brand-new tires can have a rela-
tively poor grip on certain road
1. Tire air valve
2. Tire air valve core
3. Tire air valve cap with seal
Front tire: Size:120/70 ZR17MC (58W)
Manufacturer/model:
BRIDGESTONE/BATTLAX RAC-
ING STREET RS10F
Rear tire:
Size:190/55 ZR17M/C (75W) (YZF-R1)
200/55 ZR17M/C (78W)
(YZF-R1M)
Manufacturer/model: BRIDGESTONE/BATTLAX RAC-
ING STREET RS10R
FRONT and REAR: Tire air valve:
TR412
Valve core: #9100 (original)
BX4-9-E0.book 21 ページ 2016年12月1日 木曜日 午後8時7分
Page 100 of 130

Periodic maintenance and adjustment
7-24
1
2
3
4
5
67
8
9
10
11
12
EAU37914
Checking the brake lever free
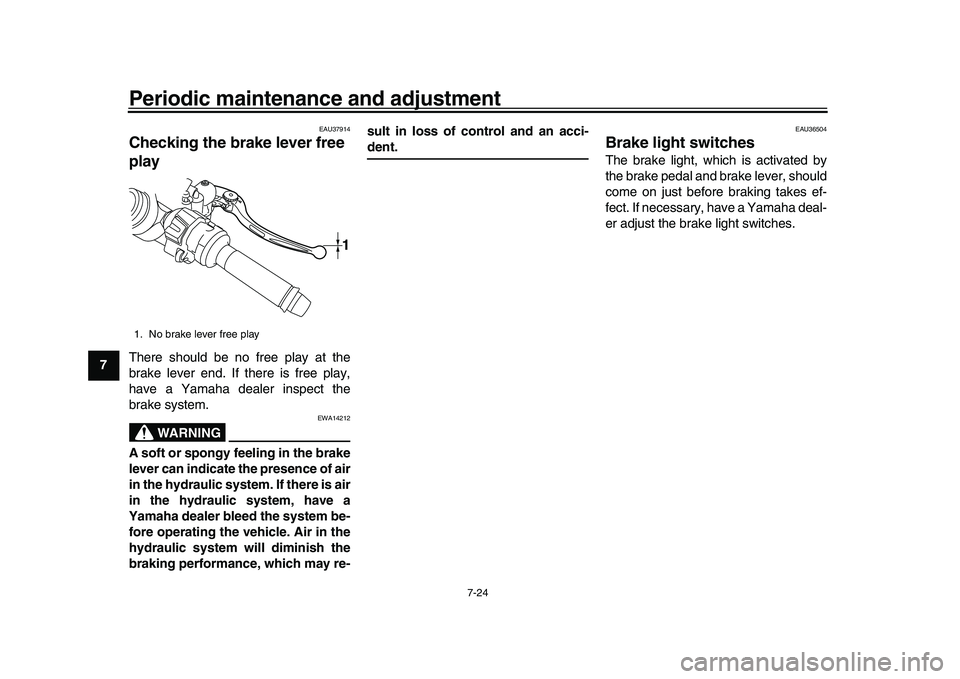
playThere should be no free play at the
brake lever end. If there is free play,
have a Yamaha dealer inspect the
brake system.
WARNING
EWA14212
A soft or spongy feeling in the brake
lever can indicate the presence of air
in the hydraulic system. If there is air
in the hydraulic system, have a
Yamaha dealer bleed the system be-
fore operating the vehicle. Air in the
hydraulic system will diminish the
braking performance, which may re- sult in loss of control and an acci-
dent.
EAU36504
Brake light switchesThe brake light, which is activated by
the brake pedal and brake lever, should
come on just before braking takes ef-
fect. If necessary, have a Yamaha deal-
er adjust the brake light switches.
1. No brake lever free play
1
BX4-9-E0.book 24 ページ 2016年12月1日 木曜日 午後8時7分
Page 102 of 130

Periodic maintenance and adjustment
7-26
1
2
3
4
5
67
8
9
10
11
12 Rear brake
WARNING
EWA15991
Improper maintenance can result in
loss of braking ability. Observe
these precautions:
Insufficient brake fluid may al-
low air to enter the brake sys-
tem, reducing braking
performance.
Clean the filler cap before re-
moving. Use only DOT 4 brake
fluid from a sealed container.
Use only the specified brake flu-
id; otherwise, the rubber seals may deteriorate, causing leak-
age.
Refill with the same type of
brake fluid. Adding a brake fluid
other than DOT 4 may result in a
harmful chemical reaction.
Be careful that water does not
enter the brake fluid reservoir
when refilling. Water will signifi-
cantly lower the boiling point of
the fluid and may result in vaporlock.
NOTICE
ECA17641
Brake fluid may damage painted sur-
faces or plastic parts. Always cleanup spilled fluid immediately.
As the brake pads wear, it is normal for
the brake fluid level to gradually go
down. A low brake fluid level may indi-
cate worn brake pads and/or brake sys-
tem leakage; therefore, be sure to
check the brake pads for wear and the
brake system for leakage. If the brake
fluid level goes down suddenly, have a
Yamaha dealer check the cause before
further riding.
EAU22733
Changing the brake fluidHave a Yamaha dealer change the
brake fluid at the intervals specified in
the periodic maintenance and lubrica-
tion chart. In addition, have the oil seals
of the master cylinders and calipers as
well as the brake hoses replaced at the
intervals listed below or whenever they
are damaged or leaking.
Oil seals: Replace every two
years.
Brake hoses: Replace every four
years.
1. Minimum level markSpecified brake fluid:
DOT 4
1
BX4-9-E0.book 26 ページ 2016年12月1日 木曜日 午後8時7分
Page 105 of 130

Periodic maintenance and adjustment7-29
1
2
3
4
5
678
9
10
11
12
EAU23098
Checking and lubricating the
cablesThe operation of all control cables and
the condition of the cables should be
checked before each ride, and the ca-
bles and cable ends should be lubricat-
ed if necessary. If a cable is damaged
or does not move smoothly, have a
Yamaha dealer check or replace it.
WARNING! Damage to the outer
housing of cables may result in in-
ternal rusting and cause interfer-
ence with cable movement. Replace
damaged cables as soon as possi-
ble to prevent unsafe condi-
tions.
[EWA10712] EAU23115
Checking and lubr
icating the
throttle grip and cableThe operation of the throttle grip should
be checked before each ride. In addi-
tion, the cable should be lubricated by a
Yamaha dealer at the intervals speci-
fied in the periodic maintenance chart.
The throttle cable is equipped with a
rubber cover. Make sure that the cover
is securely installed. Even though the
cover is installed correctly, it does not
completely protect the cable from water
entry. Therefore, use care not to pour
water directly onto the cover or cable
when washing the vehicle. If the cable
or cover becomes dirty, wipe clean with
a moist cloth.
EAU44276
Checking and lubricating the
brake and shift pedalsThe operation of the brake and shift
pedals should be checked before each
ride, and the pedal pivots should be lu-
bricated if necessary.
Brake pedal
Recommended lubricant:
Yamaha cable lubricant or other suit-
able cable lubricant
BX4-9-E0.book 29 ページ 2016年12月1日 木曜日 午後8時7分
Page 107 of 130

Periodic maintenance and adjustment7-31
1
2
3
4
5
678
9
10
11
12
EAU23203
Checking and lubricating the
sidestandThe operation of the sidestand should
be checked before each ride, and the
sidestand pivot and metal-to-metal
contact surfaces should be lubricated if
necessary.
WARNING
EWA10732
If the sidestand does not move up
and down smoothly, have a Yamaha
dealer check or repair it. Otherwise,
the sidestand could contact the
ground and distract the operator, re-sulting in a possible loss of control.
EAUM1653
Lubricating the swingarm
pivotsThe swingarm pivots must be lubricat-
ed by a Yamaha dealer at the intervals
specified in the periodic maintenance
and lubrication chart.
EAU23273
Checking the front forkThe condition and operation of the front
fork must be checked as follows at the
intervals specified in the periodic main-
tenance and lubrication chart.
To check the condition
Check the inner tubes for scratches,
damage and excessive oil leakage.
To check the operation 1. Place the vehicle on a level sur- face and hold it in an upright posi-
tion. WARNING! To avoid injury,
securely support the vehicle so
there is no danger of it falling
over.
[EWA10752]
2. While applying the front brake, push down hard on the handlebars
several times to check if the front
fork compresses and rebounds
smoothly.
Recommended lubricant:Lithium-soap-based grease
Recommended lubricant:
Lithium-soap-based grease
BX4-9-E0.book 31 ページ 2016年12月1日 木曜日 午後8時7分
Page 108 of 130

Periodic maintenance and adjustment
7-32
1
2
3
4
5
67
8
9
10
11
12
NOTICE
ECA10591
If any damage is found or the front
fork does not operate smoothly,
have a Yamaha dealer check or re-pair it.
EAU23285
Checking the steeringWorn or loose steering bearings may
cause danger. Therefore, the operation
of the steering must be checked as fol-
lows at the intervals specified in the pe-
riodic maintenance and lubrication
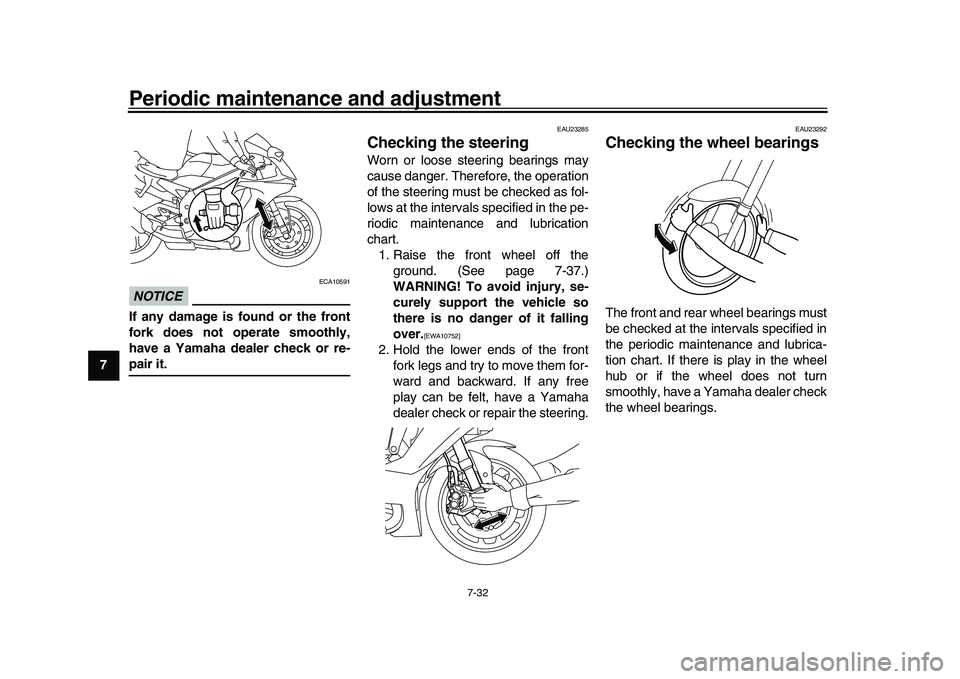
chart. 1. Raise the front wheel off the ground. (See page 7-37.)
WARNING! To avoid injury, se-
curely support the vehicle so
there is no danger of it falling
over.
[EWA10752]
2. Hold the lower ends of the frontfork legs and try to move them for-
ward and backward. If any free
play can be felt, have a Yamaha
dealer check or repair the steering.
EAU23292
Checking the wheel bearingsThe front and rear wheel bearings must
be checked at the intervals specified in
the periodic maintenance and lubrica-
tion chart. If there is play in the wheel
hub or if the wheel does not turn
smoothly, have a Yamaha dealer check
the wheel bearings.
BX4-9-E0.book 32 ページ 2016年12月1日 木曜日 午後8時7分
Page 109 of 130

Periodic maintenance and adjustment7-33
1
2
3
4
5
678
9
10
11
12
EAU68230
BatteryNOTICE
ECA22960
Use only the specified genuine
YAMAHA battery. Using a different
battery may cause the IMU to fail andthe engine to stall.
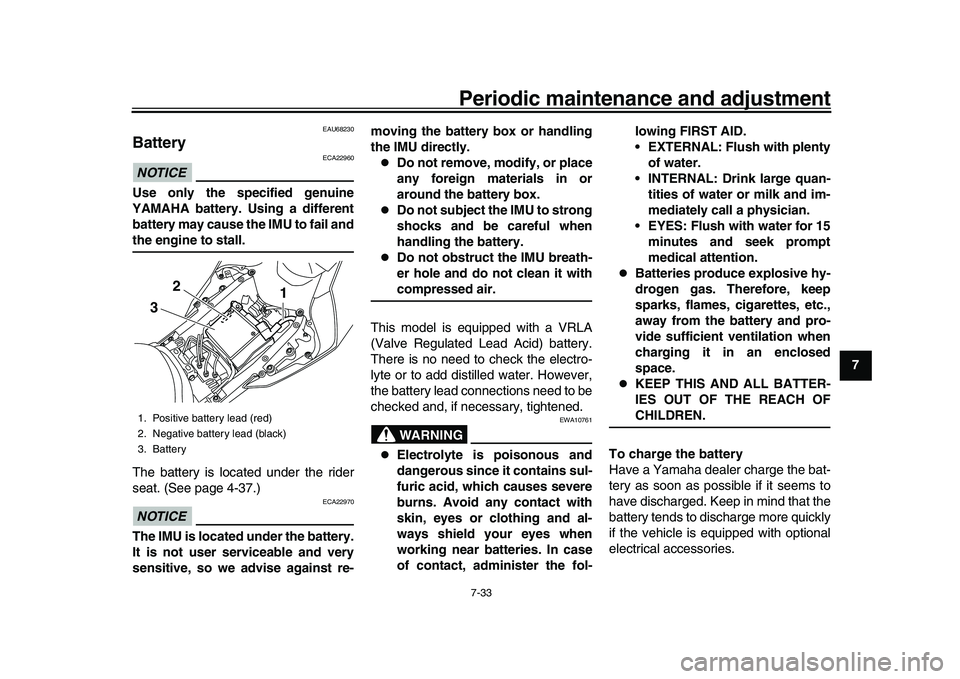
The battery is located under the rider
seat. (See page 4-37.)NOTICE
ECA22970
The IMU is located under the battery.
It is not user serviceable and very
sensitive, so we advise against re- moving the battery box or handling
the IMU directly.
Do not remove, modify, or place
any foreign materials in or
around the battery box.
Do not subject the IMU to strong
shocks and be careful when
handling the battery.
Do not obstruct the IMU breath-
er hole and do not clean it withcompressed air.
This model is equipped with a VRLA
(Valve Regulated Lead Acid) battery.
There is no need to check the electro-
lyte or to add distilled water. However,
the battery lead connections need to be
checked and, if necessary, tightened.WARNING
EWA10761
Electrolyte is poisonous and
dangerous since it contains sul-
furic acid, which causes severe
burns. Avoid any contact with
skin, eyes or clothing and al-
ways shield your eyes when
working near batteries. In case
of contact, administer the fol- lowing FIRST AID.
EXTERNAL: Flush with plenty
of water.
INTERNAL: Drink large quan- tities of water or milk and im-
mediately call a physician.
EYES: Flush with water for 15 minutes and seek prompt
medical attention.
Batteries produce explosive hy-
drogen gas. Therefore, keep
sparks, flames, cigarettes, etc.,
away from the battery and pro-
vide sufficient ventilation when
charging it in an enclosed
space.
KEEP THIS AND ALL BATTER-
IES OUT OF THE REACH OFCHILDREN.
To charge the battery
Have a Yamaha dealer charge the bat-
tery as soon as possi ble if it seems to
have discharged. Keep in mind that the
battery tends to discharge more quickly
if the vehicle is equipped with optional
electrical accessories.
1. Positive battery lead (red)
2. Negative battery lead (black)
3. Battery
1
2
3
BX4-9-E0.book 33 ページ 2016年12月1日 木曜日 午後8時7分
Page 111 of 130

Periodic maintenance and adjustment7-35
1
2
3
4
5
678
9
10
11
12
3. Remove the starter relay cover by
pulling it upward.
The fuse boxes, which contain the fus-
es for the individual circuits, are located
under panel A. (See page 7-9.) If a fuse is blown, replace it as follows.
1. Turn the key to “OFF” and turn off the electrical circuit in question.
2. Remove the blown fuse, and then install a new fuse of the specified
amperage. WARNING! Do not
use a fuse of a higher amperage
rating than recommended to
avoid causing extensive dam-
age to the electrical system and
possibly a fire.
[EWA15132]
1. Screw
2. Panel
1. Starter relay cover1 1
2
1
1. Hazard fuse
2. Fuel injection system fuse
3. Electronic throttle valve fuse
4. Backup fuse
5. Sub radiator fan motor fuse
6. Radiator fan motor fuse
7. Spare fuse
1
2
3
4
5
6 7
1. Ignition fuse
2. Signaling system fuse
3. ABS ECU fuse
4. ABS solenoid fuse
5. Headlight fuse
6. Terminal fuse 1
7. Spare fuse
8. SCU fuse (YZF-R1M)
1
23
45
6
7
8
7
BX4-9-E0.book 35 ページ 2016年12月1日 木曜日 午後8時7分
Page 113 of 130

Periodic maintenance and adjustment7-37
1
2
3
4
5
678
9
10
11
12
TIP
The right headlight comes on
when Pass/LAP switch “ /LAP”
is pushed or the dimmer switch is
set to “ ” (high beam).
The auxiliary lights were designed
to fade out as your R1 goes tosleep.
EAU67131
Supporting the motorcycleSince this model is not equipped with a
centerstand, use maintenance stands
when removing the front or rear wheel
or when performing other maintenance
that requires the motorcycle to stand up
right.
Check that the motorcycle is in a stable
and level position before starting any
maintenance.
EAU25872
TroubleshootingAlthough Yamaha motorcycles receive
a thorough inspection before shipment
from the factory, trouble may occur dur-
ing operation. Any problem in the fuel,
compression, or ignition systems, for
example, can cause poor starting and
loss of power.
The following troubleshooting charts
represent quick and easy procedures
for checking these vital systems your-
self. However, should your motorcycle
require any repair, take it to a Yamaha
dealer, whose skilled technicians have
the necessary tools, experience, and
know-how to service the motorcycle
properly.
Use only genuine Yamaha replace-
ment parts. Imitation parts may look like
Yamaha parts, but they are often inferi-
or, have a shorter service life and can
lead to expensive repair bills.
WARNING
EWA15142
When checking the fuel system, do
not smoke, and make sure there are
no open flames or sparks in the ar-
ea, including pilot lights from water
1. Maintenance stand (example)
1
BX4-9-E0.book 37 ページ 2016年12月1日 木曜日 午後8時7分
Page 116 of 130

Periodic maintenance and adjustment
7-40
1
2
3
4
5
67
8
9
10
11
12 Engine overheating
WARNING
EWAT1041
Do not remove the radiator cap when the engine and radiator are hot. Scalding hot fluid and steam may be
blown out under pressure, which could cause serious injury. Be sure to wait until the engine has cooled.
Place a thick rag, like a towel, over the radiator cap, and then slowly rotate the cap counterclockwise to the de-
tent to allow any residual pressure to escape. When the hissing sound has stopped, press down on the capwhile turning it counterclockwise, and then remove the cap.
TIPIf coolant is not available, tap water can be temporarily us
ed instead, provided that it is changed to the recommended coolantas soon as possible.
Wait until the
engine has cooled.
Check the coolant level in the
reservoir and radiator.
The coolant level
is OK.The coolant level is low.
Check the cooling system
for leakage.
Have a Yamaha dealer checkand repair the cooling system.Add coolant. (See TIP.)
Start the engine. If the engine overheats again,
have a
Yamaha dealer check
and repair the cooling system.
There is
leakage.
There is
no leakage.
BX4-9-E0.book 40 ページ 2016年12月1日 木曜日 午後8時7分