battery YAMAHA YZF-R125 2015 Owners Manual
[x] Cancel search | Manufacturer: YAMAHA, Model Year: 2015, Model line: YZF-R125, Model: YAMAHA YZF-R125 2015Pages: 98, PDF Size: 6.92 MB
Page 7 of 98

TABLE OF CONTENTS
Battery ...........................................6-31
Replacing the fuses .......................6-33
Replacing a headlight bulb............6-34
Replacing an auxiliary light bulb....6-35
Tail/brake light ...............................6-35
Replacing a turn signal light
bulb ............................................6-35
Replacing the license plate light
bulb ............................................6-36
Supporting the motorcycle............6-36
Front wheel (for non-ABS
models) ......................................6-37
Rear wheel (for non-ABS
models) ......................................6-38
Troubleshooting ............................6-40
Troubleshooting charts .................6-42
MOTORCYCLE CARE AND
STORAGE..........................................7-1
Matte color caution .........................7-1
Care .................................................7-1
Storage ............................................7-3
SPECIFICATIONS..............................8-1
CONSUMER INFORMATION............9-1
Identification numbers .....................9-1
INDEX...............................................10-1
U5D7E5E0.book Page 2 Thursday, August 21, 2014 9:30 AM
Page 13 of 98
DESCRIPTION
2-1
2
EAU10411
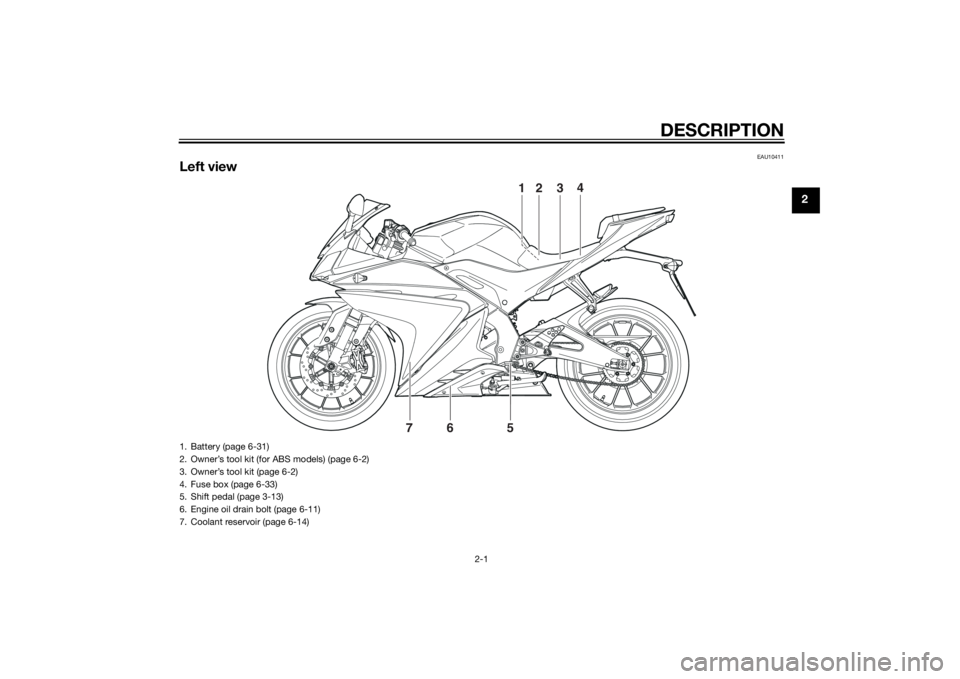
Left view
2
3
4
5 76
1
1. Battery (page 6-31)
2. Owner’s tool kit (for ABS models) (page 6-2)
3. Owner’s tool kit (page 6-2)
4. Fuse box (page 6-33)
5. Shift pedal (page 3-13)
6. Engine oil drain bolt (page 6-11)
7. Coolant reservoir (page 6-14)
U5D7E5E0.book Page 1 Thursday, August 21, 2014 9:30 AM
Page 22 of 98
INSTRUMENT AND CONTROL FUNCTIONS
3-7
3two tripmeters (which shows the
distance traveled since last set to
zero)
a fuel reserve tripmeter (which
shows the distance traveled since
the fuel level warning light came
on)
Pushing the “SELECT” button switch-
es the display between the odometer
mode and the various tripmeter modes
in the following order:
ODO (odometer) → TRIP 1 (tripmeter)
→ TRIP 2 (tripmeter) → ODO (odome-
ter)
When approximately 3.0 L (0.79 US
gal, 0.66 Imp.gal) of fuel remains in the
fuel tank, the display will automaticallychange to the fuel reserve tripmeter
mode “F TRIP” and start counting the
distance traveled from that point. In
that case, pushing the “SELECT” but-
ton switches the display between the
various tripmeter and odometer modes
in the following order:
ODO → TRIP 1 → TRIP 2 → F TRIP (fu-
el reserve tripmeter) → ODO
To reset a tripmeter, select it by push-
ing the “SELECT” button until “TRIP 1,
TRIP 2, F TRIP” is displayed. While
“TRIP 1, TRIP 2, F TRIP” is displayed,
push the “RESET” button for two sec-
onds. The fuel reserve tripmeter will re-
set automatically and disappear after
you have refueled and turned the key
to “OFF”.Multi-function display
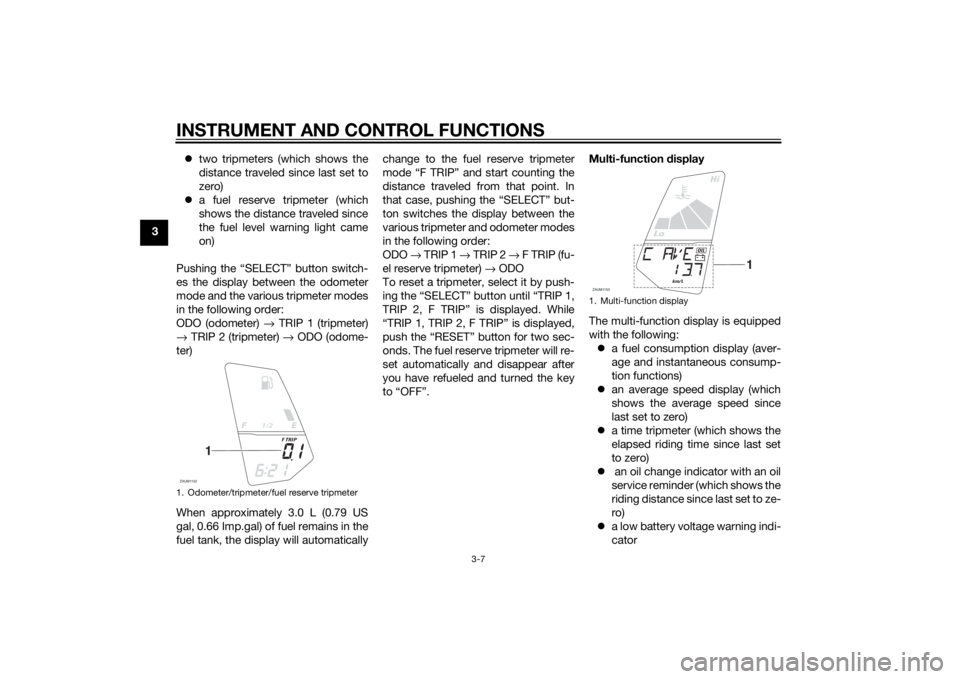
The multi-function display is equipped
with the following:
a fuel consumption display (aver-
age and instantaneous consump-
tion functions)
an average speed display (which
shows the average speed since
last set to zero)
a time tripmeter (which shows the
elapsed riding time since last set
to zero)
an oil change indicator with an oil
service reminder (which shows the
riding distance since last set to ze-
ro)
a low battery voltage warning indi-
cator
1. Odometer/tripmeter/fuel reserve tripmeterZAUM1152
1/2
F TRIP
1
1. Multi-function displayZAUM1153
km/L
Lo
Hi
OIL
1
U5D7E5E0.book Page 7 Thursday, August 21, 2014 9:30 AM
Page 25 of 98
INSTRUMENT AND CONTROL FUNCTIONS
3-10
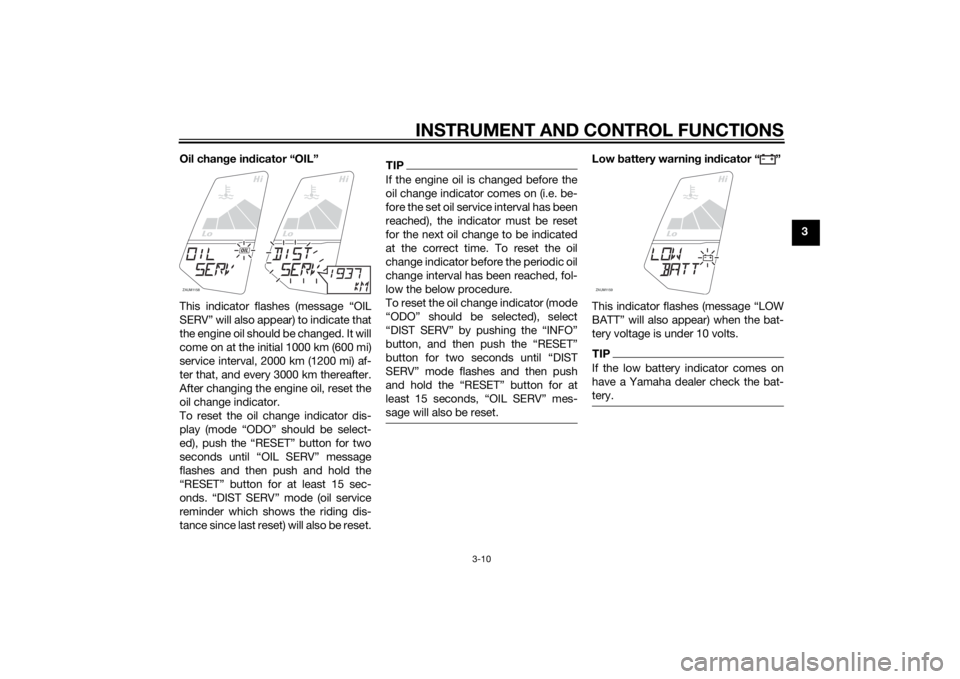
3 Oil change indicator “OIL”
This indicator flashes (message “OIL
SERV” will also appear) to indicate that
the engine oil should be changed. It will
come on at the initial 1000 km (600 mi)
service interval, 2000 km (1200 mi) af-
ter that, and every 3000 km thereafter.
After changing the engine oil, reset the
oil change indicator.
To reset the oil change indicator dis-
play (mode “ODO” should be select-
ed), push the “RESET” button for two
seconds until “OIL SERV” message
flashes and then push and hold the
“RESET” button for at least 15 sec-
onds. “DIST SERV” mode (oil service
reminder which shows the riding dis-
tance since last reset) will also be reset.
TIPIf the engine oil is changed before the
oil change indicator comes on (i.e. be-
fore the set oil service interval has been
reached), the indicator must be reset
for the next oil change to be indicated
at the correct time. To reset the oil
change indicator before the periodic oil
change interval has been reached, fol-
low the below procedure.
To reset the oil change indicator (mode
SERVŽ mode flashes and then push
sage will also be reset.
Low battery warning indicator “ ”
This indicator flashes (message “LOW
BATT” will also appear) when the bat-
tery voltage is under 10 volts.TIPIf the low battery indicator comes on
have a Yamaha dealer check the bat-
tery.
ZAUM1158
Lo
Hi
OIL
Lo
Hi
ZAUM1159
Lo
Hi
U5D7E5E0.book Page 10 Thursday, August 21, 2014 9:30 AM
Page 26 of 98
INSTRUMENT AND CONTROL FUNCTIONS
3-11
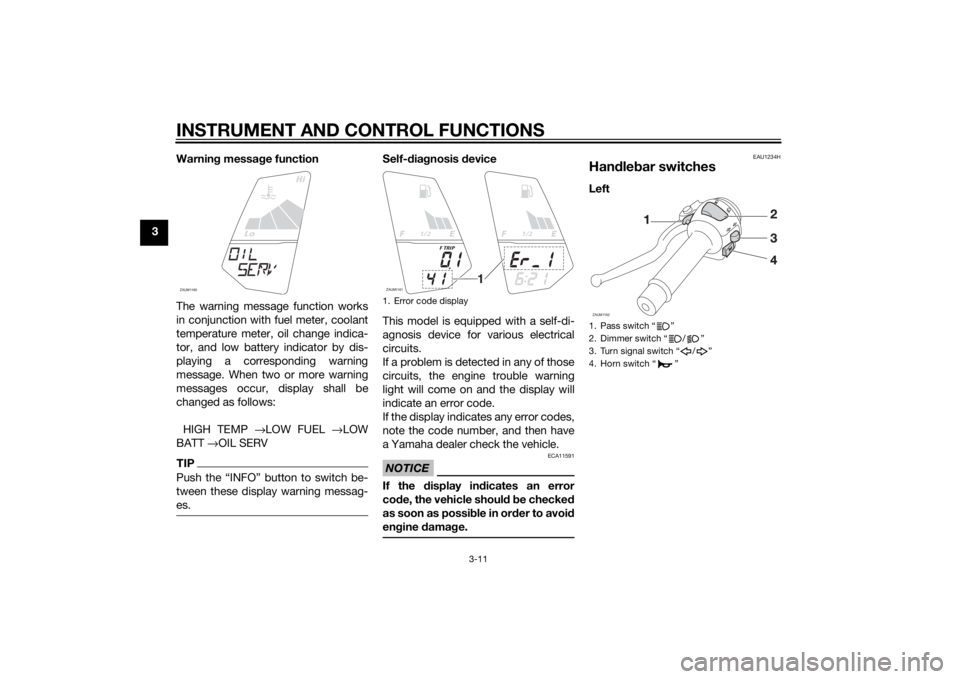
3Warning message function
The warning message function works
in conjunction with fuel meter, coolant
temperature meter, oil change indica-
tor, and low battery indicator by dis-
playing a corresponding warning
message. When two or more warning
messages occur, display shall be
changed as follows:
HIGH TEMP →LOW FUEL →LOW
BATT →OIL SERV
TIP
tween these display warning messag-
es.
Self-diagnosis device
This model is equipped with a self-di-
agnosis device for various electrical
circuits.
If a problem is detected in any of those
circuits, the engine trouble warning
light will come on and the display will
indicate an error code.
If the display indicates any error codes,
note the code number, and then have
a Yamaha dealer check the vehicle.NOTICE
ECA11591
If the display indicates an error
code, the vehicle should be checked
as soon as possible in order to avoid
engine damage.
EAU1234H
Handlebar switchesLeft
ZAUM1160
Lo
Hi
1. Error code displayZAUM1161
1/2
F TRIP
1/2
1
1. Pass switch Ž
2. Dimmer switch / Ž
3. Turn signal switch / Ž
4. Horn switch ŽZAUM1162
U5D7E5E0.book Page 11 Thursday, August 21, 2014 9:30 AM
Page 38 of 98

FOR YOUR SAFETY – PRE-OPERATION CHECKS
4-3
4
Chassis fasteners• Make sure that all nuts, bolts and screws are properly tightened.
• Tighten if necessary.—
Instruments, lights, signals
and switches• Check operation.
• Correct if necessary.—
Sidestand switch • Check operation of ignition circuit cut-off system.
• If system is not working correctly, have Yamaha dealer check vehicle.3-18
Battery• Check fluid level.
• Fill with distilled water if necessary.6-31 ITEM CHECKS PAGE
U5D7E5E0.book Page 3 Thursday, August 21, 2014 9:30 AM
Page 40 of 98

OPERATION AND IMPORTANT RIDING POINTS
5-2
5
NOTICE
ECA11834
If a warning or indicator light does
not come on initially when the key is
turned to “ON”, or if a warning or in-
dicator light remains on, see page
3-2 for the corresponding warning
and indicator light circuit check.
For ABS models:The ABS warning light should
come on when the key is turned to
“ON”, and then go off after travel-
ing at a speed of 10 km/h (6 mi/h)
or higher.
NOTICE
ECA17682
If the ABS warning light does not
come on and then go off as ex-
plained above, see page 3-2 for the
warning light circuit check.2. Shift the transmission into the
neutral position. The neutral indi-
cator light should come on. If not,
ask a Yamaha dealer to check the
electrical circuit.
3. Start the engine by pushing the
start switch.If the engine fails to start, release
the start switch, wait a few sec-
onds, and then try again. Each
starting attempt should be as
short as possible to preserve the
battery. Do not crank the engine
more than 10 seconds on any one
attempt.
NOTICE
ECA11043
For maximum engine life, never ac-
celerate hard when the engine is
cold!
EAU16673
ShiftingShifting gears lets you control the
amount of engine power available for
starting off, accelerating, climbing hills,
etc.
The gear positions are shown in the il-
lustration.TIPTo shift the transmission into the neu-
tral position, press the shift pedal down
repeatedly until it reaches the end of its
travel, and then slightly raise it.1. Shift pedal
2. Neutral positionZAUM1167
1 N2 3 4 5
6
1
2
U5D7E5E0.book Page 2 Thursday, August 21, 2014 9:30 AM
Page 46 of 98

PERIODIC MAINTENANCE AND ADJUSTMENT
6-4
6
EAU1771A
General maintenance and lubrication chartNO. ITEM CHECK OR MAINTENANCE JOBODOMETER READING
ANNUAL
CHECK
1000 km
(600 mi) 6000 km
(3500 mi) 12000 km
(7000 mi) 18000 km
(10500 mi) 24000 km
(14000 mi)
1 *Air filter element • Clean.
√√
• Replace. √√
2 Air filter check hose • Clean. √√√√√
3 *Battery • Check electrolyte level and spe-
cific gravity.
• Make sure that the breather hose is properly routed. √√√√√
4Clutch • Check operation.
•Adjust.
√√√√√
5 *Front brake • Check operation, fluid level and
vehicle for fluid leakage. √√√√√√
• Replace brake pads. Whenever worn to the limit
6 *Rear brake • Check operation, fluid level and
vehicle for fluid leakage. √√√√√√
• Replace brake pads. Whenever worn to the limit
7 *Brake hoses • Check for cracks or damage.
• Check for correct routing and
clamping. √√√√√
• Replace. Every 4 years
8 *Brake fluid • Replace. Every 2 years
9 *Wheels • Check runout and for damage. √√√√
U5D7E5E0.book Page 4 Wednesday, September 3, 2014 10:56 AM
Page 73 of 98
PERIODIC MAINTENANCE AND ADJUSTMENT
6-31
6
EAU23292
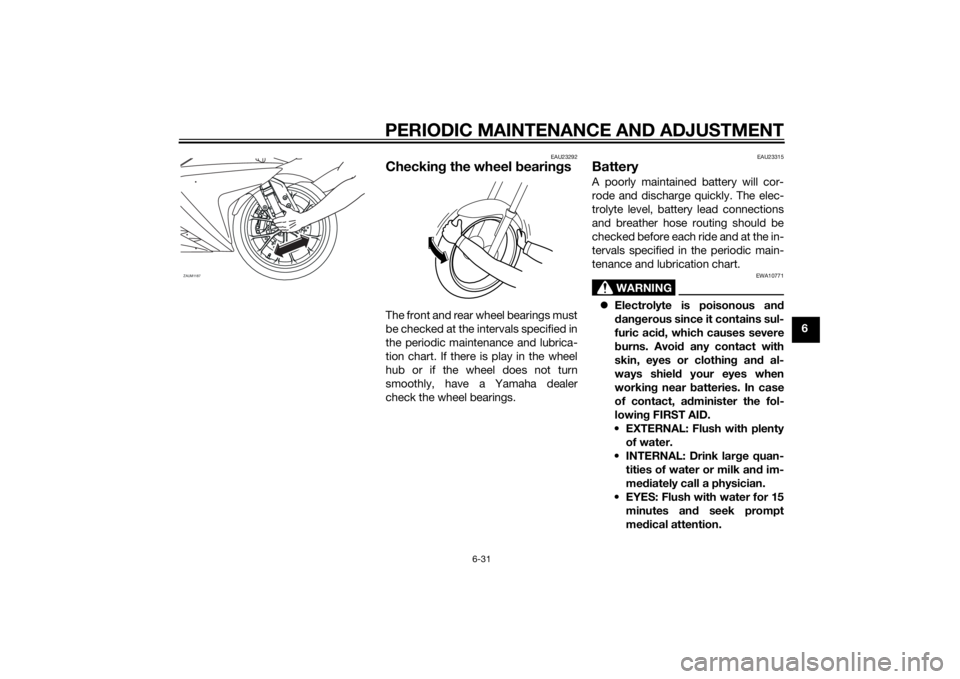
Checking the wheel bearingsThe front and rear wheel bearings must
be checked at the intervals specified in
the periodic maintenance and lubrica-
tion chart. If there is play in the wheel
hub or if the wheel does not turn
smoothly, have a Yamaha dealer
check the wheel bearings.
EAU23315
BatteryA poorly maintained battery will cor-
rode and discharge quickly. The elec-
trolyte level, battery lead connections
and breather hose routing should be
checked before each ride and at the in-
tervals specified in the periodic main-
tenance and lubrication chart.
WARNING
EWA10771
Electrolyte is poisonous and
dangerous since it contains sul-
furic acid, which causes severe
burns. Avoid any contact with
skin, eyes or clothing and al-
ways shield your eyes when
working near batteries. In case
of contact, administer the fol-
lowing FIRST AID.
EXTERNAL: Flush with plenty
of water.
INTERNAL: Drink large quan-
tities of water or milk and im-
mediately call a physician.
EYES: Flush with water for 15
minutes and seek prompt
medical attention.
ZAUM1187
U5D7E5E0.book Page 31 Thursday, August 21, 2014 9:30 AM
Page 74 of 98
PERIODIC MAINTENANCE AND ADJUSTMENT
6-32
6Batteries produce explosive hy-
drogen gas. Therefore, keep
sparks, flames, cigarettes, etc.,
away from the battery and pro-
vide sufficient ventilation when
charging it in an enclosed
space.
Take care not to spill electrolyte
on the drive chain, as this may
weaken it, shorten chain life and
possibly result in an accident.
KEEP THIS AND ALL BATTER-
IES OUT OF THE REACH OF
CHILDREN.
To check the electrolyte level
1. Place the vehicle on a level sur-
face and hold it in an upright posi-
tion.TIPMake sure that the vehicle is posi-
tioned straight up when checking the
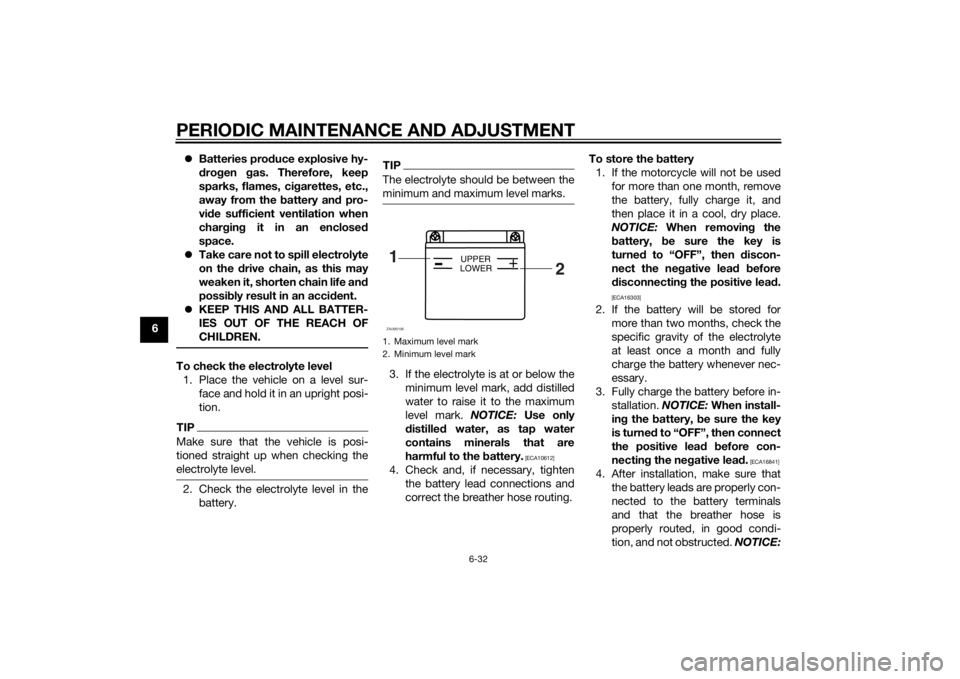
electrolyte level.2. Check the electrolyte level in the
battery.
TIPThe electrolyte should be between the
minimum and maximum level marks.3. If the electrolyte is at or below the
minimum level mark, add distilled
water to raise it to the maximum
level mark. NOTICE: Use only
distilled water, as tap water
contains minerals that are
harmful to the battery.
[ECA10612]
4. Check and, if necessary, tighten
the battery lead connections and
correct the breather hose routing.To store the battery
1. If the motorcycle will not be used
for more than one month, remove
the battery, fully charge it, and
then place it in a cool, dry place.
NOTICE: When removing the
battery, be sure the key is
turned to “OFF”, then discon-
nect the negative lead before
disconnecting the positive lead.
[ECA16303]
2. If the battery will be stored for
more than two months, check the
specific gravity of the electrolyte
at least once a month and fully
charge the battery whenever nec-
essary.
3. Fully charge the battery before in-
stallation. NOTICE: When install-
ing the battery, be sure the key
is turned to “OFF”, then connect
the positive lead before con-
necting the negative lead.
[ECA16841]
4. After installation, make sure that
the battery leads are properly con-
nected to the battery terminals
and that the breather hose is
properly routed, in good condi-
tion, and not obstructed. NOTICE:
1. Maximum level mark
2. Minimum level mark1
2
+
UPPER
LOWER
ZAUM0106
U5D7E5E0.book Page 32 Thursday, August 21, 2014 9:30 AM