torque YAMAHA YZF-R125 2016 Owners Manual
[x] Cancel search | Manufacturer: YAMAHA, Model Year: 2016, Model line: YZF-R125, Model: YAMAHA YZF-R125 2016Pages: 98, PDF Size: 6.87 MB
Page 44 of 98
Periodic maintenance and adjustment
6-2
6
EAU17303
Emission controls not only function to
ensure cleaner air, but are also vital to
proper engine operation and maximum
performance. In the following periodic
maintenance charts, the services relat-
ed to emissions control are grouped
separately. These services require
specialized data, knowledge, and
equipment. Maintenance, replace-
ment, or repair of the emission control
devices and systems may be per-
formed by any repair establishment or
individual that is certified (if applicable).
Yamaha dealers are trained and
equipped to perform these particular
services.
EAU17362
Owner’s tool kit
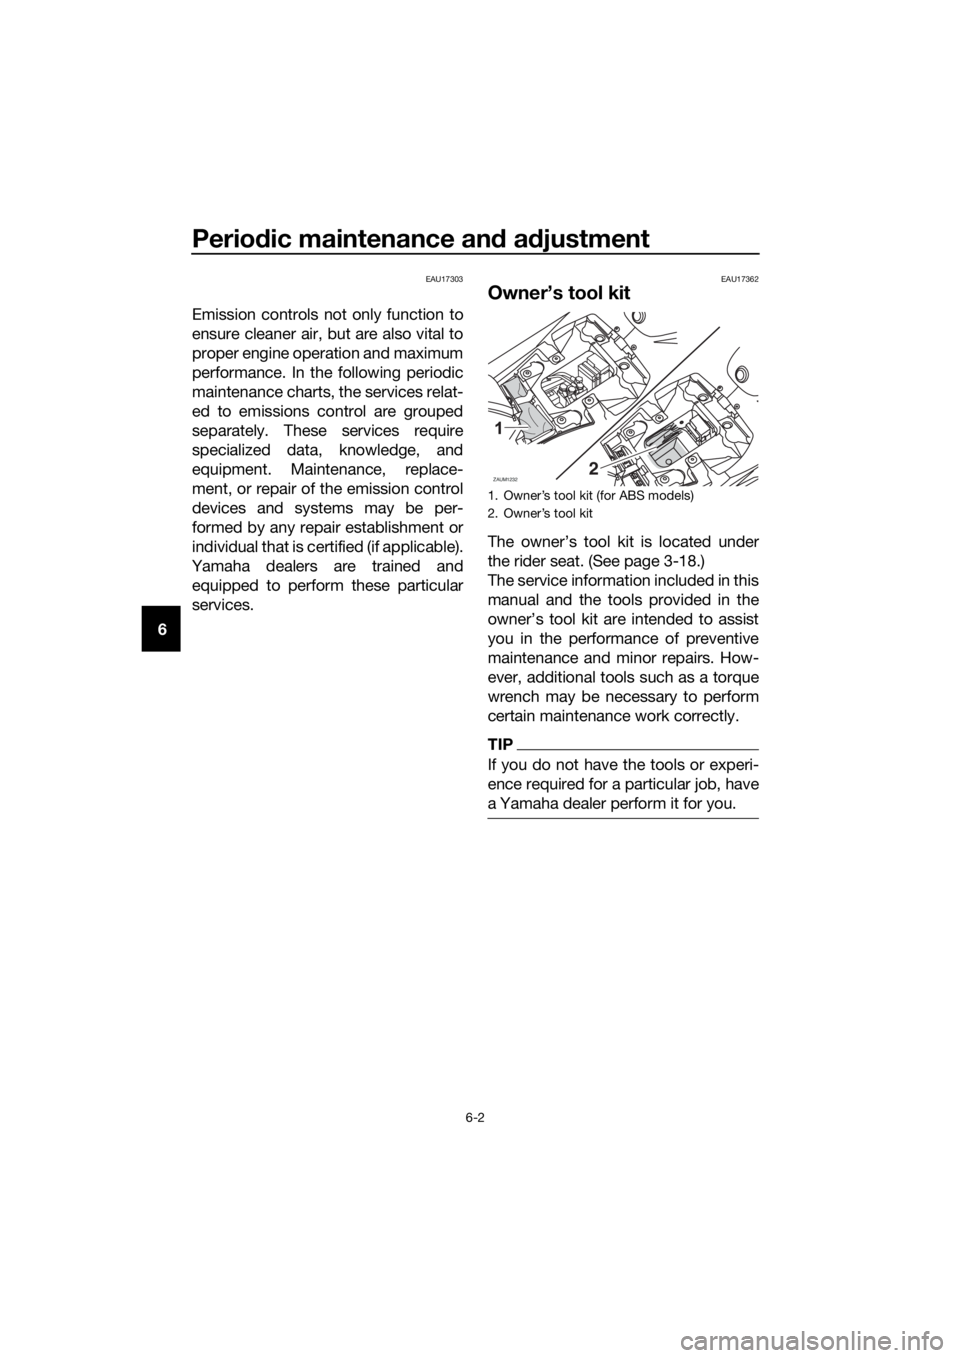
The owner’s tool kit is located under
the rider seat. (See page 3-18.)
The service information included in this
manual and the tools provided in the
owner’s tool kit are intended to assist
you in the performance of preventive
maintenance and minor repairs. How-
ever, additional tools such as a torque
wrench may be necessary to perform
certain maintenance work correctly.
TIP
If you do not have the tools or experi-
ence required for a particular job, have
a Yamaha dealer perform it for you.
1.
2.
ZAUM12322
U5D7E6E0.book Page 2 Wednesday, June 17, 2015 10:25 AM
Page 52 of 98
Periodic maintenance and adjustment
6-10
6To check the spark plug
1. Check that the porcelain insulator
around the center electrode of the
spark plug is a medium-to-light
tan (the ideal color when the vehi-
cle is ridden normally).
TIP
If the spark plug shows a distinctly dif-
ferent color, the engine could be oper-
ating improperly. Do not attempt to
diagnose such problems yourself. In-
stead, have a Yamaha dealer check
the vehicle.
2. Check the spark plug for electrode
erosion and excessive carbon or
other deposits, and replace it if
necessary.
To install the spark plug
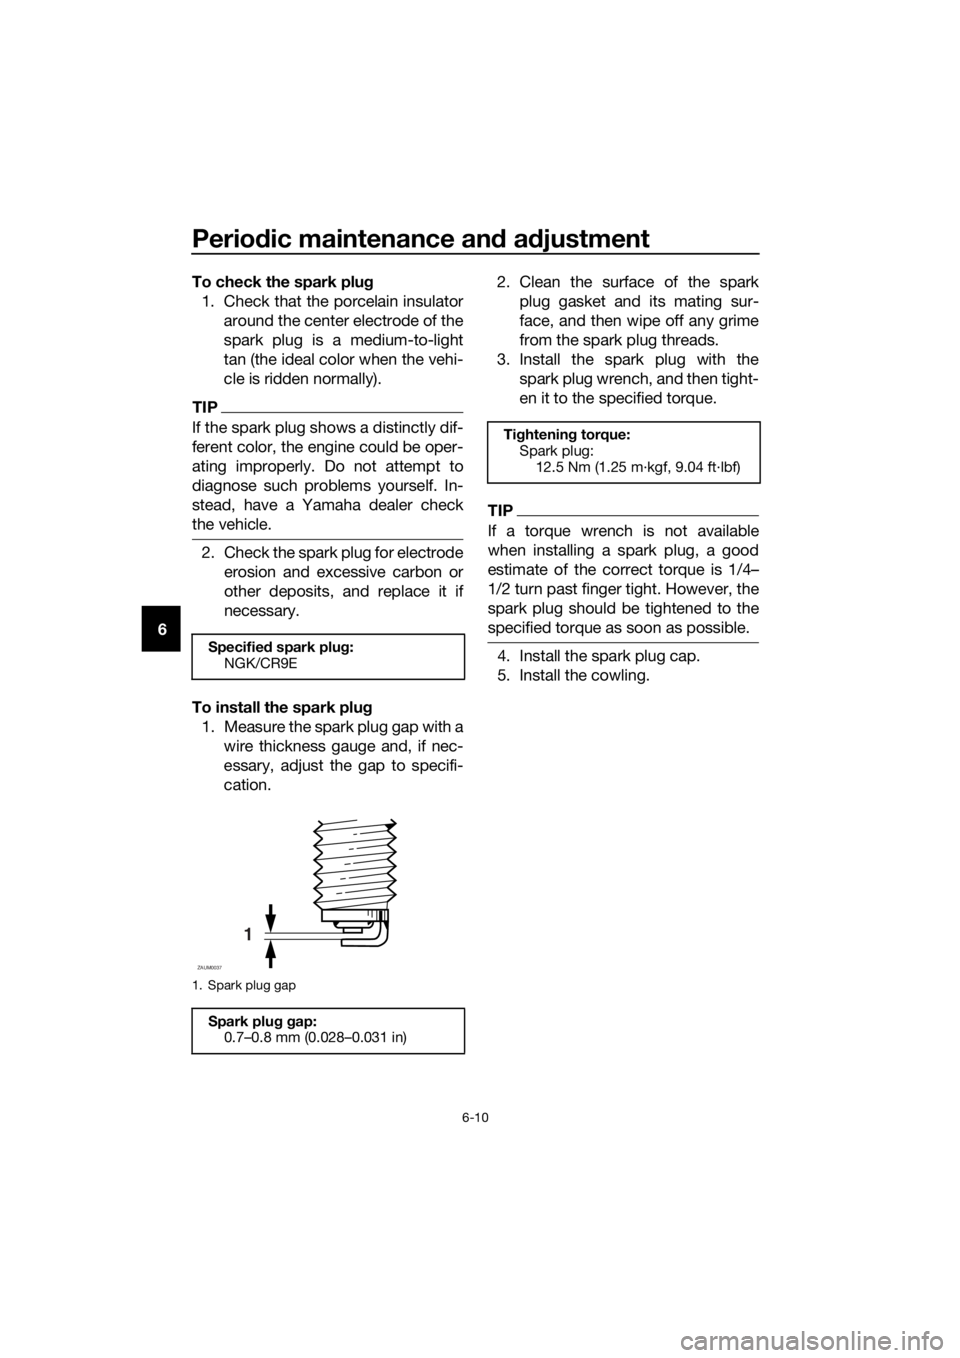
1. Measure the spark plug gap with a
wire thickness gauge and, if nec-
essary, adjust the gap to specifi-
cation.2. Clean the surface of the spark
plug gasket and its mating sur-
face, and then wipe off any grime
from the spark plug threads.
3. Install the spark plug with the
spark plug wrench, and then tight-
en it to the specified torque.
TIP
If a torque wrench is not available
when installing a spark plug, a good
estimate of the correct torque is 1/4…
1/2 turn past finger tight. However, the
spark plug should be tightened to the
specified torque as soon as possible.
4. Install the spark plug cap.
5. Install the cowling.Specified spark plug:
NGK/CR9E
1. Spark plug gap
Spark plug gap:
0.7–0.8 mm (0.028–0.031 in)
1
ZAUM0037
Tightening torque:
Spark plug:
12.5 Nm (1.25 m·kgf, 9.04 ft·lbf)
U5D7E6E0.book Page 10 Wednesday, June 17, 2015 10:25 AM
Page 54 of 98
Periodic maintenance and adjustment
6-12
64. Place an oil pan under the engine
to collect the used oil.
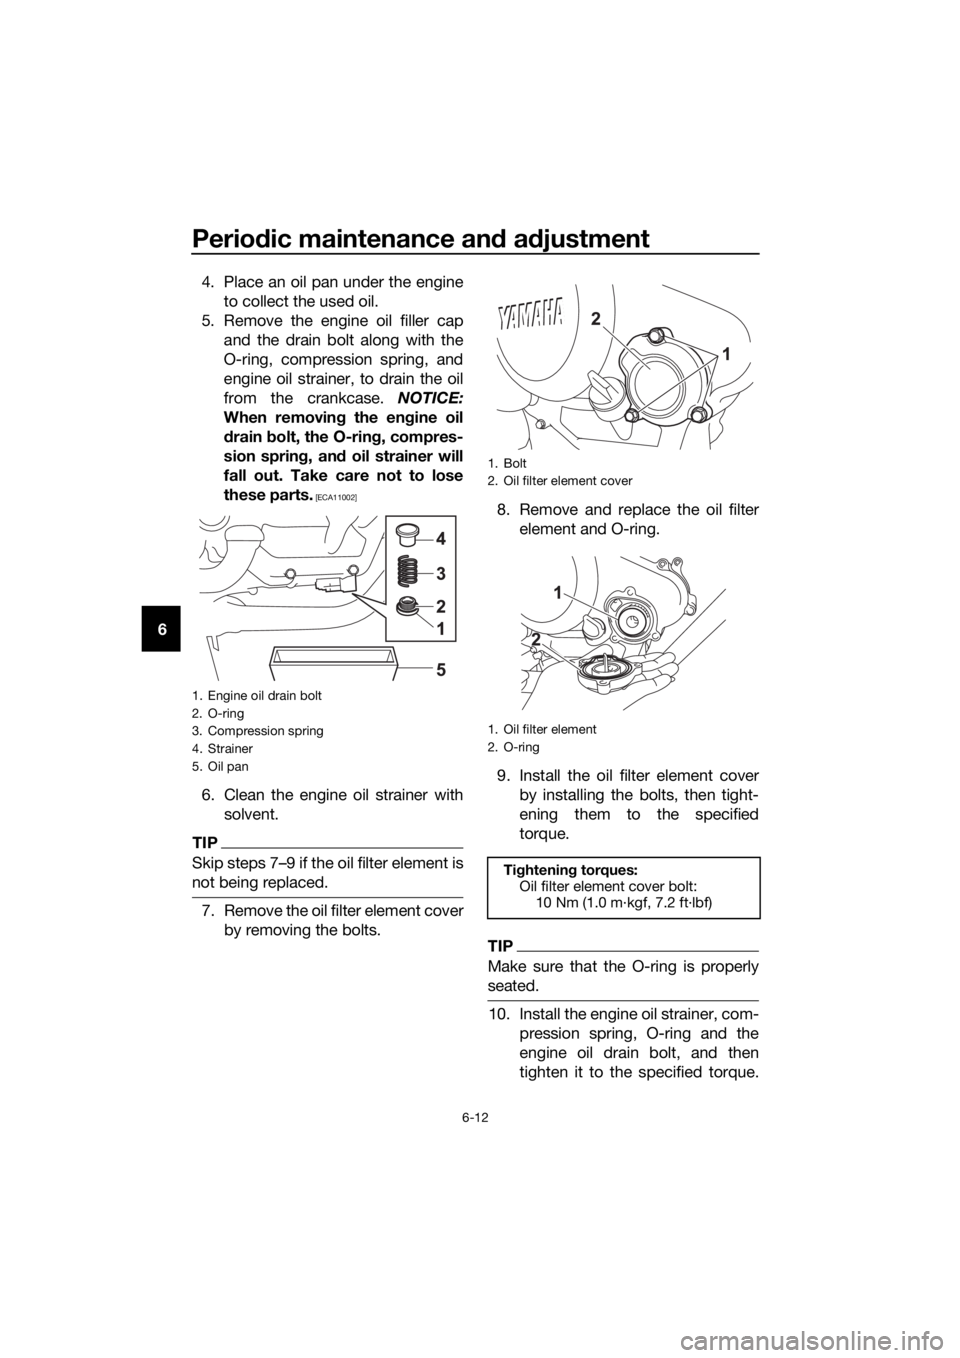
5. Remove the engine oil filler cap
and the drain bolt along with the
O-ring, compression spring, and
engine oil strainer, to drain the oil
from the crankcase. NOTICE:
When removing the engine oil
drain bolt, the O-ring, compres-
sion spring, and oil strainer will
fall out. Take care not to lose
these parts.
[ECA11002]
6. Clean the engine oil strainer with
solvent.
TIP
Skip steps 7…9 if the oil filter element is
not being replaced.
7. Remove the oil filter element cover
by removing the bolts.8. Remove and replace the oil filter
element and O-ring.
9. Install the oil filter element cover
by installing the bolts, then tight-
ening them to the specified
torque.
TIP
Make sure that the O-ring is properly
seated.
10. Install the engine oil strainer, com-
pression spring, O-ring and the
engine oil drain bolt, and then
tighten it to the specified torque.
1. Engine oil drain bolt
2. O-ring
3. Compression spring
4. Strainer
5. Oil pan
1. Bolt
2. Oil filter element cover
1. Oil filter element
2. O-ring
Tightening torques:
Oil filter element cover bolt:
10 Nm (1.0 m·kgf, 7.2 ft·lbf)
U5D7E6E0.book Page 12 Wednesday, June 17, 2015 10:25 AM
Page 55 of 98
![YAMAHA YZF-R125 2016 Owners Manual Periodic maintenance and adjustment
6-13
6 NOTICE: Before installing the
engine oil drain bolt, do not for-
get to install the O-ring, com-
pression spring, and oil strainer
in position.
[ECA10422]
1 YAMAHA YZF-R125 2016 Owners Manual Periodic maintenance and adjustment
6-13
6 NOTICE: Before installing the
engine oil drain bolt, do not for-
get to install the O-ring, com-
pression spring, and oil strainer
in position.
[ECA10422]
1](/img/51/54258/w960_54258-54.png)
Periodic maintenance and adjustment
6-13
6 NOTICE: Before installing the
engine oil drain bolt, do not for-
get to install the O-ring, com-
pression spring, and oil strainer
in position.
[ECA10422]
11. Refill with the specified amount of
the recommended engine oil, and
then install and tighten the oil filler
cap.
NOTICE
ECA11621
In order to prevent clutch slip-
page (since the engine oil also
lubricates the clutch), do not
mix any chemical additives. Do
not use oils with a diesel speci-
fication of “CD” or oils of a high-
er quality than specified. In
addition, do not use oils labeled
“ENERGY CONSERVING II” or
higher.
Make sure that no foreign mate-
rial enters the crankcase.
12. Start the engine, and then let it idle
for several minutes while checking
it for oil leakage. If oil is leaking,
immediately turn the engine off
and check for the cause.13. Turn the engine off, and then
check the oil level and correct it if
necessary.
14. Reset the oil change indicator.
(See page 3-9.)
Tightening torques:
Engine oil drain bolt:
32 Nm (3.2 m·kgf, 23 ft·lbf)
Recommended engine oil:
See page 8-1.
Oil quantity:
Without oil filter element replace-
ment:
0.95 L (1.00 US qt, 0.84 Imp.qt)
With oil filter element replacement:
1.00 L (1.06 US qt, 0.88 Imp.qt)
U5D7E6E0.book Page 13 Wednesday, June 17, 2015 10:25 AM
Page 68 of 98
Periodic maintenance and adjustment
6-26
6
EAU22762
Drive chain slack
The drive chain slack should be
checked before each ride and adjusted
if necessary.
EAUM3551To check the drive chain slack
1. Place the motorcycle on the side-
stand.
TIP
When checking and adjusting the drive
chain slack, there should be no weight
on the motorcycle.
2. Shift the transmission into the
neutral position.
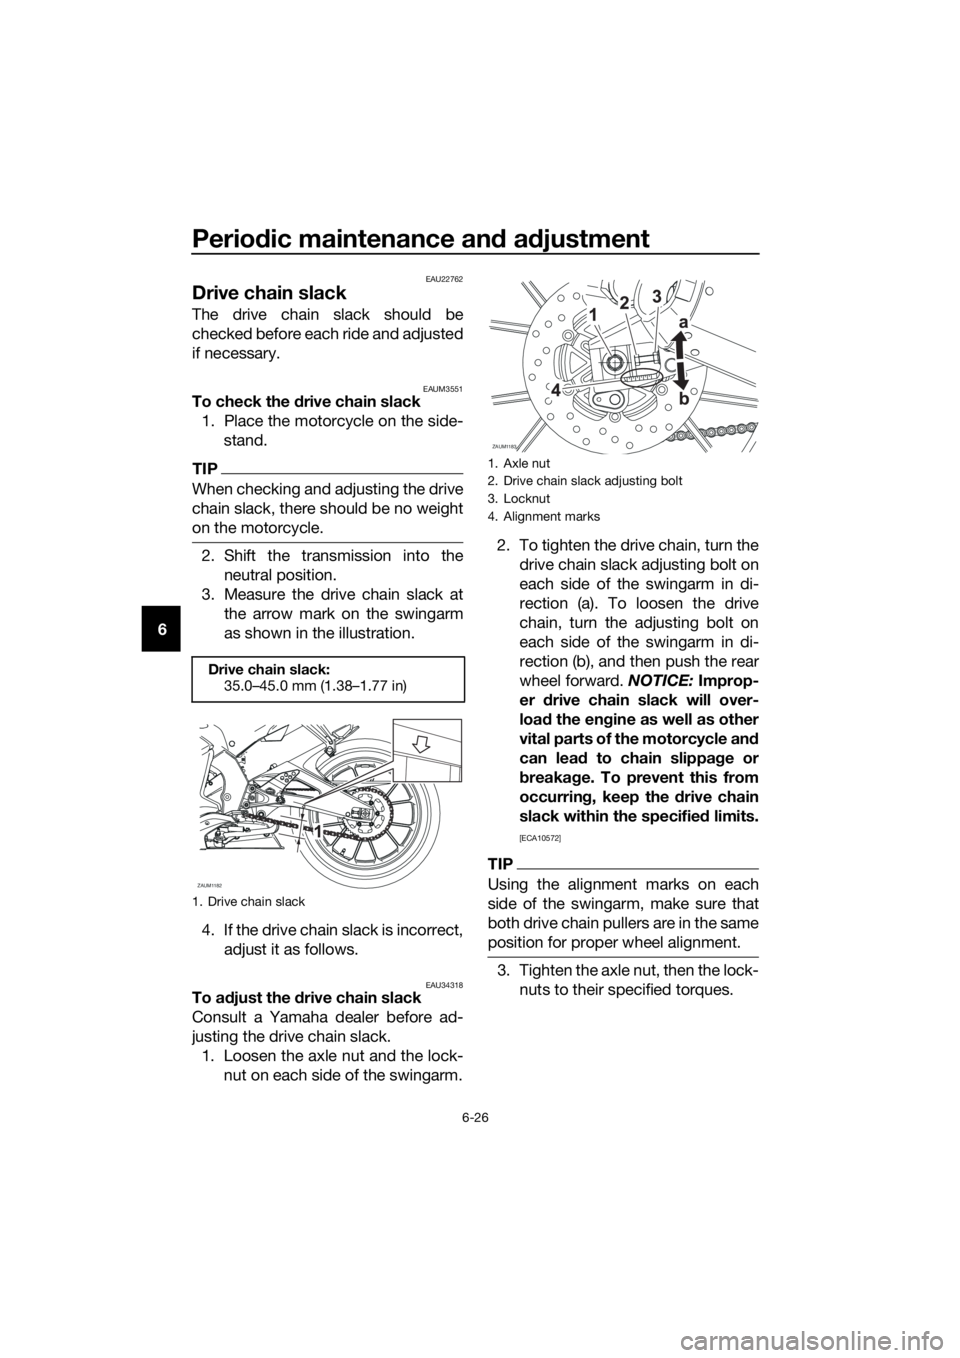
3. Measure the drive chain slack at
the arrow mark on the swingarm
as shown in the illustration.
4. If the drive chain slack is incorrect,
adjust it as follows.
EAU34318To adjust the drive chain slack
Consult a Yamaha dealer before ad-
justing the drive chain slack.
1. Loosen the axle nut and the lock-
nut on each side of the swingarm.2. To tighten the drive chain, turn the
drive chain slack adjusting bolt on
each side of the swingarm in di-
rection (a). To loosen the drive
chain, turn the adjusting bolt on
each side of the swingarm in di-
rection (b), and then push the rear
wheel forward. NOTICE: Improp-
er drive chain slack will over-
load the engine as well as other
vital parts of the motorcycle and
can lead to chain slippage or
breakage. To prevent this from
occurring, keep the drive chain
slack within the specified limits.
[ECA10572]
TIP
Using the alignment marks on each
side of the swingarm, make sure that
both drive chain pullers are in the same
position for proper wheel alignment.
3. Tighten the axle nut, then the lock-
nuts to their specified torques.
Drive chain slack:
35.0–45.0 mm (1.38–1.77 in)
1. Drive chain slack
ZAUM1182
1. Axle nut
2. Drive chain slack adjusting bolt
3. Locknut
4. Alignment marks
ZAUM1183
U5D7E6E0.book Page 26 Wednesday, June 17, 2015 10:25 AM
Page 69 of 98
Periodic maintenance and adjustment
6-27
6 4. Make sure that the drive chain
pullers are in the same position,
the drive chain slack is correct,
and the drive chain moves
smoothly.
EAU23026
Cleaning and lubricating the
drive chain
The drive chain must be cleaned and
lubricated at the intervals specified in
the periodic maintenance and lubrica-
tion chart, otherwise it will quickly wear
out, especially when riding in dusty or
wet areas. Service the drive chain as
follows.
NOTICE
ECA10584
The drive chain must be lubricated
after washing the motorcycle, riding
in the rain or riding in wet areas.
1. Clean the drive chain with kero-
sene and a small soft brush.
NOTICE: To prevent damaging
the O-rings, do not clean the
drive chain with steam cleaners,
high-pressure washers or inap-
propriate solvents.
[ECA11122]
2. Wipe the drive chain dry.
3. Thoroughly lubricate the drive
chain with a special O-ring chain
lubricant. NOTICE: Do not use
engine oil or any other lubri-
cants for the drive chain, as they
may contain substances that
could damage the O-rings.
[ECA11112]
Tightening torques:
Axle nut:
85 Nm (8.5 m·kgf, 61 ft·lbf)
Locknut:
16 Nm (1.6 m·kgf, 12 ft·lbf)
U5D7E6E0.book Page 27 Wednesday, June 17, 2015 10:25 AM
Page 81 of 98
Periodic maintenance and adjustment
6-39
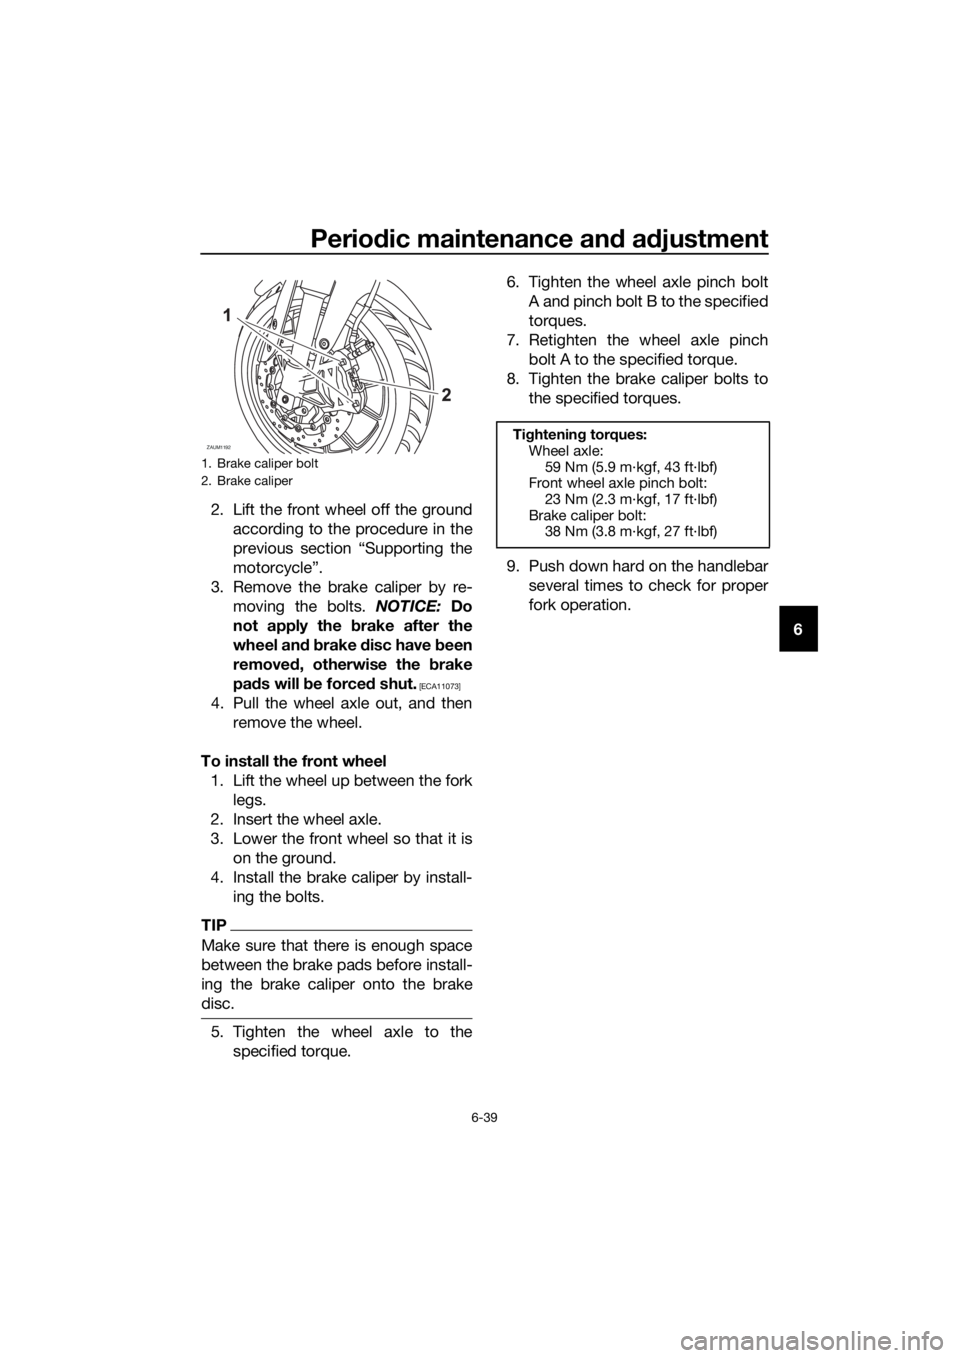
6 2. Lift the front wheel off the ground
according to the procedure in the
previous section “Supporting the
motorcycle”.
3. Remove the brake caliper by re-
moving the bolts. NOTICE: Do
not apply the brake after the
wheel and brake disc have been
removed, otherwise the brake
pads will be forced shut.
[ECA11073]
4. Pull the wheel axle out, and then
remove the wheel.
To install the front wheel
1. Lift the wheel up between the fork
legs.
2. Insert the wheel axle.
3. Lower the front wheel so that it is
on the ground.
4. Install the brake caliper by install-
ing the bolts.
TIP
Make sure that there is enough space
between the brake pads before install-
ing the brake caliper onto the brake
disc.
5. Tighten the wheel axle to the
specified torque.6. Tighten the wheel axle pinch bolt
A and pinch bolt B to the specified
torques.
7. Retighten the wheel axle pinch
bolt A to the specified torque.
8. Tighten the brake caliper bolts to
the specified torques.
9. Push down hard on the handlebar
several times to check for proper
fork operation.
1. Brake caliper bolt
2. Brake caliper
ZAUM1192Tightening torques:
Wheel axle:
59 Nm (5.9 m·kgf, 43 ft·lbf)
Front wheel axle pinch bolt:
23 Nm (2.3 m·kgf, 17 ft·lbf)
Brake caliper bolt:
38 Nm (3.8 m·kgf, 27 ft·lbf)
U5D7E6E0.book Page 39 Wednesday, June 17, 2015 10:25 AM
Page 83 of 98
Periodic maintenance and adjustment
6-41
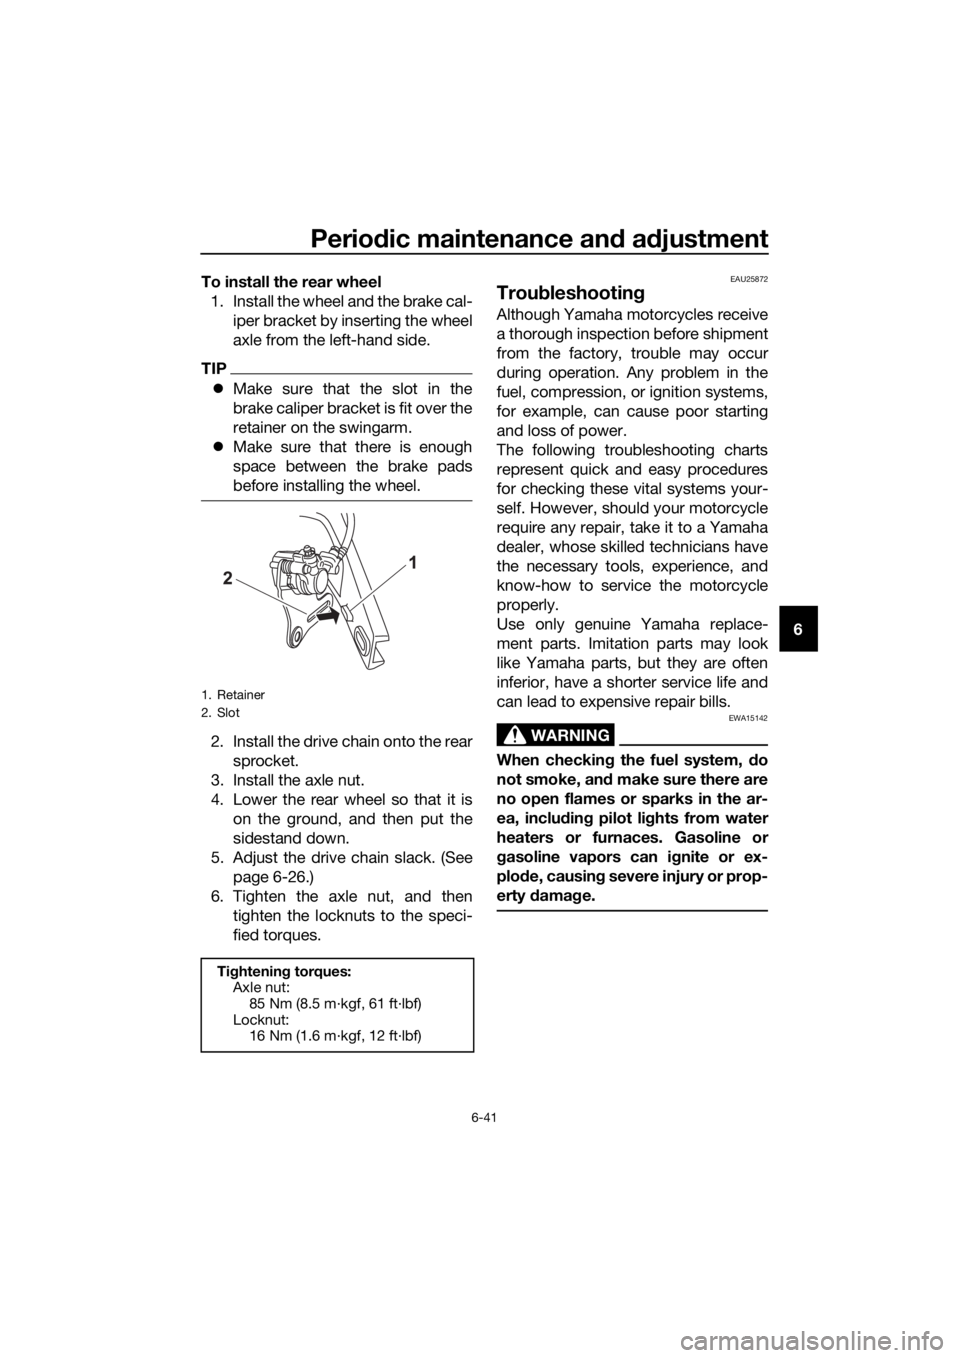
6 To install the rear wheel
1. Install the wheel and the brake cal-
iper bracket by inserting the wheel
axle from the left-hand side.
TIP
Make sure that the slot in the
brake caliper bracket is fit over the
retainer on the swingarm.
Make sure that there is enough
space between the brake pads
before installing the wheel.
2. Install the drive chain onto the rear
sprocket.
3. Install the axle nut.
4. Lower the rear wheel so that it is
on the ground, and then put the
sidestand down.
5. Adjust the drive chain slack. (See
page 6-26.)
6. Tighten the axle nut, and then
tighten the locknuts to the speci-
fied torques.
EAU25872
Troubleshooting
Although Yamaha motorcycles receive
a thorough inspection before shipment
from the factory, trouble may occur
during operation. Any problem in the
fuel, compression, or ignition systems,
for example, can cause poor starting
and loss of power.
The following troubleshooting charts
represent quick and easy procedures
for checking these vital systems your-
self. However, should your motorcycle
require any repair, take it to a Yamaha
dealer, whose skilled technicians have
the necessary tools, experience, and
know-how to service the motorcycle
properly.
Use only genuine Yamaha replace-
ment parts. Imitation parts may look
like Yamaha parts, but they are often
inferior, have a shorter service life and
can lead to expensive repair bills.
WARNING
EWA15142
When checking the fuel system, do
not smoke, and make sure there are
no open flames or sparks in the ar-
ea, including pilot lights from water
heaters or furnaces. Gasoline or
gasoline vapors can ignite or ex-
plode, causing severe injury or prop-
erty damage.
1. Retainer
2. Slot
Tightening torques:
Axle nut:
85 Nm (8.5 m·kgf, 61 ft·lbf)
Locknut:
16 Nm (1.6 m·kgf, 12 ft·lbf)
U5D7E6E0.book Page 41 Wednesday, June 17, 2015 10:25 AM