warning YAMAHA YZF-R125 2020 Owner's Manual
[x] Cancel search | Manufacturer: YAMAHA, Model Year: 2020, Model line: YZF-R125, Model: YAMAHA YZF-R125 2020Pages: 96, PDF Size: 5.7 MB
Page 45 of 96
Periodic maintenance and adjustment
6-1
6
EAU17246
Periodic inspection, adjustment, and
lubrication will keep your vehicle in the
safest and most efficient condition
possible. Safety is an obligation of the
vehicle owner/operator. The most im-
portant points of vehicle inspection,
adjustment, and lubrication are ex-
plained on the following pages.
The intervals given in the periodic
maintenance charts should be simply
considered as a general guide under
normal riding conditions. However, de-
pending on the weather, terrain, geo-
graphical location, and individual use,
the maintenance intervals may need to
be shortened.
WARNING
EWA10322
Failure to properly maintain the vehi-
cle or performing maintenance ac-
tivities incorrectly may increase
your risk of injury or death during
service or while using the vehicle. If
you are not familiar with vehicle ser-
vice, have a Yamaha dealer perform
service.
WARNING
EWA15123
Turn off the engine when performing
maintenance unless otherwise
specified.
A running engine has moving
parts that can catch on body
parts or clothing and electrical
parts that can cause shocks or
fires.
Running the engine while ser-
vicing can lead to eye injury,
burns, fire, or carbon monoxide
poisoning – possibly leading todeath. See page 1-3 for more in-
formation about carbon monox-
ide.
WARNING
EWA15461
Brake discs, calipers, drums, and
linings can become very hot during
use. To avoid possible burns, let
brake components cool before
touching them.
UB5GE1E0.book Page 1 Monday, August 26, 2019 3:02 PM
Page 57 of 96
Periodic maintenance and adjustment
6-13
6
EAU20071
Coolant
The coolant level should be checked
before each ride. In addition, the cool-
ant must be changed at the intervals
specified in the periodic maintenance
and lubrication chart.
EAUE3460To check the coolant level
1. Place the vehicle on a level sur-
face.
2. Remove cowling C of left side.
(See page 6-7.)
3. Hold the vehicle in an upright po-
sition.
TIP
The coolant level must be
checked on a cold engine since
the level varies with engine tem-
perature.
Make sure that the vehicle is posi-
tioned straight up when checking
the coolant level. A slight tilt to the
side can result in a false reading.
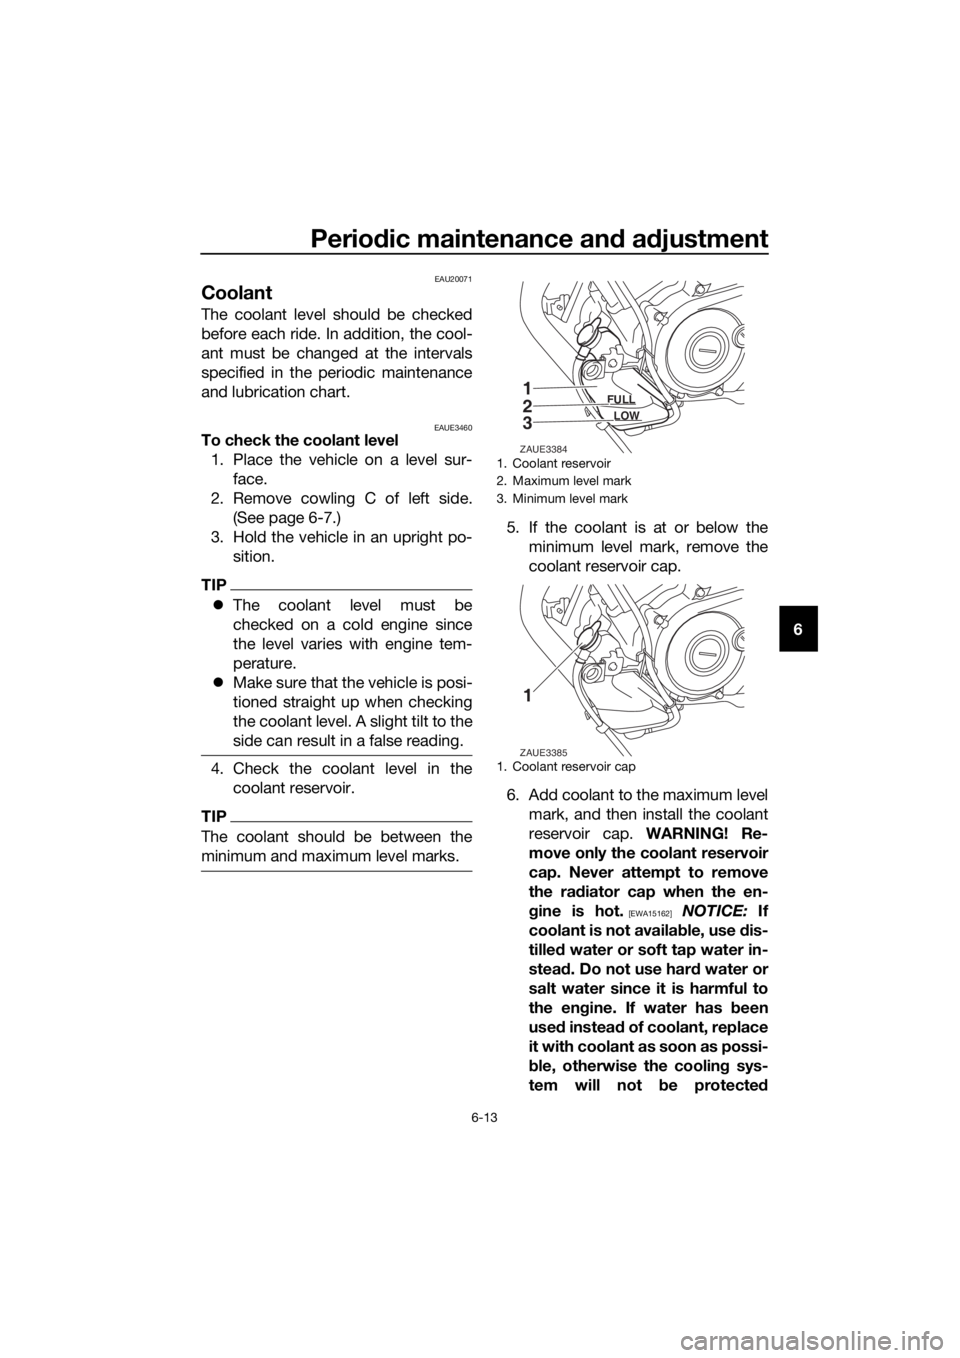
4. Check the coolant level in the
coolant reservoir.
TIP
The coolant should be between the
minimum and maximum level marks.
5. If the coolant is at or below the
minimum level mark, remove the
coolant reservoir cap.
6. Add coolant to the maximum level
mark, and then install the coolant
reservoir cap. WARNING! Re-
move only the coolant reservoir
cap. Never attempt to remove
the radiator cap when the en-
gine is hot.
[EWA15162] NOTICE: If
coolant is not available, use dis-
tilled water or soft tap water in-
stead. Do not use hard water or
salt water since it is harmful to
the engine. If water has been
used instead of coolant, replace
it with coolant as soon as possi-
ble, otherwise the cooling sys-
tem will not be protected
1. Coolant reservoir
2. Maximum level mark
3. Minimum level mark
1. Coolant reservoir cap
1
2
3FULL
LOW
ZAUE3384
1
ZAUE3385
UB5GE1E0.book Page 13 Monday, August 26, 2019 3:02 PM
Page 58 of 96
Periodic maintenance and adjustment
6-14
6against frost and corrosion. If
water has been added to the
coolant, have a Yamaha dealer
check the antifreeze content of
the coolant as soon as possible,
otherwise the effectiveness of
the coolant will be reduced.
[ECA10473]
7. Install the cowling.
EAU33032Changing the coolant
The coolant must be changed at the in-
tervals specified in the periodic mainte-
nance and lubrication chart. Have a
Yamaha dealer change the coolant.
WARNING! Never attempt to remove
the radiator cap when the engine is
hot.
[EWA10382]EAUM2391
Replacing the air filter ele-
ment and cleaning the check
hose
The air filter element should be re-
placed at the intervals specified in the
periodic maintenance and lubrication
chart. Have a Yamaha dealer replace
the air filter element more frequently if
you are riding in unusually wet or dusty
areas. In addition, the air filter check
hose must be frequently checked and
cleaned if necessary.
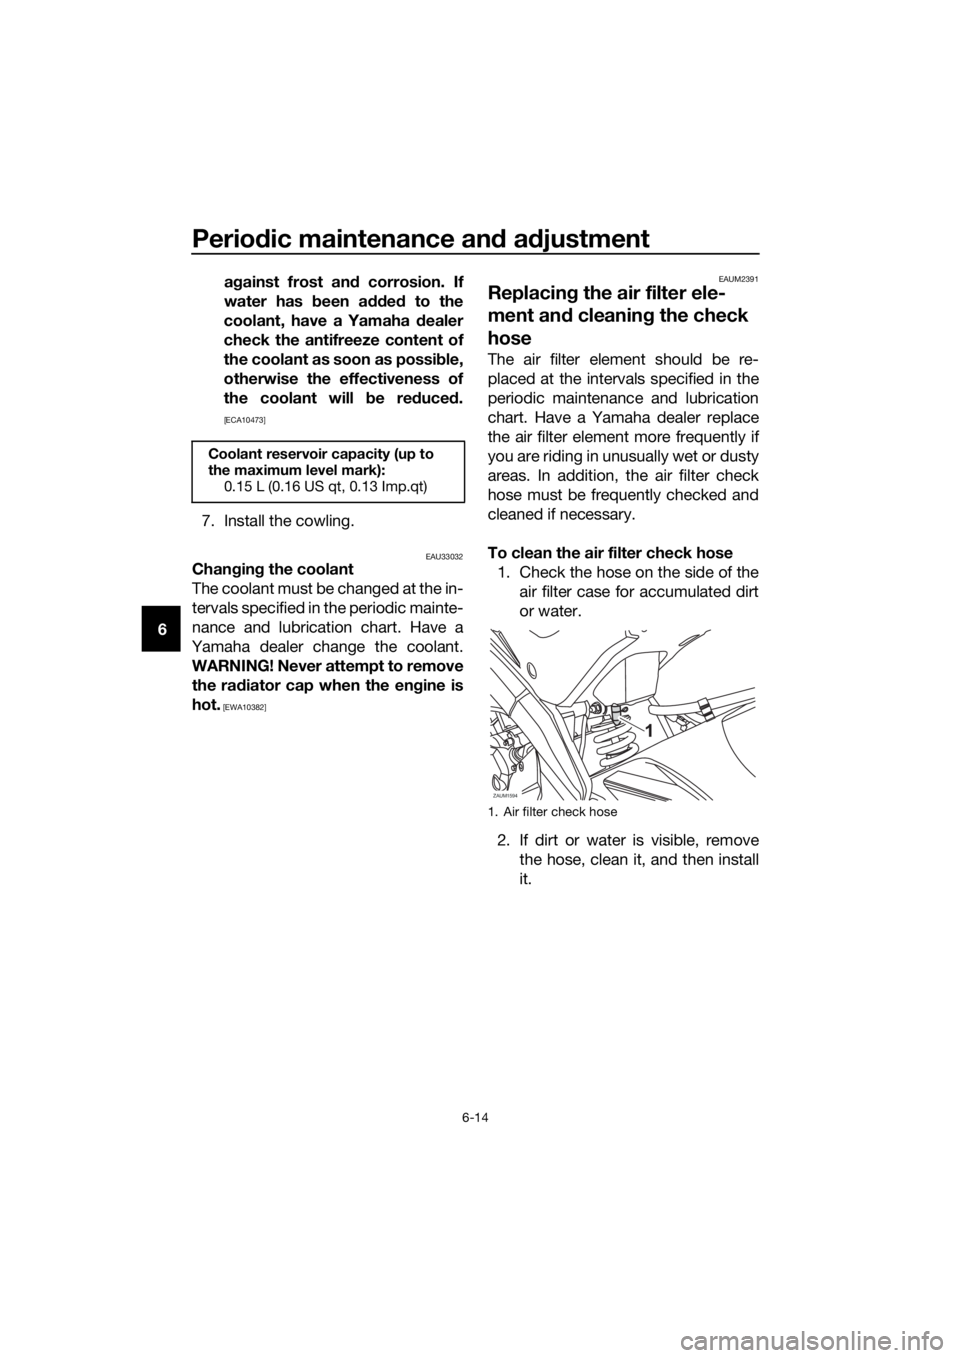
To clean the air filter check hose
1. Check the hose on the side of the
air filter case for accumulated dirt
or water.
2. If dirt or water is visible, remove
the hose, clean it, and then install
it.
Coolant reservoir capacity (up to
the maximum level mark):
0.15 L (0.16 US qt, 0.13 Imp.qt)
1. Air filter check hose
ZAUM1594
UB5GE1E0.book Page 14 Monday, August 26, 2019 3:02 PM
Page 61 of 96
Periodic maintenance and adjustment
6-17
6
EAU77621
Tires
Tires are the only contact between the
vehicle and the road. Safety in all con-
ditions of riding depends on a relatively
small area of road contact. Therefore, it
is essential to maintain the tires in good
condition at all times and replace them
at the appropriate time with the speci-
fied tires.
Tire air pressure
The tire air pressure should be
checked and, if necessary, adjusted
before each ride.
WARNING
EWA10504
Operation of this vehicle with im-
proper tire pressure may cause se-
vere injury or death from loss of
control.
The tire air pressure must be
checked and adjusted on cold
tires (i.e., when the temperature
of the tires equals the ambient
temperature).
The tire air pressure must be
adjusted in accordance with the
riding speed and with the total
weight of rider, passenger, car-
go, and accessories approved
for this model.WARNING
EWA10512
Never overload your vehicle. Opera-
tion of an overloaded vehicle could
cause an accident.
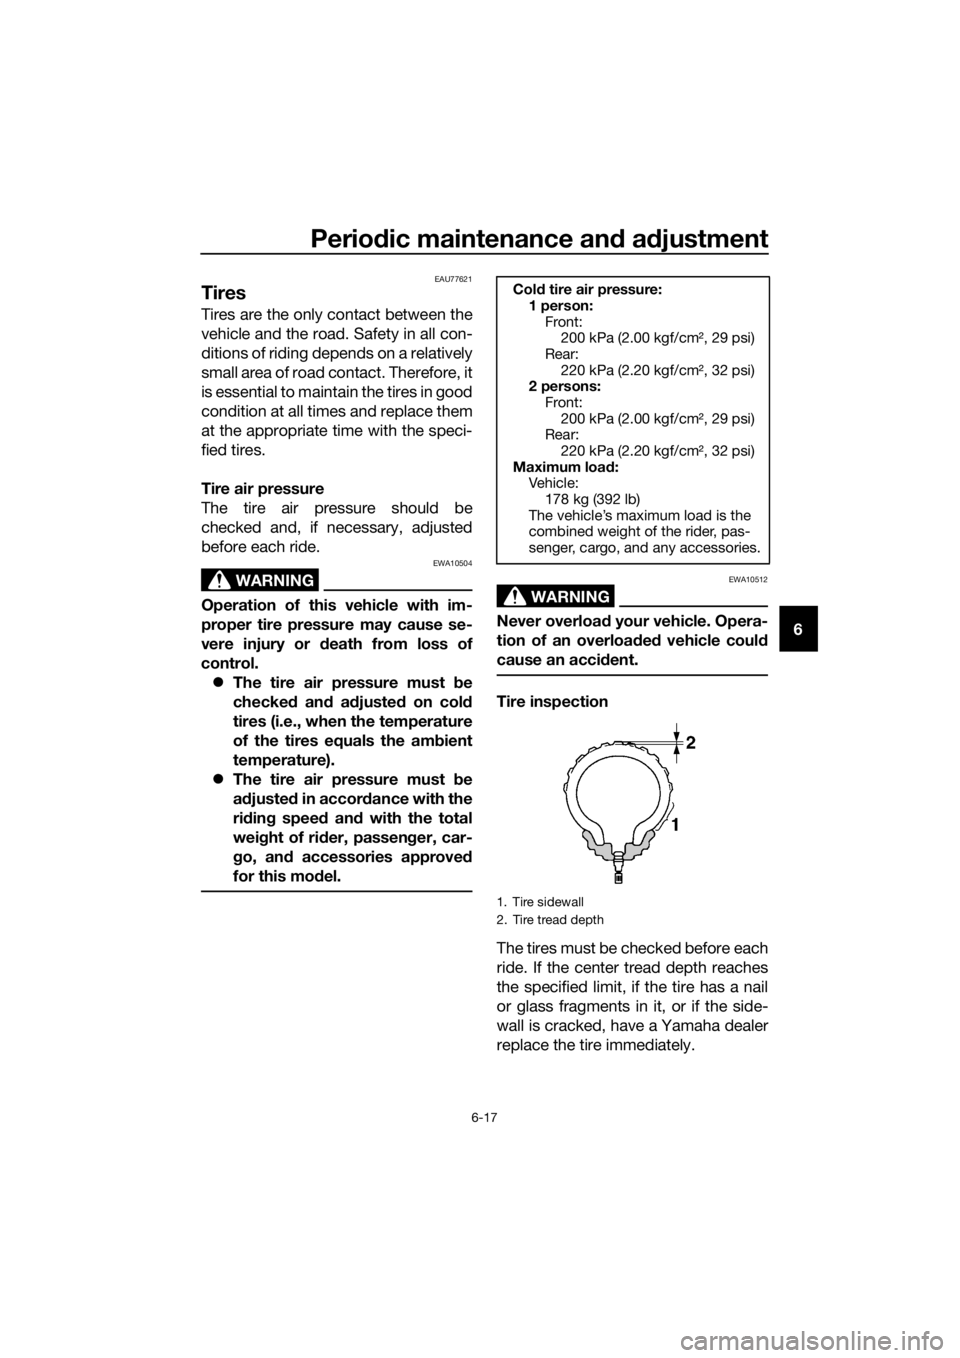
Tire inspection
The tires must be checked before each
ride. If the center tread depth reaches
the specified limit, if the tire has a nail
or glass fragments in it, or if the side-
wall is cracked, have a Yamaha dealer
replace the tire immediately.
Cold tire air pressure:
1 person:
Front:
200 kPa (2.00 kgf/cm², 29 psi)
Rear:
220 kPa (2.20 kgf/cm², 32 psi)
2 persons:
Front:
200 kPa (2.00 kgf/cm², 29 psi)
Rear:
220 kPa (2.20 kgf/cm², 32 psi)
Maximum load:
Vehicle:
178 kg (392 lb)
The vehicle’s maximum load is the
combined weight of the rider, pas-
senger, cargo, and any accessories.
1. Tire sidewall
2. Tire tread depth
UB5GE1E0.book Page 17 Monday, August 26, 2019 3:02 PM
Page 62 of 96
Periodic maintenance and adjustment
6-18
6
TIP
The tire tread depth limits may differ
from country to country. Always com-
ply with the local regulations.
WARNING
EWA10472
Have a Yamaha dealer replace
excessively worn tires. Besides
being illegal, operating the vehi-
cle with excessively worn tires
decreases riding stability and
can lead to loss of control.
The replacement of all wheel
and brake-related parts, includ-
ing the tires, should be left to a
Yamaha dealer, who has the
necessary professional knowl-
edge and experience to do so.
Ride at moderate speeds after
changing a tire since the tire
surface must first be “broken
in” for it to develop its optimal
characteristics.
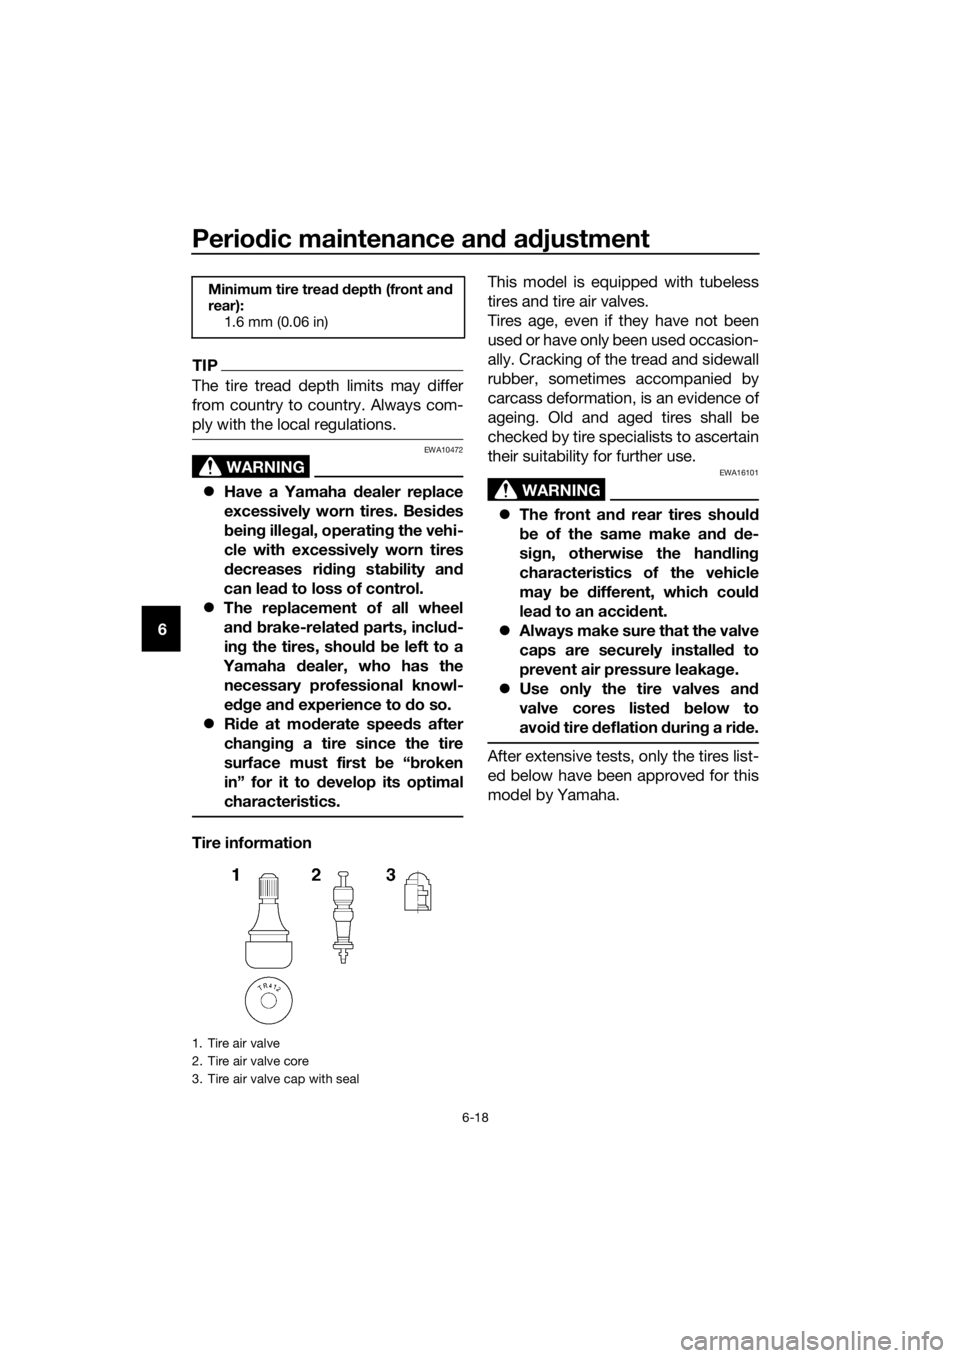
Tire informationThis model is equipped with tubeless
tires and tire air valves.
Tires age, even if they have not been
used or have only been used occasion-
ally. Cracking of the tread and sidewall
rubber, sometimes accompanied by
carcass deformation, is an evidence of
ageing. Old and aged tires shall be
checked by tire specialists to ascertain
their suitability for further use.
WARNING
EWA16101
The front and rear tires should
be of the same make and de-
sign, otherwise the handling
characteristics of the vehicle
may be different, which could
lead to an accident.
Always make sure that the valve
caps are securely installed to
prevent air pressure leakage.
Use only the tire valves and
valve cores listed below to
avoid tire deflation during a ride.
After extensive tests, only the tires list-
ed below have been approved for this
model by Yamaha.
Minimum tire tread depth (front and
rear):
1.6 mm (0.06 in)
1. Tire air valve
2. Tire air valve core
3. Tire air valve cap with seal
UB5GE1E0.book Page 18 Monday, August 26, 2019 3:02 PM
Page 65 of 96
Periodic maintenance and adjustment
6-21
6
EAUT1223
Checking the front brake lever
free play
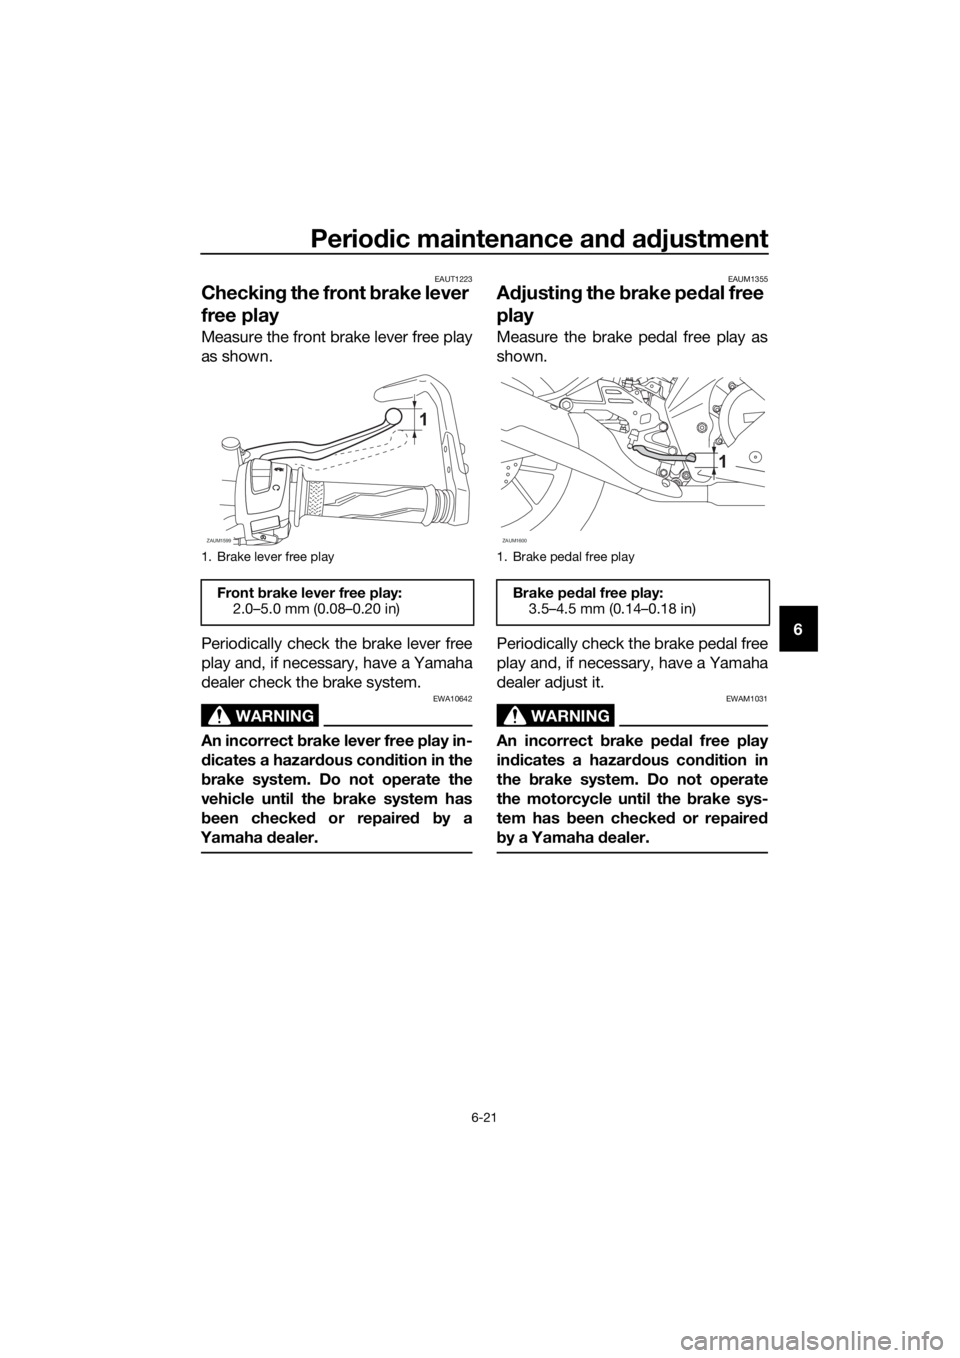
Measure the front brake lever free play
as shown.
Periodically check the brake lever free
play and, if necessary, have a Yamaha
dealer check the brake system.
WARNING
EWA10642
An incorrect brake lever free play in-
dicates a hazardous condition in the
brake system. Do not operate the
vehicle until the brake system has
been checked or repaired by a
Yamaha dealer.
EAUM1355
Adjusting the brake pedal free
play
Measure the brake pedal free play as
shown.
Periodically check the brake pedal free
play and, if necessary, have a Yamaha
dealer adjust it.
WARNING
EWAM1031
An incorrect brake pedal free play
indicates a hazardous condition in
the brake system. Do not operate
the motorcycle until the brake sys-
tem has been checked or repaired
by a Yamaha dealer.
1. Brake lever free play
Front brake lever free play:
2.0–5.0 mm (0.08–0.20 in)
ZAUM1599
1
1. Brake pedal free play
Brake pedal free play:
3.5–4.5 mm (0.14–0.18 in)
ZAUM1600
1
UB5GE1E0.book Page 21 Monday, August 26, 2019 3:02 PM
Page 67 of 96
Periodic maintenance and adjustment
6-23
6
EAU36721Rear brake pads
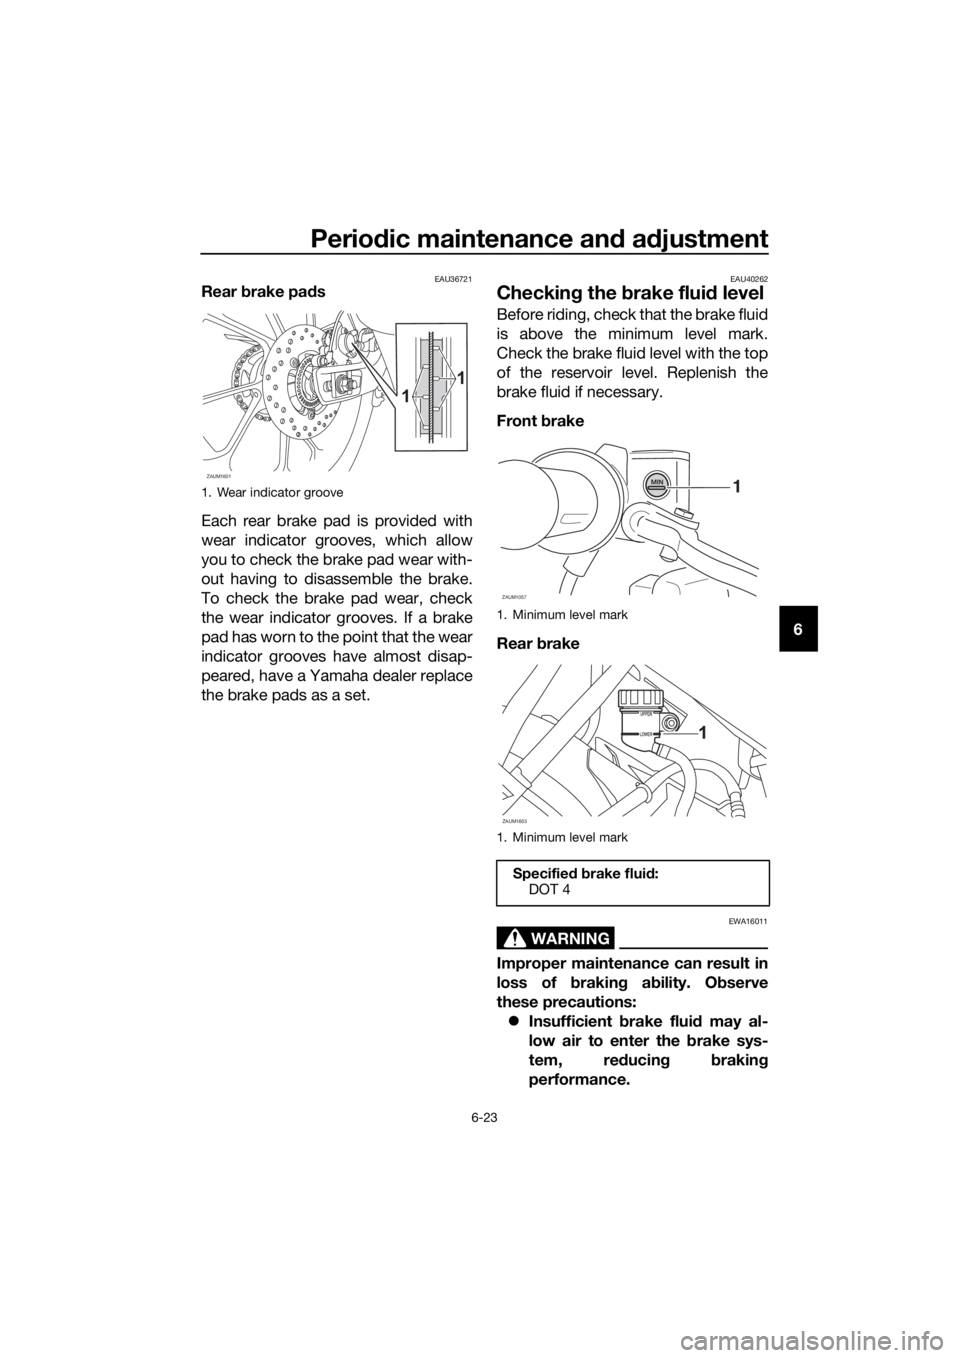
Each rear brake pad is provided with
wear indicator grooves, which allow
you to check the brake pad wear with-
out having to disassemble the brake.
To check the brake pad wear, check
the wear indicator grooves. If a brake
pad has worn to the point that the wear
indicator grooves have almost disap-
peared, have a Yamaha dealer replace
the brake pads as a set.EAU40262
Checking the brake fluid level
Before riding, check that the brake fluid
is above the minimum level mark.
Check the brake fluid level with the top
of the reservoir level. Replenish the
brake fluid if necessary.
Front brake
Rear brake
WARNING
EWA16011
Improper maintenance can result in
loss of braking ability. Observe
these precautions:
Insufficient brake fluid may al-
low air to enter the brake sys-
tem, reducing braking
performance.
1. Wear indicator groove
ZAUM1601
1
1
1. Minimum level mark
1. Minimum level mark
Specified brake fluid:
DOT 4
1
ZAUM1057
ZAUM1603
UB5GE1E0.book Page 23 Monday, August 26, 2019 3:02 PM
Page 71 of 96

Periodic maintenance and adjustment
6-27
6
EAU23098
Checking and lubricating the
cables
The operation of all control cables and
the condition of the cables should be
checked before each ride, and the ca-
bles and cable ends should be lubri-
cated if necessary. If a cable is
damaged or does not move smoothly,
have a Yamaha dealer check or re-
place it. WARNING! Damage to the
outer housing of cables may result
in internal rusting and cause inter-
ference with cable movement. Re-
place damaged cables as soon as
possible to prevent unsafe condi-
tions.
[EWA10712]EAU23115
Checking and lubricating the
throttle grip and cable
The operation of the throttle grip
should be checked before each ride. In
addition, the cable should be lubricat-
ed by a Yamaha dealer at the intervals
specified in the periodic maintenance
chart.
The throttle cable is equipped with a
rubber cover. Make sure that the cover
is securely installed. Even though the
cover is installed correctly, it does not
completely protect the cable from wa-
ter entry. Therefore, use care not to
pour water directly onto the cover or
cable when washing the vehicle. If the
cable or cover becomes dirty, wipe
clean with a moist cloth.
Recommended lubricant:
Yamaha cable lubricant or other
suitable cable lubricant
UB5GE1E0.book Page 27 Monday, August 26, 2019 3:02 PM
Page 73 of 96
Periodic maintenance and adjustment
6-29
6
EAU23203
Checking and lubricating the
sidestand
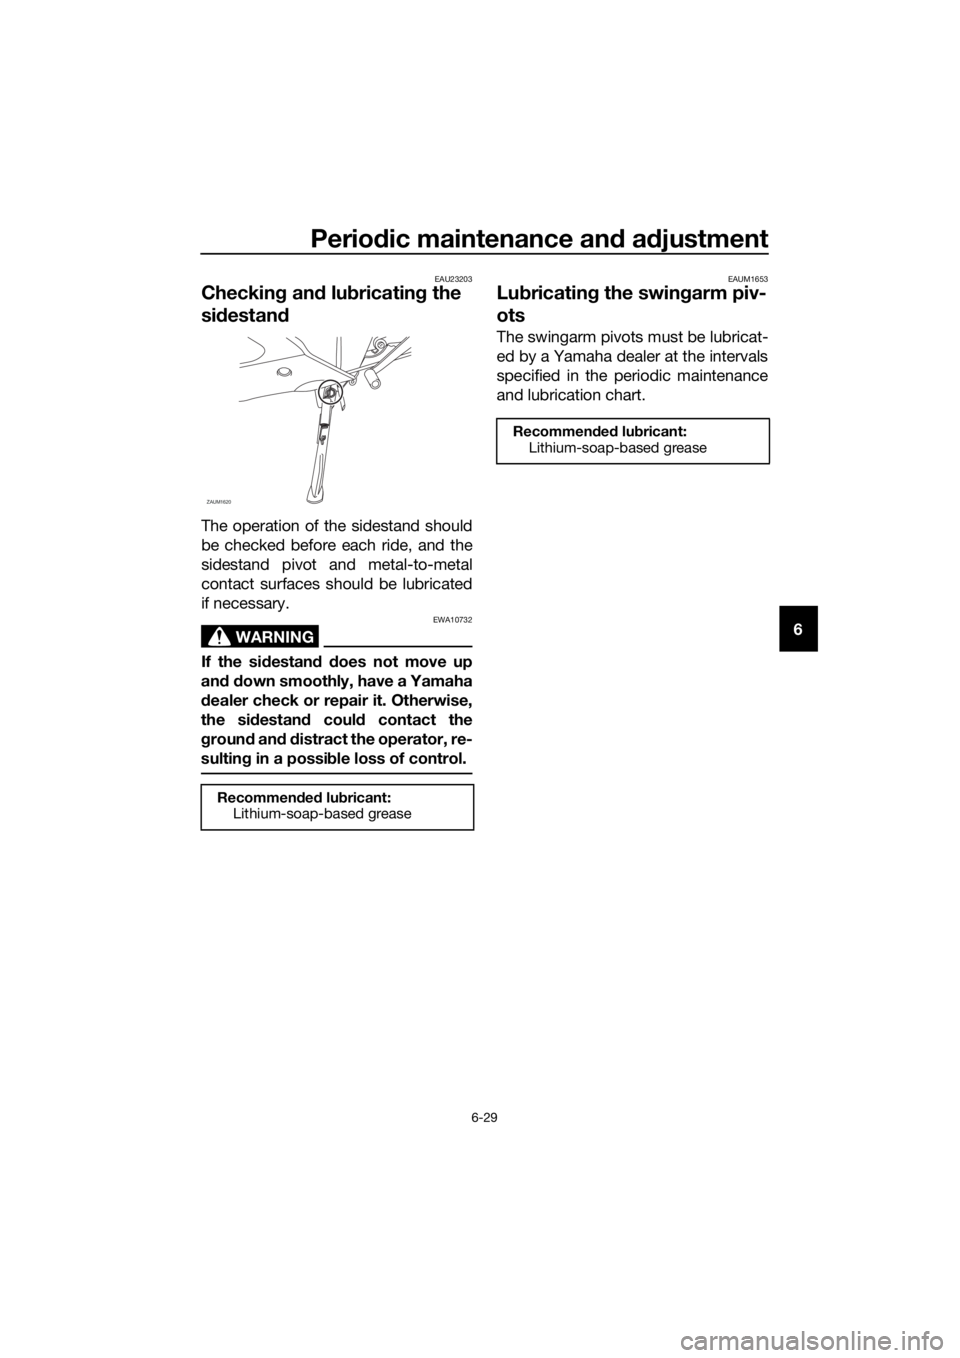
The operation of the sidestand should
be checked before each ride, and the
sidestand pivot and metal-to-metal
contact surfaces should be lubricated
if necessary.
WARNING
EWA10732
If the sidestand does not move up
and down smoothly, have a Yamaha
dealer check or repair it. Otherwise,
the sidestand could contact the
ground and distract the operator, re-
sulting in a possible loss of control.
EAUM1653
Lubricating the swingarm piv-
ots
The swingarm pivots must be lubricat-
ed by a Yamaha dealer at the intervals
specified in the periodic maintenance
and lubrication chart.
Recommended lubricant:
Lithium-soap-based grease
ZAUM1620
Recommended lubricant:
Lithium-soap-based grease
UB5GE1E0.book Page 29 Monday, August 26, 2019 3:02 PM
Page 74 of 96
Periodic maintenance and adjustment
6-30
6
EAU23273
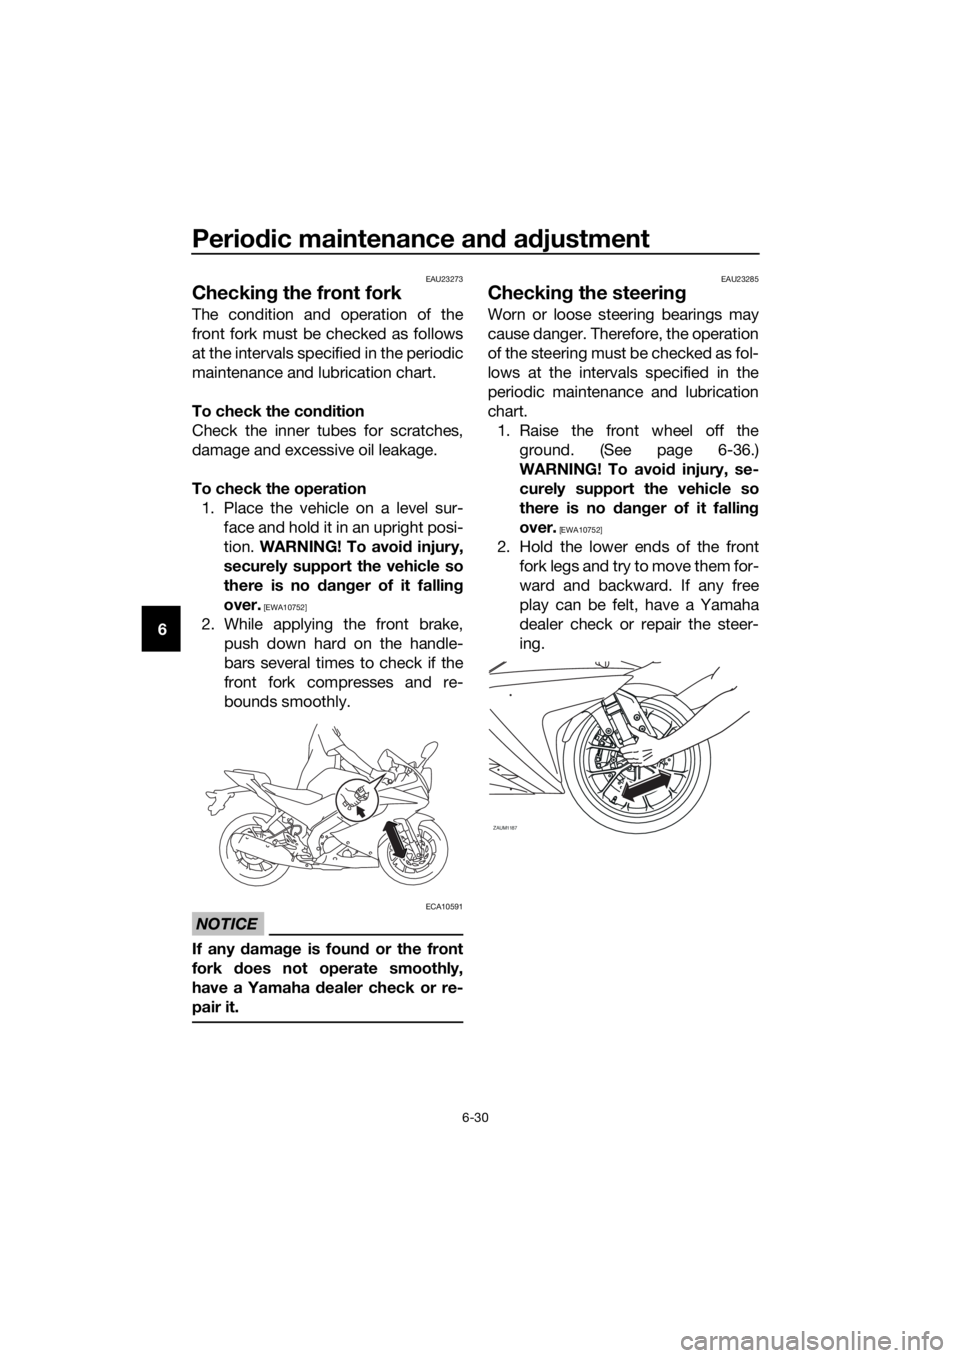
Checking the front fork
The condition and operation of the
front fork must be checked as follows
at the intervals specified in the periodic
maintenance and lubrication chart.
To check the condition
Check the inner tubes for scratches,
damage and excessive oil leakage.
To check the operation
1. Place the vehicle on a level sur-
face and hold it in an upright posi-
tion. WARNING! To avoid injury,
securely support the vehicle so
there is no danger of it falling
over.
[EWA10752]
2. While applying the front brake,
push down hard on the handle-
bars several times to check if the
front fork compresses and re-
bounds smoothly.
NOTICE
ECA10591
If any damage is found or the front
fork does not operate smoothly,
have a Yamaha dealer check or re-
pair it.
EAU23285
Checking the steering
Worn or loose steering bearings may
cause danger. Therefore, the operation
of the steering must be checked as fol-
lows at the intervals specified in the
periodic maintenance and lubrication
chart.
1. Raise the front wheel off the
ground. (See page 6-36.)
WARNING! To avoid injury, se-
curely support the vehicle so
there is no danger of it falling
over.
[EWA10752]
2. Hold the lower ends of the front
fork legs and try to move them for-
ward and backward. If any free
play can be felt, have a Yamaha
dealer check or repair the steer-
ing.
ZAUM1187
UB5GE1E0.book Page 30 Monday, August 26, 2019 3:02 PM