light YAMAHA YZF-R1M 2022 Owner's Manual
[x] Cancel search | Manufacturer: YAMAHA, Model Year: 2022, Model line: YZF-R1M, Model: YAMAHA YZF-R1M 2022Pages: 136, PDF Size: 6.01 MB
Page 49 of 136
Instrument and control functions
4-26
4
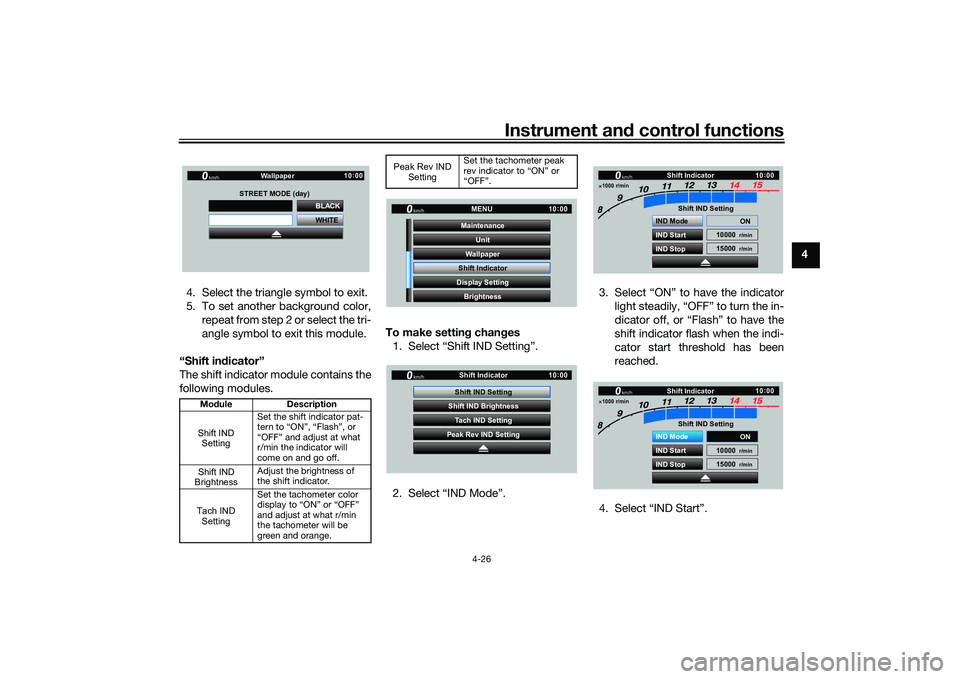
4. Select the triangle symbol to exit.
5. To set another background color, repeat from step 2 or select the tri-
angle symbol to exit this module.
“Shift in dicator”
The shift indicator module contains the
following modules. To make settin
g chan ges
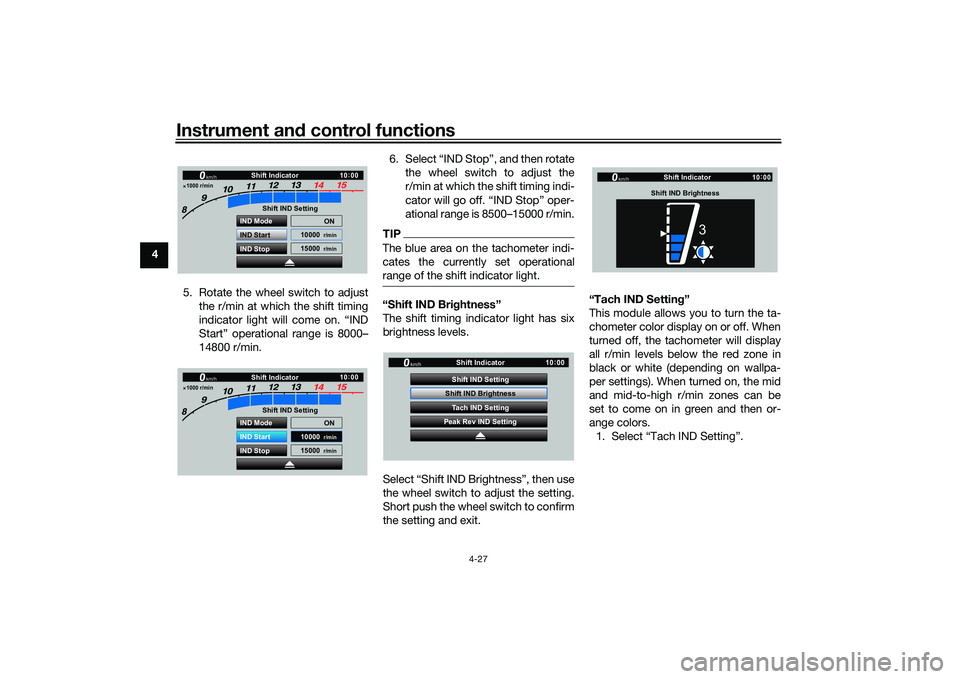
1. Select “Shift IND Setting”.
2. Select “IND Mode”. 3. Select “ON” to have the indicator
light steadily, “OFF” to turn the in-
dicator off, or “Flash” to have the
shift indicator flash when the indi-
cator start threshold has been
reached.
4. Select “IND Start”.
Mo dule Description
Set the shift indicator pat-
tern to “ON”, “Flash”, or
“OFF” and adjust at what
r/min the indicator will
come on and go off.
Adjust the brightness of
the shift indicator.
Set the tachometer color
display to “ON” or “OFF”
and adjust at what r/min
the tachometer will be
green and orange.
WHITE BLACK
Wallpaper
STREET MODE (day)
km/h
GP GPS
10 :
00
Shift IND
SettingShift IND
BrightnessTach IND Setting
Set the tachometer peak
rev indicator to
Page 50 of 136
Instrument and control functions
4-27
4
5. Rotate the wheel switch to adjustthe r/min at which the shift timing
indicator light will come on. “IND
Start” operational range is 8000–
14800 r/min. 6. Select “IND Stop”, and then rotate
the wheel switch to adjust the
r/min at which the shift timing indi-
cator will go off. “IND Stop” oper-
ational range is 8500–15000 r/min.
TIPThe blue area on the tachometer indi-
cates the currently set operational
range of the shift indicator light.“Shift IND Bri ghtness”
The shift timing indicator light has six
brightness levels.
Select “Shift IND Brightness”, then use
the wheel switch to adjust the setting.
Short push the wheel switch to confirm
the setting and exit. “Tach IND Settin
g”
This module allows you to turn the ta-
chometer color display on or off. When
turned off, the tachometer will display
all r/min levels below the red zone in
black or white (depending on wallpa-
per settings). When turned on, the mid
and mid-to-high r/min zones can be
set to come on in green and then or-
ange colors. 1. Select “Tach IND Setting”.
1000 r/min
Shift Indicator
km/h
GPS
10 :
00
Shift IND Setting
IND Mode
IND Start
IND Stop ON
10000
r/min
15000
r/min
1000 r/min
Shift Indicator
km/h
GPS
10 :
00
Shift IND Setting
IND Mode
IND Start
IND Stop ON
10000
r/min
15000
r/min
GP GPS
Tach IND Setting
Shift IND Brightness
Peak Rev IND Setting Shift Indicator
Shift IND Setting
km/h
10 :
00
Shift Indicator
Shift IND Brightness
km/h
GPS
10 :
00
3
UB3LE1E0.book Page 27 Tuesday, August 10, 2021 2:28 PM
Page 54 of 136

Instrument and control functions
4-31
4 To set the brightness
1. From the MENU screen, select
“Brightness”.
2. Select the desired brightness level by rotating the wheel switch, and
then short push the wheel switch
to fix the setting. “Clock”
This module allows you to set the
clock.
To set the clock
1. From the MENU screen, select
“Clock”.
2. When “Clock” is selected, the hours figure will be highlighted. 3. Set the hour by rotating and then
short push the wheel switch.
4. The minutes figure will become highlighted.
5. Set the minutes figure by rotating and then short push the wheel
switch.
GP GPS
Wallpaper Unit
Shift Indicator
Display Setting MENU
Maintenance
Brightness
km/h
10 :
00
Brightness
km/h
GPS
10 :
00
2
GP GPS
Shift Indicator Wallpaper
Display Setting Brightness MENU
Unit
Clock
km/h
10 :
00
Clock
km/h
10 :
00
11 :
34
Clock
km/h
10 :
00
10 :
34
Clock
km/h
10 :
00
10 34
:
UB3LE1E0.book Page 31 Tuesday, August 10, 2021 2:28 PM
Page 59 of 136

Instrument and control functions
4-36
4
EAU13222
FuelMake sure there is sufficient gasoline in
the tank.
WARNING
EWA10882
Gasoline and gasoline vapors are
extremely flammable. To avoid fires
and explosions and to reduce the
risk of injury when refueling, follow
these instructions.1. Before refueling, turn off the en-gine and be sure that no one is sit-
ting on the vehicle. Never refuel
while smoking, or while in the vi-
cinity of sparks, open flames, or
other sources of ignition such as
the pilot lights of water heaters
and clothes dryers.
2. Do not overfill the fuel tank. When refueling, be sure to insert the
pump nozzle into the fuel tank filler
hole. Stop filling when the fuel
reaches the bottom of the filler
tube. Because fuel expands when
it heats up, heat from the engine or
the sun can cause fuel to spill out
of the fuel tank. 3. Wipe up any spilled fuel immedi-
ately. NOTICE: Immediately
wipe off spilled fuel with a clean,
dry, soft cloth, since fuel may
deteriorate painted surfaces or
plastic parts.
[ECA10072]
4. Be sure to securely close the fuel tank cap.
WARNING
EWA15152
Gasoline is poisonous and can cau-
se injury or death. Handle gasoline
with care. Never siphon gasoline by
mouth. If you should swallow some
gasoline or inhale a lot of gasoline
vapor, or get some gasoline in your
eyes, see your doctor immediately. If gasoline spills on your skin, wash
with soap and water. If gasoline
spills on your clothing, change your
clothes.
EAU86072
Your Yamaha engine was designed to
use unleaded gasoline with a research
octane number of 95 or higher. If en-
gine knocking or pinging occurs, use a
gasoline of a different brand or higher
octane rating.
1. Fuel tank filler tube
2. Maximum fuel level
1
2
Recommended fuel:
Unleaded gasoline (E10 acceptable)
Octane number (RON): 95
Fuel tank capacity: 17 L (4.5 US gal, 3.7 Imp.gal)
Fuel tank reserve:
3.0 L (0.79 US gal, 0.66 Imp.gal)
UB3LE1E0.book Page 36 Tuesday, August 10, 2021 2:28 PM
Page 64 of 136

Instrument and control functions
4-41
4
EAU88830
Seat cover (for equipped mod-
els)When the seat cover is attached, the
total number of occupants is reduced
to one person. Depending on your ar-
ea’s regulations, it may be necessary
to change the vehicle’s registration to
reflect this. Contact your local authori-
ties.
EAU66920
Document storageA document storage space is located
under panel B. (See page 7-9.)
When storing the owner’s manual or
vehicle registration and insurance do-
cuments in the document storage
space, be sure to wrap them in a plas-
tic bag so that they will not get wet.
When washing the vehicle, avoid let-
ting water enter the document storage
space.
NOTICE
ECA22540
Do not place heat-sensitive items in
the document storage space. This
space can get hot when the engine
is running or when the vehicle is in
direct sunlight.
1. Panel B
2. Document storage space
1
2
UB3LE1E0.book Page 41 Tuesday, August 10, 2021 2:28 PM
Page 77 of 136

For your safety – pre-operation checks
5-3
5
Air intake duct• Make sure that the air intake duct is not blocked.
• Remove any foreign objects from the screen if necessary. —
Instruments, lights, signals
and switches • Check operation.
• Correct if necessary.
—
Sidestand switch • Check operation of ignition circuit cut-off system.
• If system is not working correctly, have Yamaha dealer check vehicle. 4-49
ITEM CHECKS PAGE
UB3LE1E0.book Page 3 Tuesday, August 10, 2021 2:28 PM
Page 79 of 136
Operation and important riding points
6-2
6
EAU88420
Starting the engineThe ignition circuit cut-off system will
enable starting when: the transmission is in the neutral
position or
the transmission is in gear, the
sidestand is up, and the clutch le-
ver is pulled.
To start the engine1. Turn the main switch on and set the engine stop switch to the run
position.
2. Confirm the indicator and warning light(s) come on for a few sec-
onds, and then go off. (See page
4-6.)TIPDo not start the engine if the mal-
function indicator light remains on.
The oil pressure and coolant tem-
perature warning light should
come on and stay on until the en-
gine is started.
The ABS warning light should
come on and stay on until the ve-
hicle reaches a speed of 10 km/h
(6 mi/h).
NOTICE
ECA24110
If a warning or indicator light does
not work as described above, have a
Yamaha dealer check the vehicle.3. Shift the transmission into the
neutral position.
4. Start the engine by pushing the start switch.
5. Release the start switch when the engine starts, or after 5 seconds.
Wait 10 seconds before pressing
the switch again to allow battery
voltage to restore.NOTICE
ECA11043
For maximum engine life, never ac-
celerate hard when the engine is
cold!
EAU68221
TIPThis model is equipped with: an inertial measurement unit
(IMU). This unit stops the engine in
case of a turnover. Turn the main
switch off and then on before at-
tempting to restart the engine.
Failing to do so will prevent the en-
gine from starting even though the
engine will crank when pushing
the start switch.
an engine auto-stop system. The
engine stops automatically if left
idling for 20 minutes. If the engine
stops, simply push the start
switch to restart the engine.
UB3LE1E0.book Page 2 Tuesday, August 10, 2021 2:28 PM
Page 80 of 136
Operation and important riding points
6-3
6
EAU67084
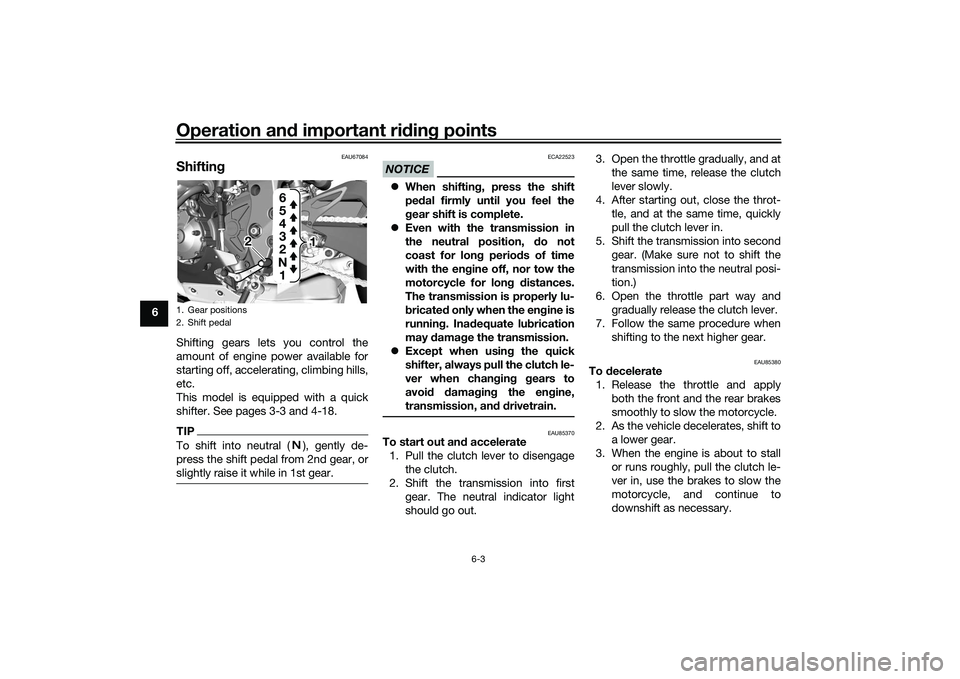
ShiftingShifting gears lets you control the
amount of engine power available for
starting off, accelerating, climbing hills,
etc.
This model is equipped with a quick
shifter. See pages 3-3 and 4-18.TIPTo shift into neutral ( ), gently de-
press the shift pedal from 2nd gear, or
slightly raise it while in 1st gear.
NOTICE
ECA22523
When shifting, press the shift
pedal firmly until you feel the
gear shift is complete.
Even with the transmission in
the neutral position, do not
coast for long periods of time
with the engine off, nor tow the
motorcycle for long distances.
The transmission is properly lu-
bricated only when the engine is
running. Inadequate lubrication
may damage the transmission.
Except when using the quick
shifter, always pull the clutch le-
ver when changing gears to
avoid damaging the engine,
transmission, and drivetrain.
EAU85370
To start out and accelerate
1. Pull the clutch lever to disengage the clutch.
2. Shift the transmission into first gear. The neutral indicator light
should go out. 3. Open the throttle gradually, and at
the same time, release the clutch
lever slowly.
4. After starting out, close the throt- tle, and at the same time, quickly
pull the clutch lever in.
5. Shift the transmission into second gear. (Make sure not to shift the
transmission into the neutral posi-
tion.)
6. Open the throttle part way and gradually release the clutch lever.
7. Follow the same procedure when shifting to the next higher gear.
EAU85380
To decelerate1. Release the throttle and apply both the front and the rear brakes
smoothly to slow the motorcycle.
2. As the vehicle decelerates, shift to a lower gear.
3. When the engine is about to stall or runs roughly, pull the clutch le-
ver in, use the brakes to slow the
motorcycle, and continue to
downshift as necessary.
1. Gear positions
2. Shift pedal
2
1 1
1
N 2 3
4
5
6
UB3LE1E0.book Page 3 Tuesday, August 10, 2021 2:28 PM
Page 81 of 136
Operation and important riding points
6-4
6
4. Once the motorcycle has
stopped, the transmission can be
shifted into the neutral position.
The neutral indicator light should
come on and then the clutch lever
can be released.
WARNING
EWA17380
Improper braking can cause
loss of control or traction. Al-
ways use both brakes and apply
them smoothly.
Make sure that the motorcycle
and the engine have sufficiently
slowed before shifting to a low-
er gear. Engaging a lower gear
when the vehicle or engine
speed is too high could make
the rear wheel lose traction or
the engine to over-rev. This
could cause loss of control, an
accident and injury. It could also
cause engine or drive train dam-
age.
EAU16811
Tips for reducing fuel con-
sumptionFuel consumption depends largely on
your riding style. Consider the follow-
ing tips to reduce fuel consumption:
Shift up swiftly, and avoid high en-
gine speeds during acceleration.
Do not rev the engine while shift-
ing down, and avoid high engine
speeds with no load on the en-
gine.
Turn the engine off instead of let-
ting it idle for an extended length
of time (e.g., in traffic jams, at traf-
fic lights or at railroad crossings).
EAU17214
ParkingWhen parking, stop the engine, and
then remove the key from the main
switch.
WARNING
EWA10312
Since the engine and exhaust
system can become very hot,
park in a place where pedestri-
ans or children are not likely to
touch them and be burned.
Do not park on a slope or on soft
ground, otherwise the vehicle
may overturn, increasing the
risk of a fuel leak and fire.
Do not park near grass or other
flammable materials which
might catch fire.
UB3LE1E0.book Page 4 Tuesday, August 10, 2021 2:28 PM
Page 89 of 136

Periodic maintenance and adjustment
7-8
7
EAU72811
TIPAir filter
• This model’s air filter uses a disposable oil-coated paper element. This element cannot be cleaned with compressed air, doing so will only damage it.
• The air filter element needs to be replaced more frequently when riding in unusually wet or dusty areas.
Hydraulic brake service
• Regularly check the front and rear brake fluid levels. Replenish if necessary.
• Every two years replace the rear brake master cylinder, the internal components of the front brake master cylinder, the brake calipers, and change the brake fluid.
• Replace the brake hoses every four years or sooner if cracked, damaged, or if any section of the stainless steel brake hose has turned black.30 *Moving parts and
cables • Lubricate.
√√√√√
31 *Throttle grip • Check operation.
• Lubricate throttle grip housing
tube guides. √√√√√
32 *Lights, signals and
switches • Check operation.
• Adjust headlight beam.
√√√√√√
NO. ITEM CHECK OR MAINTENANCE JOB
ODOMETER READING
ANNUAL
CHECK
1000 km
(600 mi) 10000 km
(6000 mi) 20000 km
(12000 mi) 30000 km
(18000 mi) 40000 km
(24000 mi)
UB3LE1E0.book Page 8 Tuesday, August 10, 2021 2:28 PM