turn signal YAMAHA YZF-R1M 2022 Owners Manual
[x] Cancel search | Manufacturer: YAMAHA, Model Year: 2022, Model line: YZF-R1M, Model: YAMAHA YZF-R1M 2022Pages: 136, PDF Size: 6.01 MB
Page 11 of 136

Safety information
1-2
1
Many accidents involve inexperi-
enced operators. In fact, many op-
erators who have been involved in
accidents do not even have a cur-
rent motorcycle license.
• Make sure that you are qualified and that you only lend your mo-
torcycle to other qualified oper-
ators.
• Know your skills and limits. Staying within your limits may
help you to avoid an accident.
• We recommend that you prac- tice riding your motorcycle
where there is no traffic until you
have become thoroughly famil-
iar with the motorcycle and all of
its controls.
Many accidents have been
caused by error of the motorcycle
operator. A typical error made by
the operator is veering wide on a
turn due to excessive speed or un-
dercornering (insufficient lean an-
gle for the speed).
• Always obey the speed limit and never travel faster than warrant-
ed by road and traffic condi-
tions. • Always signal before turning or
changing lanes. Make sure that
other motorists can see you.
The posture of the operator and
passenger is important for proper
control.
• The operator should keep both hands on the handlebar and
both feet on the operator foot-
rests during operation to main-
tain control of the motorcycle.
• The passenger should always hold onto the operator, the seat
strap or grab bar, if equipped,
with both hands and keep both
feet on the passenger footrests.
Never carry a passenger unless
he or she can firmly place both
feet on the passenger footrests.
Never ride under the influence of
alcohol or other drugs.
This motorcycle is designed for
on-road use only. It is not suitable
for off-road use. Protective Apparel
The majority of fatalities from motorcy-
cle accidents are the result of head in-
juries. The use of a safety helmet is the
single most critical factor in the pre-
vention or reduction of head injuries.
Always wear an approved helmet.
Wear a face shield or goggles.
Wind in your unprotected eyes
could contribute to an impairment
of vision that could delay seeing a
hazard.
The use of a jacket, heavy boots,
trousers, gloves, etc., is effective
in preventing or reducing abra-
sions or lacerations.
Never wear loose-fitting clothes,
otherwise they could catch on the
control levers, footrests, or wheels
and cause injury or an accident.
Always wear protective clothing
that covers your legs, ankles, and
feet. The engine or exhaust sys-
tem become very hot during or af-
ter operation and can cause
burns.
A passenger should also observe
the above precautions.
UB3LE1E0.book Page 2 Tuesday, August 10, 2021 2:28 PM
Page 14 of 136

Safety information
1-5
1operator and may limit control
ability, therefore, such accesso-
ries are not recommended.
Use caution when adding electri-
cal accessories. If electrical ac-
cessories exceed the capacity of
the motorcycle’s electrical sys-
tem, an electric failure could re-
sult, which could cause a
dangerous loss of lights or engine
power.
Aftermarket Tires an d Rims
The tires and rims that came with your
motorcycle were designed to match
the performance capabilities and to
provide the best combination of han-
dling, braking, and comfort. Other
tires, rims, sizes, and combinations
may not be appropriate. See page 7-19
for tire specifications and for informa-
tion on servicing and replacing your
tires.
Transportin g the Motorcycle
Be sure to observe following instruc-
tions before transporting the motorcy-
cle in another vehicle.
Remove all loose items from the
motorcycle.
Check that the fuel cock (if
equipped) is in the off position and
that there are no fuel leaks.
Shift the transmission into gear
(for models with a manual trans-
mission).
Secure the motorcycle with tie-
downs or suitable straps that are
attached to solid parts of the mo-
torcycle, such as the frame or up-
per front fork triple clamp (and not,
for example, to rubber-mounted
handlebars or turn signals, or
parts that could break). Choose
the location for the straps carefully
so the straps will not rub against
painted surfaces during transport.
The suspension should be com-
pressed somewhat by the tie-
downs, if possible, so that the mo-
torcycle will not bounce exces-
sively during transport.
UB3LE1E0.book Page 5 Tuesday, August 10, 2021 2:28 PM
Page 27 of 136

Instrument and control functions
4-4
4
EAU66091
Pass/LAP switch “ /LAP”
Press this switch to flash the head-
lights and to mark the start of each lap
when using the lap timer.
EAU12402
Dimmer switch “ / ”
Set this switch to “ ” for the high
beam and to “ ” for the low beam.
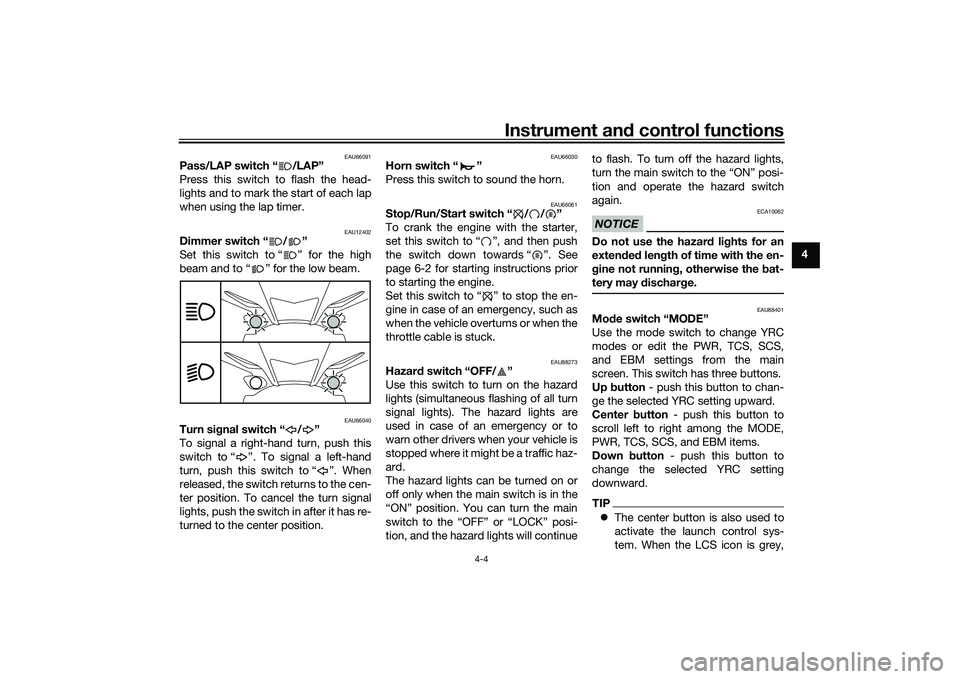
EAU66040
Turn si gnal switch “ / ”
To signal a right-hand turn, push this
switch to “ ”. To signal a left-hand
turn, push this switch to “ ”. When
released, the switch returns to the cen-
ter position. To cancel the turn signal
lights, push the switch in after it has re-
turned to the center position.
EAU66030
Horn switch “ ”
Press this switch to sound the horn.
EAU66061
Stop/Run/Start switch “ / / ”
To crank the engine with the starter,
set this switch to “ ”, and then push
the switch down towards “ ”. See
page 6-2 for starting instructions prior
to starting the engine.
Set this switch to “ ” to stop the en-
gine in case of an emergency, such as
when the vehicle overturns or when the
throttle cable is stuck.
EAU88273
Hazar d switch “OFF/ ”
Use this switch to turn on the hazard
lights (simultaneous flashing of all turn
signal lights). The hazard lights are
used in case of an emergency or to
warn other drivers when your vehicle is
stopped where it might be a traffic haz-
ard.
The hazard lights can be turned on or
off only when the main switch is in the
“ON” position. You can turn the main
switch to the “OFF” or “LOCK” posi-
tion, and the hazard lights will continue to flash. To turn off the hazard lights,
turn the main switch to the “ON” posi-
tion and operate the hazard switch
again.
NOTICE
ECA10062
Do not use the hazar
d lig hts for an
exten ded len gth of time with the en-
g ine not runnin g, otherwise the bat-
tery may d ischarge.
EAU88401
Mo de switch “MODE”
Use the mode switch to change YRC
modes or edit the PWR, TCS, SCS,
and EBM settings from the main
screen. This switch has three buttons.
Up button - push this button to chan-
ge the selected YRC setting upward.
Center button - push this button to
scroll left to right among the MODE,
PWR, TCS, SCS, and EBM items.
Down button - push this button to
change the selected YRC setting
downward.TIP The center button is also used to
activate the launch control sys-
tem. When the LCS icon is grey,
UB3LE1E0.book Page 4 Tuesday, August 10, 2021 2:28 PM
Page 29 of 136

Instrument and control functions
4-6
4
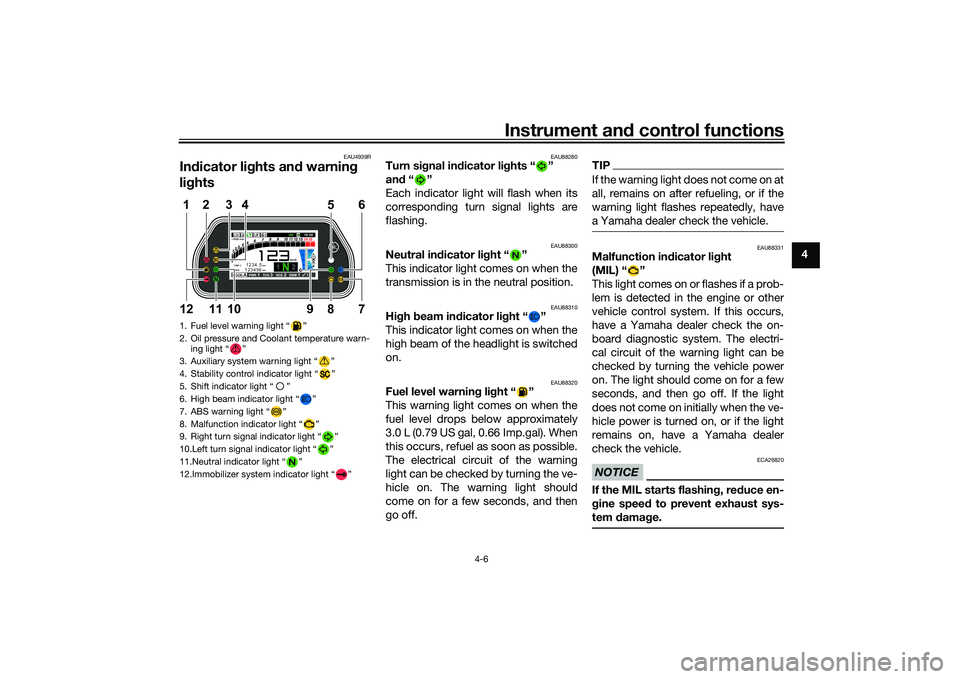
EAU4939R
In dicator lig hts and warning
lig hts
EAU88280
Turn si gnal in dicator li ghts “ ”
an d“”
Each indicator light will flash when its
corresponding turn signal lights are
flashing.
EAU88300
Neutral in dicator li ght “ ”
This indicator light comes on when the
transmission is in the neutral position.
EAU88310
Hi gh beam in dicator li ght “ ”
This indicator light comes on when the
high beam of the headlight is switched
on.
EAU88320
Fuel level warning light “ ”
This warning light comes on when the
fuel level drops below approximately
3.0 L (0.79 US gal, 0.66 Imp.gal). When
this occurs, refuel as soon as possible.
The electrical circuit of the warning
light can be checked by turning the ve-
hicle on. The warning light should
come on for a few seconds, and then
go off.
TIPIf the warning light does not come on at
all, remains on after refueling, or if the
warning light flashes repeatedly, have
a Yamaha dealer check the vehicle.
EAU88331
Malfunction in dicator li ght
(MIL) “ ”
This light comes on or flashes if a prob-
lem is detected in the engine or other
vehicle control system. If this occurs,
have a Yamaha dealer check the on-
board diagnostic system. The electri-
cal circuit of the warning light can be
checked by turning the vehicle power
on. The light should come on for a few
seconds, and then go off. If the light
does not come on initially when the ve-
hicle power is turned on, or if the light
remains on, have a Yamaha dealer
check the vehicle.NOTICE
ECA26820
If the MIL starts flashin g, re duce en-
g ine spee d to prevent exhaust sys-
tem damag e.
1. Fuel level warning light “ ”
2. Oil pressure and Coolant temperature warn-
ing light “ ”
3. Auxiliary system warning light “ ”
4. Stability control indicator light “ ”
5. Shift indicator light “ ”
6. High beam indicator light “ ”
7. ABS warning light “ ”
8. Malfunction indicator light “ ”
9. Right turn signal indicator light “ ”
10.Left turn signal indicator light “ ”
11.Neutral indicator light “ ”
12.Immobilizer system indicator light “ ”
ABS
1 2
GPSN
LCSQS
LIF 2
ODO123456 TRIP-1
1234.5
1000 r/min
km
km
km/h
10:
00
MODE-APWR 1TCS 3SCS 2EBM 1T-2
5
12
6
7
9
8
1012
11
3
4
UB3LE1E0.book Page 6 Tuesday, August 10, 2021 2:28 PM
Page 89 of 136

Periodic maintenance and adjustment
7-8
7
EAU72811
TIPAir filter
• This model’s air filter uses a disposable oil-coated paper element. This element cannot be cleaned with compressed air, doing so will only damage it.
• The air filter element needs to be replaced more frequently when riding in unusually wet or dusty areas.
Hydraulic brake service
• Regularly check the front and rear brake fluid levels. Replenish if necessary.
• Every two years replace the rear brake master cylinder, the internal components of the front brake master cylinder, the brake calipers, and change the brake fluid.
• Replace the brake hoses every four years or sooner if cracked, damaged, or if any section of the stainless steel brake hose has turned black.30 *Moving parts and
cables • Lubricate.
√√√√√
31 *Throttle grip • Check operation.
• Lubricate throttle grip housing
tube guides. √√√√√
32 *Lights, signals and
switches • Check operation.
• Adjust headlight beam.
√√√√√√
NO. ITEM CHECK OR MAINTENANCE JOB
ODOMETER READING
ANNUAL
CHECK
1000 km
(600 mi) 10000 km
(6000 mi) 20000 km
(12000 mi) 30000 km
(18000 mi) 40000 km
(24000 mi)
UB3LE1E0.book Page 8 Tuesday, August 10, 2021 2:28 PM
Page 116 of 136

Periodic maintenance and adjustment
7-35
73. Remove the panel by removing
the quick fastener screws.
TIPTo access the ABS motor fuse, remove
the starter relay cover by pulling it up-
ward.Fuse box 2 is located under panel A.
(See page 7-9.)
If a fuse is blown, replace it as follows.1. Turn the key to “OFF” and turn off the electrical circuit in question. 2. Remove the blown fuse, and then
install a new fuse of the specified
amperage. WARNING! Do not
use a fuse of a higher amperage
rating than recommended to
avoid causing extensive dam-
age to the electrical system and
possibly a fire.
[EWA15132]
1. Battery cover
2. Bolt
1. Quick fastener screw
2. Panel
2
2
1
1
2
1. Fuse box 2
2. Terminal fuse 1 (for auxiliary DC connector)
3. Headlight fuse
4. Hazard fuse
5. ABS ECU fuse
6. Signaling system fuse
7. Ignition fuse
8. Spare fuse
9. SCU fuse (YZF-R1M)
234567
8
9
1
UB3LE1E0.book Page 35 Tuesday, August 10, 2021 2:28 PM
Page 117 of 136

Periodic maintenance and adjustment
7-36
7
3. Turn the key to “ON” and turn on
the electrical circuit in question to
check if the device operates.
4. If the fuse immediately blows again, have a Yamaha dealer
check the electrical system.
EAU67122
Vehicle lightsThis model is equipped with full-LED
lighting.
The headlights, auxiliary lights, turn
signals, brake/tail light, and license
plate light are all LED. There are no
user replaceable bulbs.
If a light does not come on, check the
fuses and then have a Yamaha dealer
check the vehicle.NOTICE
ECA16581
Do not affix any type of tinted film or
stickers to the headlight lens.
Specified fuses:Main fuse:
50.0 A
Terminal fuse 1:
2.0 A
Headlight fuse: 7.5 A
Signaling system fuse: 7.5 A
Ignition fuse:
15.0 A
Radiator fan motor fuse: 15.0 A
Sub radiator fan motor fuse: 10.0 A
ABS motor fuse:
30.0 A
Hazard fuse: 7.5 A
ABS ECU fuse: 7.5 A
ABS solenoid fuse:
15.0 A
SCU fuse: 7.5 A (YZF1000D)
Fuel injection system fuse: 15.0 A
Backup fuse:
7.5 A
Electronic throttle valve fuse: 7.5 A
1. Auxiliary light
2. Headlight
12
UB3LE1E0.book Page 36 Tuesday, August 10, 2021 2:28 PM
Page 128 of 136

Specifications
9-2
9
Size:190/55ZR17M/C (75W) (YZF1000)
200/55ZR17M/C (78W) (YZF1000D)
Manufacturer/model: BRIDGESTONE/BATTLAX RACING
STREET RS11RLoading:Maximum load:185 kg (408 lb)
The vehicle’s maximum load is the combined
weight of the rider, passenger, cargo and any
accessories.Front brake:Type: Hydraulic dual disc brakeRear brake:Type:
Hydraulic single disc brakeFront suspension:Type:Telescopic forkRear suspension:Type:Swingarm (link suspension)Electrical system:System voltage:
12 VBattery:Model:YTZ7S(F)
Voltage, capacity:
12 V, 6.0 Ah (10 HR)
Bulb wattage:Headlight:LED
Brake/tail light:
LED
Front turn signal light: LED
Rear turn signal light: LED
Auxiliary light:
LED
License plate light: LED
UB3LE1E0.book Page 2 Tuesday, August 10, 2021 2:28 PM
Page 133 of 136

Index
11-2
11
Steering, checking ................................ 7-32
Stop/Run/Start switch ............................ 4-4
Storage ................................................... 8-4
Supporting the motorcycle ................... 7-37
Swingarm pivots, lubricating ................ 7-31TThrottle grip, checking and lubricating........................................... 7-29
Tires ...................................................... 7-19
Titanium muffler, cleaning ...................... 8-3
Tool kit .................................................... 7-2
Troubleshooting.................................... 7-37
Troubleshooting chart .......................... 7-39
Turn signal indicator lights ..................... 4-6
Turn signal switch................................... 4-4VValve clearance .................................... 7-18
Vehicle identification number ............... 10-1
Vehicle lights ........................................ 7-36WWheel bearings, checking .................... 7-32
Wheels .................................................. 7-21YYamalube.............................................. 7-16
YRC functions visual guide .................... 3-6
YRC settings......................................... 4-16
YRC (Yamaha Ride Control) ................... 3-1
UB3LE1E0.book Page 2 Tuesday, August 10, 2021 2:28 PM