fuel Abarth 124 Spider 2017 Owner handbook (in English)
[x] Cancel search | Manufacturer: ABARTH, Model Year: 2017, Model line: 124 Spider, Model: Abarth 124 Spider 2017Pages: 220, PDF Size: 2.9 MB
Page 4 of 220

READ THIS CAREFULLY
REFUELLINGOnly refuel with unleaded petrol with octane rating (RON) not less than 95 in compliance with the European specification EN228. Do not use
petrol containing methanol or ethanol E85. Using these mixtures may cause misfiring and handling issues, as well as damage fundamental
components of the supply system.
STARTING THE ENGINE
Versions with manual transmission: make sure that the handbrake is engaged; set the gear lever to neutral, fully depress the clutch pedal
without pressing the accelerator, then press the ignition device button.
Versions with automatic transmission: make sure that the handbrake is engaged and that the gear lever is in P (Park) or N (Neutral),
depress the brake pedal, then press the ignition device button.
PARKING ON FLAMMABLE MATERIAL
The catalytic converter develops high temperatures during operation. Do not park the vehicle on grass, dry leaves, pine needles or other
flammable material: fire hazard.
RESPECTING THE ENVIRONMENT
The vehicle is fitted with a system that carries out a continuous diagnosis of the emission-related components in order to help protect the
environment.
ELECTRICAL ACCESSORIES
Contact an Abarth Dealership if you decide to add electrical accessories (with the risk of gradually draining the battery) after buying the vehicle.
They can calculate the overall electrical requirement and check that the vehicle's electric system can support the required load.
SCHEDULED SERVICING
Correct maintenance of the vehicle is essential for ensuring that it maintains its performance and its safety features, its environmental
friendliness and low running costs unchanged over time.
Page 11 of 220

KEYS
KEYS
1)
A code number is stamped on the plate
attached to the key set; detach this
plate and store it in a safe place (not in
the vehicle) for use if you need to make
a replacement key (auxiliary key).
Also write down the code number and
keep it in a separate safe and
convenient place, but not in the vehicle.
If your key (auxiliary key) is lost, consult
Abarth Dealership and have your code
number ready (1 fig.2=auxiliary key /2
= transmitter/3 = key code number
plate).
IMPORTANT Always keep a spare key
in case one is lost. If a key is lost, go to
an Abarth Dealership as soon as
possible.
IMPORTANT The driver must carry the
key to ensure the system functions
properly.
KEYLESS ENTRY SYSTEM
This system uses the key buttons to
remotely lock and unlock the doors and
the boot lid, fuel-filler flap, and opens
the boot lid.
The system can start the engine without
having to take the key out of your purse
or pocket.
Note
The keyless entry system operation
may vary due to local conditions.
The keyless entry system is fully
operational (door/boot lid/fuel-filler flap
lock/unlock) when the ignition is
switched off. The system does not
operate if the ignition is switched to any
position other than off.
If the key does not operate when
pressing a button or the operational
range becomes too small, the battery
maybedead.
Battery life is about one year.
Replace the battery with a new one if
the
warning light (green) flashes in
the instrument cluster. Replacing thebattery about once a year is
recommended because the warning
light/indicator light may not illuminate or
flash depending on the rate of battery
depletion.
Additional keys can be obtained at
Abarth Dealership. Up to 6 keys can be
used with the keyless functions per
vehicle. Bring all keys to Abarth
Dealership when additional keys are
required.
TRANSMITTER
ButtonsLock button: to lock the doors, the
boot lid and the fuel filler flap, press the
button. The hazard warning lights will
flash once. The doors and the boot lid,
fuel filler flap cannot be locked by
pressing the lock button while any other
door is open. The hazard warning lights
will also not flash.
Unlock button: to unlock the doors
and the boot lid, press the
button.
The hazard warning lights will flash
twice.
Boot button: to open the boot lid,
press and hold the
button until
the boot lid opens.
204010100-361-002AB
9
Page 16 of 220

ADVANCED
KEYLESS ENTRY
SYSTEM
(where provided)
6)
The advanced keyless function allows
you to lock/unlock the door and the
boot lid, fuel filler flap, or open the boot
lid while carrying the key.
IMPORTANT Radio waves from the key
may affect medical devices such as
pacemakers: before using the key near
people who use medical devices, ask
the medical device manufacturer or
your physician if radio waves from the
key will affect the device.
IMPORTANT The advanced keyless
entry system functions can be
deactivated to prevent any possible
adverse effect on a user wearing a
pacemaker or other medical device. If
the system is deactivated, you will be
unable to start the engine by carrying
the key. Contact Abarth Dealership for
details. If the advanced keyless entry
system has been deactivated, you can
start the engine by following the
procedure indicated when the key
battery goes dead.
IMPORTANT
6)The operation of the recognition system
depends on various factors, such as, for
example, any electromagnetic wave
interference from external sources (e.g.
mobile phones), the charge of the battery in
the electronic key and the presence of
metal objects near the key or the vehicle. In
these cases it is still possible to unlock the
doors by using the metal insert in the
electronic key (see description on the
following pages).
VEHICLE SECURITY
ALARM
(where provided)
MODIFICATIONS AND
ADD-ON EQUIPMENT
FCA cannot guarantee the immobilizer
and the theft-deterrent systems'
operation if the system has been
modified or if any add-on equipment
has been installed.
IMPORTANT To avoid damage to the
vehicle, do not modify the system or
install any add-on equipment to the
immobilizer and the theft-deterrent
systems or the vehicle.
IMMOBILIZER SYSTEM
The immobilizer system allows the
engine to start only with a key the
system recognises. If you have a
problem with the immobilizer system or
the key, contact an Abarth Dealership.
Arming the system: the system is
armed when the ignition is switched
from ON to OFF. The
warning light
in the instrument cluster flashes every
2 seconds until the system is disarmed.
Disarming the system: the system is
disarmed when the ignition is switched
ON with the correct programmed key.
The
warning light illuminates for
about 3 seconds and then turns off.
14
GETTING TO KNOW YOUR VEHICLE
Page 18 of 220

DOORS
LOCK / UNLOCK WITH
AUXILIARY KEY
7) 8) 9) 10) 11) 12) 13) 14)
Both doors and the boot lid, fuel filler
flap lock automatically when the driver's
door is locked using the auxiliary key.
They both unlock when the driver's
door is unlocked using the auxiliary key.
Turn the auxiliary key toward the front to
lock, toward the back to unlock.
MANUAL LOCK / UNLOCK
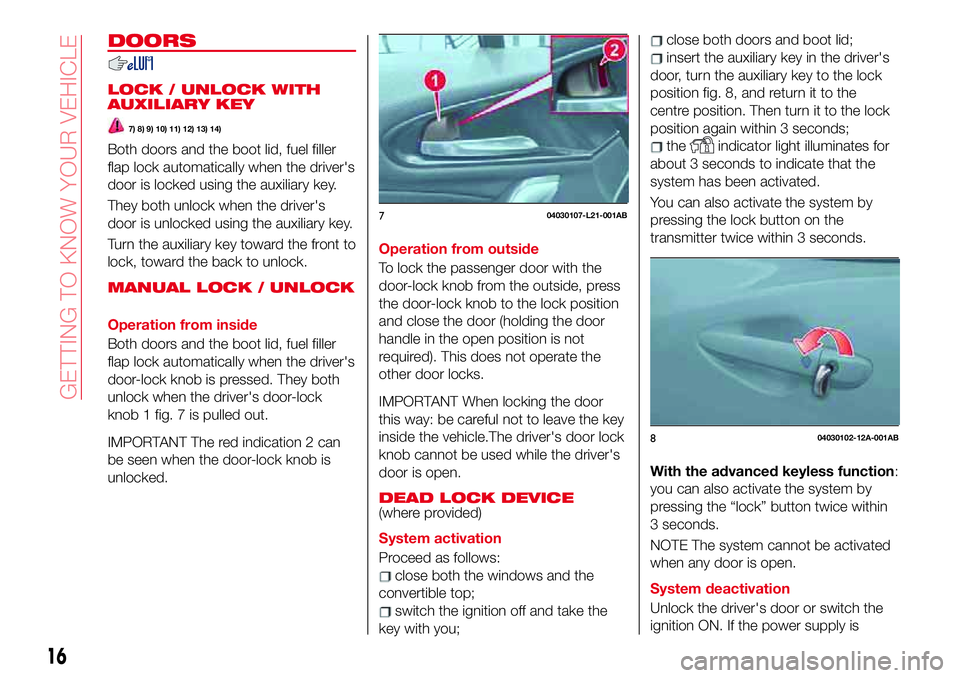
Operation from inside
Both doors and the boot lid, fuel filler
flap lock automatically when the driver's
door-lock knob is pressed. They both
unlock when the driver's door-lock
knob 1 fig. 7 is pulled out.
IMPORTANT The red indication 2 can
be seen when the door-lock knob is
unlocked.
Operation from outside
To lock the passenger door with the
door-lock knob from the outside, press
the door-lock knob to the lock position
and close the door (holding the door
handle in the open position is not
required). This does not operate the
other door locks.
IMPORTANT When locking the door
this way: be careful not to leave the key
inside the vehicle.The driver's door lock
knob cannot be used while the driver's
door is open.
DEAD LOCK DEVICE
(where provided)
System activation
Proceed as follows:
close both the windows and the
convertible top;
switch the ignition off and take the
key with you;
close both doors and boot lid;
insert the auxiliary key in the driver's
door, turn the auxiliary key to the lock
position fig. 8, and return it to the
centre position. Then turn it to the lock
position again within 3 seconds;
theindicator light illuminates for
about 3 seconds to indicate that the
system has been activated.
You can also activate the system by
pressing the lock button on the
transmitter twice within 3 seconds.
With the advanced keyless function:
you can also activate the system by
pressing the “lock” button twice within
3 seconds.
NOTE The system cannot be activated
when any door is open.
System deactivation
Unlock the driver's door or switch the
ignition ON. If the power supply is
704030107-L21-001AB
804030102-12A-001AB
16
GETTING TO KNOW YOUR VEHICLE
Page 19 of 220

interrupted (fuse blows or the battery is
disconnected), the system can only be
deactivated by unlocking a door with
the auxiliary key.
PASSIVE ENTRY(with Advanced Keyless function)
Both doors and the boot lid, fuel filler
flap can be locked/unlocked by
pressing the “door locking” switch on
the handle fig. 9 while the key is being
carried.
To lock
To lock the doors and the boot lid, fuel
filler flap, press the “door locking”
switch and the hazard warning lights
will flash once.
To unlock
To unlock the doors and the boot lid,
fuel filler flap, press the “door locking”switch and the hazard warning lights
will flash twice.
NOTE Confirm that both doors and the
boot lid, fuel filler flap are securely
locked.
NOTE Both doors and the boot lid, fuel
filler flap cannot be locked when any
door is open.
NOTE It may require a few seconds for
the doors to unlock after the “door
locking” switch is pressed.
The setting can be changed so that a
beep sound is heard for confirmation
when the doors and the boot lid, fuel
filler flap are locked/unlocked using the
“door locking” switch.
With theft-deterrent system
The hazard warning lights flash when
the theft-deterrent system is armed or
turned off (refer to “Theft-deterrent
system” in “Vehicle security alarm”
paragraph).
With dead lock
Pressing the “door locking” switch
twice within 3 seconds will activate the
dead lock device. The setting can be
changed so that the doors and the boot
lid, fuel filler flap are locked
automatically without pressing the
“door locking” switch.Auto-lock function
A beep sound is heard when both
doors are closed while the advanced
key is being carried.
Both doors and the boot lid, fuel filler
flap are locked automatically after about
three seconds when the advanced key
is out of the operational range.
Also, the hazard warning lights flash
once (even if the driver is in the
operational range, both doors and the
boot lid, fuel filler flap are locked
automatically after about 30 seconds).
If you are out of the operational range
before the doors and the boot lid are
completely closed or another key is left
in the vehicle, the auto-lock function will
not work.
Always make sure that both doors and
the boot lid are closed and locked
before leaving the vehicle. The
auto-lock function does not close the
power windows.
Auto re-lock function
After unlocking with the “door locking”
switch, both doors and the boot lid, fuel
filler flap will automatically re-lock if any
of the following operations are not
performed within about 30 seconds:
Opening a door or the boot lid.
Switching the ignition to any position
other than off.
904000098-121-555AB
17
Page 20 of 220

If your vehicle has a theft-deterrent
system, the hazard warning lights will
flash for confirmation.
The time required for the doors and the
boot lid, fuel filler flap to lock
automatically can be changed (refer to
“Personalisation features” paragraph in
“Knowing the instrument panel”
chapter).
LOCKING / UNLOCKING
WITH TRANSMITTER
Both doors and the boot lid, fuel filler
flap can be locked/unlocked by
operating the keyless entry system
transmitter: refer to “Keyless entry
system” in “Keys” paragraph.
WARNING
7)Always take all children and pets with
you or leave a responsible person with
them: leaving a child or a pet unattended in
a parked vehicle is dangerous. In hot
weather, temperatures inside a vehicle can
become high enough to cause brain
damage or even death.
8)Do not leave the key in your vehicle with
children and keep them in a place where
your children will not find or play with them:
leaving children in a vehicle with the key is
dangerous. This could result in someone
being badly injured or even killed.9)Always close both the windows and
convertible top, lock the doors and take the
key with you when leaving your vehicle
unattended: leaving your vehicle unlocked
is dangerous as children could lock
themselves in a hot vehicle, which could
result in death. Also, a vehicle left unlocked
becomes an easy target for thieves and
intruders.
10)After closing the doors, always verify
that they are securely closed: doors not
securely closed are dangerous, if the
vehicle is driven with a door not securely
closed, the door could open unexpectedly
resulting in an accident.
11)Always confirm the safety around the
vehicle before opening a door: suddenly
opening a door is dangerous. A passing
vehicle or a pedestrian could be hit and
cause an accident.
12)Always confirm the conditions around
the vehicle before opening/closing the
doors and use caution during strong winds
or when parked on an incline. Not being
aware of the conditions around the vehicle
is dangerous because fingers could get
caught in the door or a passing pedestrian
could be hit, resulting in an unexpected
accident or injury.
13)If the power window does not go up or
down automatically because the battery is
dead, slowly open/close the power window
while pressing the glass inward. Otherwise,
the power window may contact the
convertible top and the door cannot be
opened/closed resulting in damage to the
window.14)Never activate the double locking
system with passengers, especially
children, still inside the vehicle: activating
the system with passengers, especially
children, still inside the vehicle is
dangerous. The passengers cannot open
the doors from inside. They would be
trapped and subjected to extreme
temperatures. This could result in serious
injuries or even death.
18
GETTING TO KNOW YOUR VEHICLE
Page 49 of 220

CONTROL PANEL AND INSTRUMENTS
1. Odometer/Trip meter and Trip computer button/Dashboard illumination - 2. Tachometer - 3. Speedometer - 4. Automatic
transmission info display - 5. Odometer/Trip computer info/Engine coolant temperature gauge/Fuel gauge/Outside
temperature/Speed limiter/Cruise Control/INFO switch display
4905020103-121-001AB
47
Page 50 of 220

Right hand drive versions
1. Odometer/Trip meter and Trip computer button/Dashboard illumination - 2. Tachometer - 3. Speedometer - 4. Automatic
transmission info display - 5. Odometer/Trip computer info/Engine coolant temperature gauge/Fuel gauge/Outside
temperature/Speed limiter/Cruise Control/INFO switch display
5005020107-121-001AB
48
KNOWING THE INSTRUMENT PANEL
Page 51 of 220

ODOMETER / TRIP METER
The display mode can be changed from
odometer to “Trip meter A” to “Trip
meter B” and then back to odometer by
pressing the selector 1 fig. 51 while one
of them is displayed. The selected
mode will be displayed.
When the ignition is switched to ACC or
OFF, the odometer or trip meters
cannot be displayed, however, pressing
the selector can inadvertently switch
the trip meters or reset them during an
approximate ten-minute period in the
following cases:
after the ignition is switched to off
from ON;
after the driver's door is opened.Trip meter
The trip meter can record the total
distance of two trips. One is recorded in
“Trip A”, and the other is recorded in
“Trip B”.
For instance, “Trip A” can record the
distance from the point of origin, and
“Trip B” can record the distance from
where the fuel tank is filled.
Use this meter to measure trip
distances and to compute fuel
consumption.
If the fuel economy data is reset using
the fuel economy monitor, or Trip A is
reset using the trip meter when the
function which synchronizes the fuel
economy monitor and the trip meter is
on, the fuel economy data and Trip A
are reset simultaneously.
NOTE Only the trip meters record
tenths of kilometers (miles).
Trip meter reset
The trip meter will be erased when the
power supply is interrupted (blown fuse
or the battery is disconnected) or when
the vehicle is driven over 9999.9 km
(mile).
INSTRUMENT PANEL
ILLUMINATION
Brightness adjustment
The brightness of the instrument cluster
and dashboard illuminations can be
adjusted by rotating the knob 1
the brightness decreasesby
rotating the knob to the left. A beep
sound will be heard when the knob has
been rotated to the maximum dim
position;
the brightness increasesby
rotating the knob to the right.
Cancelling illumination dimmer
Rotate the knob to the right until a beep
sound is heard while the instrument
cluster is dimmed with the ignition
switched ON. If the instrument cluster's
visibility is reduced due to glare from
surrounding brightness, cancel the
illumination dimmer.
5105020102-121-001AB-high.jpg
5205020102-121-001AB-high.jpg
49
Page 52 of 220

When the illumination dimmer is
canceled, the instrument cluster cannot
be dimmed even if the position lights
are turned on. When the illumination
dimmer is canceled, the screen in the
center display switches to constant
display of the daytime screen.
TRIP COMPUTER AND
INFO SWITCH
The following information can be
selected by pressing the INFO switch
fig. 53 with the ignition switched ON:
Distance-to-empty (approximate
distance you can travel on the available
fuel);
Average fuel economy;
Current fuel economy;
Average vehicle speed;
Vehicle speed alarm.
If you have any problems with your trip
computer, contact an Abarth
Dealership.Vehicle speed alarm mode
In this mode, the current setting for the
vehicle speed alarm is displayed. You
can change the vehicle speed setting at
which the warning is triggered.
IMPORTANT The vehicle speed alarm
display is activated at the same time
the beep sound is heard. The set
vehicle speed flashes several times.
The vehicle speed alarm can be set
using the INFO switch.
The vehicle speed alarm function can
be set between 30 and 250 km/h.
IMPORTANT Always set the vehicle
speed according to the laws and
regulations of the country/city in which
the vehicle is driven. In addition, always
verify the speed of the vehicle using the
speedometer.
The vehicle speed alarm can be set
using the following procedure:
press the INFO switch to display the
vehicle speed alarm mode;
press the INFO switch continuously
until a beep sound is heard. The set
vehicle speed display flashes the third
digit (hundredths place) fig. 54;
press the INFO switch and set the
third digit (hundredths place) to the
desired vehicle speed. The numerical
value changes each time the INFO
switch is pressed;
press the INFO switch continuously
until a beep sound is heard. The set
vehicle speed display flashes the lower
two digits (tenths and ones place)
fig. 55;
530620500-122-001AB
5405020110-121-002
5505020110-121-003
50
KNOWING THE INSTRUMENT PANEL