parking brake Abarth 124 Spider 2017 Owner handbook (in English)
[x] Cancel search | Manufacturer: ABARTH, Model Year: 2017, Model line: 124 Spider, Model: Abarth 124 Spider 2017Pages: 220, PDF Size: 2.9 MB
Page 4 of 220

READ THIS CAREFULLY
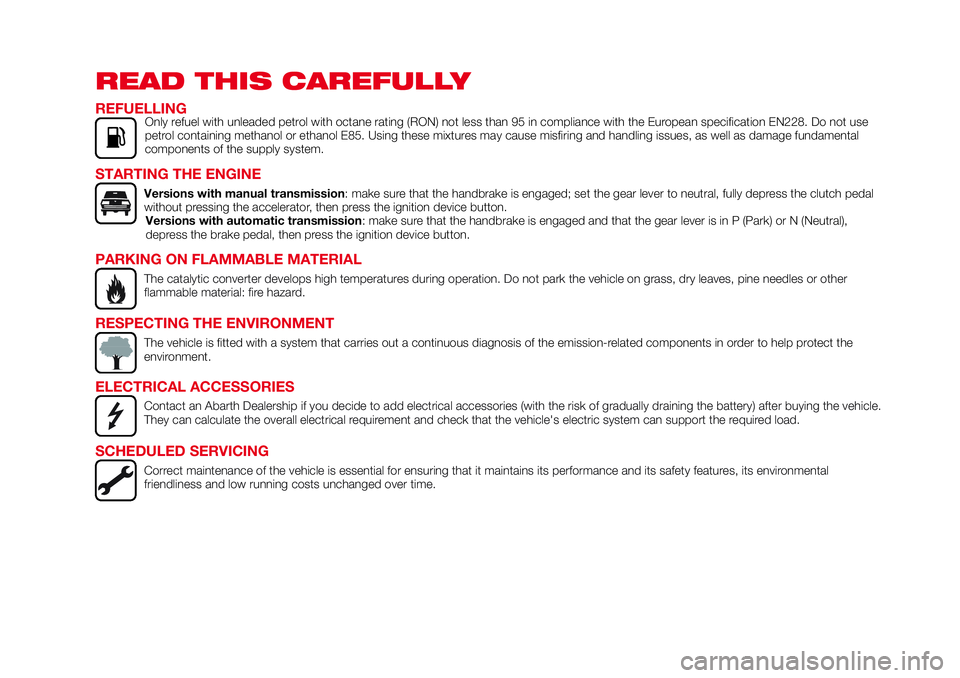
REFUELLINGOnly refuel with unleaded petrol with octane rating (RON) not less than 95 in compliance with the European specification EN228. Do not use
petrol containing methanol or ethanol E85. Using these mixtures may cause misfiring and handling issues, as well as damage fundamental
components of the supply system.
STARTING THE ENGINE
Versions with manual transmission: make sure that the handbrake is engaged; set the gear lever to neutral, fully depress the clutch pedal
without pressing the accelerator, then press the ignition device button.
Versions with automatic transmission: make sure that the handbrake is engaged and that the gear lever is in P (Park) or N (Neutral),
depress the brake pedal, then press the ignition device button.
PARKING ON FLAMMABLE MATERIAL
The catalytic converter develops high temperatures during operation. Do not park the vehicle on grass, dry leaves, pine needles or other
flammable material: fire hazard.
RESPECTING THE ENVIRONMENT
The vehicle is fitted with a system that carries out a continuous diagnosis of the emission-related components in order to help protect the
environment.
ELECTRICAL ACCESSORIES
Contact an Abarth Dealership if you decide to add electrical accessories (with the risk of gradually draining the battery) after buying the vehicle.
They can calculate the overall electrical requirement and check that the vehicle's electric system can support the required load.
SCHEDULED SERVICING
Correct maintenance of the vehicle is essential for ensuring that it maintains its performance and its safety features, its environmental
friendliness and low running costs unchanged over time.
Page 13 of 220

IGNITION SWITCH
PUSH BUTTON START
POSITIONS
The system operates only when the key
is within operational range.
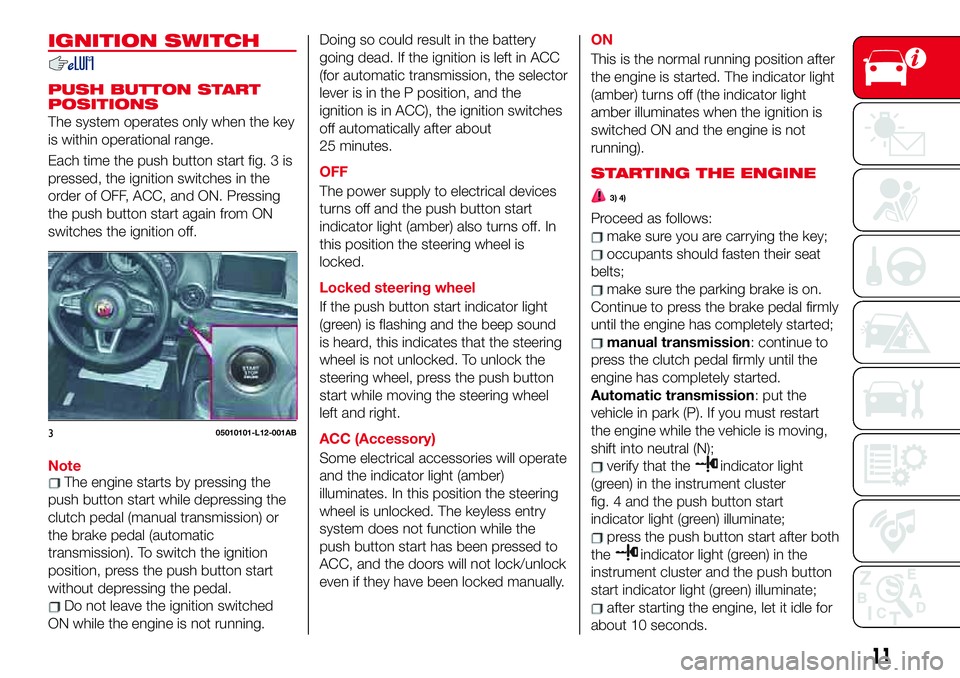
Each time the push button start fig. 3 is
pressed, the ignition switches in the
order of OFF, ACC, and ON. Pressing
the push button start again from ON
switches the ignition off.
Note
The engine starts by pressing the
push button start while depressing the
clutch pedal (manual transmission) or
the brake pedal (automatic
transmission). To switch the ignition
position, press the push button start
without depressing the pedal.
Do not leave the ignition switched
ON while the engine is not running.Doing so could result in the battery
going dead. If the ignition is left in ACC
(for automatic transmission, the selector
lever is in the P position, and the
ignition is in ACC), the ignition switches
off automatically after about
25 minutes.
OFF
The power supply to electrical devices
turns off and the push button start
indicator light (amber) also turns off. In
this position the steering wheel is
locked.
Locked steering wheel
If the push button start indicator light
(green) is flashing and the beep sound
is heard, this indicates that the steering
wheel is not unlocked. To unlock the
steering wheel, press the push button
start while moving the steering wheel
left and right.
ACC (Accessory)
Some electrical accessories will operate
and the indicator light (amber)
illuminates. In this position the steering
wheel is unlocked. The keyless entry
system does not function while the
push button start has been pressed to
ACC, and the doors will not lock/unlock
even if they have been locked manually.ON
This is the normal running position after
the engine is started. The indicator light
(amber) turns off (the indicator light
amber illuminates when the ignition is
switched ON and the engine is not
running).
STARTING THE ENGINE
3) 4)
Proceed as follows:
make sure you are carrying the key;
occupants should fasten their seat
belts;
make sure the parking brake is on.
Continue to press the brake pedal firmly
until the engine has completely started;
manual transmission: continue to
press the clutch pedal firmly until the
engine has completely started.
Automatic transmission: put the
vehicle in park (P). If you must restart
the engine while the vehicle is moving,
shift into neutral (N);
verify that theindicator light
(green) in the instrument cluster
fig. 4 and the push button start
indicator light (green) illuminate;
press the push button start after both
the
indicator light (green) in the
instrument cluster and the push button
start indicator light (green) illuminate;
after starting the engine, let it idle for
about 10 seconds.
305010101-L12-001AB
11
Page 15 of 220

To switch the ignition position without
starting the engine, perform the
following operations after the push
button start indicator light (green) turns
on:
release the clutch pedal (manual
transmission) or brake pedal (automatic
transmission);
press the push button start to switch
the ignition position. The ignition
switches in the order of ACC, ON, and
OFF each time the push button start is
pressed. To switch the ignition position
again, perform the operation from the
beginning.
TURNING THE ENGINE
OFF
5) 6)
Proceed as follows:
stop the vehicle completely;
manual transmission: shift into
neutral and set the parking brake.
Automatic transmission: shift the
selector lever to the P position and set
the parking brake.
press the push button start to turn
off the engine. The ignition position is
OFF.
IMPORTANT When leaving the vehicle,
make sure the push button start is off.
Emergency engine stop
Continuously pressing the push button
start or quickly pressing it any number
of times while the engine is running or
the vehicle is being driven will turn the
engine off immediately. The ignition
switches to ACC.
WARNING
3)Before leaving the driver's seat, always
switch the ignition off, set the parking
brake, and make sure the selector lever is
in P (automatic transmission) or in 1
stgear
or R (manual transmission). Leaving the
driver's seat without switching the ignition
off, setting the parking brake, and shifting
the selector lever to P (automatic
transmission) or to 1
stgear or R (manual
transmission) is dangerous. Unexpected
vehicle movement could occur which could
result in an accident. In addition, if your
intention is to leave the vehicle for even a
short period, it is important to switch the
ignition off, as leaving it in another position
will disable some of the vehicle's security
systems and run the battery down.
4)Radio waves from the key may affect
medical devices such as pacemakers.
Before using the key near people who use
medical devices, ask the medical device
manufacturer or your physician if radio
waves from the key will affect the device.5)Do not stop the engine while the vehicle
is moving. Stopping the engine while the
vehicle is moving for any reason other than
in an emergency is dangerous. Stopping
the engine while the vehicle is moving will
result in reduced braking ability due to the
loss of power braking, which could cause
an accident and serious injury.
6)Always take the key with you when you
leave your vehicle to prevent someone
from accidentally operating the controls.
Remember to engage the parking brake.
Never leave children unattended in the
vehicle.
13
Page 24 of 220

WARNING
34)Any adjustment of the steering wheel
position must be carried out only with the
vehicle stationary and the engine turned
off. Adjusting the steering wheel while the
vehicle is moving is dangerous. Moving it
can very easily cause the driver to abruptly
turn to the left or right. This can lead to loss
of control or an accident.
35)It is absolutely forbidden to carry out
any aftermarket operation involving steering
system or steering column modifications
(e.g. installation of antitheft device) that
could adversely affect performance and
safety, invalidate the warranty and also
result in the vehicle not meeting
type-approval requirements.
36)Before exiting the vehicle, ALWAYS
engage the parking brake, steer the
wheels, engage the first gear if uphill and
the reverse if downhill. If the vehicle is
parked on a steep slope, chock the wheels
with wedges or stones. When leaving the
vehicle, always lock all the doors by
pressing the button on the key.
MIRRORS
OUTSIDE MIRRORS
37)
Driver's side wide angle mirror
The wide angle mirror has two
curvatures on its surface separated by
a region line 1 fig. 13 into outer and
inner regions.
The inner region is a standard convex
mirror whereas the outer region allows
for a wider range of visibility within the
same sweep. This combination allows
for better assurance when making lane
changes.
Objects appearing in the outer region
are actually further away than they are
in the inner region.
INSIDE DAY / NIGHT
MIRROR
39)
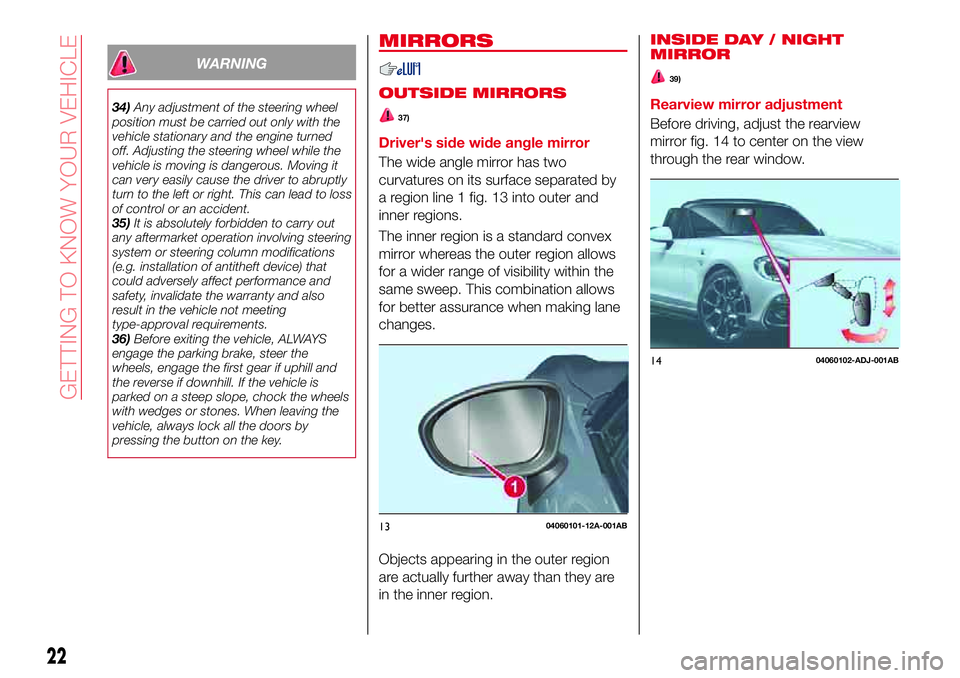
Rearview mirror adjustment
Before driving, adjust the rearview
mirror fig. 14 to center on the view
through the rear window.
1304060101-12A-001AB
1404060102-ADJ-001AB
22
GETTING TO KNOW YOUR VEHICLE
Page 26 of 220

39)Do not stack cargo or objects higher
than the seatbacks: cargo stacked higher
than the seatbacks is dangerous. It can
block your view in the rearview mirror,
which might cause you to hit another car
when changing lanes.EXTERIOR LIGHTS
HEADLIGHTS
Turn the headlight switch 1 fig. 18 to
turn the headlights, other exterior lights
and dashboard illumination ON or OFF.
When the headlight switch is turned to
the
orposition, the
lights-on indicator light in the
instrument cluster turns on.
With auto-light control
When the headlight switch is turned to
theAUTOposition, the lights-on
indicator light in the instrument cluster
turns on/off in conjunction with the
automatic on/off operation of the
headlights.
IMPORTANT To prevent discharging the
battery, do not leave the lights on while
the engine is off unless safety requires
them.
1805030101-121-001AB
24
GETTING TO KNOW YOUR VEHICLE
DAYTIME RUNNING
LIGHTS (DRL)
40) 41)
Some countries require moving vehicles
to have their lights on (running lights)
during the daytime.
The running lights turn on automatically
when the vehicle starts moving.
They turn off when the parking brake is
operated or the selector lever is shifted
to the P position (versions with
automatic transmission).
Page 43 of 220

release support rod 3 fig. 38 from its
locking device, then insert it in the
padded area 4 fig. 39 and secure it in
the support rod hole indicated by the
arrow to hold the bonnet open.CLOSING
54)
Proceed as follows:
check under the bonnet area to
make certain all filler caps are in place
and all loose items (e.g. tools, oil
containers, etc.) have been removed;
lift the bonnet, grasp the padded
area on the support rod, and secure the
support rod from its locking device.
Verify that the support rod is secured in
the clip before closing the bonnet;
lower the bonnet slowly to a height of
about 20 cm above its closed position
and then let it drop.
IMPORTANT When closing the bonnet,
do not push it excessively such as by
applying your weight. Otherwise, the
bonnet could be deformed.
WARNING
51)Perform these operations only when
the car is stationary.
52)The bonnet may drop suddenly if the
supporting rod is not positioned correctly.
53)Use both hands to lift the bonnet.
Before lifting, check that the windscreen
wiper arms are not raised from the
windscreen, that the vehicle is stationary
and that the parking brake is engaged.
54)Always check that the bonnet is closed
and securely locked. A bonnet that is not
closed and securely locked is dangerous
as it could fly open while the vehicle is
moving and block the driver's vision which
could result in a serious accident.
55)With active bonnet: do not pull the
bonnet's release handle after the active
bonnet has activated. Pulling the release
handle while the active bonnet is operating
is dangerous as it will raise the bonnet
further and obstruct vision. In addition, the
bonnet cannot be lowered manually,
therefore do not attempt to forcefully push
the bonnet back down. Otherwise, it could
deform the bonnet or cause injury. If the
active bonnet has activated, always
contact an Abarth Dealership immediately.
3707030201-122-001AB
3807030201-130-888AB
3907030201-123-002AB
41
Page 44 of 220

CONVERTIBLE TOP
(SOFT TOP)
LOWERING THE
CONVERTIBLE TOP
IMPORTANT Do not sit on the folded
convertible top. Otherwise, the
convertible top could be damaged or
you may fall off and be injured.
Proceed as follows:
make sure the parking brake is
applied. If the engine is running, turn it
off;
make sure there are no objects
which have been placed in the area
where the convertible top is to be
retracted;
with the lock release button 1
fig. 40 depressed forward (red mark
2 visible), pull back the top latch lever 3
fig.41tounlockit;
remove the striker 4 from the anchor
5 fig. 42;
IMPORTANT If the power windows do
not go down automatically, fully open
the windows.
standing outside of the vehicle, hold
the convertible top along the front edge
6 fig. 43 and pull it toward the vehicle
rear;
4004110102-L36-006AB
4104110102-L21-001AB
4204110102-L22-002AB
42
GETTING TO KNOW YOUR VEHICLE
Page 45 of 220

IMPORTANT To lower the convertible
top from inside the vehicle, use the
convertible top's handles 6 fig. 43.
move the convertible top rearward
and fold it while pressing the rear glass
lightly with your hand;
with the back end of the convertible
top pressed, press the front end until a
latch sound is heard fig. 44. Lightly rock
the retracted convertible top to make
sure it is securely locked.
RAISING THE
CONVERTIBLE TOP
Proceed as follows:
make sure the parking brake is
applied. If the engine is running, turn it
off;
pull up the unlock lever 1 to
disengage the lock 1 fig. 45;
standing outside of the vehicle, hold
the convertible top along the front edge
and pull it towards the vehicle front;
IMPORTANT If the power windows do
not go down automatically, fully open
the windows.
IMPORTANT To raise the convertible
top from inside the vehicle, use the
convertible top's handles 2 fig. 46.
sitting in a seat, grasp the convertible
top's handles 3 fig. 47, and press the
convertible top against the windscreen.
4304110102-123-002AB
4404110102-126-001AB
4504110103-121-004-1AB
4604110103-L23-002AB
43
Page 55 of 220

For the following warning/indicator
lights:
Master warning light;
Brake system warning light;
ABS warning light;
Charging system warning light;
Engine oil warning light;
Check engine light;
High engine coolant temperature
warning light;
Automatic transmission warning light;
Power steering malfunction indicator
light;
Air Bag/Seat Belt pretensioner
system warning light;
Active bonnet warning light;
Low fuel warning light;
Seat belt warning light;
Seat belt warning light;
Door-ajar warning light;
Low washer fluid level warning light;
Tyre Pressure Monitoring System
warning light;
KEY warning light;
LED headlight KEY warning light;
Wrench indicator light;
TCS/DSC indicator light;
DSC OFF indicator light;
Security indicator light;
Passenger Air Bag deactivation
indicator light (where provided).The light turns on when the ignition is
switched on for an operation check,
and turns off a few seconds later or
when the engine is started. If the light
does not turn on or remains turned on,
contact an Abarth Dealership.
Only for “Brake system warning
light”: the light turns on continuously
when the parking brake is applied.
53
Page 56 of 220

WARNING LIGHTS ON INSTRUMENT PANEL
Red warning lights
Warning light What it means
PARKING BRAKE WARNING - WARNING LIGHT INSPECTION / LOW BRAKE FLUID LEVEL
WARNING
Parking brake warning / Warning light inspection
The light illuminates when the parking brake is applied with the ignition switched to START or
ON. It turns off when the parking brake is fully released.
Low brake fluid level warning
If the brake warning light remains illuminated even though the parking brake is released, the
brake fluid may be low or there could be a problem with the brake system. Park the vehicle in a
safe place immediately and contact an Abarth Dealership.
IMPORTANT Do not drive with the brake system warning light illuminated. Contact an Abarth
Dealership to have the brakes inspected as soon as possible. Driving with the brake system
warning light illuminated is dangerous. It indicates that your brakes may not work at all or that
they could completely fail at any time. If this light remains illuminated, after checking that the
parking brake is fully released, have the brakes inspected immediately.
IMPORTANT In addition, the effectiveness of the braking may diminish so you may need to
depress the brake pedal more strongly than normal to stop the vehicle.
Stop the vehicle in a safe place immediately and contact an Abarth Dealership.
EBD (Electronic Brake-force Distribution) SYSTEM WARNING
If the EBD (Electronic Brake-force Distribution) control unit determines that some components
are operating incorrectly, the control unit may illuminate the brake system warning light and the
ABS warning light simultaneously. The problem is likely to be the electronic brake force
distribution system. Stop the vehicle in a safe place immediately and contact an Abarth
Dealership.
IMPORTANT Do not drive with both the ABS warning light and brake warning light illuminated.
Contact an Abarth Dealership to have the brakes inspected as soon as possible. Driving when
the brake system warning light and ABS warning light are illuminated simultaneously is
dangerous. When both lights are illuminated, the rear wheels could lock more quickly in an
emergency stop than under normal circumstances.
54
KNOWING THE INSTRUMENT PANEL