steering wheel Abarth 124 Spider 2018 Owner handbook (in English)
[x] Cancel search | Manufacturer: ABARTH, Model Year: 2018, Model line: 124 Spider, Model: Abarth 124 Spider 2018Pages: 220, PDF Size: 2.91 MB
Page 159 of 220

37)The front and rear tow hooks should be
used only for emergencies on the road. You
are allowed to tow the vehicle for short
distances using an appropriate device in
accordance with the highway code (a rigid
bar), to move the vehicle on the road in
readiness for towing or transport via a
breakdown vehicle. Tow hooks MUST NOT
be used to tow vehicles off the road or
where there are obstacles and/or for
towing operations using ropes or other
non-rigid devices. Respecting the above
conditions, towing must take place with
two vehicles (one towing, the other towed)
aligned as much as possible along the
same center line.EMERGENCY
TOWING
TOWING DESCRIPTION
Proper lifting and towing are necessary
to prevent damage to the vehicle.
Government and local laws must be
followed.
A towed vehicle usually should have its
drive wheels (rear wheels) off the
ground. If excessive damage or other
conditions prevent this, use wheel
dollies.
When towing with the rear wheels on
the ground, release the parking brake.
IMPORTANT Do not tow the vehicle
pointed backward with driving wheels
on the ground. This may cause internal
damage to the transmission.
IMPORTANT Do not tow with sling-type
equipment. This could damage your
vehicle. Use wheel-lift or flatbed
equipment.
If towing service is not available in an
emergency, the vehicle may be towed
with all four wheels on the ground using
the towing hook at the front of the
vehicle. Only tow the vehicle on paved
surfaces for short distances at low
speeds.Follow these instructions when towing
the vehicle with all wheels on the
ground:
shift to neutral (manual transmission),
or the N position (automatic
transmission);
switch the ignition to ACC;
release the parking brake.
NOTE Remember that power assist for
the brakes and steering will not be
available when the engine is not
running.
157
Page 173 of 220

You should replace the tire before the
band crosses the entire tread.
SNOW CHAINS
50)
The snow chains may be applied only
to the rear wheel tires. Check the
tension of the snow chains after the first
few metres have been driven.
IMPORTANT Using snow chains with
tires with non-original dimensions may
damage the vehicle.
IMPORTANT Using different size or type
(M+S, snow, etc.) tires between front
and rear axle may adversely affect
vehicle driveability, with the risk of losing
control of the vehicle and resulting
accidents.TIRE ROTATION
RECOMMENDATIONS
211)
The single wheel will therefore operate
on a different axle and, where possible,
on the opposite side of the vehicle.
IMPORTANT The following rotation
methods must NOT be used with
one-way tires! This type of tires can
only be switched from the front axle to
the rear axle and vice versa, keeping
them on the same side of the vehicle.
IMPORTANT Rotate tires periodically.
Irregular tire wear is dangerous. To
equalize tread wear for maintaining
good performance in handling and
braking, rotate the tires every 10,000
km, or sooner if irregular wear
develops.
IMPORTANT Because your vehicle is
not equipped with a spare tire, you
cannot do a tire rotation safely with the
jack that comes with your vehicle.
Contact an Abarth Dealership for tire
rotation.
IMPORTANT Rotate unidirectional tires
and radial tires that have an
asymmetrical tread pattern or studs
only from front to rear, not from side to
side. Tire performance will be reduced if
rotated from side to side.
With limited-slip differential
Your vehicle is equipped with
limited-slip differential. Do not use the
following:
tires not of the designated size;
tires of different sizes or types at the
same time;
tires not sufficiently inflated.
If these instructions are not followed,
the rotation of the left and right wheels
will be different and will thus apply a
constant load on the limited-slip
differential. This will cause a
malfunction.
WARNING
207)If the tires are “unidirectional”, do not
switch tires from the right-hand side of the
vehicle to the left-hand side, and vice
versa. This type of tires can only be
switched from the front axle to the rear axle
and vice versa, keeping them on the same
side of the vehicle.
208)Travelling with partially or completely
flat tires can cause safety problems and
irreparable damages to the tire.
209)Always use tires that are in good
condition. Driving with worn tires is
dangerous. Reduced braking, steering, and
traction could result in an accident.
210)Replace all four tires at the same time.
Replacing just one tyre is dangerous. It
could cause poor handling and poor
braking resulting in loss of vehicle control.
15407031403-ALL-001AB
171
Page 195 of 220

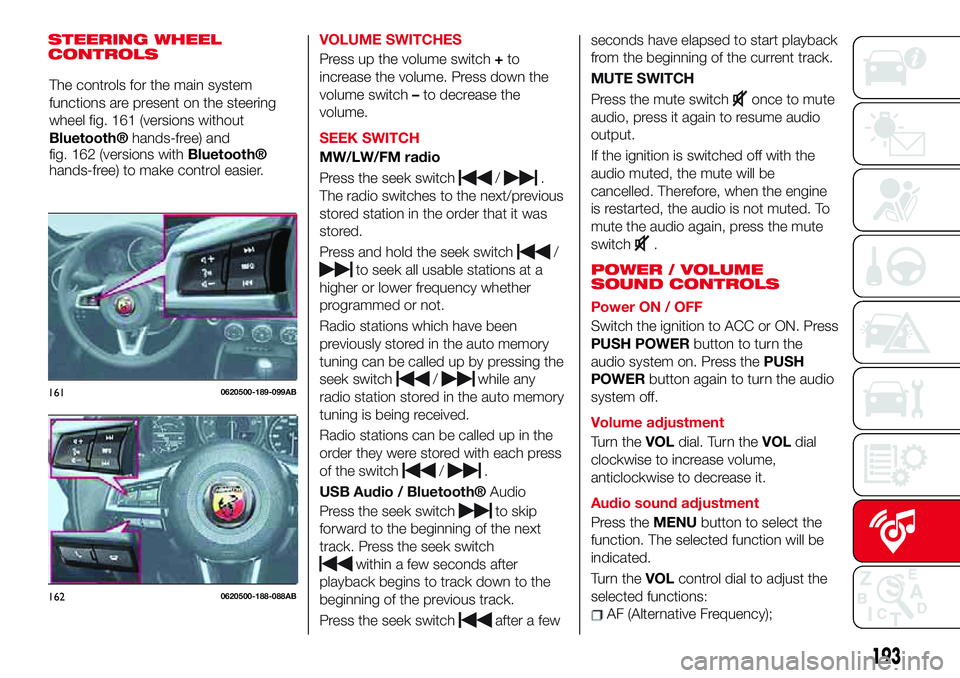
STEERING WHEEL
CONTROLSVOLUME SWITCHES
Press up the volume switch+to
increase the volume. Press down the
volume switch–to decrease the
volume.
SEEK SWITCH
MW/LW/FM radio
Press the seek switch
/.
The radio switches to the next/previous
stored station in the order that it was
stored.
Press and hold the seek switch
/
to seek all usable stations at a
higher or lower frequency whether
programmed or not.
Radio stations which have been
previously stored in the auto memory
tuning can be called up by pressing the
seek switch
/while any
radio station stored in the auto memory
tuning is being received.
Radio stations can be called up in the
order they were stored with each press
of the switch
/.
USB Audio /
Bluetooth®Audio
Press the seek switch
to skip
forward to the beginning of the next
track. Press the seek switch
within a few seconds after
playback begins to track down to the
beginning of the previous track.
Press the seek switch
after a fewseconds have elapsed to start playback
from the beginning of the current track.
MUTE SWITCH
Press the mute switch
once to mute
audio, press it again to resume audio
output.
If the ignition is switched off with the
audio muted, the mute will be
cancelled. Therefore, when the engine
is restarted, the audio is not muted. To
mute the audio again, press the mute
switch
.
POWER / VOLUME
SOUND CONTROLS
Power ON / OFF
Switch the ignition to ACC or ON. Press
PUSH POWERbutton to turn the
audio system on. Press thePUSH
POWERbutton again to turn the audio
system off.
Volume adjustment
Turn theVOLdial. Turn theVOLdial
clockwise to increase volume,
anticlockwise to decrease it.
Audio sound adjustment
Press theMENUbutton to select the
function. The selected function will be
indicated.
Turn theVOLcontrol dial to adjust the
selected functions:
AF (Alternative Frequency);
1610620500-189-099AB
1620620500-188-088AB
193
The controls for the main system
functions are present on the steering
wheel fig. 161 (versions without
Bluetooth®hands-free) and
fig. 162 (versions withBluetooth®
hands-free) to make control easier.
Page 199 of 220

RADIO 7”
STEERING WHEEL
CONTROLS
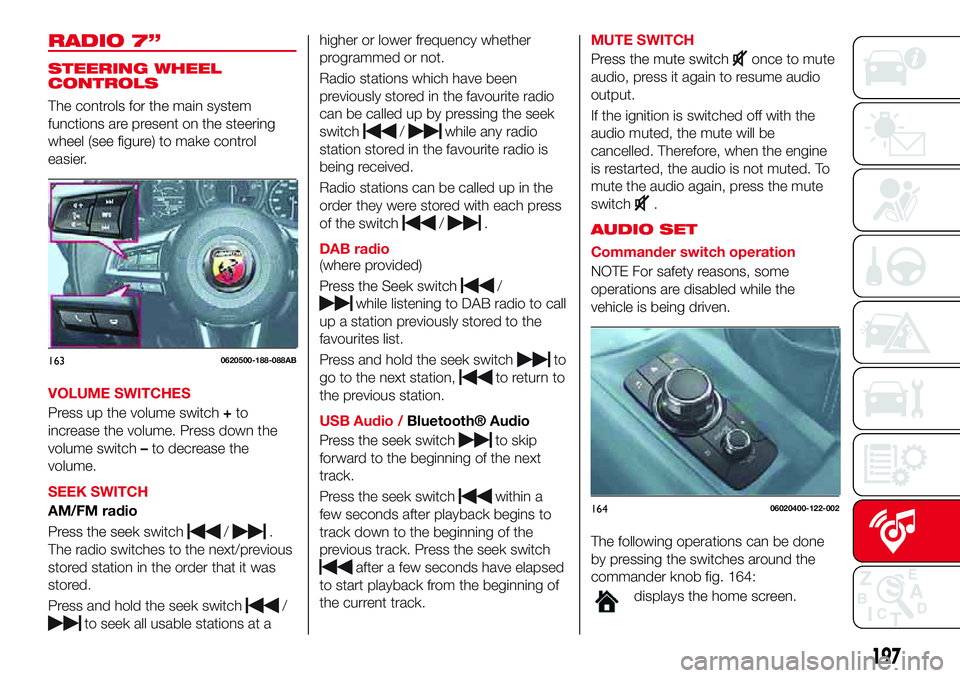
The controls for the main system
functions are present on the steering
wheel (see figure) to make control
easier.
VOLUME SWITCHES
Press up the volume switch+to
increase the volume. Press down the
volume switch–to decrease the
volume.
SEEK SWITCH
AM/FM radio
Press the seek switch
/.
The radio switches to the next/previous
stored station in the order that it was
stored.
Press and hold the seek switch
/
to seek all usable stations at ahigher or lower frequency whether
programmed or not.
Radio stations which have been
previously stored in the favourite radio
can be called up by pressing the seek
switch
/while any radio
station stored in the favourite radio is
being received.
Radio stations can be called up in the
order they were stored with each press
of the switch
/.
DAB radio
(where provided)
Press the Seek switch
/
while listening to DAB radio to call
up a station previously stored to the
favourites list.
Press and hold the seek switch
to
go to the next station,
to return to
the previous station.
USB Audio /
Bluetooth® Audio
Press the seek switch
to skip
forward to the beginning of the next
track.
Press the seek switch
within a
few seconds after playback begins to
track down to the beginning of the
previous track. Press the seek switch
after a few seconds have elapsed
to start playback from the beginning of
the current track.MUTE SWITCH
Press the mute switch
once to mute
audio, press it again to resume audio
output.
If the ignition is switched off with the
audio muted, the mute will be
cancelled. Therefore, when the engine
is restarted, the audio is not muted. To
mute the audio again, press the mute
switch
.
AUDIO SET
Commander switch operation
NOTE For safety reasons, some
operations are disabled while the
vehicle is being driven.
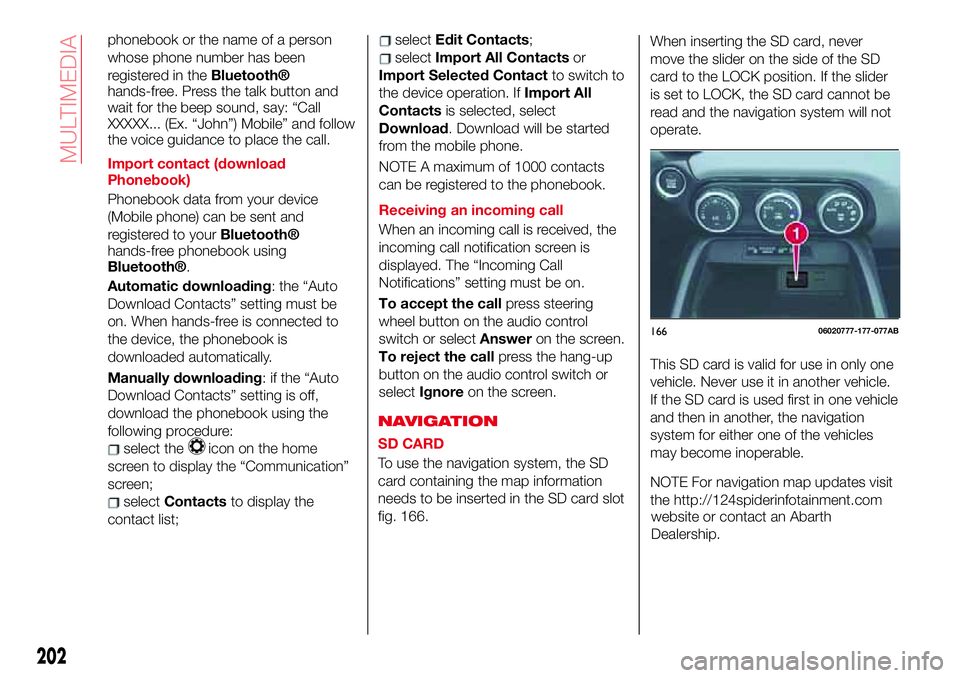
The following operations can be done
by pressing the switches around the
commander knob fig. 164:
displays the home screen.
1630620500-188-088AB
16406020400-122-002
197
Page 204 of 220

phonebook or the name of a person
whose phone number has been
registered in the
Bluetooth®
hands-free. Press the talk button and
wait for the beep sound, say: “Call
XXXXX... (Ex. “John”) Mobile” and follow
the voice guidance to place the call.
Import contact (download
Phonebook)
Phonebook data from your device
(Mobile phone) can be sent and
registered to your
Bluetooth®
hands-free phonebook using
Bluetooth®.
Automatic downloading: the “Auto
Download Contacts” setting must be
on. When hands-free is connected to
the device, the phonebook is
downloaded automatically.
Manually downloading: if the “Auto
Download Contacts” setting is off,
download the phonebook using the
following procedure:
select theicon on the home
screen to display the “Communication”
screen;
selectContactsto display the
contact list;
selectEdit Contacts;
selectImport All Contactsor
Import Selected Contactto switch to
the device operation. IfImport All
Contactsis selected, select
Download. Download will be started
from the mobile phone.
NOTE A maximum of 1000 contacts
can be registered to the phonebook.
Receiving an incoming call
When an incoming call is received, the
incoming call notification screen is
displayed. The “Incoming Call
Notifications” setting must be on.
To accept the callpress steering
wheel button on the audio control
switch or selectAnsweron the screen.
To reject the callpress the hang-up
button on the audio control switch or
selectIgnoreon the screen.
NAVIGATION
SD CARD
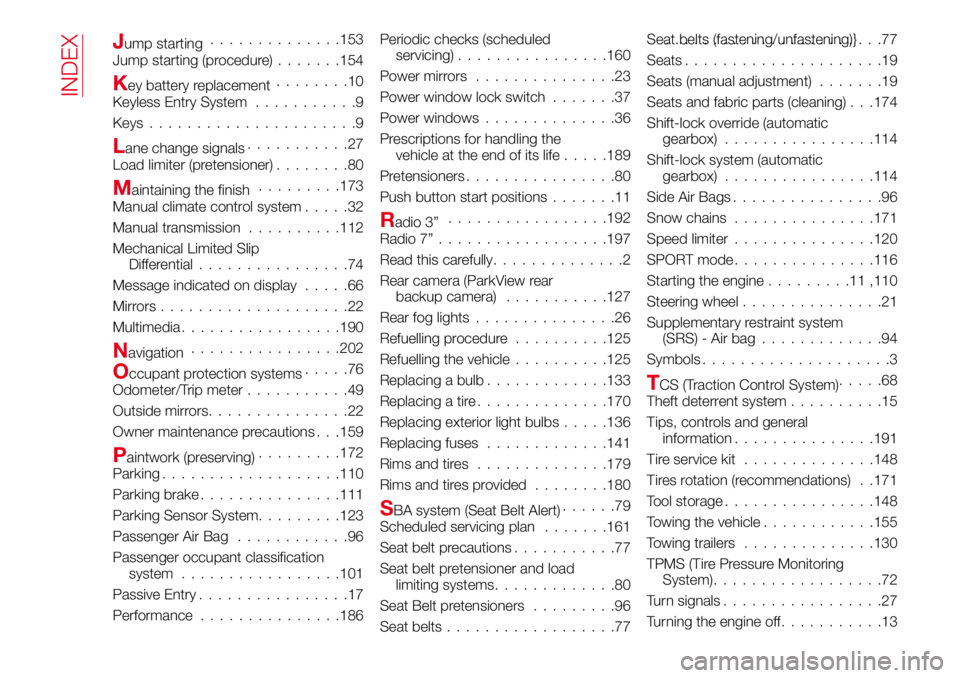
To use the navigation system, the SD
card containing the map information
needs to be inserted in the SD card slot
fig. 166.When inserting the SD card, never
move the slider on the side of the SD
card to the LOCK position. If the slider
is set to LOCK, the SD card cannot be
read and the navigation system will not
operate.
This SD card is valid for use in only one
vehicle. Never use it in another vehicle.
If the SD card is used first in one vehicle
and then in another, the navigation
system for either one of the vehicles
may become inoperable.
NOTE For navigation map updates visit
the http://124spiderinfotainment.com
16606020777-177-077AB
202
MULTIMEDIA
website or contact an Abarth
Dealership.
Page 216 of 220

Jump starting..............153
Jump starting (procedure).......154
Key battery replacement........10
Keyless Entry System...........9
Keys......................9
Lane change signals...........27
Load limiter (pretensioner)........80
Maintaining the finish.........173
Manual climate control system.....32
Manual transmission..........112
Mechanical Limited Slip
Differential................74
Message indicated on display.....66
Mirrors....................22
Multimedia.................190
Navigation................202
Occupant protection systems.....76
Odometer/Trip meter...........49
Outside mirrors...............22
Owner maintenance precautions . . .159
Paintwork (preserving).........172
Parking...................110
Parking brake...............111
Parking Sensor System.........123
Passenger Air Bag............96
Passenger occupant classification
system.................101
Passive Entry................17
Performance...............186Periodic checks (scheduled
servicing)................160
Powermirrors ...............23
Power window lock switch.......37
Power windows..............36
Prescriptions for handling the
vehicle at the end of its life.....189
Pretensioners................80
Push button start positions.......11
Radio 3”.................192
Radio 7”..................197
Read this carefully..............2
Rear camera (ParkView rear
backup camera)...........127
Rear fog lights...............26
Refuelling procedure..........125
Refuelling the vehicle..........125
Replacing a bulb.............133
Replacing a tire..............170
Replacing exterior light bulbs.....136
Replacing fuses.............141
Rimsandtires ..............179
Rims and tires provided........180
SBA system (Seat Belt Alert)......79
Scheduled servicing plan.......161
Seat belt precautions...........77
Seat belt pretensioner and load
limiting systems.............80
Seat Belt pretensioners.........96
Seat belts..................77Seat belts (fastening/unfastening)}.......................77
Seats.....................19
Seats (manual adjustment).......19
Seats and fabric parts (cleaning) . . .174
Shift-lock override (automatic
gearbox)................114
Shift-lock system (automatic
gearbox)................114
Side Air Bags................96
Snow chains...............171
Speed limiter...............120
SPORTmode...............116
Starting the engine.........11,110
Steering wheel...............21
Supplementary restraint system
(SRS) - Air bag.............94
Symbols....................3
TCS (Traction Control System).....68
Theft deterrent system..........15
Tips, controls and general
information...............191
Tire service kit..............148
Tires rotation (recommendations) . .171
Tool storage................148
Towing the vehicle............155
Towing trailers..............130
TPMS (Tire Pressure Monitoring
System)..................72
Turn signals.................27
Turning the engine off...........13
INDEX