change time Abarth 124 Spider 2018 Owner handbook (in English)
[x] Cancel search | Manufacturer: ABARTH, Model Year: 2018, Model line: 124 Spider, Model: Abarth 124 Spider 2018Pages: 220, PDF Size: 2.91 MB
Page 4 of 220
READ THIS CAREFULLY
REFUELLINGOnly refuel with unleaded petrol with octane rating (RON) not less than 95 in compliance with the European specification EN228. Do not use
petrol containing methanol or ethanol E85. Using these mixtures may cause misfiring and handling issues, as well as damage fundamental
components of the supply system.
STARTING THE ENGINE
Versions with manual transmission: make sure that the handbrake is engaged; set the gear lever to neutral, fully depress the clutch pedal
without pressing the accelerator, then press the ignition device button.
Versions with automatic transmission: make sure that the handbrake is engaged and that the gear lever is in P (Park) or N (Neutral),
depress the brake pedal, then press the ignition device button.
PARKING ON FLAMMABLE MATERIAL
The catalytic converter develops high temperatures during operation. Do not park the vehicle on grass, dry leaves, pine needles or other
flammable material: fire hazard.
RESPECTING THE ENVIRONMENT
The vehicle is fitted with a system that carries out a continuous diagnosis of the emission-related components in order to help protect the
environment.
ELECTRICAL ACCESSORIES
Contact an Abarth Dealership if you decide to add electrical accessories (with the risk of gradually draining the battery) after buying the vehicle.
They can calculate the overall electrical requirement and check that the vehicle's electric system can support the required load.
SCHEDULED SERVICING
Correct maintenance of the vehicle is essential for ensuring that it maintains its performance and its safety features, its environmental
friendliness and low running costs unchanged over time.
Page 20 of 220
If your vehicle has a theft-deterrent
system, the hazard warning lights will
flash for confirmation.
The time required for the doors and the
boot lid, fuel filler flap to lock
automatically can be changed (refer to
“Personalisation features” paragraph in
“Knowing the instrument panel”
chapter).
LOCKING / UNLOCKING
WITH TRANSMITTER
Both doors and the boot lid, fuel filler
flap can be locked/unlocked by
operating the keyless entry system
transmitter: refer to “Keyless entry
system” in “Keys” paragraph.
WARNING
7)Always take all children and pets with
you or leave a responsible person with
them: leaving a child or a pet unattended in
a parked vehicle is dangerous. In hot
weather, temperatures inside a vehicle can
become high enough to cause brain
damage or even death.
8)Do not leave the key in your vehicle with
children and keep them in a place where
your children will not find or play with them:
leaving children in a vehicle with the key is
dangerous. This could result in someone
being badly injured or even killed.9)Always close both the windows and
convertible top, lock the doors and take the
key with you when leaving your vehicle
unattended: leaving your vehicle unlocked
is dangerous as children could lock
themselves in a hot vehicle, which could
result in death. Also, a vehicle left unlocked
becomes an easy target for thieves and
intruders.
10)After closing the doors, always verify
that they are securely closed: doors not
securely closed are dangerous, if the
vehicle is driven with a door not securely
closed, the door could open unexpectedly
resulting in an accident.
11)Always confirm the safety around the
vehicle before opening a door: suddenly
opening a door is dangerous. A passing
vehicle or a pedestrian could be hit and
cause an accident.
12)Always confirm the conditions around
the vehicle before opening/closing the
doors and use caution during strong winds
or when parked on an incline. Not being
aware of the conditions around the vehicle
is dangerous because fingers could get
caught in the door or a passing pedestrian
could be hit, resulting in an unexpected
accident or injury.
13)If the power window does not go up or
down automatically because the battery is
dead, slowly open/close the power window
while pressing the glass inward. Otherwise,
the power window may contact the
convertible top and the door cannot be
opened/closed resulting in damage to the
window.14)Never activate the double locking
system with passengers, especially
children, still inside the vehicle: activating
the system with passengers, especially
children, still inside the vehicle is
dangerous. The passengers cannot open
the doors from inside. They would be
trapped and subjected to extreme
temperatures. This could result in serious
injuries or even death.
18
GETTING TO KNOW YOUR VEHICLE
Page 21 of 220
SEATS
MANUAL ADJUSTMENT
15) 16) 17) 18) 19) 20) 21) 22) 24) 25) 26) 27) 28)
7)
Forward / Rearward
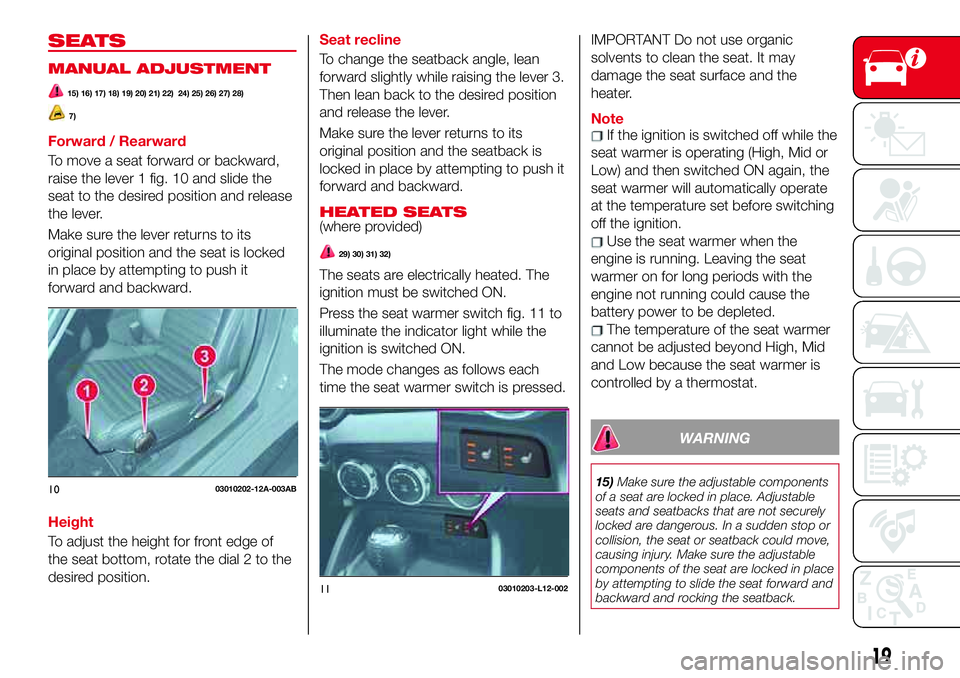
To move a seat forward or backward,
raise the lever 1 fig. 10 and slide the
seat to the desired position and release
the lever.
Make sure the lever returns to its
original position and the seat is locked
in place by attempting to push it
forward and backward.
Height
To adjust the height for front edge of
the seat bottom, rotate the dial 2 to the
desired position.Seat recline
To change the seatback angle, lean
forward slightly while raising the lever 3.
Then lean back to the desired position
and release the lever.
Make sure the lever returns to its
original position and the seatback is
locked in place by attempting to push it
forward and backward.
HEATED SEATS(where provided)
29) 30) 31) 32)
The seats are electrically heated. The
ignition must be switched ON.
Press the seat warmer switch fig. 11 to
illuminate the indicator light while the
ignition is switched ON.
The mode changes as follows each
time the seat warmer switch is pressed.
IMPORTANT Do not use organic
solvents to clean the seat. It may
damage the seat surface and the
heater.
NoteIf the ignition is switched off while the
seat warmer is operating (High, Mid or
Low) and then switched ON again, the
seat warmer will automatically operate
at the temperature set before switching
off the ignition.
Use the seat warmer when the
engine is running. Leaving the seat
warmer on for long periods with the
engine not running could cause the
battery power to be depleted.
The temperature of the seat warmer
cannot be adjusted beyond High, Mid
and Low because the seat warmer is
controlled by a thermostat.
WARNING
15)Make sure the adjustable components
of a seat are locked in place. Adjustable
seats and seatbacks that are not securely
locked are dangerous. In a sudden stop or
collision, the seat or seatback could move,
causing injury. Make sure the adjustable
components of the seat are locked in place
by attempting to slide the seat forward and
backward and rocking the seatback.1003010202-12A-003AB
1103010203-L12-002
19
Page 27 of 220
HIGH BEAMS
The headlights switch between high
and low beams by moving the lever
forward or backward.
When the headlight high-beams are on,
the
warning light is turned on.
FLASH TO PASS
Can be used when the ignition is
switched ON.
To flash the headlights, pull the lever
fully towards you (the headlight switch
does not need to be on).
The
warning light in the instrument
cluster illuminates simultaneously.
The lever will return to the normal
position when released.
AUTOMATIC LIGHTING(where provided)
Light sensor
When the headlight switch is in the
AUTOposition and the ignition is
switched ON, the light sensor senses
the surrounding lightness or darkness
and automatically turns the headlights,
other exterior lights and dashboard
illumination on or off.
IMPORTANT The light sensor also
works as a rain sensor for the
auto-wiper control. Keep hands and
scrapers clear of the windshield when
the wiper lever is in the AUTO position
and the ignition is switched ON as
fingers could be pinched or the wipers
and wiper blades damaged when the
wipers activate automatically. If you are
going to clean the windshield, be sure
the wipers are turned off completely
(this is particularly important when
clearing ice and snow) when it is
particularly tempting to leave the engine
running.COMING HOME LIGHT
SYSTEM
The coming me home light system
turns on the headlights (low beams)
when the lever is operated.
System activation
When the lever is pulled with the ignition
switched to ACC or OFF, the low beam
headlights turn on.
The headlights turn off after a certain
period of time has elapsed after the
doors are closed.
The time until the headlights turn off
after all of the doors are closed can be
changed. If no operations are done for
3 minutes after the lever is pulled, the
headlights turn off.
The headlights turn off if the lever is
pulled again while the headlights are on.
25
Page 29 of 220
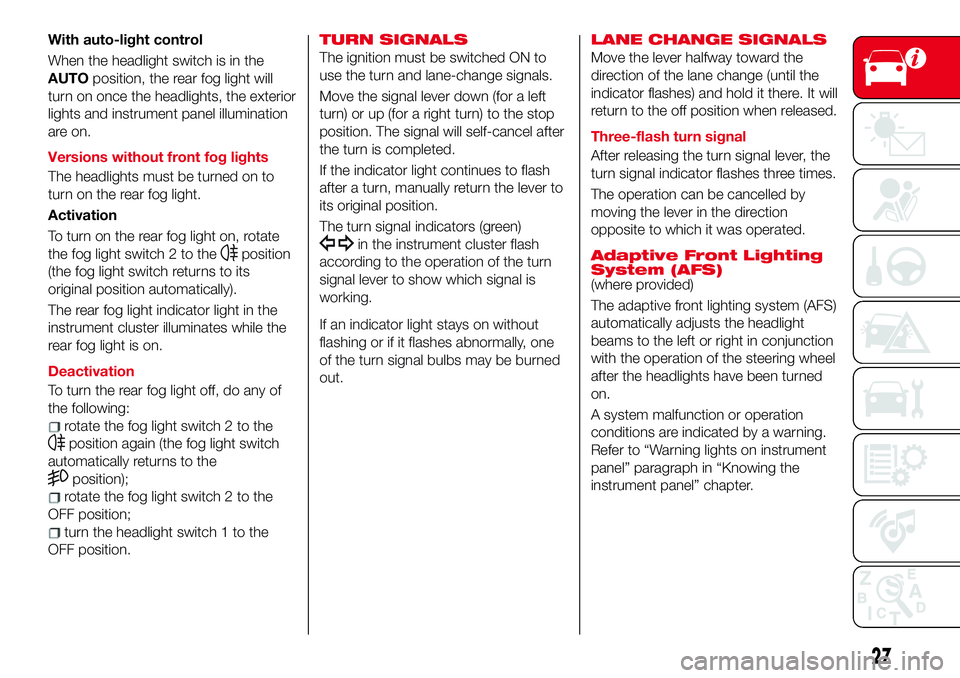
With auto-light control
When the headlight switch is in the
AUTOposition, the rear fog light will
turn on once the headlights, the exterior
lights and instrument panel illumination
are on.
Versions without front fog lights
The headlights must be turned on to
turn on the rear fog light.
Activation
To turn on the rear fog light on, rotate
the fog light switch 2 to the
position
(the fog light switch returns to its
original position automatically).
The rear fog light indicator light in the
instrument cluster illuminates while the
rear fog light is on.
Deactivation
To turn the rear fog light off, do any of
the following:
rotate the fog light switch 2 to the
position again (the fog light switch
automatically returns to the
position);
rotate the fog light switch 2 to the
OFF position;
turn the headlight switch 1 to the
OFF position.
TURN SIGNALS
The ignition must be switched ON to
use the turn and lane-change signals.
Move the signal lever down (for a left
turn) or up (for a right turn) to the stop
position. The signal will self-cancel after
the turn is completed.
If the indicator light continues to flash
after a turn, manually return the lever to
its original position.
The turn signal indicators (green)
in the instrument cluster flash
according to the operation of the turn
signal lever to show which signal is
working.
If an indicator light stays on without
flashing or if it flashes abnormally, one
of the turn signal bulbs may be burned
out.LANE CHANGE SIGNALS
Move the lever halfway toward the
direction of the lane change (until the
indicator flashes) and hold it there. It will
return to the off position when released.
Three-flash turn signal
After releasing the turn signal lever, the
turn signal indicator flashes three times.
The operation can be cancelled by
moving the lever in the direction
opposite to which it was operated.
Adaptive Front Lighting
System (AFS)
(where provided)
The adaptive front lighting system (AFS)
automatically adjusts the headlight
beams to the left or right in conjunction
with the operation of the steering wheel
after the headlights have been turned
on.
A system malfunction or operation
conditions are indicated by a warning.
Refer to “Warning lights on instrument
panel” paragraph in “Knowing the
instrument panel” chapter.
27
Page 52 of 220
When the illumination dimmer is
canceled, the instrument cluster cannot
be dimmed even if the position lights
are turned on. When the illumination
dimmer is canceled, the screen in the
center display switches to constant
display of the daytime screen.
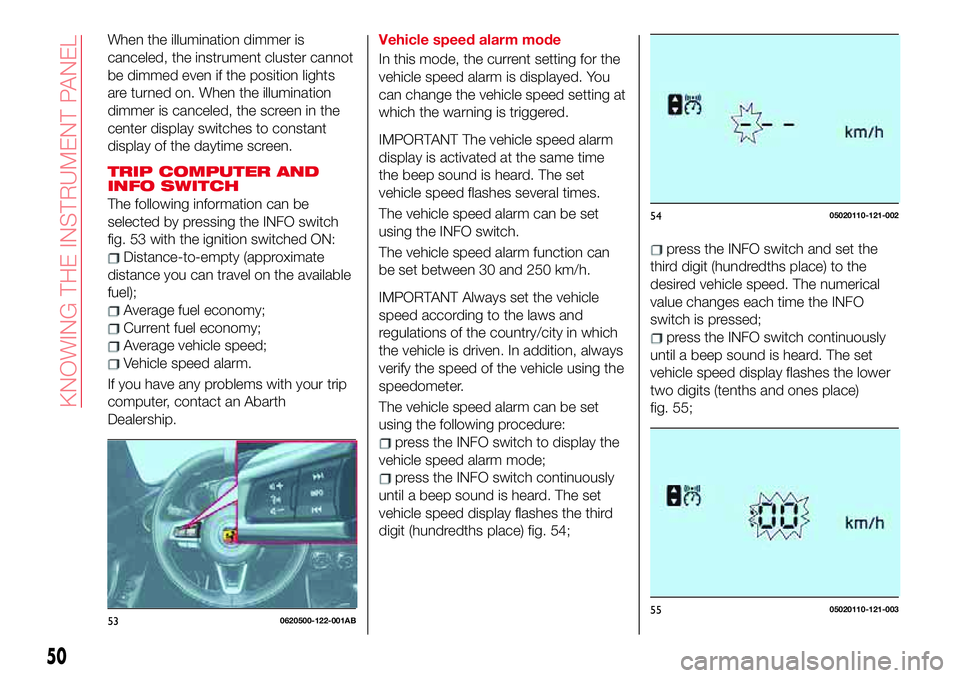
TRIP COMPUTER AND
INFO SWITCH
The following information can be
selected by pressing the INFO switch
fig. 53 with the ignition switched ON:
Distance-to-empty (approximate
distance you can travel on the available
fuel);
Average fuel economy;
Current fuel economy;
Average vehicle speed;
Vehicle speed alarm.
If you have any problems with your trip
computer, contact an Abarth
Dealership.Vehicle speed alarm mode
In this mode, the current setting for the
vehicle speed alarm is displayed. You
can change the vehicle speed setting at
which the warning is triggered.
IMPORTANT The vehicle speed alarm
display is activated at the same time
the beep sound is heard. The set
vehicle speed flashes several times.
The vehicle speed alarm can be set
using the INFO switch.
The vehicle speed alarm function can
be set between 30 and 250 km/h.
IMPORTANT Always set the vehicle
speed according to the laws and
regulations of the country/city in which
the vehicle is driven. In addition, always
verify the speed of the vehicle using the
speedometer.
The vehicle speed alarm can be set
using the following procedure:
press the INFO switch to display the
vehicle speed alarm mode;
press the INFO switch continuously
until a beep sound is heard. The set
vehicle speed display flashes the third
digit (hundredths place) fig. 54;
press the INFO switch and set the
third digit (hundredths place) to the
desired vehicle speed. The numerical
value changes each time the INFO
switch is pressed;
press the INFO switch continuously
until a beep sound is heard. The set
vehicle speed display flashes the lower
two digits (tenths and ones place)
fig. 55;
530620500-122-001AB
5405020110-121-002
5505020110-121-003
50
KNOWING THE INSTRUMENT PANEL
Page 53 of 220
press the INFO switch and set the
two lower digits (tenths and ones place)
to the desired vehicle speed. The
numerical value changes each time the
INFO switch is pressed;
press the INFO switch continuously
until a beep sound is heard. The set
vehicle speed is displayed on the
vehicle speed alarm screen.
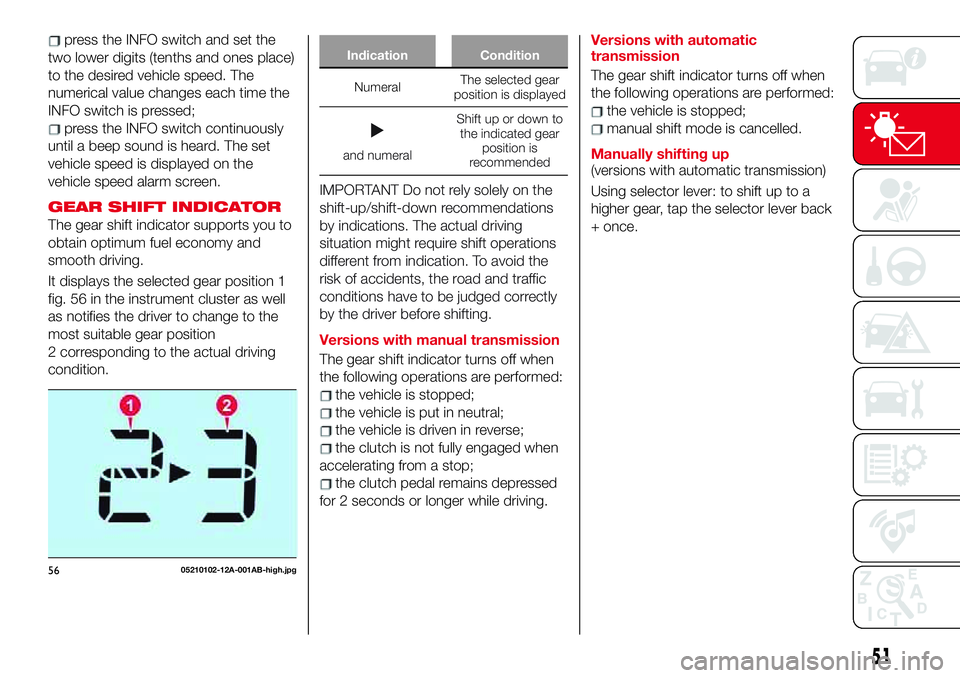
GEAR SHIFT INDICATOR
The gear shift indicator supports you to
obtain optimum fuel economy and
smooth driving.
It displays the selected gear position 1
fig. 56 in the instrument cluster as well
as notifies the driver to change to the
most suitable gear position
2 corresponding to the actual driving
condition.
Indication Condition
NumeralThe selected gear
position is displayed
and numeralShift up or down to
the indicated gear
position is
recommended
IMPORTANT Do not rely solely on the
shift-up/shift-down recommendations
by indications. The actual driving
situation might require shift operations
different from indication. To avoid the
risk of accidents, the road and traffic
conditions have to be judged correctly
by the driver before shifting.
Versions with manual transmission
The gear shift indicator turns off when
the following operations are performed:
the vehicle is stopped;
the vehicle is put in neutral;
the vehicle is driven in reverse;
the clutch is not fully engaged when
accelerating from a stop;
the clutch pedal remains depressed
for 2 seconds or longer while driving.Versions with automatic
transmission
The gear shift indicator turns off when
the following operations are performed:
the vehicle is stopped;
manual shift mode is cancelled.
Manually shifting up
(versions with automatic transmission)
Using selector lever: to shift up to a
higher gear, tap the selector lever back
+ once.
5605210102-12A-001AB-high.jpg
51
Page 81 of 220

82)Do not operate a vehicle with a
damaged seat belt. Using a damaged seat
belt is dangerous. An accident could
damage the belt webbing of the seat belt in
use. A damaged seat belt cannot provide
adequate protection in a collision. Contact
an Abarth Dealership to inspect all seat belt
systems in use during an accident before
they are used again.
83)Have your seat belts changed
immediately if the pretensioner or load
limiter has been expended. Always have an
expert repairer, we recommend an Abarth
Dealership immediately inspect the seat
belt pretensioners and air bags after any
collision. Like the air bags, the seat belt
pretensioners and load limiters will only
function once and must be replaced after
any collision that caused them to deploy. If
the seat belt pretensioners and load
limiters are not replaced, the risk of injury in
a collision will increase.
84)Positioning the shoulder portion of the
seat belt. Improper positioning of the
shoulder portion of the seat belt is
dangerous. Always make sure the shoulder
portion of the seat belt is positioned across
your shoulder and near your neck, but
never under your arm, on your neck, or on
your upper arm.
85)Positioning the lap portion of the seat
belt. The lap portion of the seat belt worn
too high is dangerous. In a collision, this
would concentrate the impact force directly
on the abdominal area, causing serious
injury. Wear the lap portion of the belt
snugly and as low as possible.86)Instructions for use of seat belt
assemblies. Seat belts are designed to
bear upon the bony structure of the body,
and should be worn low across the front of
the pelvis or the pelvis, chest and
shoulders, as applicable; wearing the lap
section of the belt across the abdominal
area must be avoided. Seat belts should
be adjusted as firmly as possible,
consistent with comfort, to provide the
protection for which they have been
designed. A slack belt will greatly reduce
the protection afforded to the wearer. Care
should be taken to avoid contamination of
the webbing with polishes, oils and
chemicals, and particularly battery acid.
Cleaning may safely be carried out using
mild soap and water. The belt should be
replaced if webbing becomes frayed,
contaminated or damaged. It is essential to
replace the entire assembly after it has
been worn in a severe impact even if
damage to the assembly is not obvious.
Belts should not be worn with straps
twisted. Each belt assembly must only be
used by one occupant; it is dangerous to
put a belt around a child being carried on
the occupant's lap.
87)No modifications or additions should
be made by the user which will either
prevent the seat belt adjusting devices
from operating to remove slack, or prevent
the seat belt assembly from being adjusted
to remove slack.SBA SYSTEM
(Seat Belt Alert)
SEAT BELT WARNING
LIGHT
The LED on dashboard trim turns on if
the driver or passenger's seat is
occupied and the seat belt is not
fastened with the ignition switched ON.
If the driver or passenger's seat belt is
unfastened (only when the passenger
seat is occupied) and the vehicle is
driven at a speed faster than about
20 km/h, the
LED flashes. After a
short time, the LED stops flashing, but
remains illuminated.
If a seat belt remains unfastened, the
LED flashes again for a given period of
time. In this case, fasten the seat belt.
If the driver or passenger's seat belt is
unfastened after the LED turns on, and
the vehicle speed exceeds 20 km/h, the
LED flashes again.
79
Page 114 of 220
MANUAL
TRANSMISSION
136) 137) 138)
25)
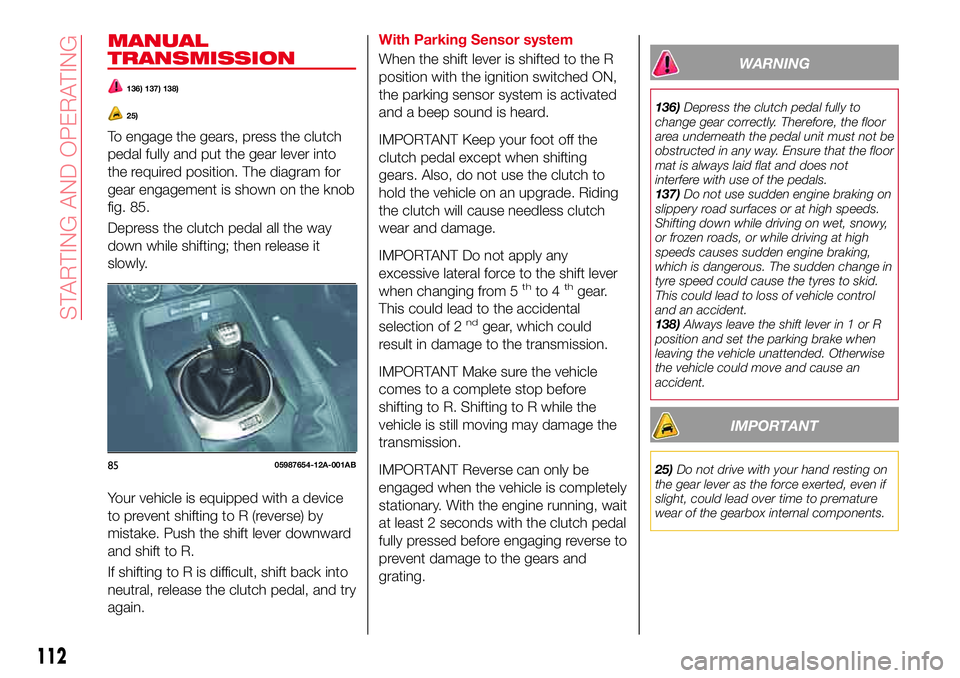
To engage the gears, press the clutch
pedal fully and put the gear lever into
the required position. The diagram for
gear engagement is shown on the knob
fig. 85.
Depress the clutch pedal all the way
down while shifting; then release it
slowly.
Your vehicle is equipped with a device
to prevent shifting to R (reverse) by
mistake. Push the shift lever downward
and shift to R.
If shifting to R is difficult, shift back into
neutral, release the clutch pedal, and try
again.With Parking Sensor system
When the shift lever is shifted to the R
position with the ignition switched ON,
the parking sensor system is activated
and a beep sound is heard.IMPORTANT Keep your foot off the
clutch pedal except when shifting
gears. Also, do not use the clutch to
hold the vehicle on an upgrade. Riding
the clutch will cause needless clutch
wear and damage.
IMPORTANT Do not apply any
excessive lateral force to the shift lever
when changing from 5
thto 4thgear.
This could lead to the accidental
selection of 2
ndgear, which could
result in damage to the transmission.
IMPORTANT Make sure the vehicle
comes to a complete stop before
shifting to R. Shifting to R while the
vehicle is still moving may damage the
transmission.
IMPORTANT Reverse can only be
engaged when the vehicle is completely
stationary. With the engine running, wait
at least 2 seconds with the clutch pedal
fully pressed before engaging reverse to
prevent damage to the gears and
grating.
WARNING
136)Depress the clutch pedal fully to
change gear correctly. Therefore, the floor
area underneath the pedal unit must not be
obstructed in any way. Ensure that the floor
mat is always laid flat and does not
interfere with use of the pedals.
137)Do not use sudden engine braking on
slippery road surfaces or at high speeds.
Shifting down while driving on wet, snowy,
or frozen roads, or while driving at high
speeds causes sudden engine braking,
which is dangerous. The sudden change in
tyre speed could cause the tyres to skid.
This could lead to loss of vehicle control
and an accident.
138)Always leave the shift lever in 1 or R
position and set the parking brake when
leaving the vehicle unattended. Otherwise
the vehicle could move and cause an
accident.
IMPORTANT
25)Do not drive with your hand resting on
the gear lever as the force exerted, even if
slight, could lead over time to premature
wear of the gearbox internal components.8505987654-12A-001AB
112
STARTING AND OPERATING
Page 120 of 220
IMPORTANT When the MODE switch is
pressed during cruise control system
operation, the system switches to the
adjustable speed limiter.
Without Speed limiter: press the
OFF/CANCEL switch. The
warning
light (amber) turns off.
When a cruising speed has been set
warning light (green) turns on
Long-press the OFF/CANCEL switch or
press the OFF/CANCEL switch 2 times.
When a cruising speed has not
been set
warning light (amber)
turns on press the OFF/CANCEL
switch.
SETTING A DESIRED
SPEED
Proceed as follows:
With Speed limiter: activate the
cruise control device by pressing the
MODE switch. The cruise warning light
(amber) turns on;
Without Speed limiter: activate the
cruise control device by pressing the
ON switch. The cruise warning light
(amber) turns on;
accelerate to the desired speed,
which must be more than 25 km/h;
set the cruise control by pressing the
SET/- switch at the desired speed. The
cruise control is set at the moment the
SET/- switch is pressed. Release the
accelerator pedal simultaneously. The
warning light (green) turns on.
The cruise control speed setting cannot
be performed under the following
conditions:
Automatic transmission: the
selector lever is in the P or N position;
Manual transmission: the shift
lever is in the neutral position;
The parking brake is applied;
Vehicles with Speed limiter:the
MODE switch for the adjustable speed
limiter is pressed.
Release the SET/- switch at the
desired speed, otherwise the speed will
continue decreasing while the SET/-
switch is pressed and held (except
when the accelerator pedal is
depressed);
On a steep grade, the vehicle may
momentarily slow down while
ascending, or speed up while
descending.
The cruise control will cancel if the
vehicle speed decreases below
21 km/h when climbing a steep grade.
The cruise control may cancel at
about 15 km/h below the preset speed
such as when climbing a long, steep
grade.
The vehicle speed preset using the
cruise control is displayed in the
instrument cluster.
INCREASING SPEED
To increase speed using cruise
control switch
Press the RESUME/+ switch and hold it
your vehicle will accelerate. Release the
switch at the desired speed.
Press the RESUME/+ switch and
release it immediatelyto adjust the
preset speed. Multiple operations will
increase the preset speed according to
the number of times it is operated.
Increasing speed with a single
RESUME/+ switch operation
Meter display for vehicle speed
indicated in km/h: 1 km/h.
To increase speed using
accelerator pedal
Depress the accelerator pedal to
accelerate to the desired speed.
Press the SET/- switch and release it
immediately.
IMPORTANT Accelerate if you want to
speed up temporarily when the cruise
control is on. Greater speed will not
interfere with or change the set speed.
Take your foot off the accelerator to
return to the set speed.
118
STARTING AND OPERATING