ECU Abarth 124 Spider 2020 Owner handbook (in English)
[x] Cancel search | Manufacturer: ABARTH, Model Year: 2020, Model line: 124 Spider, Model: Abarth 124 Spider 2020Pages: 224, PDF Size: 3.9 MB
Page 44 of 224
WARNING
52)Perform these operations only when
the car is stationary.
53)The bonnet may drop suddenly if the
supporting rod is not positioned correctly.
54)Use both hands to lift the bonnet.
Before lifting, check that the windscreen
wiper arms are not raised from the
windscreen, that the vehicle is stationary
and that the parking brake is engaged.
55)Always check that the bonnet is closed
and securely locked. A bonnet that is not
closed and securely locked is dangerous
as it could fly open while the vehicle is
moving and block the driver's vision which
could result in a serious accident.
56)With active bonnet: do not pull the
bonnet's release handle after the active
bonnet has activated. Pulling the release
handle while the active bonnet is operating
is dangerous as it will raise the bonnet
further and obstruct vision. In addition, the
bonnet cannot be lowered manually,
therefore do not attempt to forcefully push
the bonnet back down. Otherwise, it could
deform the bonnet or cause injury. If the
active bonnet has activated, always
contact an Abarth Dealership immediately.
CONVERTIBLE TOP
(SOFT TOP)
LOWERING THE
CONVERTIBLE TOP
IMPORTANT Do not sit on the folded
convertible top. Otherwise, the
convertible top could be damaged or
you may fall off and be injured.
Proceed as follows:
make sure the parking brake is
applied. If the engine is running, turn it
off;
make sure there are no objects
which have been placed in the area
where the convertible top is to be
retracted;
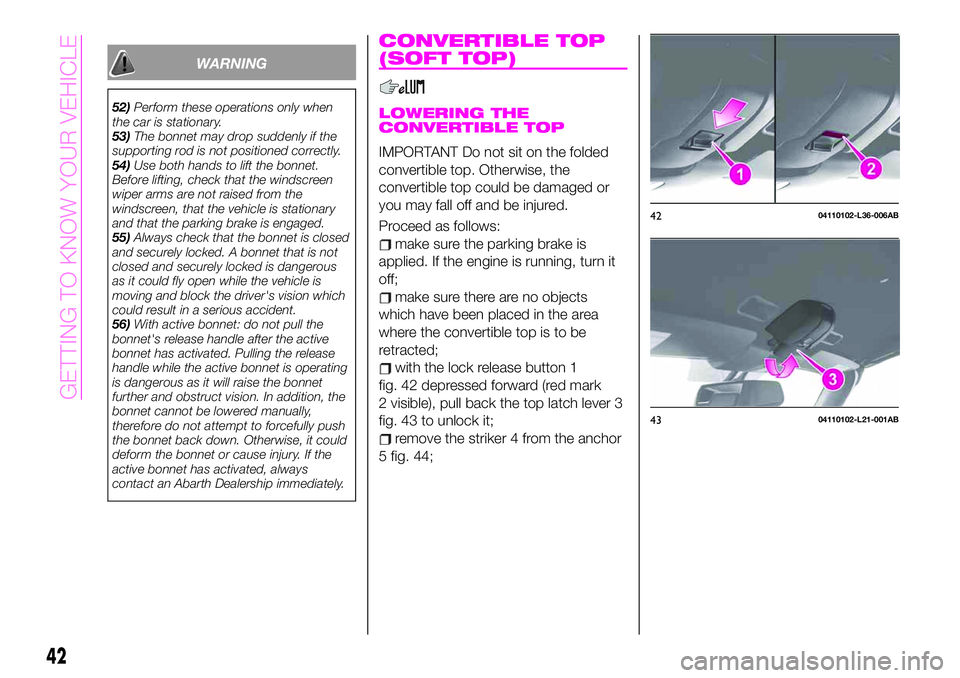
with the lock release button 1
fig. 42 depressed forward (red mark
2 visible), pull back the top latch lever 3
fig. 43 to unlock it;
remove the striker 4 from the anchor
5 fig. 44;
4204110102-L36-006AB
4304110102-L21-001AB
42
GETTING TO KNOW YOUR VEHICLE
Page 45 of 224
IMPORTANT If the power windows do
not go down automatically, fully open
the windows.
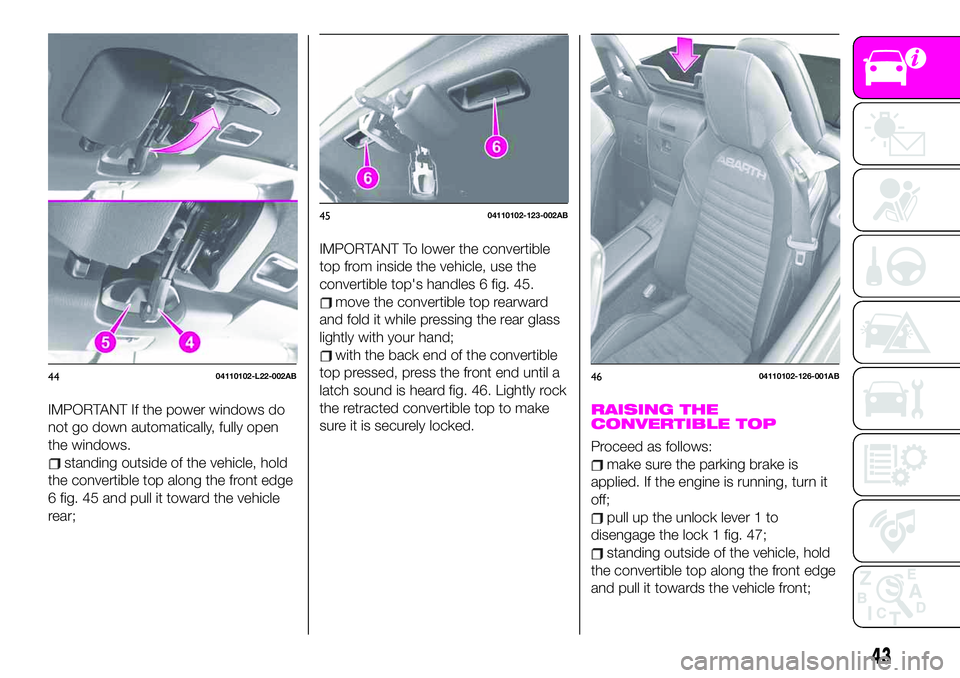
standing outside of the vehicle, hold
the convertible top along the front edge
6 fig. 45 and pull it toward the vehicle
rear;
IMPORTANT To lower the convertible
top from inside the vehicle, use the
convertible top's handles 6 fig. 45.
move the convertible top rearward
and fold it while pressing the rear glass
lightly with your hand;
with the back end of the convertible
top pressed, press the front end until a
latch sound is heard fig. 46. Lightly rock
the retracted convertible top to make
sure it is securely locked.
RAISING THE
CONVERTIBLE TOP
Proceed as follows:
make sure the parking brake is
applied. If the engine is running, turn it
off;
pull up the unlock lever 1 to
disengage the lock 1 fig. 47;
standing outside of the vehicle, hold
the convertible top along the front edge
and pull it towards the vehicle front;
4404110102-L22-002AB
4504110102-123-002AB
4604110102-126-001AB
43
Page 47 of 224

CONVERTIBLE TOP
PRECAUTIONS
57) 58) 59) 60) 61)
12) 13) 0) 15) 16) 17) 18) 19) 20) 21)
Remove leaves or other matter that
may accumulate on and around the
convertible top. If leaves or other matter
block the drain filter, water may enter
the vehicle. Clean the drain filter at least
once a year.
Before opening the convertible top,
make sure the rear window defogger
switch is turned off. Otherwise the heat
generated from the defogger could
damage the convertible top and the
internal material.
Before lowering or raising the
convertible top, stop in a safe place off
the right-of-way and park on a level
surface.
Make sure nothing is on the
convertible top or near the back
window when raising or lowering the
convertible top.
Even small objects may interfere and
cause damage.
When lowering the convertible top,
make sure objects inside the vehicle are
not blown away by the wind.
Secure all loose objects inside before
driving with the convertible top down.
To help prevent burglary or vandalism
and to ensure that the passenger
compartment stays dry, close the
convertible top and both windows
securely and lock both doors when
leaving the vehicle.
Do not drive through an automatic
car wash; it may damage the
convertible top.
Do not raise or lower the convertible
top when the temperature is below 5 °C
(41 °F); this will damage the convertible
top material.
The soft top is made of high quality
material and if it is not maintained
correctly, the material could harden,
becomes stained, or have an uneven
gloss.
Do not lower the convertible top
when it's wet. If the convertible top
dries while folded, it will deteriorate and
mold.
Lowering the convertible top while
it's wet can also cause water to drip
into the passenger compartment.
Do not raise or lower the convertible
top in a strong wind as it could damage
the convertible top or cause an
unexpected accident.
The power windows go down
automatically in conjunction with the
convertible top opening/closing.
However, this is a function for improving
the operability, and it does not mean
there is a problem. If the vehicle battery
is disconnected for vehicle maintenance
or other reasons, the power windows
will not go down automatically. If the
power windows do not go down, the
automatic open/close mechanism for
the windows must be reset.
The windblocker reduces the amount
of wind coming into the cabin from
behind when driving with the
convertible top opened.
45
Page 48 of 224
WARNING
57)Before starting the vehicle make sure
the convertible top is correctly locked.
58)Sit in the seat with the seat belt
correctly fastened when the vehicle is
moving: standing in the vehicle, or sitting
on the convertible top storage area or
center console when the vehicle is moving
is a dangerous way to ride. During a
sudden manoeuvre or collision you could
be seriously injured or even killed.
59)Always keep your hands and fingers
away from the fastening mechanisms when
moving the convertible top: it is dangerous
to place your hands or fingers near the
fastening mechanisms. Your hands or
fingers could be caught and injured by the
mechanism.
60)Be careful while installing/removing the
soft top to prevent any damage or injury.
61)Keep children away from the area in
which the soft-top is folding while
installing/removing it.
IMPORTANT
12)Never open the soft top in presence of
snow or ice to prevent damage.
13)Loads may not be secured on the roof.
14)Bird droppings and plant resins must
be washed off the soft top immediately as
they can damage its fabric.
15)Never use high-pressure washing
systems.
16)When using steam washers or
high-pressure water washers, maintain a
suitable distance and do not exceed a
maximum temperature of 60°C. Damage,
alterations and water infiltration may occur
if the distance is too small or if pressure is
too high.
17)If a water jet is used, direct away from
the edges of the fabric and the windscreen
surround to prevent water infiltration.
18)Never use alcohol, petrol, chemical
products, detergents, stain removers, wax,
solvents and “wash and polish” products.
19)Rinse immediately to remove soap to
prevent stains and blots. Repeat the
operation if needed.
20)Follow the instructions on the
waterproofing product container for perfect
results.
21)The rubber seals of the soft top must
be washed with water only. If you notice
that seals are dry or sticking, apply talcum
powder or products specifically for rubber
(silicone spray).
46
GETTING TO KNOW YOUR VEHICLE
Page 56 of 224
WARNING LIGHTS AND MESSAGES
IMPORTANT The indication of the
warning light in the instrument panel is
indicative and precautionary and as
such must not be considered as
exhaustive and/or alternative to the
information contained in the Owner
Handbook, which you are advised to
read carefully in all cases. Always refer
to the information in this chapter in the
event of a failure indication.
IMPORTANT The instrument panel
warning light will stay on until the cause
of the failure is eliminated.
Versions with Radio 7”
The details for some warnings can be
viewed on the centre display.
Proceed as follows:
if the warning light is turned on,
select
icon on the home screen to
display the application screen;
select “Vehicle Status Monitor”;
select “Warning Guidance”to
display the current warnings;
select the applicable warning to view
the warning details.
WARNING LIGHTS AND
MESSAGES
For the following warning/indicator
lights:
Master warning light;
Brake system warning light;
ABS warning light;
Charging system warning light;
Engine oil warning light;
Check engine light;
High engine coolant temperature
warning light;
Automatic transmission warning light;
Power steering malfunction indicator
light;
Air Bag/Seat Belt pretensioner
system warning light;
Active bonnet warning light;
Low fuel warning light;
Seat belt warning light;
Seat belt warning light;
Door-ajar warning light;
Low washer fluid level warning light;
Tyre Pressure Monitoring System
warning light;
KEY warning light;
LED headlight KEY warning light;
Wrench indicator light;
TCS/DSC indicator light;
DSC OFF indicator light;
Security indicator light;
Passenger Air Bag deactivation
indicator light (where provided).
The light turns on when the ignition is
switched on for an operation check,
and turns off a few seconds later or
when the engine is started. If the light
does not turn on or remains turned on,
contact an Abarth Dealership.
Only for “Brake system warning
light”: the light turns on continuously
when the parking brake is applied.
54
KNOWING THE INSTRUMENT PANEL
Page 59 of 224
Warning light What it means what to do
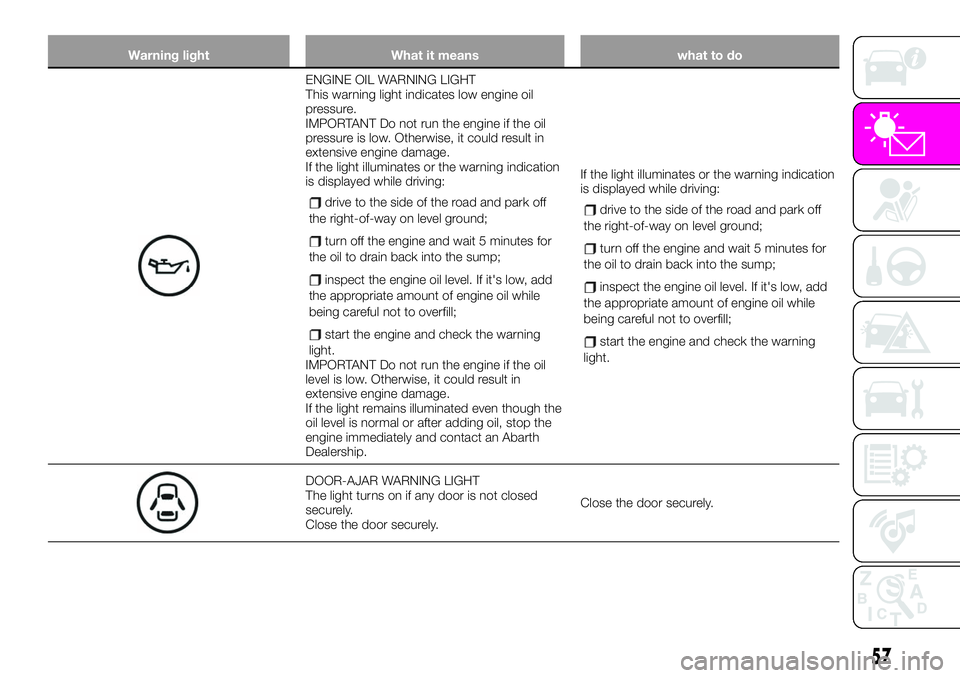
ENGINE OIL WARNING LIGHT
This warning light indicates low engine oil
pressure.
IMPORTANT Do not run the engine if the oil
pressure is low. Otherwise, it could result in
extensive engine damage.
If the light illuminates or the warning indication
is displayed while driving:
drive to the side of the road and park off
the right-of-way on level ground;
turn off the engine and wait 5 minutes for
the oil to drain back into the sump;
inspect the engine oil level. If it's low, add
the appropriate amount of engine oil while
being careful not to overfill;
start the engine and check the warning
light.
IMPORTANT Do not run the engine if the oil
level is low. Otherwise, it could result in
extensive engine damage.
If the light remains illuminated even though the
oil level is normal or after adding oil, stop the
engine immediately and contact an Abarth
Dealership.If the light illuminates or the warning indication
is displayed while driving:
drive to the side of the road and park off
the right-of-way on level ground;
turn off the engine and wait 5 minutes for
the oil to drain back into the sump;
inspect the engine oil level. If it's low, add
the appropriate amount of engine oil while
being careful not to overfill;
start the engine and check the warning
light.
DOOR-AJAR WARNING LIGHT
The light turns on if any door is not closed
securely.
Close the door securely.Close the door securely.
57
Page 62 of 224
Warning light What it means What to do
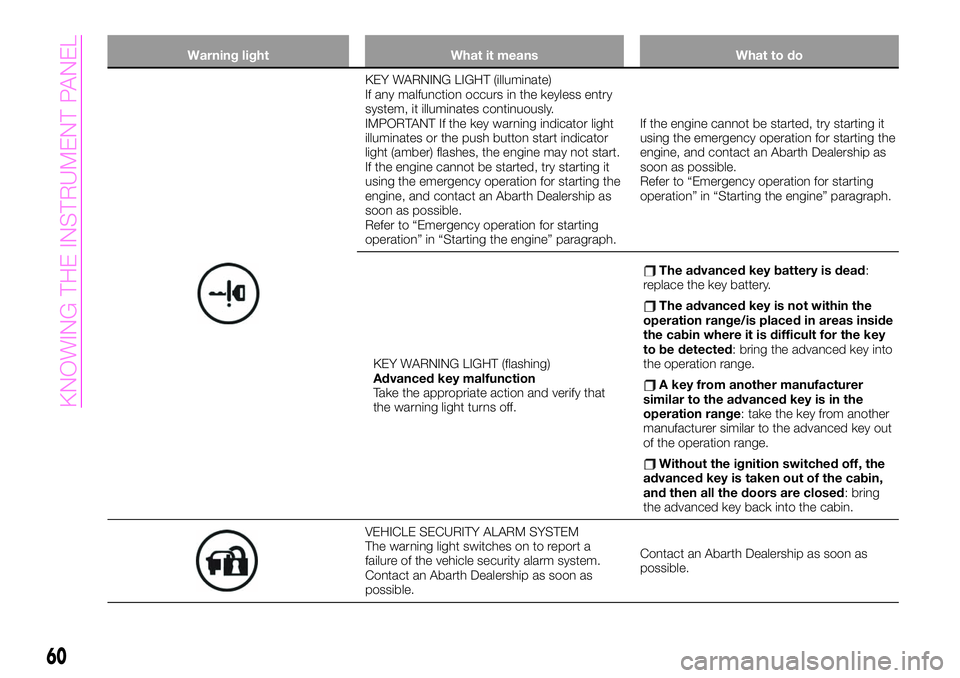
KEY WARNING LIGHT (illuminate)
If any malfunction occurs in the keyless entry
system, it illuminates continuously.
IMPORTANT If the key warning indicator light
illuminates or the push button start indicator
light (amber) flashes, the engine may not start.
If the engine cannot be started, try starting it
using the emergency operation for starting the
engine, and contact an Abarth Dealership as
soon as possible.
Refer to “Emergency operation for starting
operation” in “Starting the engine” paragraph.If the engine cannot be started, try starting it
using the emergency operation for starting the
engine, and contact an Abarth Dealership as
soon as possible.
Refer to “Emergency operation for starting
operation” in “Starting the engine” paragraph.
KEY WARNING LIGHT (flashing)
Advanced key malfunction
Take the appropriate action and verify that
the warning light turns off.
The advanced key battery is dead:
replace the key battery.
The advanced key is not within the
operation range/is placed in areas inside
the cabin where it is difficult for the key
to be detected
: bring the advanced key into
the operation range.
A key from another manufacturer
similar to the advanced key is in the
operation range
: take the key from another
manufacturer similar to the advanced key out
of the operation range.
Without the ignition switched off, the
advanced key is taken out of the cabin,
and then all the doors are closed
: bring
the advanced key back into the cabin.
VEHICLE SECURITY ALARM SYSTEM
The warning light switches on to report a
failure of the vehicle security alarm system.
Contact an Abarth Dealership as soon as
possible.Contact an Abarth Dealership as soon as
possible.
60
KNOWING THE INSTRUMENT PANEL
Page 89 of 224
When an infant or small child sits on the
passenger seat, the system shuts off
the passenger front and side air bags
and seat belt pretensioner system, so
make sure the passenger air bag
deactivation OFF indicator light
illuminates. For more details, refer to
"Passenger occupant classification
sensor" in “Front Air Bags” paragraph.
IMPORTANT A seat belt or
child-restraint system can become very
hot in a closed vehicle during warm
weather. To avoid burning yourself or a
child, check them before you or your
child touches them.
NOTE Your vehicle is equipped with
ISOFIX anchors for attachment of
ISOFIX child-restraint systems. When
using these anchors to secure a
child-restraint system, refer to “Using
ISOFIX anchor” paragraph in this
chapter.
87
Page 91 of 224
CHILD-RESTRAINT
SYSTEM TYPES
In this Owner Handbook, explanation of
child restraint systems secured with
seat belts is provided for the following
three types of popular child-restraint
systems: baby seat, child seat, junior
seat.
IMPORTANT Installation position is
determined by the type of child-restraint
system. Always read the
manufacturer's instructions and this
Owner Handbook carefully.
IMPORTANT Due to variations in the
design of child restraint systems,
vehicle seats and seat belts, not all
child restraint may fit all seating
positions. Before purchasing a
child-restraint system, it should be
tested in the specific vehicle seating
position (or positions) where it is
intended to be used. If a previously
purchased child-restraint system does
not fit, you may need to purchase a
different one that will.
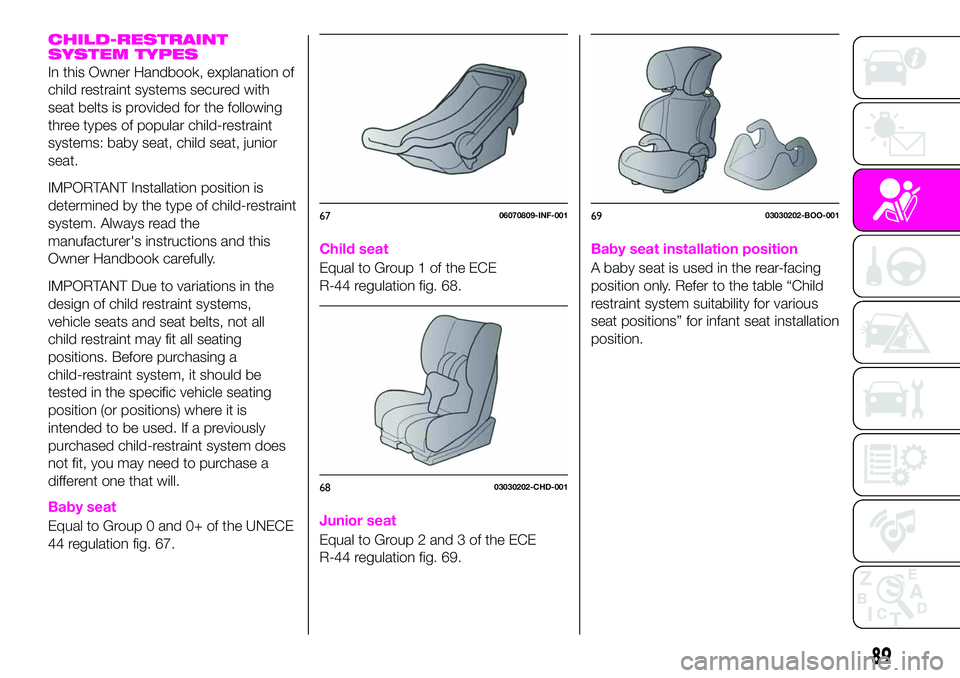
Baby seat
Equal to Group 0 and 0+ of the UNECE
44 regulation fig. 67.
Child seat
Equal to Group 1 of the ECE
R-44 regulation fig. 68.
Junior seat
Equal to Group 2 and 3 of the ECE
R-44 regulation fig. 69.
Baby seat installation position
A baby seat is used in the rear-facing
position only. Refer to the table “Child
restraint system suitability for various
seat positions” for infant seat installation
position.
6706070809-INF-001
6803030202-CHD-001
6903030202-BOO-001
89
Page 93 of 224
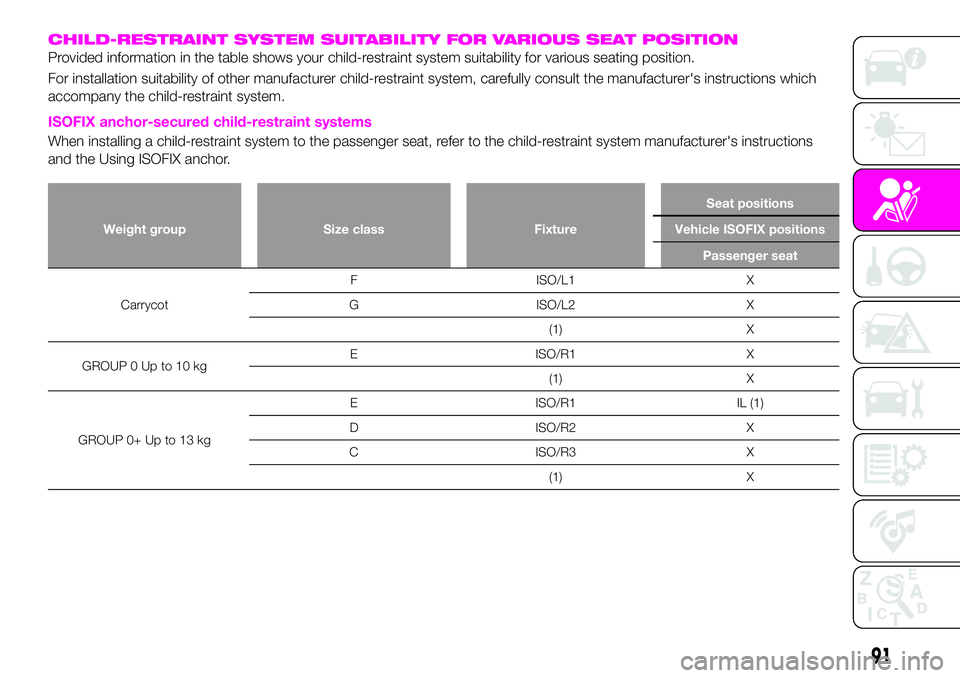
CHILD-RESTRAINT SYSTEM SUITABILITY FOR VARIOUS SEAT POSITION
Provided information in the table shows your child-restraint system suitability for various seating position.
For installation suitability of other manufacturer child-restraint system, carefully consult the manufacturer's instructions which
accompany the child-restraint system.
ISOFIX anchor-secured child-restraint systems
When installing a child-restraint system to the passenger seat, refer to the child-restraint system manufacturer's instructions
and the Using ISOFIX anchor.
Weight group Size class FixtureSeat positions
Vehicle ISOFIX positions
Passenger seat
CarrycotF ISO/L1 X
G ISO/L2 X
(1) X
GROUP 0 Up to 10 kgE ISO/R1 X
(1) X
GROUP 0+ Up to 13 kgE ISO/R1 IL (1)
D ISO/R2 X
C ISO/R3 X
(1) X
91