warning Abarth 500 2015 Owner handbook (in English)
[x] Cancel search | Manufacturer: ABARTH, Model Year: 2015, Model line: 500, Model: Abarth 500 2015Pages: 215, PDF Size: 19.08 MB
Page 35 of 215

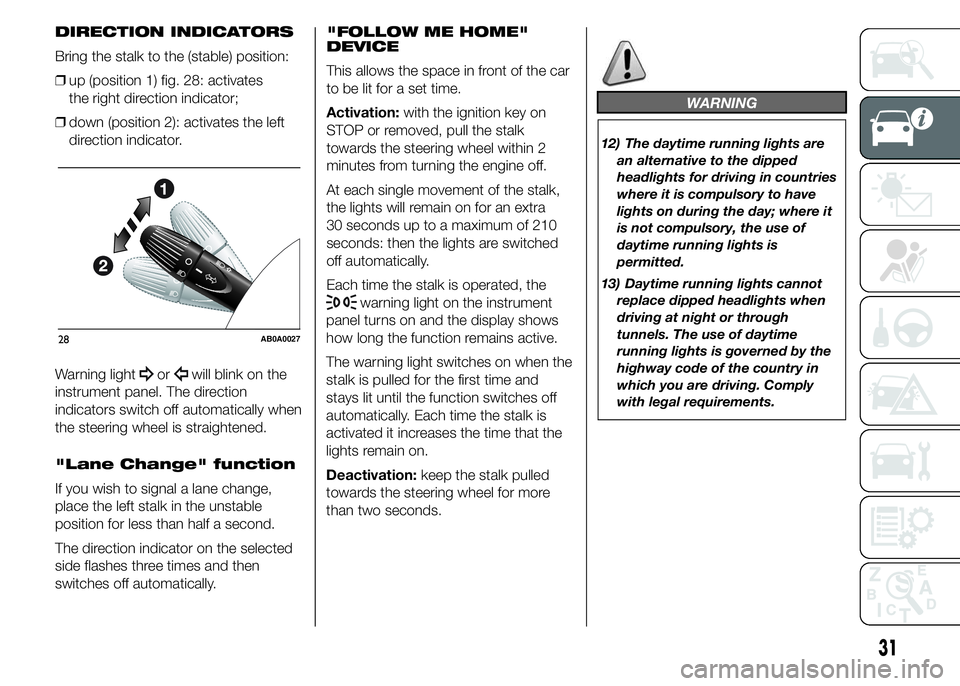
DIRECTION INDICATORS
Bring the stalk to the (stable) position:
❒up (position 1) fig. 28: activates
the right direction indicator;
❒down (position 2): activates the left
direction indicator.
Warning light
orwill blink on the
instrument panel. The direction
indicators switch off automatically when
the steering wheel is straightened.
"Lane Change" function
If you wish to signal a lane change,
place the left stalk in the unstable
position for less than half a second.
The direction indicator on the selected
side flashes three times and then
switches off automatically."FOLLOW ME HOME"
DEVICE
This allows the space in front of the car
to be lit for a set time.
Activation:with the ignition key on
STOP or removed, pull the stalk
towards the steering wheel within 2
minutes from turning the engine off.
At each single movement of the stalk,
the lights will remain on for an extra
30 seconds up to a maximum of 210
seconds: then the lights are switched
off automatically.
Each time the stalk is operated, the
warning light on the instrument
panel turns on and the display shows
how long the function remains active.
The warning light switches on when the
stalk is pulled for the first time and
stays lit until the function switches off
automatically. Each time the stalk is
activated it increases the time that the
lights remain on.
Deactivation:keep the stalk pulled
towards the steering wheel for more
than two seconds.
WARNING
12) The daytime running lights are
an alternative to the dipped
headlights for driving in countries
where it is compulsory to have
lights on during the day; where it
is not compulsory, the use of
daytime running lights is
permitted.
13) Daytime running lights cannot
replace dipped headlights when
driving at night or through
tunnels. The use of daytime
running lights is governed by the
highway code of the country in
which you are driving. Comply
with legal requirements.
28AB0A0027
31
Page 39 of 215

IMPORTANT When the SPORT button
is pressed, the function is activated
about 5 seconds later.
IMPORTANT During acceleration using
the SPORT function the steering may
shudder which is typical of a sports
setting.
HAZARD WARNING
LIGHTS
They are turned on by pressing the
button B fig. 31, regardless of the
position of the ignition key.
With the device on, warning lights
andlight up in the instrument
panel.
Press button B again to switch the
lights off.
IMPORTANT The use of hazard warning
lights is governed by the highway
code of the country you are driving in:
comply with legal requirements.Emergency braking
In the event of an emergency braking,
the hazard warning light switch on
automatically together with warning
lights
andon the instrument
panel.
The lights switch off automatically when
emergency braking ceases.
FRONT FOG
LIGHTS/REAR FOG
LIGHTS
(for versions/markets, where provided)
The fog lights can be activated only
when the dipped headlamps are on.
To turn on the front/rear fog lights, use
the button C fig. 31 as follows:
❒First pressing: front fog lights on;
❒second pressing: rear fog lamps
on;
❒third pressing: front/rear fog lights
off.
With front fog lights on, the
warning
light on the instrument panel will come
on at the same time.
With rear fog lights on, the
warning
light on the instrument panel will come
on at the same time.REAR FOG LIGHTS
When the dipped beam headlights are
on, these can be activated by pressing
button
fig. 32.
With lights on, the warning light
on
the instrument panel will come on at the
same time.
Press the button again to switch the
lights off.
FUEL CUT-OFF SYSTEM
This intervenes in the case of an impact
causing:
❒the fuel supply cut-off with the engine
consequently switching off
❒the automatic unlocking of the doors
❒turning on the lights inside the
vehicle.
32AB0A0030
35
Page 40 of 215

The intervention of the system is
indicated by a message shown on the
display.
IMPORTANT Carefully check the car for
fuel leaks, for instance in the engine
compartment, under the car or near the
tank area.
14)
After a collision, turn the ignition key to
STOP position to prevent the battery
from running down.
To restore the correct operation of the
car, proceed as follows:
❒turn the ignition key to the MAR-ON
position
❒activate the right direction indicator
❒deactivate the right direction indicator
❒activate the left direction indicator
❒deactivate the left direction indicator
❒activate the right direction indicator
❒deactivate the right direction indicator
❒activate the left direction indicator
❒deactivate the left direction indicator
❒turn the ignition key to the STOP
position
❒turn the ignition key to the MAR-ON
position.
WARNING
14) If, after an impact, you smell fuel
or notice leaks from the fuel
system, do not reactivate the
system to avoid the risk of fire.
INTERIOR FITTINGS
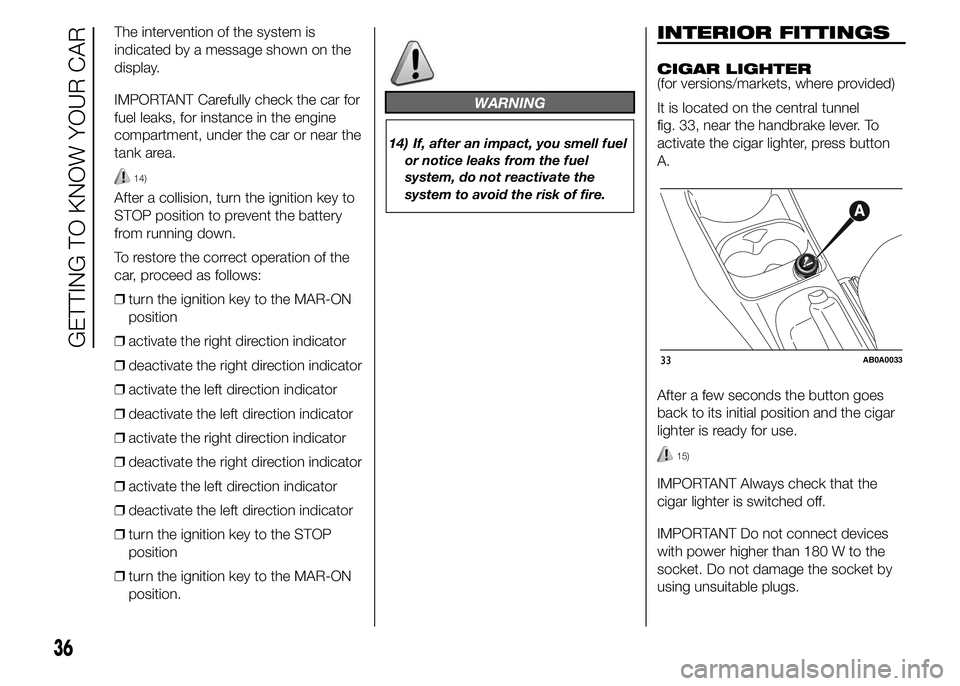
CIGAR LIGHTER
(for versions/markets, where provided)
It is located on the central tunnel
fig. 33,near the handbrake lever. To
activate the cigar lighter, press button
A.
After a few seconds the button goes
back to its initial position and the cigar
lighter is ready for use.
15)
IMPORTANT Always check that the
cigar lighter is switched off.
IMPORTANT Do not connect devices
with power higher than 180 W to the
socket. Do not damage the socket by
using unsuitable plugs.
33AB0A0033
36
GETTING TO KNOW YOUR CAR
Page 43 of 215

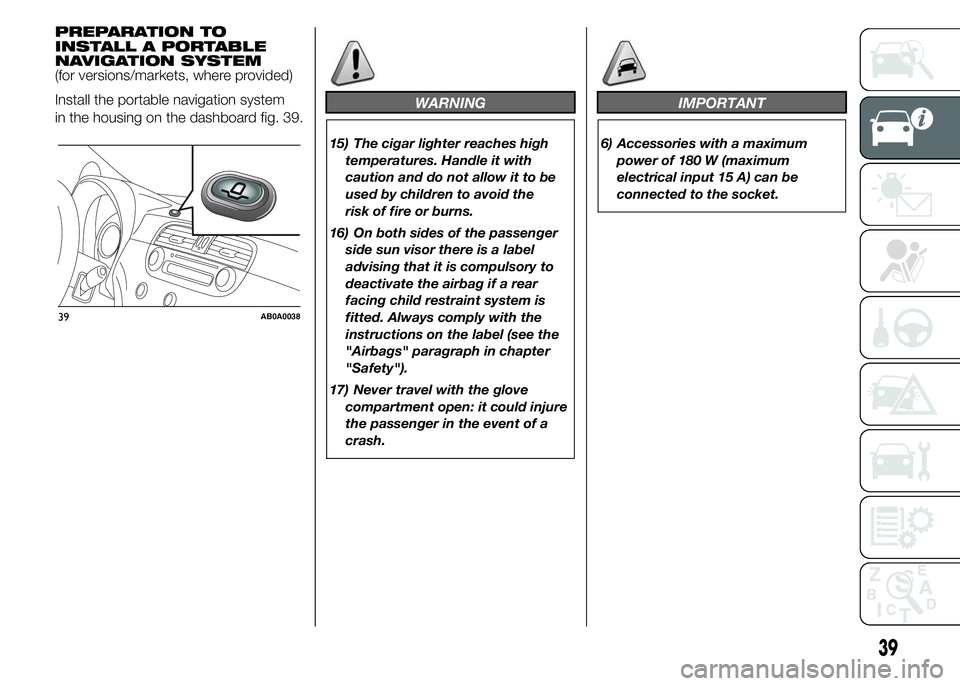
PREPARATION TO
INSTALL A PORTABLE
NAVIGATION SYSTEM
(for versions/markets, where provided)
Install the portable navigation system
in the housing on the dashboard fig. 39.
WARNING
15) The cigar lighter reaches high
temperatures. Handle it with
caution and do not allow it to be
used by children to avoid the
risk of fire or burns.
16) On both sides of the passenger
side sun visor there is a label
advising that it is compulsory to
deactivate the airbag if a rear
facing child restraint system is
fitted. Always comply with the
instructions on the label (see the
"Airbags" paragraph in chapter
"Safety").
17) Never travel with the glove
compartment open: it could injure
the passenger in the event of a
crash.
IMPORTANT
6) Accessories with a maximum
power of 180 W (maximum
electrical input 15 A) can be
connected to the socket.
39AB0A0038
39
Page 46 of 215

IMPORTANT
7) Do not open the sun roof if there
is snow or ice on it: you may
damage it.
8) Use the sun roof only at "spoiler"
position if a transverse roof rack is
fitted.
WARNING
18) When leaving the car, always
remove the key from the ignition
to avoid the risk of injury due
to accidental operation of the sun
roof. Improper use of the roof
can be dangerous. Before and
during operation, always check
that nobody is at risk of being
injured by the moving sun roof or
by objects getting caught or hit by
it.
DOORS
19)
DOOR CENTRAL
LOCKING/UNLOCKING
Unlocking doors from
the outside
Press the
button on the key or turn
the metal insert (located inside the key)
to position 1 fig. 44 in the driver side
door lock.
When the key is turned the doors and
the tailgate are simultaneously
unlocked.Locking doors from the
outside
With the doors closed, press the
button on the key or fit and then turn
the metal insert (located inside the
key) to position 2 fig. 44 in the driver
side door lock.
IMPORTANT If one of the doors is not
completely closed or if there is a fault in
the system, the central locking will not
be activated. If the operation is
repeated 10/11 times in quick
succession, the device is excluded for
approximately 30 seconds.
44AB0A0041
42
GETTING TO KNOW YOUR CAR
Page 47 of 215

Door locking/unlocking
from the inside
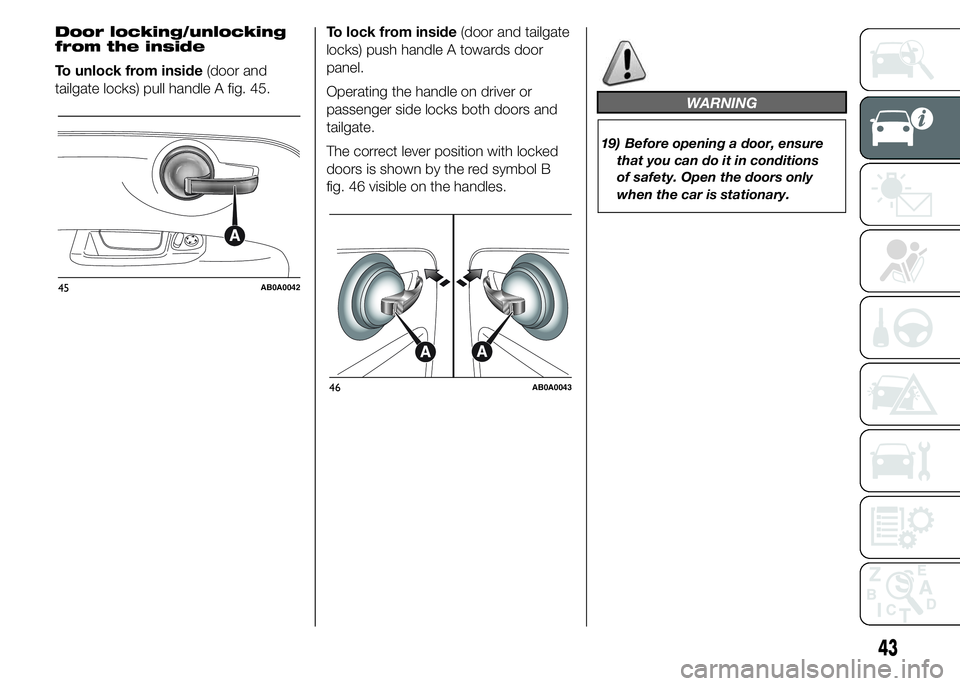
To unlock from inside(door and
tailgate locks) pull handle A fig. 45.To lock from inside(door and tailgate
locks) push handle A towards door
panel.
Operating the handle on driver or
passenger side locks both doors and
tailgate.
The correct lever position with locked
doors is shown by the red symbol B
fig. 46 visible on the handles.
WARNING
19) Before opening a door, ensure
that you can do it in conditions
of safety. Open the doors only
when the car is stationary.
45AB0A0042
46AB0A0043
43
Page 48 of 215

ELECTRIC WINDOWS
IN BRIEF
These operate when the ignition key
is turned to MAR-ON and for about
three minutes after the ignition key is
turned to STOP or removed unless
one of the doors is opened.
20)
The electric window control buttons are
located beside the gear lever fig. 47
and activate:
A Opening/closing of the left window.
B Opening/closing of the right
window.
21)
If the button is held down for several
seconds, the window raises or lowers
automatically (only with key in MAR-ON
position).
As regards the passenger's side
window, only the opening occurs
automatically with the same procedure.
WARNING
20) Incorrect use of the electric
windows may be dangerous.
Before and during operation,
always check that nobody is
exposed to the risk of being
injured either directly by the
moving window or through
objects getting caught or hit by it.
21) When leaving the car, always
remove the ignition key to avoid
the risk of injury for people still on
board due to accidental operation
of the electric windows.
47AB0A0225
44
GETTING TO KNOW YOUR CAR
Page 51 of 215

IMPORTANT To return the backrest to
its correct position, we recommend
operating from the outside through the
doors.
TOTAL EXTENSION
Tilting the rear seat completely forwards
allows maximum loading volume.
Proceed as follows:
❒remove the rear seat head restraints
(where provided)
❒check that the seat belts are correctly
extended and not twisted
❒operate the levers A and B fig. 53 to
release the backrests and guide
them onto the cushion.
IMPORTANT To return the backrest to
its correct position, we recommend
operating from the outside through the
doors.REPOSITIONING THE
REAR SEAT
Raise the backrests and push them
back until the locking click of both
retainers is heard.
Position the seat belt buckles upwards
and set the cushion to the position of
normal use.
IMPORTANT When returning the
backrest to its normal position, make
sure that it is correctly fastened and
that you hear the lock click.
Make sure the backrest is properly
secured at both sides to prevent it
moving forward in the event of sharp
braking that may cause injuries to
passengers.
WARNING
22) Never exceed the maximum
allowed load in the luggage
compartment (see "Technical
specifications" chapter). Also
make sure that the objects you
place in the luggage compartment
have been properly secured, to
avoid them from being thrown
forward consequent to sudden
braking and injuring your
passengers.
23) If you are travelling in areas with
few filling stations and you want
to transport fuel in a spare tank,
comply with the law by using only
an approved, suitably secured
tank. Anyway, by doing so, you
increase the risk of fire in the
event of an accident with your
vehicle.
24) Do not travel with the tailgate
open: exhaust gas may enter
the passenger compartment.
47
Page 53 of 215

CLOSING
Proceed as follows:
❒hold the bonnet up with one hand
and with the other remove rod C
fig. 56 from housing E and fit it back
into its catch D
❒lower the bonnet to approximately 20
centimetres above the engine
compartment and let it come down.
Make sure that the bonnet is
completely closed and not just
secured in safety position. If it is not
perfectly closed, do not try to press
the bonnet down but open it and
repeat the procedure.
28)
WARNING
25) Incorrect positioning of the
supporting rod may cause the
bonnet to drop suddenly. Only
perform these operations when
the car is stationary.
26) When the engine is warm, work
carefully inside the engine
compartment to avoid getting
burnt. Do not place your hands
near the engine fan as it may be
activated even when the key is
removed. Wait for the engine
to cool down.
27) Pay attention to scarves, ties and
other loose-fitting garments. If
they accidentally come into
contact with moving parts, they
may get caught up and dragged
with serious risks for those
wearing them.28) For safety reasons, the bonnet
must always be properly closed
while driving. Make sure that the
bonnet is perfectly closed and
that the lock is engaged. If you
notice when driving that the
bonnet has not been properly
locked, stop immediately
and close the bonnet correctly.
IMPORTANT
10) Before opening the bonnet,
make sure that windscreen wiper
arm is not raised, but is rather
positioned against the
windscreen.
49
Page 54 of 215

ROOF RACK/SKI
RACK
FASTENERS
The fasteners are located in the area
indicated in fig. 57.
To use the front fasteners, remove the
cap A fig. 57, accessible with the door
open.
The rear fixing areas B can be found
according to measurements shown in
fig. 58.
29) 30)
Lineaccessori Abarth provides a
specific roof rack/ski rack for the
tailgate.IMPORTANT Follow the instructions
contained in the assembly kit carefully.
Assembly must be performed by
qualified personnel.
WARNING
29) Strictly adhere to the laws in
force concerning maximum
clearance. Never exceed the
maximum permitted loads; see
chapter "Technical
specifications".
30) Evenly distribute the load and
take into account, when driving,
the increased responsiveness
of the car to side wind. Check that
the attachment fixing screws are
tight after a few kilometres.
57AB0A0054
130 mm30 mm
58AB0A0055
50
GETTING TO KNOW YOUR CAR