dashboard warning lights Abarth 500 2020 Owner handbook (in English)
[x] Cancel search | Manufacturer: ABARTH, Model Year: 2020, Model line: 500, Model: Abarth 500 2020Pages: 196, PDF Size: 3.53 MB
Page 23 of 196

DIPPED HEADLIGHTS/
SIDE LIGHTS
With the ignition key turned to MAR,
turn the ring nut to
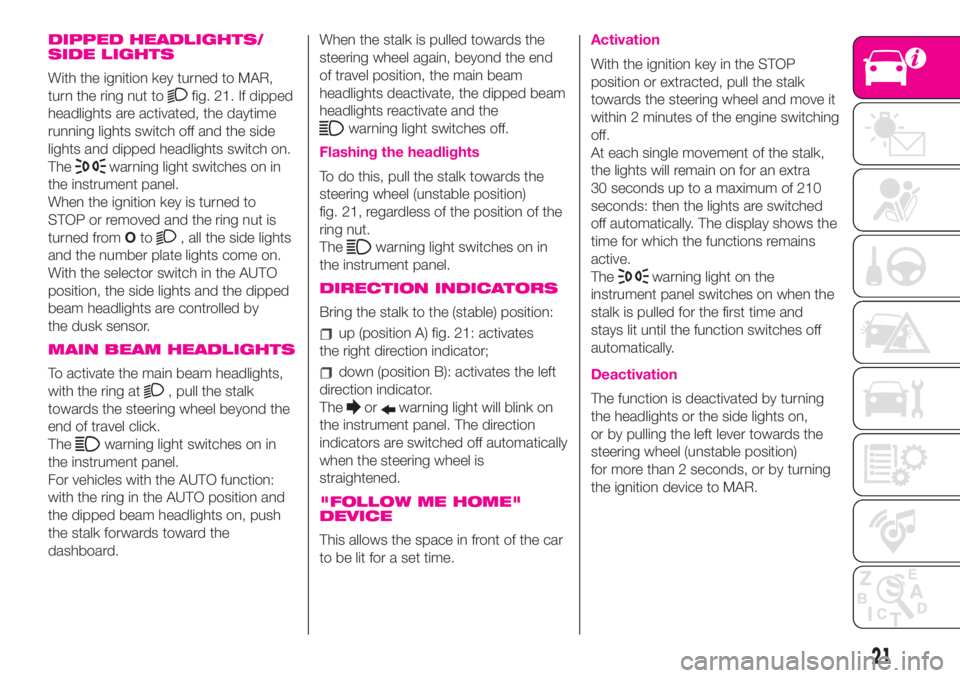
fig. 21. If dipped
headlights are activated, the daytime
running lights switch off and the side
lights and dipped headlights switch on.
The
warning light switches on in
the instrument panel.
When the ignition key is turned to
STOP or removed and the ring nut is
turned fromOto
, all the side lights
and the number plate lights come on.
With the selector switch in the AUTO
position, the side lights and the dipped
beam headlights are controlled by
the dusk sensor.
MAIN BEAM HEADLIGHTS
To activate the main beam headlights,
with the ring at
, pull the stalk
towards the steering wheel beyond the
end of travel click.
The
warning light switches on in
the instrument panel.
For vehicles with the AUTO function:
with the ring in the AUTO position and
the dipped beam headlights on, push
the stalk forwards toward the
dashboard.When the stalk is pulled towards the
steering wheel again, beyond the end
of travel position, the main beam
headlights deactivate, the dipped beam
headlights reactivate and the
warning light switches off.
Flashing the headlights
To do this, pull the stalk towards the
steering wheel (unstable position)
fig. 21, regardless of the position of the
ring nut.
The
warning light switches on in
the instrument panel.
DIRECTION INDICATORS
Bring the stalk to the (stable) position:
up (position A) fig. 21: activates
the right direction indicator;
down (position B): activates the left
direction indicator.
The
orwarning light will blink on
the instrument panel. The direction
indicators are switched off automatically
when the steering wheel is
straightened.
"FOLLOW ME HOME"
DEVICE
This allows the space in front of the car
to be lit for a set time.
Activation
With the ignition key in the STOP
position or extracted, pull the stalk
towards the steering wheel and move it
within 2 minutes of the engine switching
off.
At each single movement of the stalk,
the lights will remain on for an extra
30 seconds up to a maximum of 210
seconds: then the lights are switched
off automatically. The display shows the
time for which the functions remains
active.
The
warning light on the
instrument panel switches on when the
stalk is pulled for the first time and
stays lit until the function switches off
automatically.
Deactivation
The function is deactivated by turning
the headlights or the side lights on,
or by pulling the left lever towards the
steering wheel (unstable position)
for more than 2 seconds, or by turning
the ignition device to MAR.
21
Page 46 of 196

NOTE Buttons+and–activate different
functions according to the following
situations:
within the menu, they allow you to
scroll up or down through the options;
during setting operations, they
increase or decrease values.
The menu comprises the following
functions:
LIGHTING: adjusts the dashboard
and instrument panel lighting
SPEED BEEP: sets the vehicle
speed limit (km/h or mph). The driver is
alerted when this speed is exceeded.
TRIP B ACTIVATION/DATA: activates
(”On”) and deactivates (”Off”) the Trip
B display (partial trip counter)
SET TIME: set the display clock
SET DATE: sets the display date
AUTOCLOSE: enables or disables
automatic door locking on exceeding a
speed of 20 km/h
MEASUREMENT UNITS: sets the
measurement units for distance and
fuel consumption
LANGUAGE: sets the display
language
WARNING VOLUME: sets the
volume (on 8 levels) of the audible
warning (buzzer) that accompanies the
failure/warning display
SEAT BELT BUZZER: reactivation of
the SBR buzzer (displayed only if the
SBR system was disabled by the
Abarth Dealership)
SERVICE: displays mileage intervals
for scheduled servicing
AIRBAG/PASSENGER BAG:
enables/disables the passenger side
airbag
DAYTIME RUNNING LIGHTS:
enables/disables daytime running lights
ITPMS RESET: resets the iTPMS
system (”self-learning”, see the “iTPMS
System” paragraph)
SEE RADIO (if present): enables/
disables duplicating some of the radio
information shown on theUconnect™
system display on the instrument panel
display.
SEE PHONE (if present): enables/
disables duplicating some of the call
information shown on theUconnect™
system display on the instrument panel
display.
SEE NAVIGATION (if present):
enables/disables duplicating some of
the navigation information shown on
theUconnect™system display on the
instrument panel display.
EXIT MENU
TRIP COMPUTER
The Trip computer is used to display
information on car operation when the
key is turned to MAR.
This function is characterised by two
separate memories, called "Trip A" and
"Trip B", where the car's "complete
missions" (journeys) are recorded in a
reciprocally independent manner, as
well as, for versions where present,
"Instant info" and "Best average
consumption".
Both memories can be reset: i.e. start
of a new journey.
"Trip A" can be used to display the
values relating to:
Range (where present)
Distance travelled A
Average consumption A
Instantaneous fuel consumption
(where present)
Average speed A
Trip time A (driving time)
Reset Trip A.
“Best average consumption": in ECO
mode, displays a screen summarising
the best average consumption (where
provided). The
icon indicates the
best performance. This information can
be reset by resetting Trip A.
"Trip B" allows the display of the
following parameters:
44
KNOWING THE INSTRUMENT PANEL
Page 84 of 196

WARNING
91)Do not apply stickers or other objects
on the steering wheel, on the dashboard in
the passenger side airbag area, on the
side upholstery on the roof and on the
seats. Never put objects (e.g. mobile
phones) on the passenger's side
dashboard since they could interfere with
correct inflation of the airbag and also
cause serious injury to the passengers.
92)Always drive with your hands on the
rim of the steering wheel so that the airbag
can inflate freely if required. Do not drive
bent over the steering wheel, but rather sit
upright with your back firmly resting against
the seat back.
93)When there is an active passenger
airbag, DO NOT install rearward facing
child restraint systems on the front seat.
Deployment of the airbag in a crash could
cause fatal injuries to the child regardless
of the severity of the collision. Therefore,
always deactivate the passenger side
airbag when a rearward facing child
restraint system is installed on the front
passenger seat. The front passenger seat
must also be positioned back as far as
possible in order to prevent the child
restraint system from coming into contact
with the dashboard. Immediately reactivate
the passenger airbag as soon as the child
restraint system has been removed.94)A failure of the
warning light is
indicated by thesymbol on the display.
In this case, thewarning light may
not indicate a possible problem with the
airbag restraint system. Before driving off,
contact an Abarth Dealership to have
the system checked immediately.
95)The
warning light indicates the
passenger side airbag protection status. If
the warning light is off, passenger side
protection is active: to deactivate it, use the
Setup Menu (in this case the LED lights
up). When the vehicle is started (ignition
key turned to MAR position), the warning
light turns on for about 8 seconds,
provided that at least 5 seconds have
elapsed from when it was switched off. If
not, contact an Abarth Dealership. If the
engine is switched off/on again in less than
5 seconds the warning light may remain
off. In this case, to check correct warning
light operation, switch the engine off,
wait for at least 5 seconds and switch the
engine on again. The warning light may
light up with various intensity levels
depending on the vehicle conditions. The
intensity may also vary during the same key
cycle.
96)If, when turning the key to MAR, the
warning light does not switch on or if it
stays on when travelling, there could be
a fault in the restraint systems; in this event
airbags or pretensioners may not be
deployed in the event of impact or, in a
lower number of cases, they may deploy
accidentally. Before driving off, contact
an Abarth Dealership to have the system
checked immediately.97)In some versions, in case of a LED
failure (located on the plate of the
instrument panel), thewarning light on
the instrument panel turns on and the
passenger side airbags are deactivated.
98)Do not cover the front seat backrests
with extra covers if they are equipped
with side bags.
99)If the car has been subject to theft,
attempted theft, vandalism, or flooding,
have the airbag system inspected at an
Abarth Dealership.
100)The airbags may also be deployed
when the car is not moving, if the key is in
the ignition and turned to MAR-ON or
when the engine is off, if the car is hit by
another moving vehicle. Therefore, even if
the vehicle is stationary, when an active
front passenger airbag is fitted, DO NOT
install rearward facing child restraint
systems on the front passenger seat.
Deployment of the airbag following an
impact could cause fatal injuries to the
child. Therefore, always deactivate the
passenger side airbag when a rearward
facing child restraint system is installed on
the front passenger seat. The front
passenger seat must also be positioned
back as far as possible in order to prevent
the child restraint system from coming
into contact with the dashboard.
Immediately reactivate the passenger
airbag as soon as the child restraint system
has been removed. Also remember that, if
the key is turned to STOP, none of the
safety devices (airbags or pretensioners)
will be deployed in the event of collision.
Non-deployment in such cases does
not indicate a system malfunction.
82
SAFETY
Page 110 of 196

“Fix&Go” KIT
127) 128)
28)
DESCRIPTION
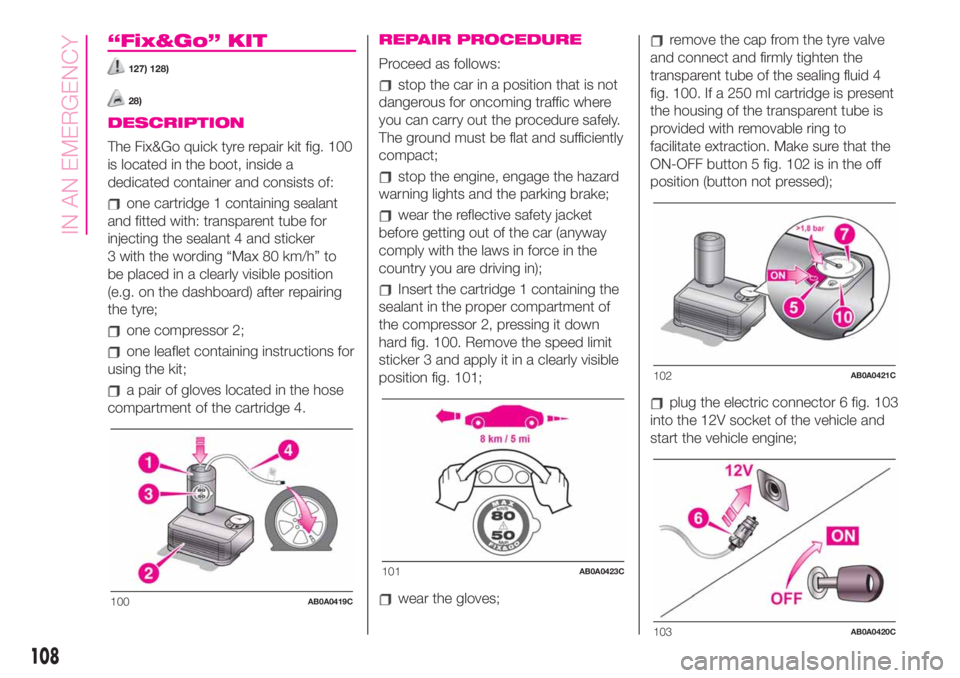
The Fix&Go quick tyre repair kit fig. 100
is located in the boot, inside a
dedicated container and consists of:
one cartridge 1 containing sealant
and fitted with: transparent tube for
injecting the sealant 4 and sticker
3 with the wording “Max 80 km/h” to
be placed in a clearly visible position
(e.g. on the dashboard) after repairing
the tyre;
one compressor 2;
one leaflet containing instructions for
using the kit;
a pair of gloves located in the hose
compartment of the cartridge 4.
REPAIR PROCEDURE
Proceed as follows:
stop the car in a position that is not
dangerous for oncoming traffic where
you can carry out the procedure safely.
The ground must be flat and sufficiently
compact;
stop the engine, engage the hazard
warning lights and the parking brake;
wear the reflective safety jacket
before getting out of the car (anyway
comply with the laws in force in the
country you are driving in);
Insert the cartridge 1 containing the
sealant in the proper compartment of
the compressor 2, pressing it down
hard fig. 100. Remove the speed limit
sticker 3 and apply it in a clearly visible
position fig. 101;
wear the gloves;
remove the cap from the tyre valve
and connect and firmly tighten the
transparent tube of the sealing fluid 4
fig. 100. If a 250 ml cartridge is present
the housing of the transparent tube is
provided with removable ring to
facilitate extraction. Make sure that the
ON-OFF button 5 fig. 102 is in the off
position (button not pressed);
plug the electric connector 6 fig. 103
into the 12V socket of the vehicle and
start the vehicle engine;
100AB0A0419C
101AB0A0423C
102AB0A0421C
103AB0A0420C
108
IN AN EMERGENCY