lock Abarth Punto Evo 2011 Owner handbook (in English)
[x] Cancel search | Manufacturer: ABARTH, Model Year: 2011, Model line: Punto Evo, Model: Abarth Punto Evo 2011Pages: 270, PDF Size: 3.53 MB
Page 5 of 270
THE FIAT CODE SYSTEM
This is an electronic engine locking system which
increases protection against attempted thefts of the car.
It is automatically activated when the ignition key is
removed.
An electronic device is fitted in each ignition key grip.
The device transmits a radio-frequency signal when the
engine is started through a special aerial built into the
ignition switch. The modulated signal, which changes
each time the engine is started, is the “password”, by
means of which the control unit recognises the key and
enables to start the engine.
OPERATION
Each time the vehicle is started by turning the ignition
key to MAR, the Fiat CODE system control unit sends
a recognition code to the engine control unit to
deactivate the immobiliser.
The acknowledgement code is sent only if the Fiat
CODE system control unit has recognised the code
transmitted from the key.
Each time the ignition key is turned to STOP, the Fiat
CODE system deactivates the functions of the engine
management control unit.
If the code is not recognised correctly during ignition,
the
Ywarning light comes on in the instrument panel.
SYMBOLS
Special coloured labels have been attached near or
actually on some of the components of your car. These
labels bear symbols that remind you of the precautions
to be taken as regards that particular component.
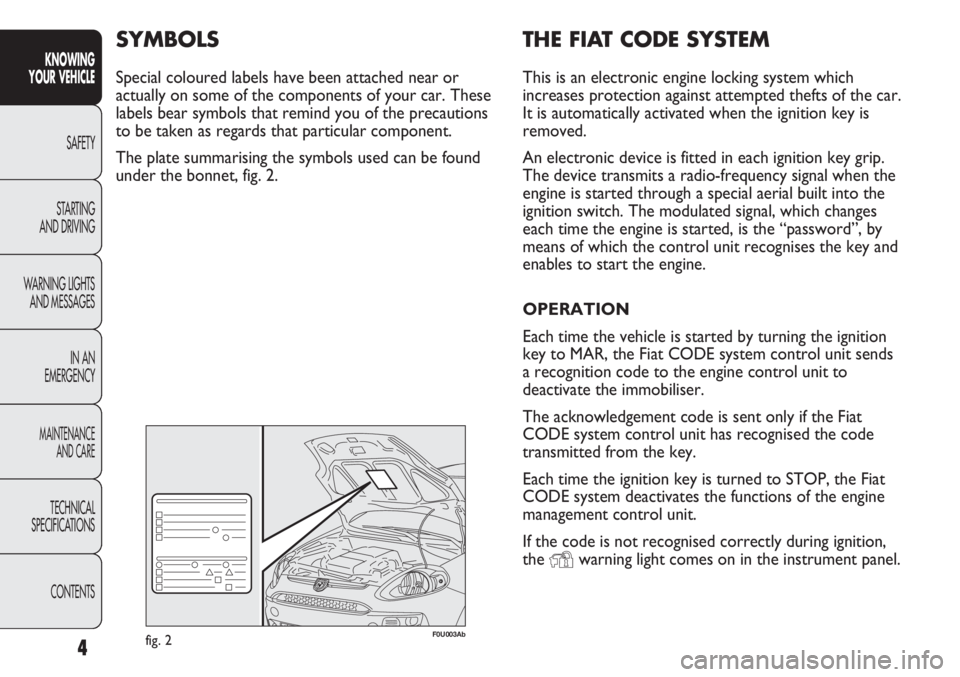
The plate summarising the symbols used can be found
under the bonnet, fig. 2.
F0U003Abfig. 2
CONTENTS TECHNICAL
SPECIFICATIONS
MAINTENANCE
AND CARE
IN AN
EMERGENCY WARNING LIGHTS
AND MESSAGESSTARTING
AND DRIVINGSAFETY
KNOWING
YOUR VEHICLE
4
Page 6 of 270
THE KEYS
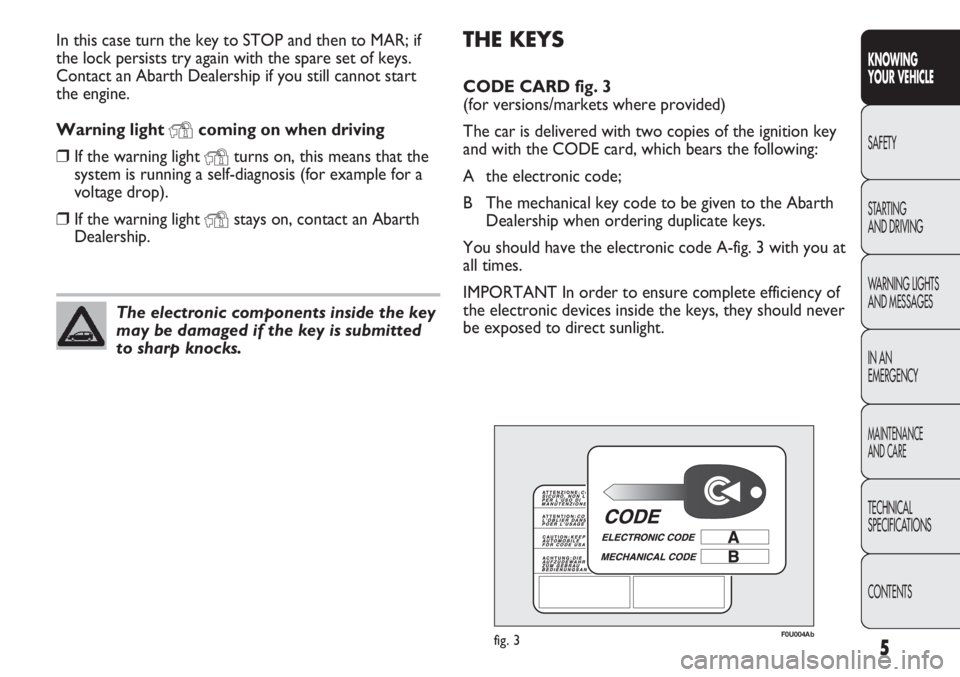
CODE CARD fig. 3
(for versions/markets where provided)
The car is delivered with two copies of the ignition key
and with the CODE card, which bears the following:
A the electronic code;
B The mechanical key code to be given to the Abarth
Dealership when ordering duplicate keys.
You should have the electronic code A-fig. 3 with you at
all times.
IMPORTANT In order to ensure complete efficiency of
the electronic devices inside the keys, they should never
be exposed to direct sunlight. In this case turn the key to STOP and then to MAR; if
the lock persists try again with the spare set of keys.
Contact an Abarth Dealership if you still cannot start
the engine.
Warning light
Ycoming on when driving
❒If the warning light Yturns on, this means that the
system is running a self-diagnosis (for example for a
voltage drop).
❒If the warning light Ystays on, contact an Abarth
Dealership.
The electronic components inside the key
may be damaged if the key is submitted
to sharp knocks.
F0U004Abfig. 3
CONTENTS TECHNICAL
SPECIFICATIONS
MAINTENANCE
AND CARE
IN AN
EMERGENCY WARNING LIGHTS
AND MESSAGES STARTING
AND DRIVING SAFETY
KNOWING
YOUR VEHICLE
5
Page 7 of 270
6
KNOWING
YOUR VEHICLE
SAFETY
STARTING
AND DRIVING
WARNING LIGHTS
AND MESSAGES
IN AN
EMERGENCY
MAINTENANCE
AND CARE
TECHNICAL
SPECIFICATIONS
CONTENTS
F0U005Abfig. 4
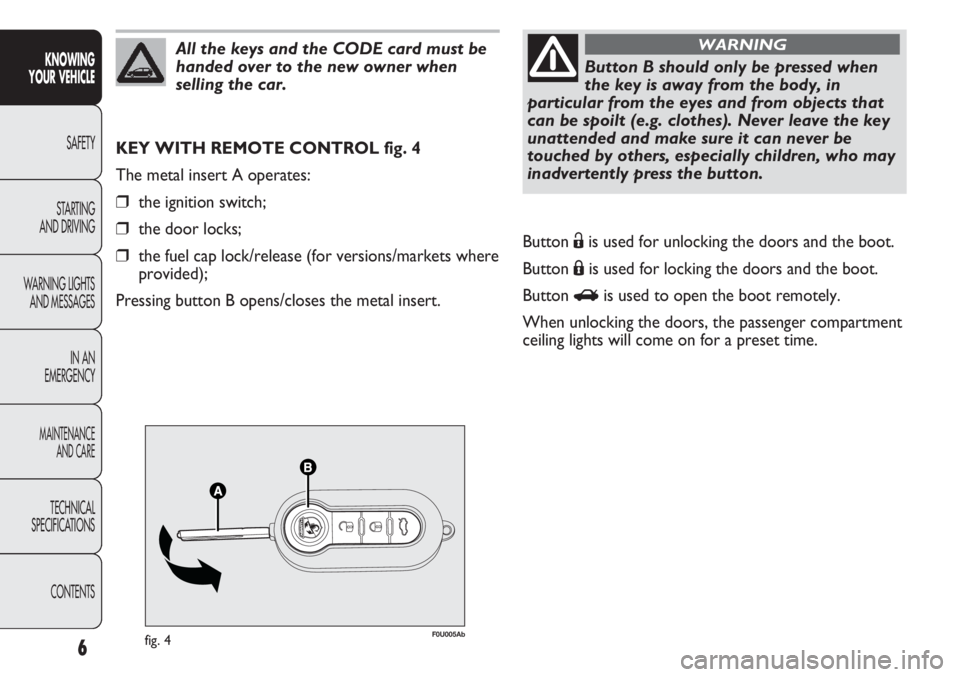
KEY WITH REMOTE CONTROL fig. 4
The metal insert A operates:
❒the ignition switch;
❒the door locks;
❒the fuel cap lock/release (for versions/markets where
provided);
Pressing button B opens/closes the metal insert.
All the keys and the CODE card must be
handed over to the new owner when
selling the car.
Button B should only be pressed when
the key is away from the body, in
particular from the eyes and from objects that
can be spoilt (e.g. clothes). Never leave the key
unattended and make sure it can never be
touched by others, especially children, who may
inadvertently press the button.
WARNING
Button Ëis used for unlocking the doors and the boot.
Button Áis used for locking the doors and the boot.
Button
Ris used to open the boot remotely.
When unlocking the doors, the passenger compartment
ceiling lights will come on for a preset time.
Page 8 of 270
7
F0U006Abfig. 5F0U007Abfig. 6
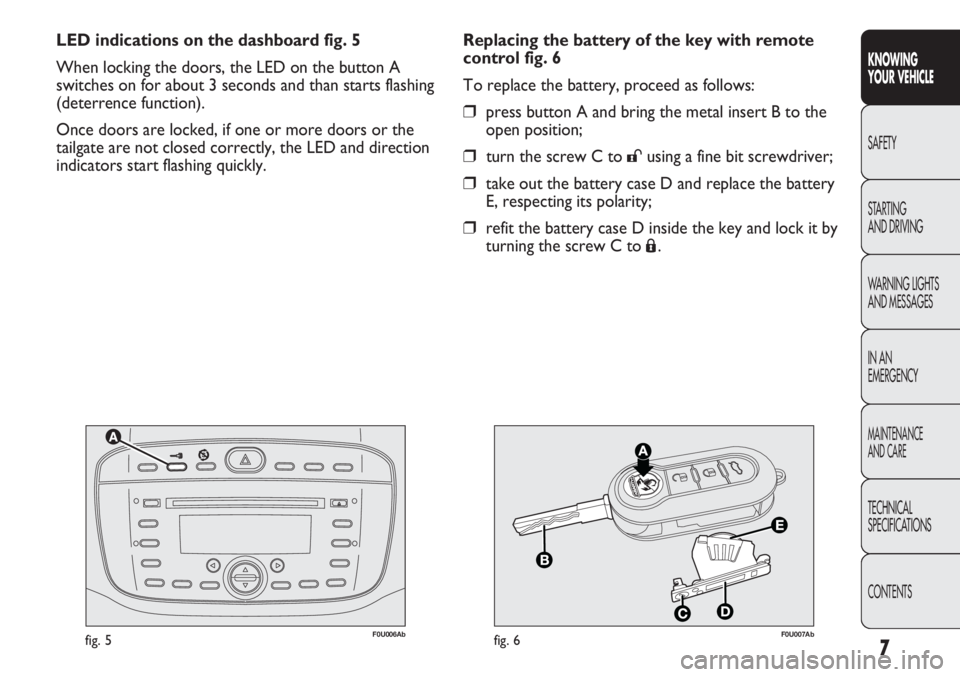
Replacing the battery of the key with remote
control fig. 6
To replace the battery, proceed as follows:
❒press button A and bring the metal insert B to the
open position;
❒turn the screw C to :using a fine bit screwdriver;
❒take out the battery case D and replace the battery
E, respecting its polarity;
❒refit the battery case D inside the key and lock it by
turning the screw C to
Á. LED indications on the dashboard fig. 5
When locking the doors, the LED on the button A
switches on for about 3 seconds and than starts flashing
(deterrence function).
Once doors are locked, if one or more doors or the
tailgate are not closed correctly, the LED and direction
indicators start flashing quickly.
KNOWING
YOUR VEHICLE
SAFETY
STARTING
AND DRIVING
WARNING LIGHTS
AND MESSAGES
IN AN
EMERGENCY
MAINTENANCE
AND CARE
TECHNICAL
SPECIFICATIONS
CONTENTS
Page 10 of 270
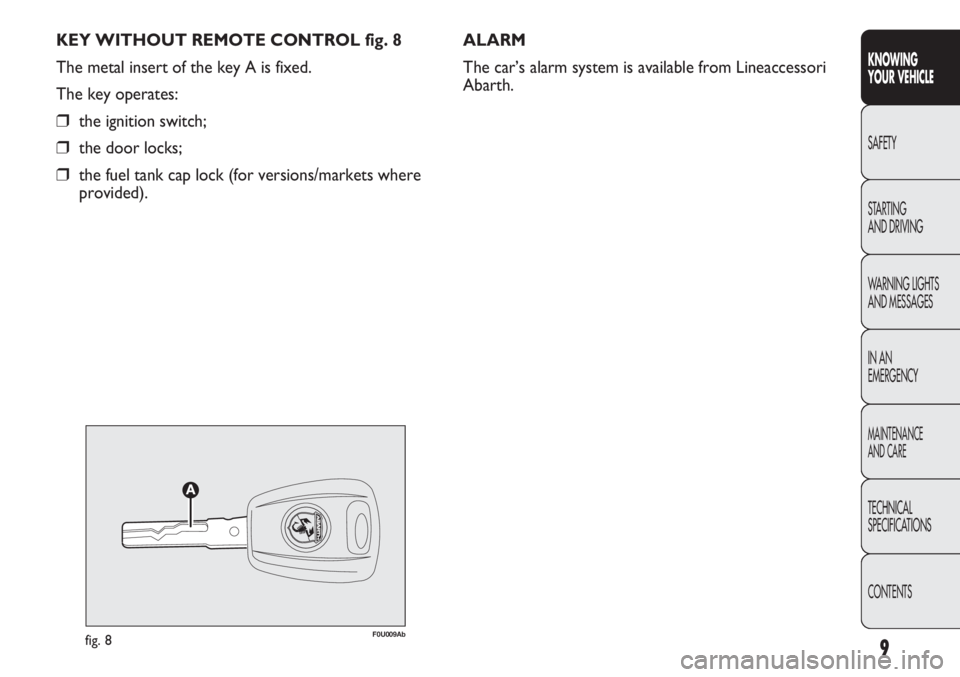
KEY WITHOUT REMOTE CONTROL fig. 8
The metal insert of the key A is fixed.
The key operates:
❒the ignition switch;
❒the door locks;
❒the fuel tank cap lock (for versions/markets where
provided).ALARM
The car’s alarm system is available from Lineaccessori
Abarth.
fig. 8F0U009Ab
9
KNOWING
YOUR VEHICLE
SAFETY
STARTING
AND DRIVING
WARNING LIGHTS
AND MESSAGES
IN AN
EMERGENCY
MAINTENANCE
AND CARE
TECHNICAL
SPECIFICATIONS
CONTENTS
Page 11 of 270
10
KNOWING
YOUR VEHICLE
SAFETY
STARTING
AND DRIVING
WARNING LIGHTS
AND MESSAGES
IN AN
EMERGENCY
MAINTENANCE
AND CARE
TECHNICAL
SPECIFICATIONS
CONTENTS
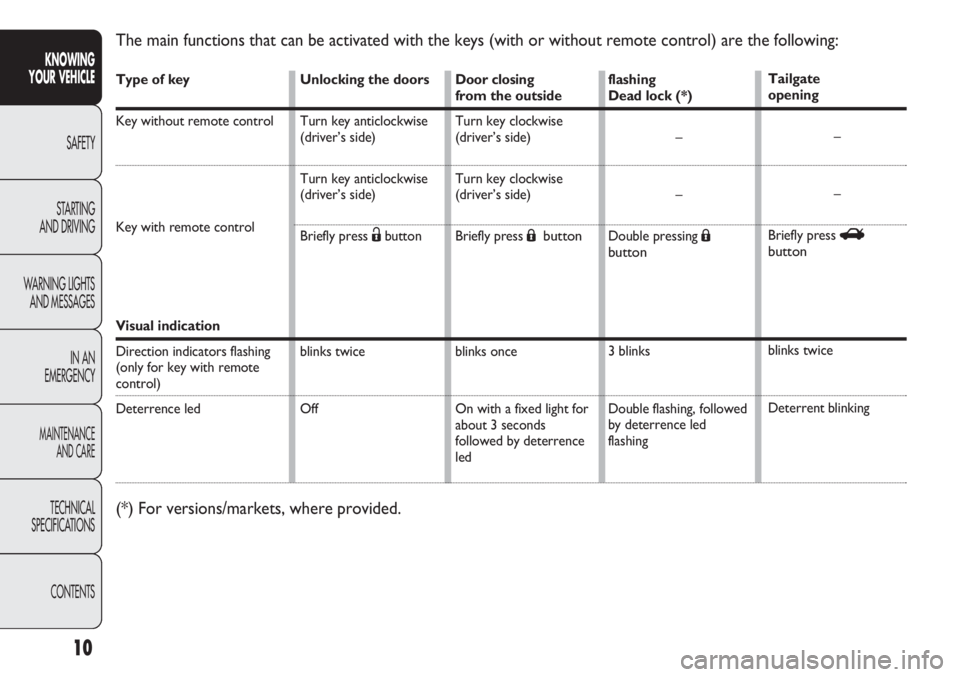
The main functions that can be activated with the keys (with or without remote control) are the following:
Type of key
Key without remote control
Key with remote control
Visual indication
Direction indicators flashing
(only for key with remote
control)
Deterrence led
Unlocking the doors
Turn key anticlockwise
(driver’s side)
Turn key anticlockwise
(driver’s side)
Briefly press
Ëbutton
blinks twice
OffDoor closing
from the outside
Turn key clockwise
(driver’s side)
Turn key clockwise
(driver’s side)
Briefly press Ábutton
blinks once
On with a fixed light for
about 3 seconds
followed by deterrence
led flashing
Dead lock (*)
–
–
Double pressing
Á
button
3 blinks
Double flashing, followed
by deterrence led
flashingTailgate
opening
–
–
Briefly press
R
button
blinks twice
Deterrent blinking
(*) For versions/markets, where provided.
Page 12 of 270
11
KNOWING
YOUR VEHICLE
SAFETY
STARTING
AND DRIVING
WARNING LIGHTS
AND MESSAGES
IN AN
EMERGENCY
MAINTENANCE
AND CARE
TECHNICAL
SPECIFICATIONS
CONTENTS
fig. 9F0U010Ab
If the ignition device has been tampered
with (e.g. an attempted theft), have it
checked over by an Abarth Dealership as soon
as possible.
WARNING
When getting out of the car, always
remove the key to prevent someone
from accidentally activating the controls.
Remember to engage the handbrake. If the car
is parked on a slope uphill, engage the first
gear; if the car is facing downhill, engage the
reverse gear. Never leave children unattended
in the car.
WARNING
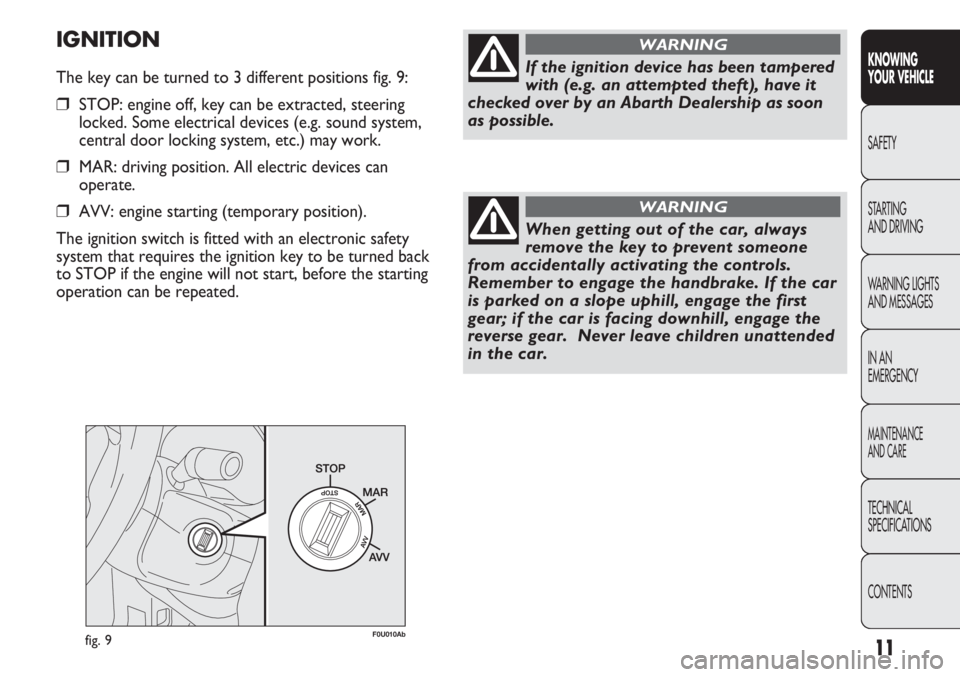
IGNITION
The key can be turned to 3 different positions fig. 9:
❒STOP: engine off, key can be extracted, steering
locked. Some electrical devices (e.g. sound system,
central door locking system, etc.) may work.
❒MAR: driving position. All electric devices can
operate.
❒AVV: engine starting (temporary position).
The ignition switch is fitted with an electronic safety
system that requires the ignition key to be turned back
to STOP if the engine will not start, before the starting
operation can be repeated.
Page 13 of 270
Never remove the key while the car is
moving. The steering wheel would
automatically lock as soon as you try to turn it.
This is always the case, even when the vehicle is
being towed.
WARNING
It is absolutely forbidden to carry out any
after-sales operation involving steering
system or steering column modifications (e.g.
installing an anti-theft device) which could
adversely affect performance and safety,
invalidate the warranty and also result in the car
failing to comply with regulations.
WARNINGSTEERING LOCK
Engagement
When the key is at STOP, remove the key and turn the
steering wheel until it locks.
Disengagement
Move the steering wheel slightly as you turn the ignition
key to MAR.
CONTENTS TECHNICAL
SPECIFICATIONS
MAINTENANCE
AND CARE
IN AN
EMERGENCY WARNING LIGHTS
AND MESSAGESSTARTING
AND DRIVINGSAFETY
KNOWING
YOUR VEHICLE
12
Page 19 of 270
18
KNOWING
YOUR VEHICLE
SAFETY
STARTING
AND DRIVING
WARNING LIGHTS
AND MESSAGES
IN AN
EMERGENCY
MAINTENANCE
AND CARE
TECHNICAL
SPECIFICATIONS
CONTENTS
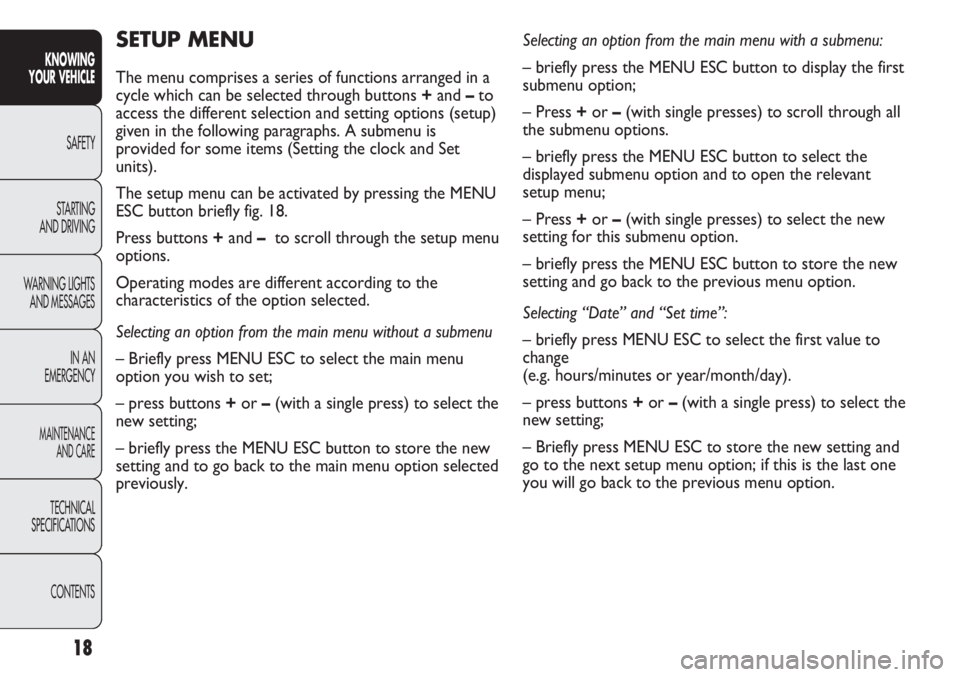
SETUP MENU
The menu comprises a series of functions arranged in a
cycle which can be selected through buttons +and –to
access the different selection and setting options (setup)
given in the following paragraphs. A submenu is
provided for some items (Setting the clock and Set
units).
The setup menu can be activated by pressing the MENU
ESC button briefly fig. 18.
Press buttons +and – to scroll through the setup menu
options.
Operating modes are different according to the
characteristics of the option selected.
Selecting an option from the main menu without a submenu
– Briefly press MENU ESC to select the main menu
option you wish to set;
– press buttons +or –(with a single press) to select the
new setting;
– briefly press the MENU ESC button to store the new
setting and to go back to the main menu option selected
previously.Selecting an option from the main menu with a submenu:
– briefly press the MENU ESC button to display the first
submenu option;
– Press +or –(with single presses) to scroll through all
the submenu options.
– briefly press the MENU ESC button to select the
displayed submenu option and to open the relevant
setup menu;
– Press +or –(with single presses) to select the new
setting for this submenu option.
– briefly press the MENU ESC button to store the new
setting and go back to the previous menu option.
Selecting “Date” and “Set time”:
– briefly press MENU ESC to select the first value to
change
(e.g. hours/minutes or year/month/day).
– press buttons +or –(with a single press) to select the
new setting;
– Briefly press MENU ESC to store the new setting and
go to the next setup menu option; if this is the last one
you will go back to the previous menu option.
Page 23 of 270

CONTENTS TECHNICAL
SPECIFICATIONS
MAINTENANCE
AND CARE
IN AN
EMERGENCY WARNING LIGHTS
AND MESSAGESSTARTING
AND DRIVINGSAFETY
KNOWING
YOUR VEHICLE
22
SET TIME
(Setting the clock)
This function enables the clock to be set through two
submenus: “Time” and “Format”.
To carry out the adjustment, proceed as follows:
– briefly press MENU ESC: the display will show the
two submenus “Time” and “Mode”;
– press the button +or –to switch between the two
submenus;
– once you have selected a submenu, press MENU ESC
briefly;
– if selecting “Time”, briefly press MENU ESC - the
“hours” will flash on the display;
– press the button +or –for setting;– briefly press MENU ESC: “minutes” will flash on the
display;
– press the button +or –for setting;
– if selecting “Mode”,briefly press MENU ESC: the mode
will flash on the display;
– press the button +or –to select “24h” or “12h”.
When you have made the required adjustments, press
MENU ESC to go back to the submenu screen or hold
the button down to go back to the main menu screen
without saving.
– hold down MENU ESC again to go back to the
standard screen or main menu, depending on which
point in the menu you have reached.