Acura CL 2003 Owner's Manual
Manufacturer: ACURA, Model Year: 2003, Model line: CL, Model: Acura CL 2003Pages: 355, PDF Size: 4.18 MB
Page 191 of 355

Store or secure all items that could
be thrown around and hurt
someone during a crash.
Be sure items placed on the f loor
behind the f ront seats cannot roll
under the seats and interf ere with
the driver’s ability to operate the
pedals, or with the proper
operation of the seats.
Keep the glove box closed while
driving. If the lid is open, a
passenger could injure their knees
during a crash or sudden stop. Do not put any items on top of the
rear shelf . They can block your
view and be thrown around the car
during a crash.
The f inal number is the total weight
of cargo you can carry. If you are towing a trailer, add the
tongue weight to the number
above. Add up the weight of all occupants.
To f igure out how much cargo you
can carry: This f igure includes the total weight
of all occupants, cargo, accessories,
and the tongue weight if you are
towing a trailer. The maximum load for your car is
700 lbs (325 kg).
Subtract the total f rom 700 lbs
(325 kg). Carrying Items in the Passenger
Compartment
Load Limit
Carrying Cargo
Bef ore Driving188
Overloading or improper
loading can affect handling and
stability and cause a crash in
which you can be hurt or killed.
Follow all load limits and other
loading guidelines in this
manual.
Page 192 of 355

If you carry large items that
prevent you f rom closing the trunk
lid, exhaust gas can enter the
passenger area. To avoid the
possibility of carbon monoxide
poisoning, f ollow the instructions
on page . Distribute cargo evenly on the
f loor of the trunk, placing the
heaviest items on the bottom and
as far forward as possible.
If you can carry any items on a
roof rack,besurethetotalweight
of the rack and the items does not
exceed the maximum allowable
weight. Please contact your Acura
dealer f or f urther inf ormation.The cargo net can be used to help
hold down items stored in the trunk.
To use the cargo net, hook it to the
buttons on the f loor and sides of the
trunk. You can use the cargo net in
several conf igurations by hooking it
to dif f erent buttons.
When you are not using the cargo
net, store it in the pocket in the lef t
side of the trunk.
52
Carrying Cargo in the Trunk or on
a Roof Rack
Cargo Net
Carrying Cargo
Bef ore Driving189
T T
R
RU UN NKK N
NEET
T H
HO
OO OKK
C
CA
A R
RGGO O N
NEET
T
Page 193 of 355

190
Page 194 of 355

This section gives you tips on
starting the engine under various
conditions, and how to operate the
automatic transmission. It also
includes important inf ormation on
parking your car, the braking system,
the Traction Control System, the
Vehicle Stability Assist System, and
f acts you need if you are planning to
tow a trailer.........................
Preparing to Drive .192
.......................
Starting the Engine .193
Starting in Cold Weather ....................
at High Altitude .193
....
6-speed Manual Transmission . 194
.....
Recommended Shif t Points . 195
..............
Engine Speed Limiter . 195
.......................
Reverse Lockout .196
..............
Automatic Transmission . 197
.
Shif t Lever Position Indicator . 197
................
Shif t Lever Positions . 198
..............
Engine Speed Limiter . 203
....................
Shif t Lock Release . 204
...........................................
Parking .205
.....................
The Braking System .206
.............
Brake Wear Indicators . 206
...............
Brake System Design . 207
.......................
Anti-lock Brakes .207
Important Saf ety .........................
Reminders .208
........................
ABS Indicator .208
..............
Traction Control System . 209
...
Vehicle Stability Assist System . 212
...............
Driving in Bad Weather . 215
...........................
Towing a Trailer .217
Driving
Driving191
Page 195 of 355

Make sure all windows, mirrors,
and outside lights are clean and
unobstructed. Remove f rost, snow,
or ice.
Check that the hood and trunk are
f ully closed.Check the adjustment of the
inside and outside mirrors (see
page ).
Check the adjustment of the
steering wheel (see page ).
Make sure the doors are securely
closed and locked.
Fasten your seat belt. Check that
your passengers have f astened
their seat belts (see page ).Turn the ignition switch ON (II).
Check the indicator lights in the
instrument panel.
Start the engine (see page ).
Check the gauges and indicator
lights in the instrument panel (see
page ).
Visually check the tires. If a tire
looks low, use a gauge to check its
pressure.
Check that any items you may be
carrying with you inside are stored
properly or f astened down
securely.
Youshoulddothefollowingchecks
and adjustments every day bef ore
you drive your car.
Check the adjustment of the seat
(see page ).
1.
2.
3.
4. 5.
6.
7.
8.
9.
1510.
11.
12.
91
98 76 193
57
Preparing to Drive
Driving192
Page 196 of 355

Apply the parking brake.
In cold weather, turn of f all
electrical accessories to reduce
the drain on the battery.
Push the clutch pedal down all the
way. START (III) does not
f unction unless the clutch pedal is
depressed.
Make sure the shif t lever is in
Park. Press on the brake pedal.
Without touching the accelerator
pedal, turn the ignition key to the
START (III) position. If the engine
does not start right away, do not
hold the key in START (III) f or
more than 15 seconds at a time.
Pause f or at least 10 seconds
bef ore trying again.
If the engine does not start within15 seconds, or starts but stalls
right away, repeat step 4 with the
accelerator pedal pressed half-way
down. If the engine starts, release
pressure on the accelerator pedal
so the engine does not race.
If the engine still does not start,
press the accelerator pedal all the
way down and hold it there while
starting in order to clear f looding.
As bef ore, keep the ignition key in
the START (III) position f or no
more than 15 seconds. Return to
step 5 if the engine does not start.
If it starts, lif t your f oot of f the
accelerator pedal so the engine
does not race.
An engine is harder to start in cold
weather. The thinner air f ound at
high altitude above 8,000 f eet (2,400
meters) adds to the problem. Use the f ollowing procedure:
Turn of f all electrical accessories
to reduce the drain on the battery.
Push the accelerator pedal half-
way to the f loor and hold it there
while starting the engine. Do not
hold the ignition key in START
(III) f or more than 15 seconds.
When the engine starts, release
the accelerator pedal gradually as
the engine speeds up and smooths
out.
If the engine fails to start in step 2,
push the accelerator pedal to the
f loor and hold it there while you
try to start the engine for no more
than 15 seconds. If the engine
does not start, return to step 2.
1.
2.
3.
4.
5.
6.
1.
2.
3.
Manual Transmission:
Automatic Transmission:
Driving
Starting the Engine
Starting in Cold Weather at High
A ltitude (A bove 8,000 f eet/
2,400 meters)
193
Page 197 of 355

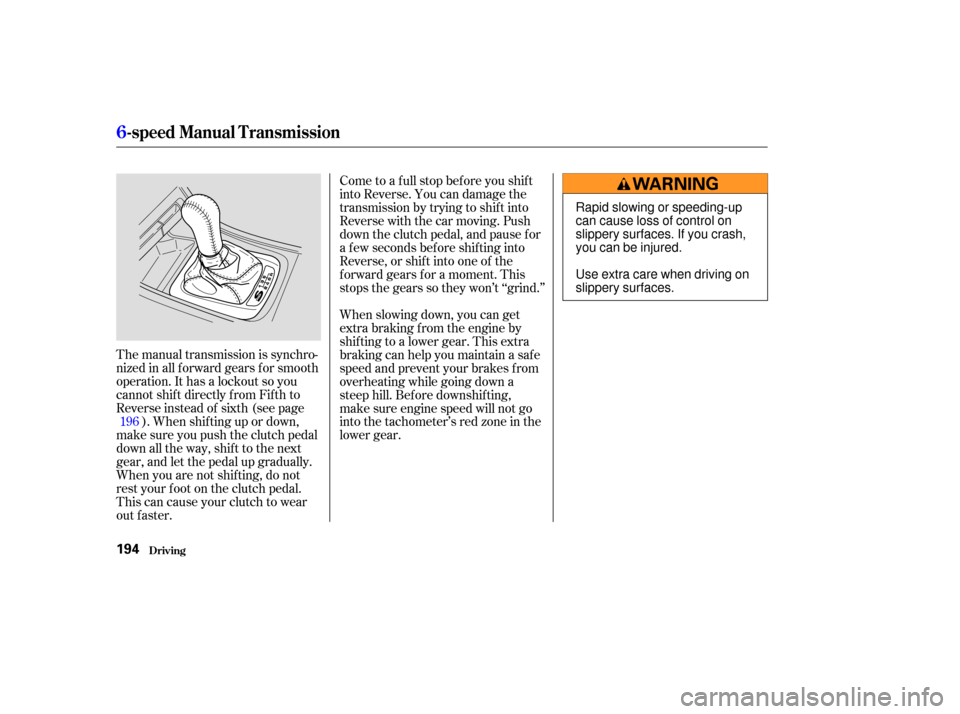
The manual transmission is synchro-
nizedinallforwardgearsforsmooth
operation. It has a lockout so you
cannot shift directly from Fifth to
Reverse instead of sixth (see page). When shif ting up or down,
make sure you push the clutch pedal
down all the way, shift to the next
gear, and let the pedal up gradually.
When you are not shif ting, do not
rest your f oot on the clutch pedal.
This can cause your clutch to wear
out f aster. Come to a full stop before you shift
into Reverse. You can damage the
transmission by trying to shif t into
Reverse with the car moving. Push
down the clutch pedal, and pause f or
a f ew seconds bef ore shif ting into
Reverse, or shif t into one of the
f orward gears f or a moment. This
stops the gears so they won’t ‘‘grind.’’
When slowing down, you can get
extra braking f rom the engine by
shifting to a lower gear. This extra
braking can help you maintain a safe
speed and prevent your brakes f rom
overheating while going down a
steep hill. Bef ore downshif ting,
make sure engine speed will not go
into the tachometer’s red zone in the
lower gear.
196
Driving
6-speed Manual T ransmission
194
Rapid slowing or speeding-up
can cause loss of control on
slippery surfaces. If you crash,
you can be injured.
Use extra care when driving on
slippery surfaces.
Page 198 of 355

Drive in the highest gear that lets
the engine run and accelerate
smoothly. This will give you the best
f uel economy and ef f ective emis-
sions control. The f ollowing shif t
points are recommended:If you exceed the maximum speed
f or the gear you are in, the engine
speed will enter into the tachometer’s
red zone. If this occurs, you may f eel
the engine cut in and out. This is
caused by a limiter in the engine’s
computer controls. The engine will
run normally when you reduce the
RPM below the red zone.
Shif t up
1st to 2nd
2nd to 3rd 3rd to 4th4th to 5th
5th to 6th Normal acceleration
15 mph (24 km/h)
25 mph (40 km/h)
40 mph (64 km/h)
47 mph (75 km/h)
52 mph (83 km/h) Bef ore downshif ting, make sure the
engine will not go into the
tachometer’s red zone.
Driving
6-speed Manual T ransmission
Recommended Shif t Points Engine Speed L imiter
195
Page 199 of 355

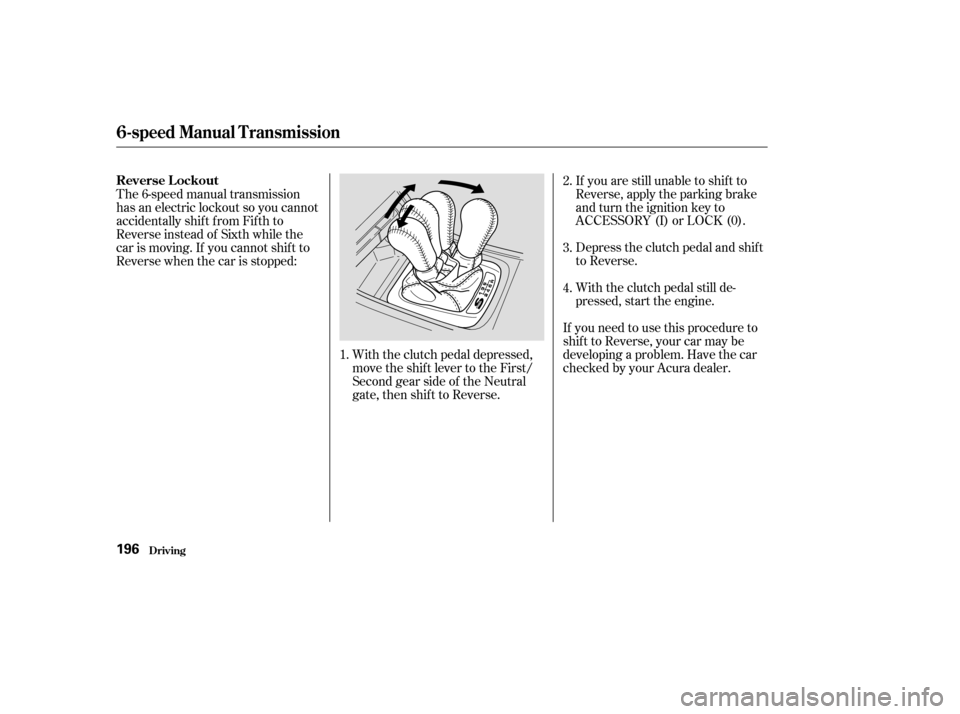
With the clutch pedal depressed,
move the shift lever to the First/
Second gear side of the Neutral
gate, then shif t to Reverse.If you are still unable to shif t to
Reverse, apply the parking brake
and turn the ignition key to
ACCESSORY (I) or LOCK (0).
Depress the clutch pedal and shif t
to Reverse.
With the clutch pedal still de-
pressed, start the engine.
If you need to use this procedure to
shif t to Reverse, your car may be
developing a problem. Have the car
checked by your Acura dealer.
The 6-speed manual transmission
has an electric lockout so you cannot
accidentally shif t f rom Fif th to
Reverse instead of Sixth while the
car is moving. If you cannot shif t to
Reverse when the car is stopped:
1.2.
3.
4.
Driving
6-speed Manual T ransmission
Reverse Lockout
196
Page 200 of 355

Your Acura’s transmission has f ive
f orward speeds, and is electronically
controlled f or smoother shif ting. It
also has a ‘‘lock-up’’ torque converter
forbetterfueleconomy.Youmay
f eel what seems like another shif t
when the converter locks.This indicator in the tachometer
shows which position the shif t lever
is in. The illuminated number next to
the ‘‘D ’’ indicator shows you the
gear you have selected in the
Sequential SportShif t mode.The ‘‘D ’’ indicator comes on f or a
f ew seconds when you turn the
ignition switch ON (II). If it f lashes
while driving (in any shif t position),
it indicates a possible problem in the
transmission. Avoid rapid
acceleration and have the
transmission checked by an
authorized Acura dealer as soon as
possible.
The malf unction indicator lamp may
come on along with the ‘‘D ’’
indicator if there is a problem in the
automatic transmission control
system.
5 5
5
Shif t L ever Position Indicator
Automatic Transmission
Driving197