display Acura ILX 2014 Navigation Manual
[x] Cancel search | Manufacturer: ACURA, Model Year: 2014, Model line: ILX, Model: Acura ILX 2014Pages: 234, PDF Size: 8.8 MB
Page 65 of 234
64
Navigation
Entering a Destination
HDEST/ROUTE button
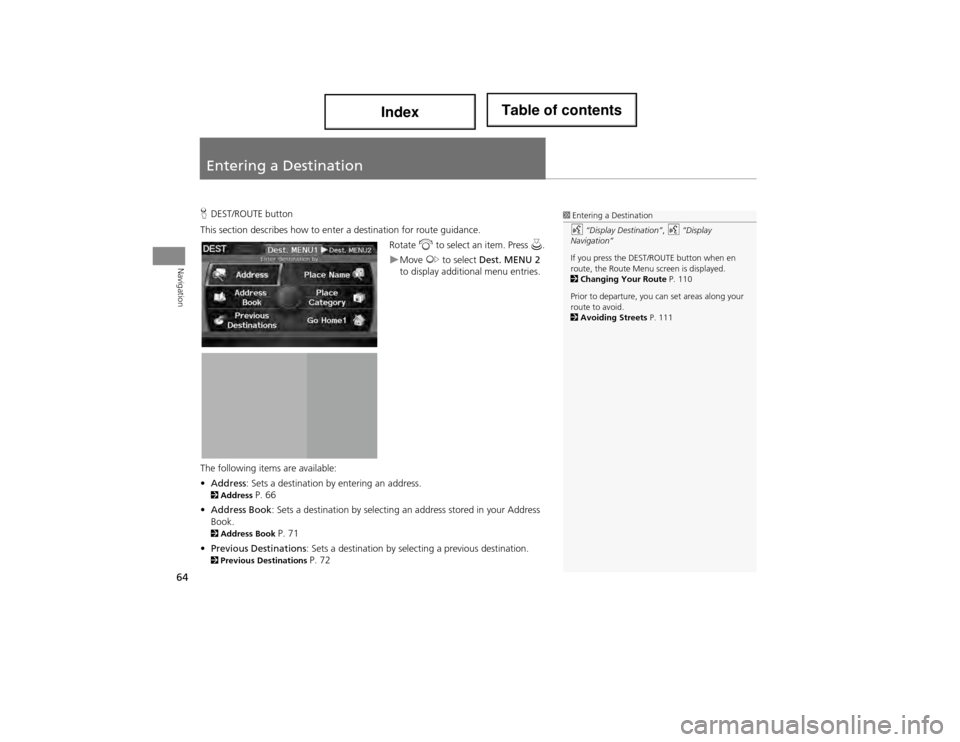
This section describes how to ente r a destination for route guidance.
Rotate i to select an item. Press u.
Move y to select Dest. MENU 2
to display additi onal menu entries.
The following items are available:
• Address : Sets a destination by entering an address.
2Address P. 66
• Address Book : Sets a destination by selecting an address stored in your Address
Book.
2 Address Book P. 71
• Previous Destinations : Sets a destination by select ing a previous destination.
2Previous Destinations P. 72
1Entering a Destination
d “Display Destination” , d “Display
Navigation”
If you press the DEST/ROUTE button when en
route, the Route Menu screen is displayed.
2 Changing Your Route P. 110
Prior to departure, you ca n set areas along your
route to avoid.
2 Avoiding Streets P. 111
Page 67 of 234
66
Entering a DestinationAddress
Navigation
Address
HDEST/ROUTE button Address
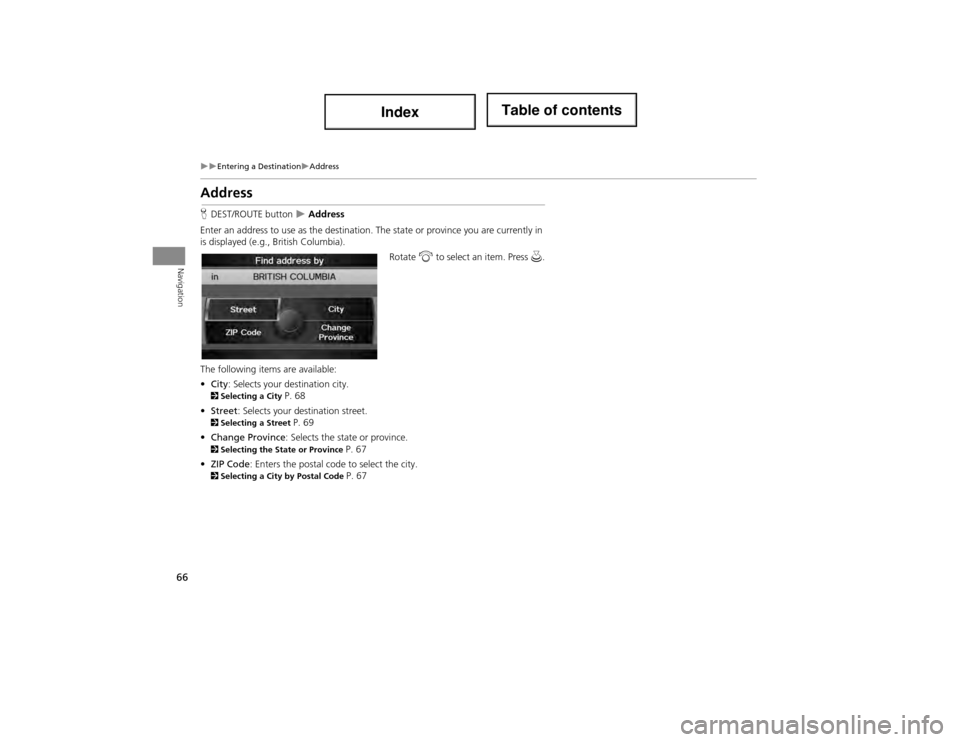
Enter an address to use as the destination. The state or province you are currently in
is displayed (e.g., British Columbia).
Rotate i to select an item. Press u.
The following items are available:
• City : Selects your destination city.
2Selecting a City P. 68
• Street : Selects your destination street.
2Selecting a Street P. 69
• Change Province : Selects the state or province.
2Selecting the State or Province P. 67
• ZIP Code: Enters the postal code to select the city.
2Selecting a City by Postal Code P. 67
Page 69 of 234
68
Entering a DestinationAddress
Navigation
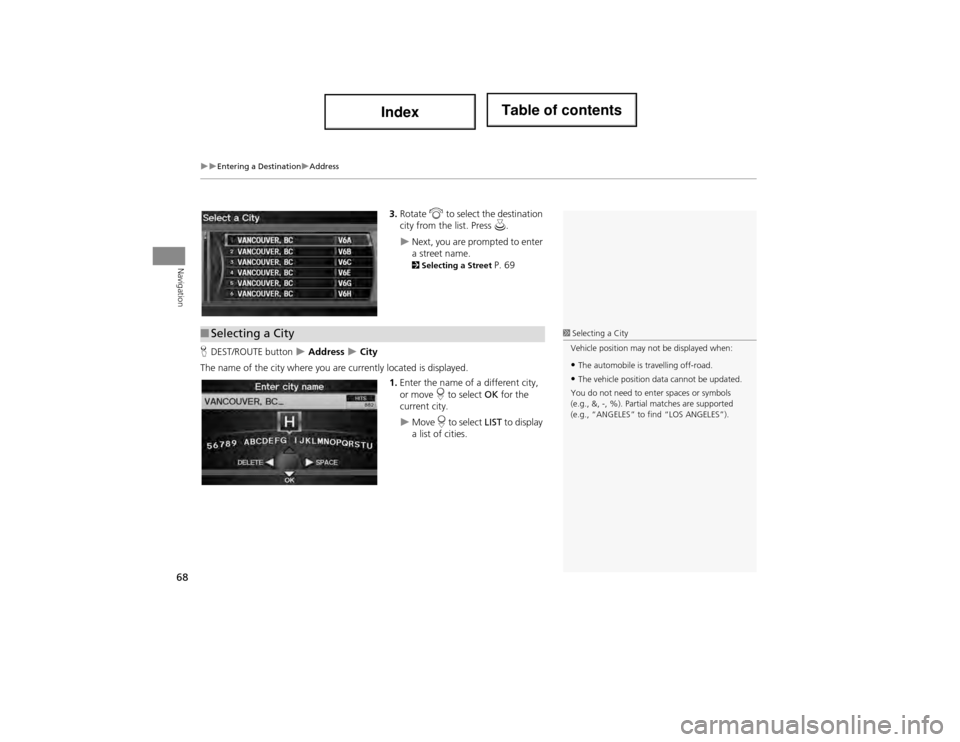
3.Rotate i to select the destination
city from the list. Press u.
Next, you are prompted to enter
a street name.
2Selecting a Street P. 69
H DEST/ROUTE button
Address City
The name of the city where you ar e currently located is displayed.
1.Enter the name of a different city,
or move r to select OK for the
current city.
Move r to select LIST to display
a list of cities.
■ Selecting a City1 Selecting a City
Vehicle position may no t be displayed when:
•The automobile is travelling off-road.
•The vehicle position data cannot be updated.
You do not need to enter spaces or symbols
(e.g., &, -, %). Partial matches are supported
(e.g., “ANGELES” to find “LOS ANGELES”).
Page 70 of 234
69
Entering a DestinationAddress
Navigation
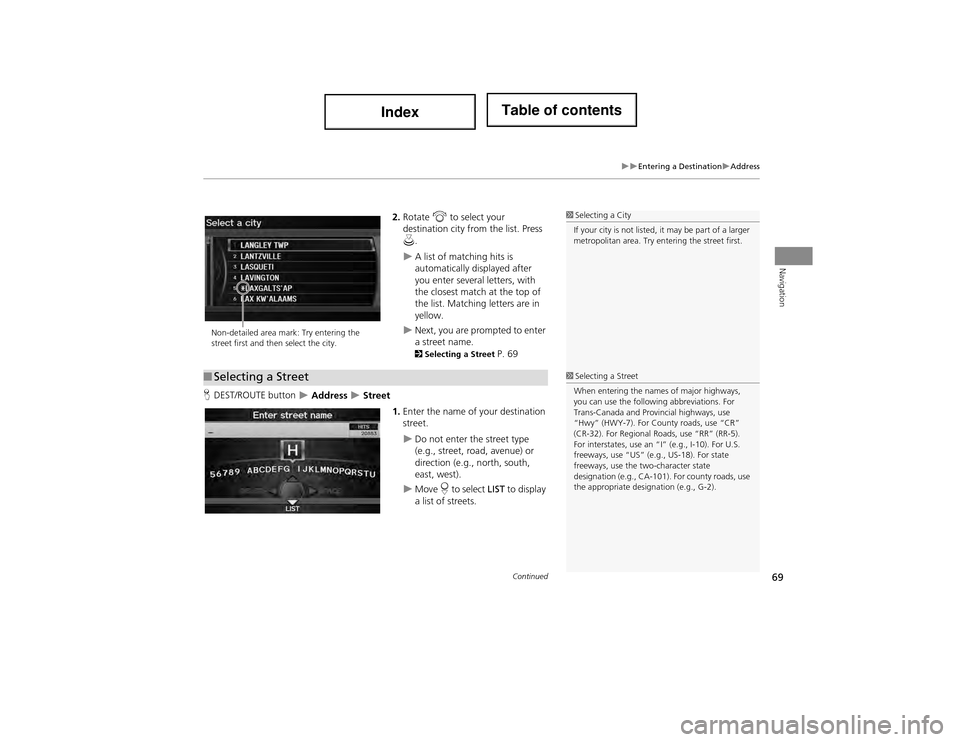
2.Rotate i to select your
destination city from the list. Press
u .
A list of matching hits is
automatically displayed after
you enter several letters, with
the closest match at the top of
the list. Matching letters are in
yellow.
Next, you are prompted to enter
a street name.
2Selecting a Street P. 69
H DEST/ROUTE button
Address Street
1.Enter the name of your destination
street.
Do not enter the street type
(e.g., street, road, avenue) or
direction (e.g., north, south,
east, west).
Move r to select LIST to display
a list of streets.
1 Selecting a City
If your city is not listed, it may be part of a larger
metropolitan area. Try ente ring the street first.
Non-detailed area mark: Try entering the
street first and then select the city.
■Selecting a Street1 Selecting a Street
When entering the names of major highways,
you can use the following abbreviations. For
Trans-Canada and Provincial highways, use
“Hwy” (HWY-7). For County roads, use “CR”
(CR-32). For Regional Roads, use “RR” (RR-5).
For interstates, use an “I ” (e.g., I-10). For U.S.
freeways, use “US” (e.g., US-18). For state
freeways, use the two-character state
designation (e.g., CA-101). For county roads, use
the appropriate design ation (e.g., G-2).
Continued
Page 71 of 234
70
Entering a DestinationAddress
Navigation
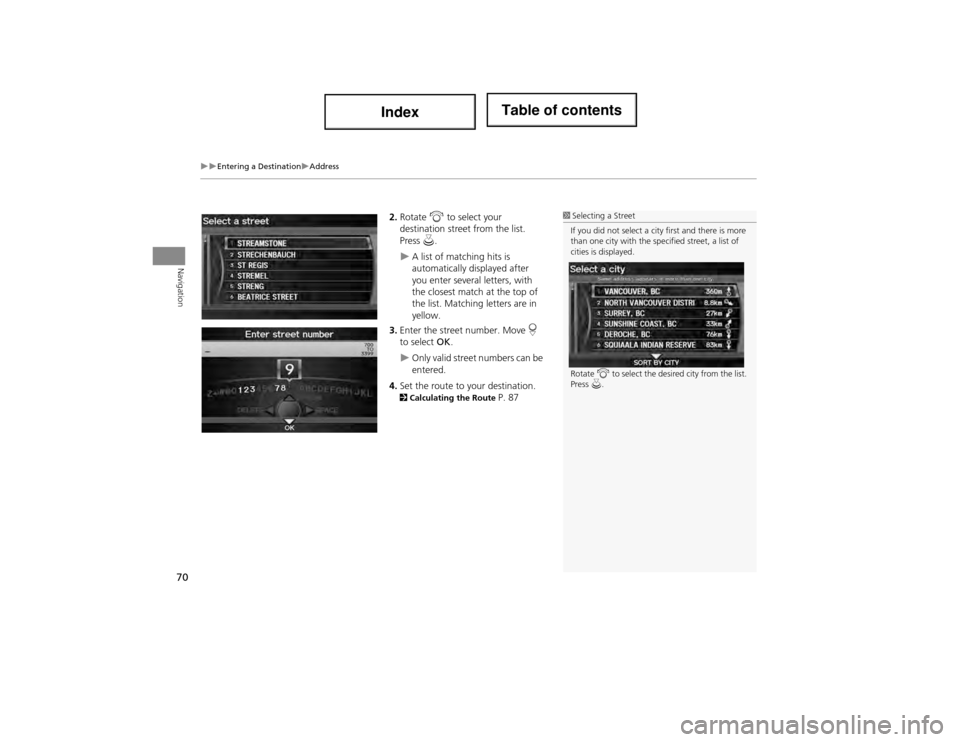
2.Rotate i to select your
destination street from the list.
Press u.
A list of matching hits is
automatically displayed after
you enter several letters, with
the closest match at the top of
the list. Matching letters are in
yellow.
3. Enter the street number. Move r
to select OK.
Only valid street numbers can be
entered.
4. Set the route to your destination.
2 Calculating the Route P. 87
1Selecting a Street
If you did not select a city first and there is more
than one city with the specified street, a list of
cities is displayed.
Rotate i to select the desired city from the list.
Press u.
Page 72 of 234
71
Entering a DestinationAddress Book
Navigation
Address Book
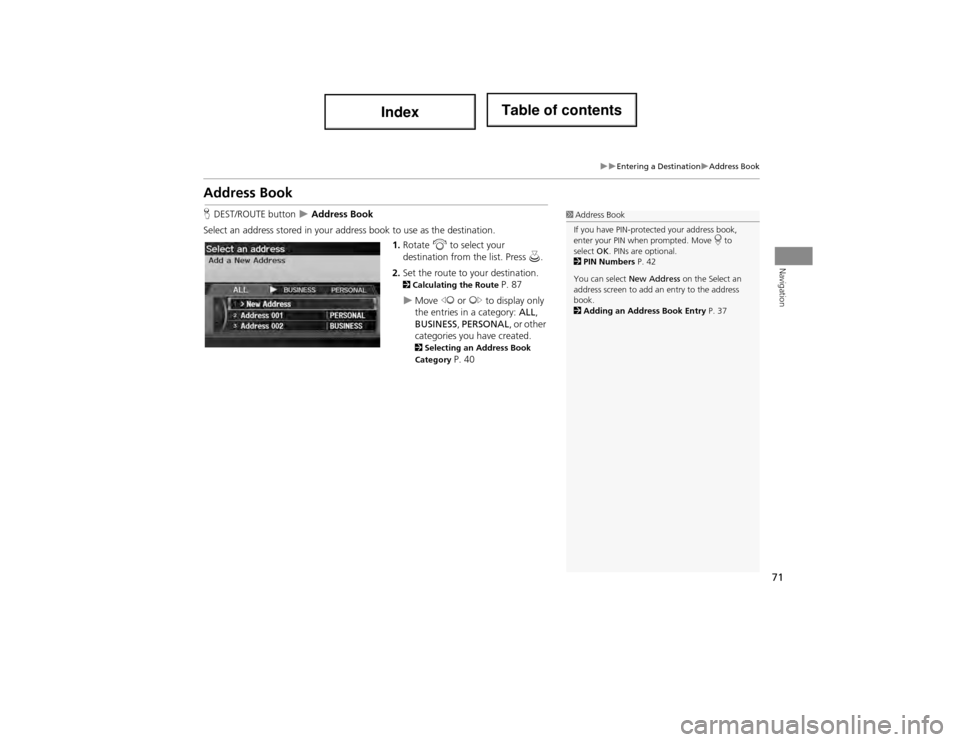
HDEST/ROUTE button Address Book
Select an address stored in your addr ess book to use as the destination.
1.Rotate i to select your
destination from the list. Press u.
2. Set the route to your destination.
2 Calculating the Route P. 87
Move w or y to display only
the entries in a category: ALL,
BUSINESS , PERSONAL , or other
categories you have created.
2 Selecting an Address Book
Category P. 40
1 Address Book
If you have PIN-protected your address book,
enter your PIN when prompted. Move r to
select OK. PINs are optional.
2 PIN Numbers P. 42
You can select New Address on the Select an
address screen to add an entry to the address
book.
2 Adding an Address Book Entry P. 37
Page 73 of 234
72
Entering a DestinationPrevious Destinations
Navigation
Previous Destinations
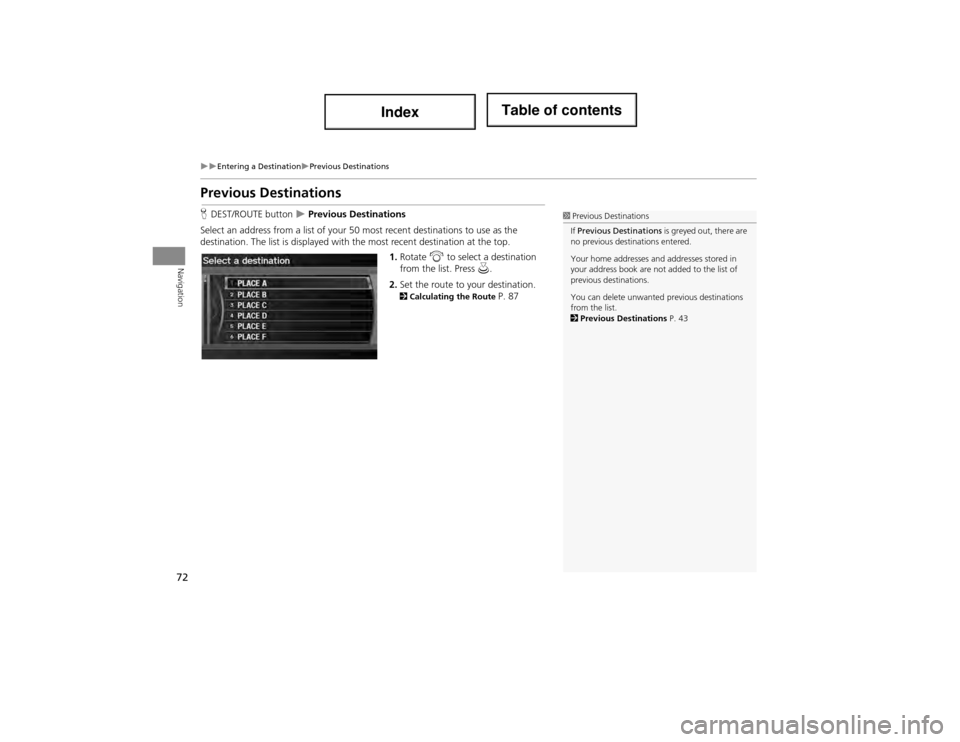
HDEST/ROUTE button Previous Destinations
Select an address from a list of your 50 most recent destinations to use as the
destination. The list is displayed with the most recent destination at the top.
1.Rotate i to select a destination
from the list. Press u .
2. Set the route to your destination.
2 Calculating the Route P. 87
1Previous Destinations
If Previous De stinations is greyed out, there are
no previous destinations entered.
Your home addresses an d addresses stored in
your address book are not added to the list of
previous destinations.
You can delete unwanted previous destinations
from the list.
2 Previous Destinations P. 43
Page 74 of 234
73
Entering a DestinationPlace Name
Navigation
Place Name
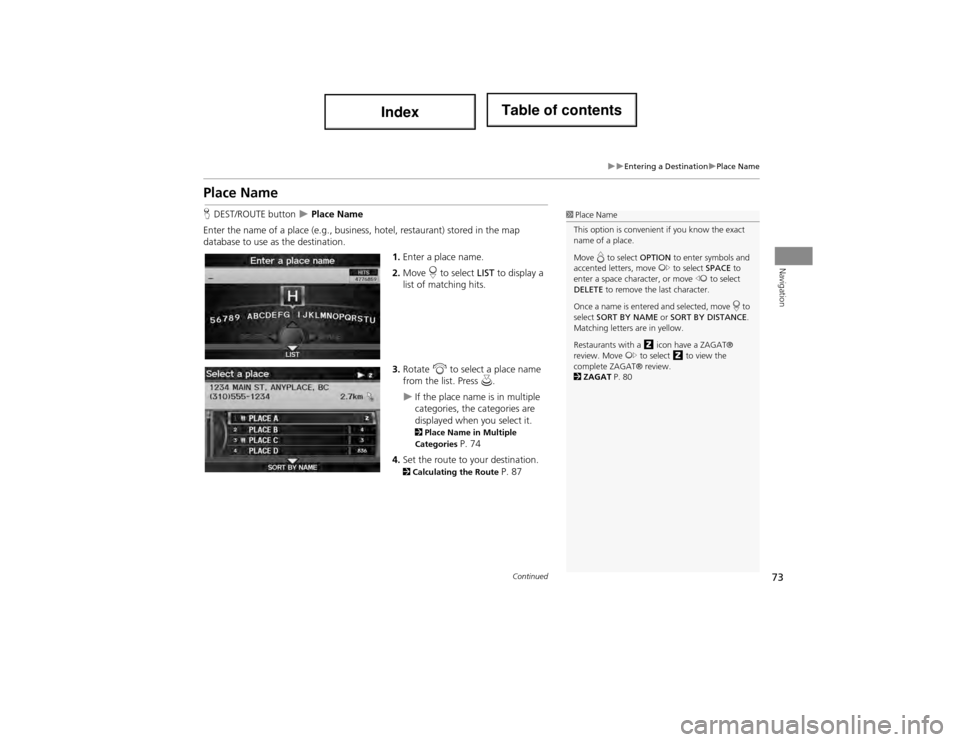
HDEST/ROUTE button Place Name
Enter the name of a place (e.g., business, hotel, restaurant) stored in the map
database to use as the destination.
1.Enter a place name.
2. Move r to select LIST to display a
list of matching hits.
3. Rotate i to select a place name
from the list. Press u.
If the place name is in multiple
categories, the categories are
displayed when you select it.
2Place Name in Multiple
Categories P. 74
4. Set the route to your destination.
2 Calculating the Route P. 87
1Place Name
This option is convenient if you know the exact
name of a place.
Move e to select OPTION to enter symbols and
accented letters, move y to select SPACE to
enter a space character, or move w to select
DELETE to remove the last character.
Once a name is entered and selected, move r to
select SORT BY NAME or SORT BY DISTANCE .
Matching letters are in yellow.
Restaurants with a z icon have a ZAGAT®
review. Move y to select z to view the
complete ZAGAT® review.
2 ZAGAT P. 80
Continued
Page 75 of 234
74
Entering a DestinationPlace Name
Navigation
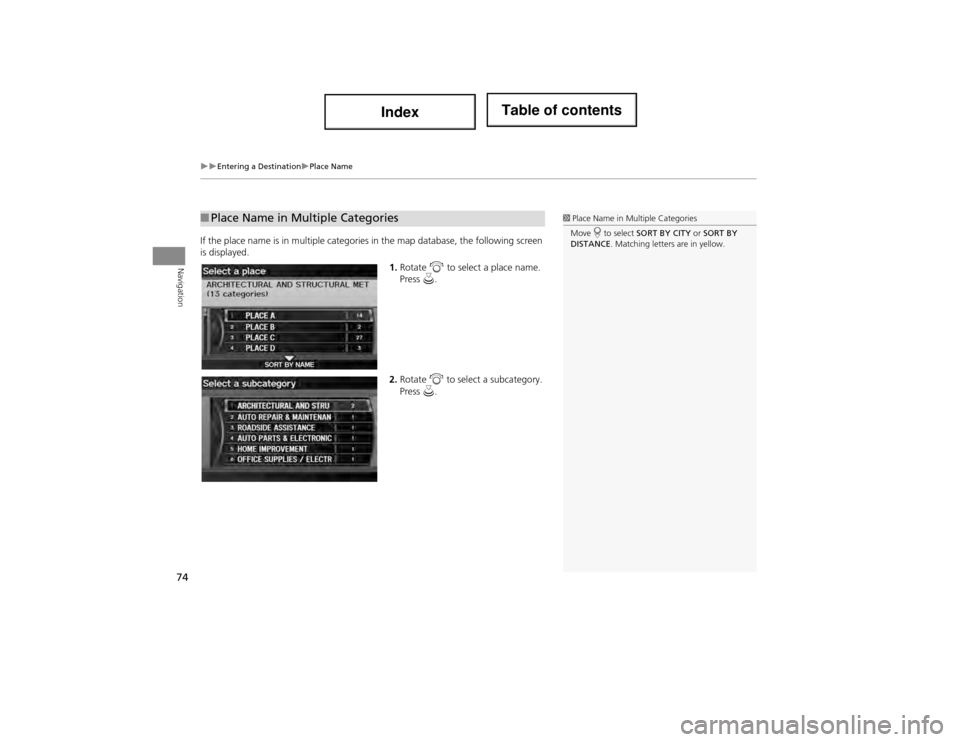
If the place name is in multiple categories in the map database, the following screen
is displayed.1.Rotate i to select a place name.
Press u.
2. Rotate i to select a subcategory.
Press u.
■Place Name in Multiple Categories1 Place Name in Mu ltiple Categories
Move r to select SORT BY CITY or SORT BY
DISTANCE . Matching letters are in yellow.
Page 77 of 234
76
Entering a DestinationPlace Category
Navigation
Place Category
HDEST/ROUTE button Place Category
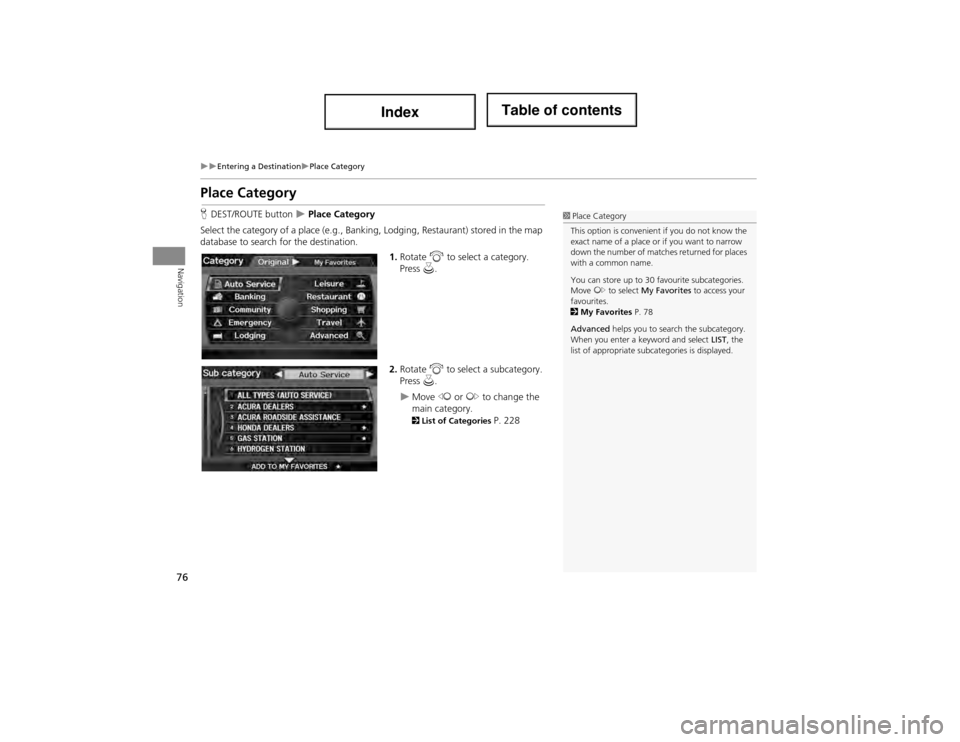
Select the category of a place (e.g., Banking, Lodging, Restaurant) stored in the map
database to search for the destination. 1.Rotate i to select a category.
Press u.
2. Rotate i to select a subcategory.
Press u.
Move w or y to change the
main category.
2 List of Categories P. 228
1Place Category
This option is convenient if you do not know the
exact name of a place or if you want to narrow
down the number of matches returned for places
with a common name.
You can store up to 30 favourite subcategories.
Move y to select My Favorites to access your
favourites.
2 My Favorites P. 78
Advanced helps you to search the subcategory.
When you enter a keyword and select LIST, the
list of appropriate subcategories is displayed.