set clock Acura ILX 2016 Owner's Manual
[x] Cancel search | Manufacturer: ACURA, Model Year: 2016, Model line: ILX, Model: Acura ILX 2016Pages: 521, PDF Size: 24.09 MB
Page 12 of 521
11
Quick Reference Guide
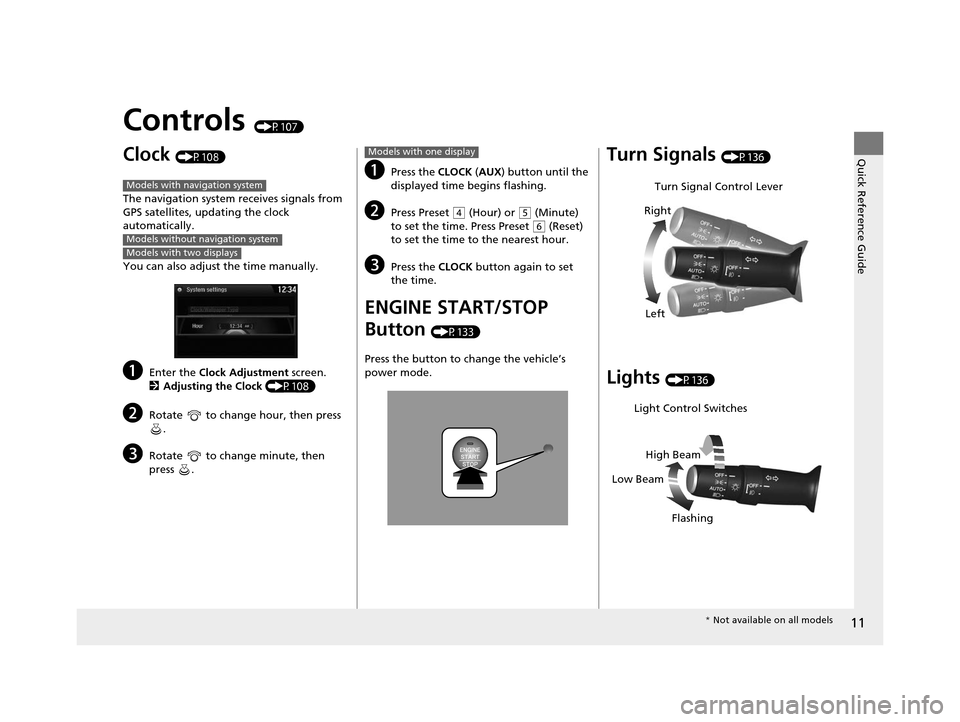
Controls (P107)
Clock (P108)
The navigation system receives signals from
GPS satellites, updating the clock
automatically.
You can also adjust the time manually.
aEnter the Clock Adjustment screen.
2 Adjusting the Clock (P108)
bRotate to change hour, then press
.
cRotate to change minute, then
press .
Models with navigation system
Models without navigation system
Models with two displays
aPress the CLOCK (AUX ) button until the
displayed time begins flashing.
bPress Preset ( 4 (Hour) or (5 (Minute)
to set the time. Press Preset ( 6 (Reset)
to set the time to the nearest hour.
cPress the CLOCK button again to set
the time.
ENGINE START/STOP
Button
(P133)
Press the button to ch ange the vehicle’s
power mode.
Models with one displayTurn Signals (P136)
Lights (P136)
Turn Signal Control Lever
Right
Left
Light Control Switches
Low Beam High Beam
Flashing
* Not available on all models
16 ACURA ILX-31TX66300.book 11 ページ 2014年12月22日 月曜日 午後10時15分
Page 109 of 521
108
Controls
Clock
You can adjust the time in the clock display, with the power mode in ON.
Adjusting the Clock
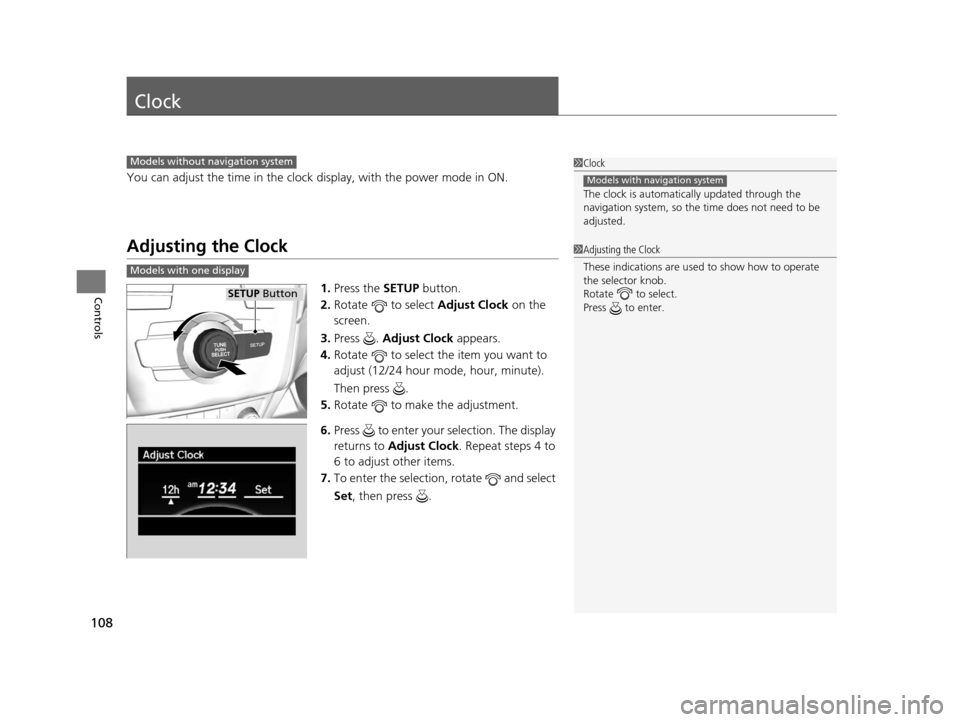
1.Press the SETUP button.
2. Rotate to select Adjust Clock on the
screen.
3. Press . Adjust Clock appears.
4. Rotate to select the item you want to
adjust (12/24 hour mode, hour, minute).
Then press .
5. Rotate to make the adjustment.
6. Press to enter your selection. The display
returns to Adjust Clock . Repeat steps 4 to
6 to adjust other items.
7. To enter the selection, rotate and select
Set , then press .
1Clock
The clock is automatica lly updated through the
navigation system, so the ti me does not need to be
adjusted.
Models with navigation system
Models without navigation system
1 Adjusting the Clock
These indications are used to show how to operate
the selector knob.
Rotate to select.
Press to enter.
Models with one display
SETUP Button
16 ACURA ILX-31TX66300.book 108 ページ 2014年12月22日 月曜日 午後10時15分
Page 110 of 521
109
uuClock uAdjusting the Clock
Controls
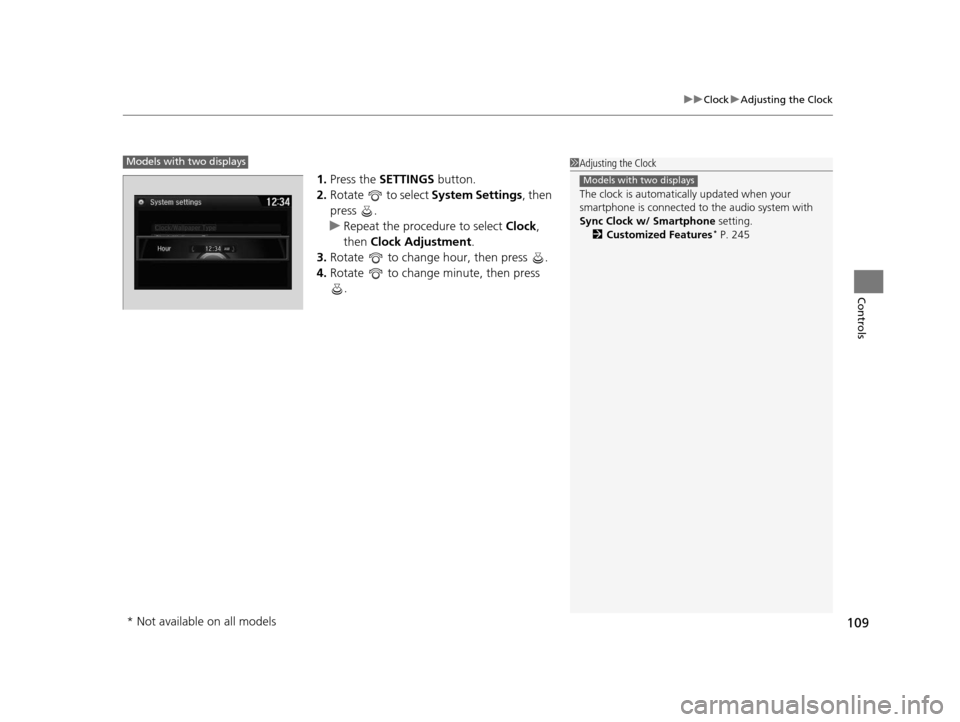
1. Press the SETTINGS button.
2. Rotate to select System Settings, then
press .
u Repeat the procedure to select Clock,
then Clock Adjustment .
3. Rotate to change hour, then press .
4. Rotate to change minute, then press
.
1Adjusting the Clock
The clock is automatica lly updated when your
smartphone is connected to the audio system with
Sync Clock w/ Smartphone setting.
2 Customized Features
* P. 245
Models with two displays
Models with two displays
* Not available on all models
16 ACURA ILX-31TX66300.book 109 ページ 2014年12月22日 月曜日 午後10時15分
Page 172 of 521
171
Features
Audio System Basic Operation
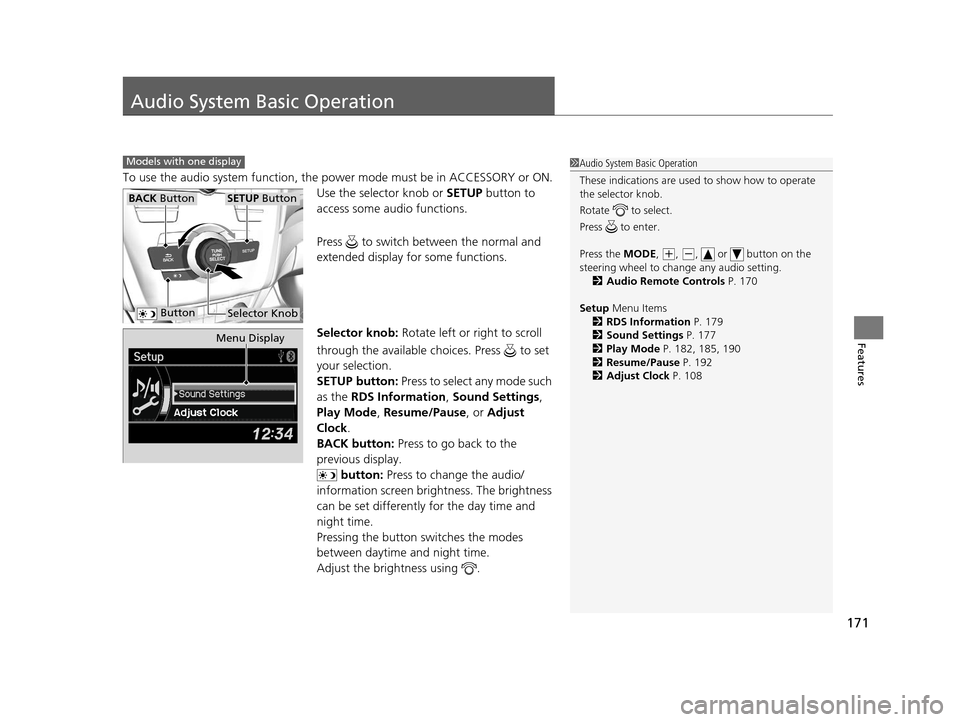
To use the audio system function, the power mode must be in ACCESSORY or ON.
Use the selector knob or SETUP button to
access some audio functions.
Press to switch between the normal and
extended display fo r some functions.
Selector knob: Rotate left or right to scroll
through the available ch oices. Press to set
your selection.
SETUP button: Press to select any mode such
as the RDS Information , Sound Settings,
Play Mode , Resume/Pause , or Adjust
Clock .
BACK button: Press to go back to the
previous display.
button: Press to change the audio/
information screen brightness. The brightness
can be set differently for the day time and
night time.
Pressing the button switches the modes
between daytime and night time.
Adjust the brightness using .
Models with one display1 Audio System Basic Operation
These indications are used to show how to operate
the selector knob.
Rotate to select.
Press to enter.
Press the MODE,
( +, (-, or button on the
steering wheel to cha nge any audio setting.
2 Audio Remote Controls P. 170
Setup Menu Items
2 RDS Information P. 179
2 Sound Settings P. 177
2 Play Mode P. 182, 185, 190
2 Resume/Pause P. 192
2 Adjust Clock P. 108
BACK ButtonSETUP Button
Selector Knob Button
Menu Display
16 ACURA ILX-31TX66300.book 171 ページ 2014年12月22日 月曜日 午後10時15分
Page 174 of 521
173
uuAudio System Basic Operation uAudio/Information Screen
Continued
Features
Shows the current audio information.
2 Audio System Basic Operation P. 171
Shows a clock screen or an image you import.
2Wallpaper Setup P. 175
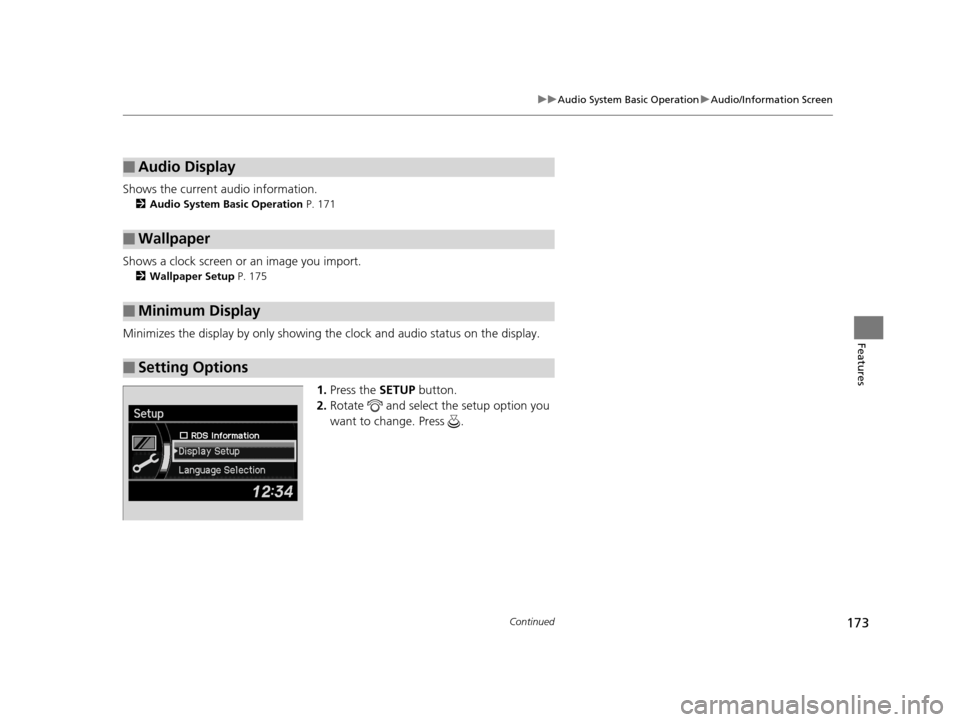
Minimizes the display by only showing the clock and audio status on the display.
1.Press the SETUP button.
2. Rotate and select the setup option you
want to change. Press .
■Audio Display
■Wallpaper
■Minimum Display
■Setting Options
16 ACURA ILX-31TX66300.book 173 ページ 2014年12月22日 月曜日 午後10時15分
Page 202 of 521
201
uuAudio System Basic Operation uAudio/Information Screen
Continued
Features
■Phone
Shows the HFL information.
2 Bluetooth ® HandsFreeLink® P. 268
■Info
Shows the Trip Computer or Clock/Wallpaper and other information. Rotate
to select an item, then press .
■Trip computer (Current Drive)
Shows the range and instant and average fu el economy of the current trip, as well
as the average fuel economy from your last trip.
■Trip computer (History of Trip A)
Shows the range, average fuel economy and distances traveled for the current trip,
as well as the average fuel economy and distances traveled during the last three
driving cycles.
Each time you reset the trip meter A, th e information on the display updates. The
history of the previous three driving cycles is kept.
■Deleting the history manually
1. Move on the History of Trip A screen to select Delete History , then press .
2. A confirmation message appears on the screen. Rotate to select Yes, then
press .
■Clock/Wallpaper
Shows a clock screen or an image you import.
■App
Connects with your smartphone to start the navigation app.
2 Smartphone Navi Apps P. 233
16 ACURA ILX-31TX66300.book 201 ページ 2014年12月22日 月曜日 午後10時15分
Page 203 of 521
uuAudio System Basic Operation uAudio/Information Screen
202
Features
You can change, store, and delete the wa llpaper on the audio/information screen.
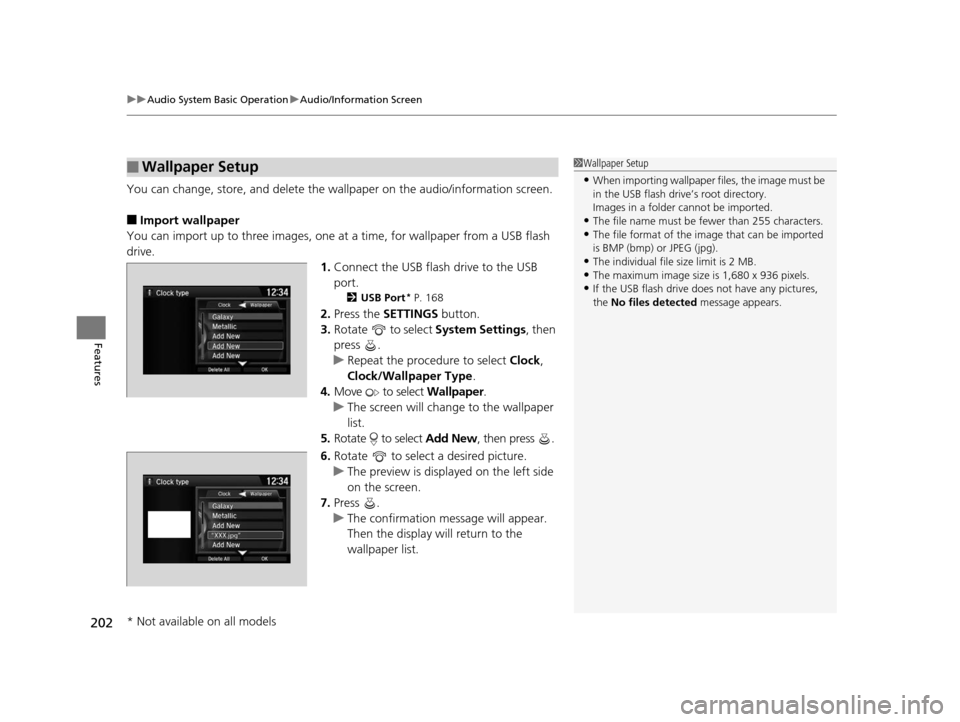
■Import wallpaper
You can import up to three images, one at a time, for wallpaper from a USB flash
drive.
1.Connect the USB flash drive to the USB
port.
2 USB Port* P. 168
2.Press the SETTINGS button.
3. Rotate to select System Settings, then
press .
u Repeat the procedure to select Clock,
Clock/Wallpaper Type .
4. Move to select Wallpaper.
u The screen will change to the wallpaper
list.
5. Rotate to select Add New, then press .
6. Rotate to select a desired picture.
u The preview is displayed on the left side
on the screen.
7. Press .
u The confirmation message will appear.
Then the display will return to the
wallpaper list.
■Wallpaper Setup1Wallpaper Setup
•When importing wallpaper files, the image must be
in the USB flash drive’s root directory.
Images in a folder cannot be imported.
•The file name must be fewer than 255 characters.•The file format of the im age that can be imported
is BMP (bmp) or JPEG (jpg).
•The individual file size limit is 2 MB.•The maximum image size is 1,680 x 936 pixels.
•If the USB flash drive doe s not have any pictures,
the No files detected message appears.
* Not available on all models
16 ACURA ILX-31TX66300.book 202 ページ 2014年12月22日 月曜日 午後10時15分
Page 204 of 521
203
uuAudio System Basic Operation uAudio/Information Screen
Features
■Select wallpaper
1. Press the SETTINGS button.
2. Rotate to select System Settings, then press .
u Repeat the procedure to select Clock/Wallpaper Type .
3. Move to select Wallpaper.
u The screen changes to the wallpaper list.
4. Rotate to select a desired wallpaper.
u The preview is displayed on the left side on the screen.
5. Press .
u The pop-up menu appears on the screen.
6. Rotate to select Set, then press .
u The display will return to the wallpaper list.
■Delete wallpaper
1. Press the SETTINGS button.
2. Rotate to select System Settings, then press .
u Repeat the procedure to select Clock/Wallpaper Type .
3. Move to select Wallpaper.
u The screen changes to the wallpaper list.
4. Rotate to select a wallpaper that you want to delete, then press .
u The preview is displayed on the left side on the screen.
u The pop-up menu appears on the screen.
5. Rotate to select Delete, then press .
u The confirmation me ssage will appear.
6. Rotate to select Yes, then press to delete completely.
u The display will return to the wallpaper list.
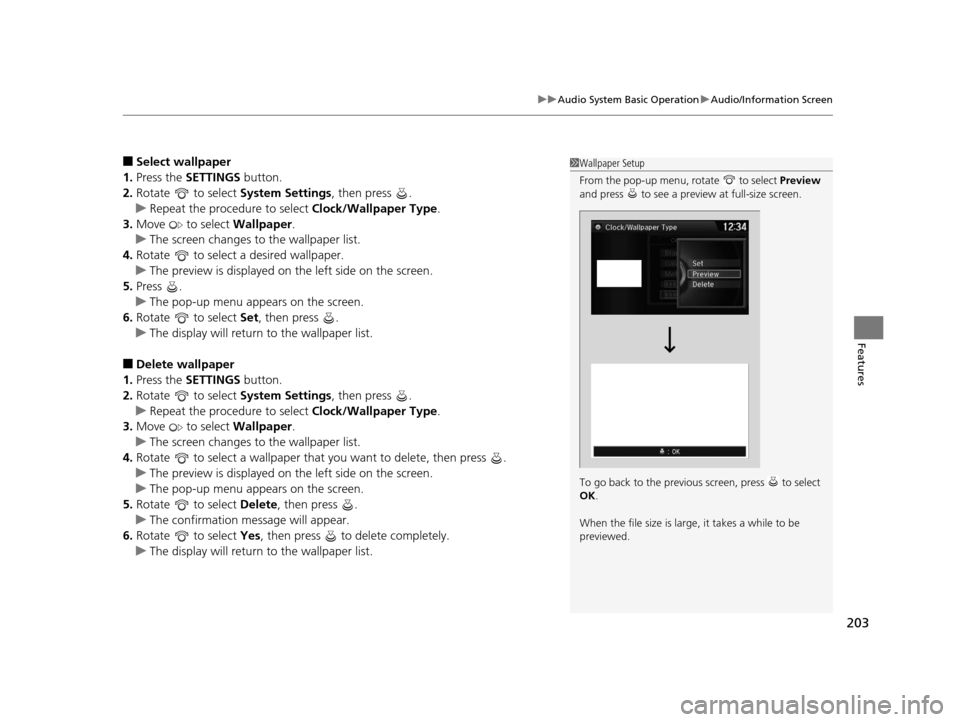
1Wallpaper Setup
From the pop-up menu, rotate to select Preview
and press to see a preview at full-size screen.
To go back to the previous screen, press to select
OK .
When the file size is large, it takes a while to be
previewed.
16 ACURA ILX-31TX66300.book 203 ページ 2014年12月22日 月曜日 午後10時15分
Page 234 of 521
233
uuAudio System Basic Operation uSmartphone Navi Apps
Features
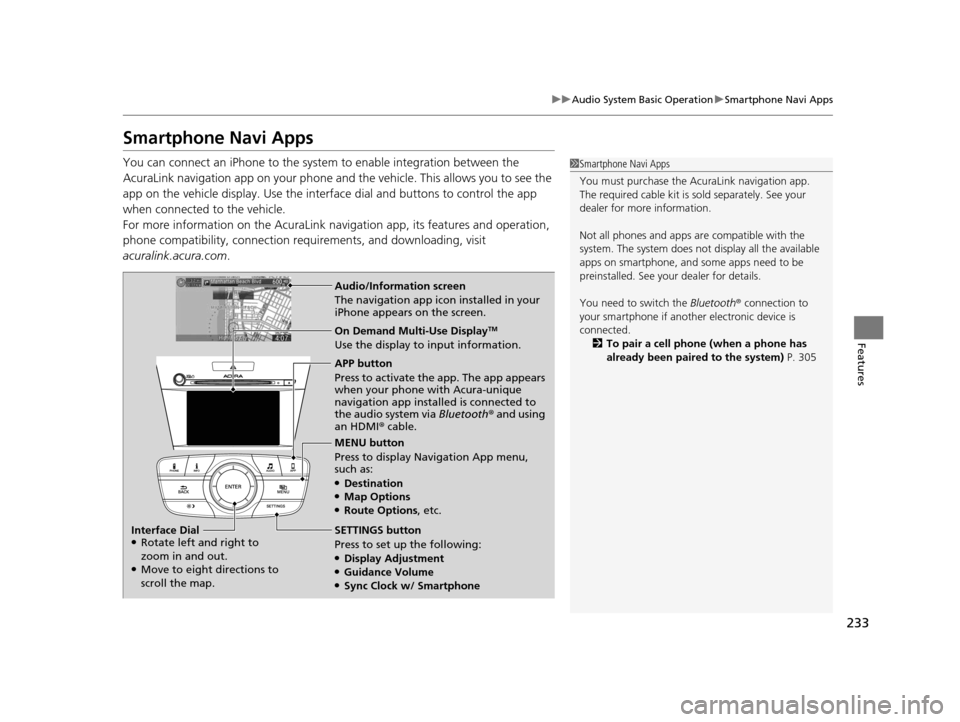
Smartphone Navi Apps
You can connect an iPhone to the syst em to enable integration between the
AcuraLink navigation app on your phone and the vehicle. This allows you to see the
app on the vehicle display. Use the interface dial and buttons to control the app
when connected to the vehicle.
For more information on the AcuraLink navi gation app, its features and operation,
phone compatibility, connection requ irements, and downloading, visit
acuralink.acura.com .1Smartphone Navi Apps
You must purchase the AcuraLink navigation app.
The required cable kit is so ld separately. See your
dealer for more information.
Not all phones and apps ar e compatible with the
system. The system does not display all the available
apps on smartphone, and so me apps need to be
preinstalled. See your dealer for details.
You need to switch the Bluetooth® connection to
your smartphone if another electronic device is
connected. 2 To pair a cell phone (when a phone has
already been paired to the system) P. 305
Audio/Information screen
The navigation app icon installed in your
iPhone appears on the screen.
On Demand Multi-Use DisplayTM
Use the display to input information.
APP button
Press to activate the app. The app appears
when your phone with Acura-unique
navigation app installed is connected to
the audio system via Bluetooth® and using
an HDMI® cable.
MENU button
Press to display Navigation App menu,
such as:
●Destination●Map Options●Route Options , etc.
SETTINGS button
Press to set up the following:
●Display Adjustment●Guidance Volume●Sync Clock w/ Smartphone
Interface Dial
●Rotate left and right to
zoom in and out.
●Move to eight directions to
scroll the map.
16 ACURA ILX-31TX66300.book 233 ページ 2014年12月22日 月曜日 午後10時15分
Page 247 of 521
246
uuCustomized Features*u
Features
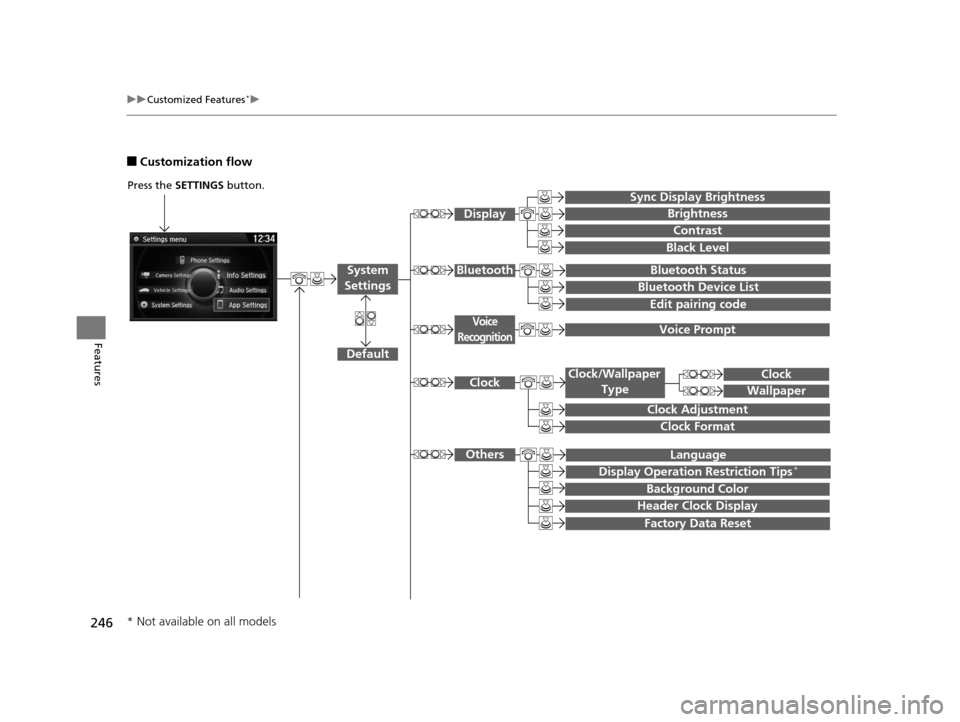
■Customization flow
Press the SETTINGS button.
Voice Prompt
Brightness
Contrast
Black Level
Bluetooth Status
Bluetooth Device List
Edit pairing code
Default
Display
System
SettingsBluetooth
Voice
Recognition
Sync Display Brightness
Factory Data Reset
Background Color
Header Clock Display
Clock
Clock Adjustment
Clock Format
Clock
Language
Display Operation Restriction Tips*
Others
Wallpaper
Clock/Wallpaper Type
* Not available on all models
16 ACURA ILX-31TX66300.book 246 ページ 2014年12月22日 月曜日 午後10時15分