set clock Acura ILX 2019 Owner's Manual
[x] Cancel search | Manufacturer: ACURA, Model Year: 2019, Model line: ILX, Model: Acura ILX 2019Pages: 621, PDF Size: 34.8 MB
Page 12 of 621
11
Quick Reference Guide
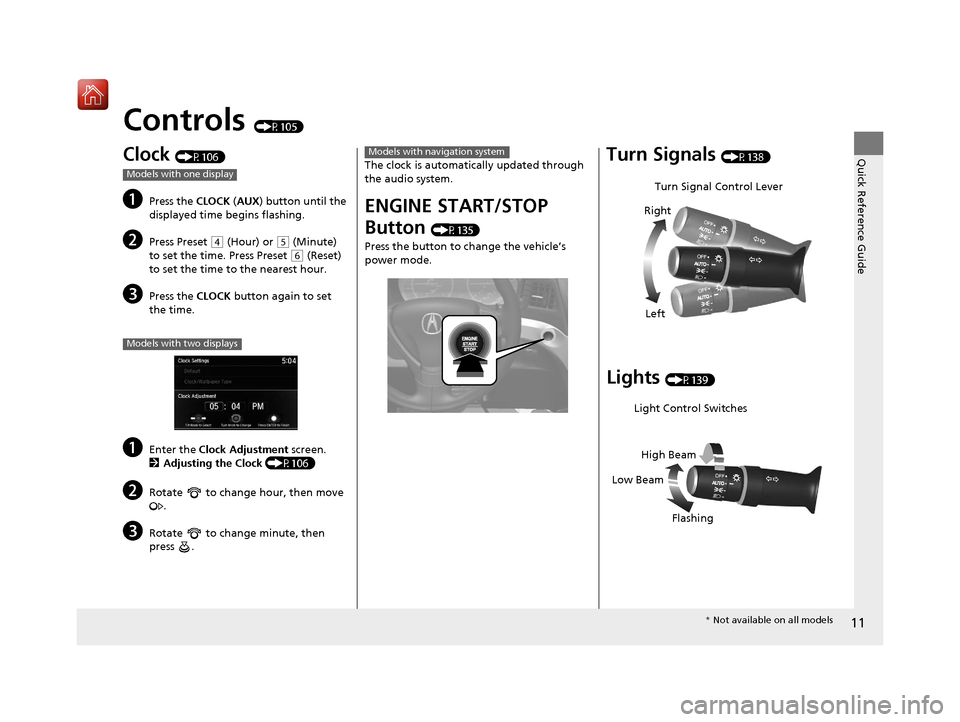
Controls (P105)
Clock (P106)
aPress the CLOCK (AUX ) button until the
displayed time begins flashing.
bPress Preset ( 4 (Hour) or (5 (Minute)
to set the time. Press Preset
( 6 (Reset)
to set the time to the nearest hour.
cPress the CLOCK button again to set
the time.
aEnter the Clock Adjustment screen.
2 Adjusting the Clock (P106)
bRotate to change hour, then move
.
cRotate to change minute, then
press .
Models with one display
Models with two displays
The clock is automati cally updated through
the audio system.
ENGINE START/STOP
Button
(P135)
Press the button to ch ange the vehicle’s
power mode.
Models with navigation systemTurn Signals (P138)
Lights (P139)
Turn Signal Control Lever
Right
Left
Light Control Switches
Low Beam High Beam
Flashing
* Not available on all models
19 ACURA ILX-31TX66610.book 11 ページ 2020年4月17日 金曜日 午前8時52分
Page 107 of 621
106
Controls
Clock
Adjusting the Clock
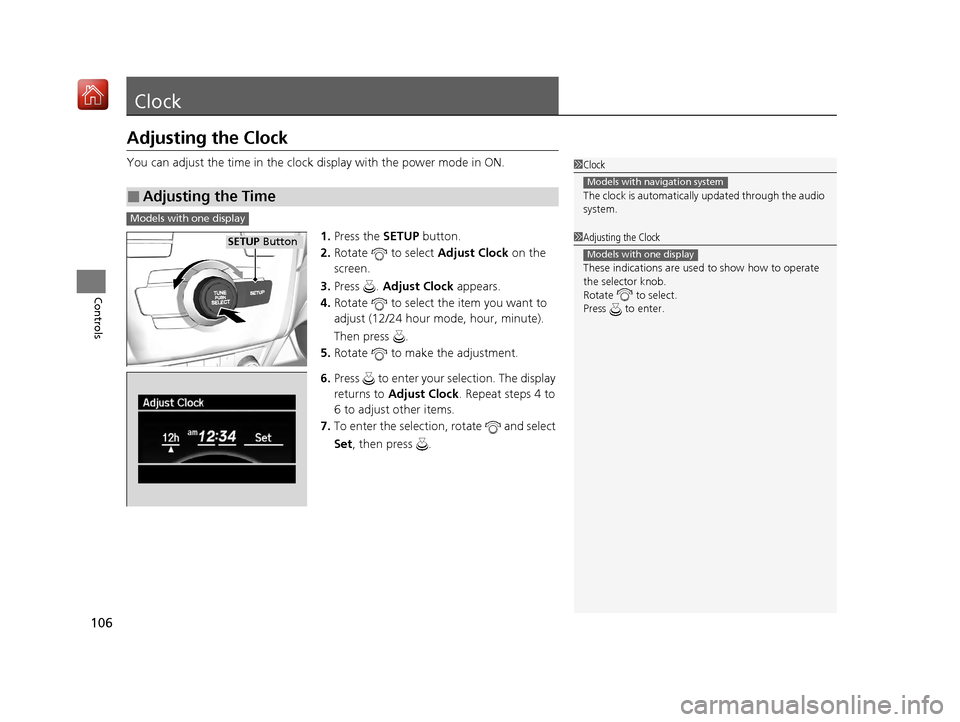
You can adjust the time in the clock display with the power mode in ON.
1. Press the SETUP button.
2. Rotate to select Adjust Clock on the
screen.
3. Press . Adjust Clock appears.
4. Rotate to select the item you want to
adjust (12/24 hour mode, hour, minute).
Then press .
5. Rotate to make the adjustment.
6. Press to enter your selection. The display
returns to Adjust Clock . Repeat steps 4 to
6 to adjust other items.
7. To enter the selection, rotate and select
Set , then press .
■Adjusting the Time
1Clock
The clock is automatically updated through the audio
system.
Models with navigation system
1Adjusting the Clock
These indications are used to show how to operate
the selector knob.
Rotate to select.
Press to enter.
Models with one display
Models with one display
SETUo Button
19 ACURA ILX-31TX66610.book 106 ページ 2020年4月17日 金曜日 午前8時52分
Page 108 of 621
107
uuClock uAdjusting the Clock
Controls
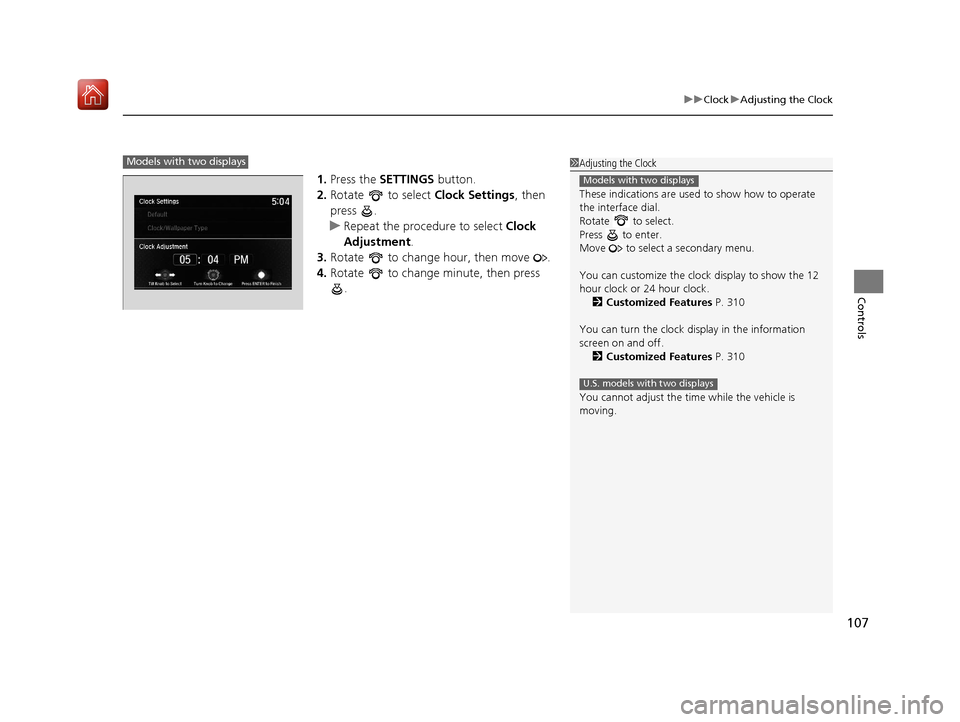
1. Press the SETTINGS button.
2. Rotate to select Clock Settings, then
press .
u Repeat the procedure to select Clock
Adjustment .
3. Rotate to change hour, then move .
4. Rotate to change minute, then press
.
1Adjusting the Clock
These indications are used to show how to operate
the interface dial.
Rotate to select.
Press to enter.
Move to select a secondary menu.
You can customize the clock display to show the 12
hour clock or 24 hour clock. 2 Customized Features P. 310
You can turn the clock display in the information
screen on and off. 2 Customized Features P. 310
You cannot adjust the time while the vehicle is
moving.
Models with two displays
U.S. models with two displays
Models with two displays
19 ACURA ILX-31TX66610.book 107 ページ 2020年4月17日 金曜日 午前8時52分
Page 184 of 621
183
Features
Audio System Basic Operation
To use the audio system function, the power mode must be in ACCESSORY or ON.
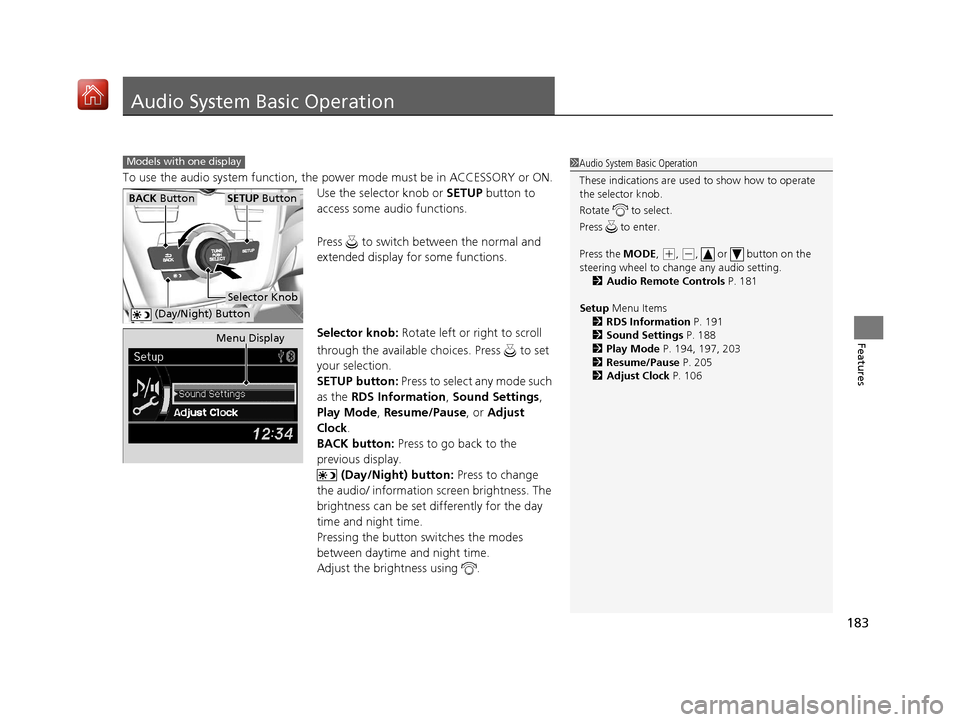
Use the selector knob or SETUP button to
access some audio functions.
Press to switch between the normal and
extended display fo r some functions.
Selector knob: Rotate left or right to scroll
through the available ch oices. Press to set
your selection.
SETUP button: Press to select any mode such
as the RDS Information , Sound Settings,
Play Mode , Resume/Pause , or Adjust
Clock .
BACK button: Press to go back to the
previous display.
(Day/Night) button: Press to change
the audio/ information screen brightness. The
brightness can be set differently for the day
time and night time.
Pressing the button switches the modes
between daytime and night time.
Adjust the brightness using .
Models with one display1 Audio System Basic Operation
These indications are used to show how to operate
the selector knob.
Rotate to select.
Press to enter.
Press the MODE,
( +, (-, or button on the
steering wheel to cha nge any audio setting.
2 Audio Remote Controls P. 181
Setup Menu Items
2 RDS Information P. 191
2 Sound Settings P. 188
2 Play Mode P. 194, 197, 203
2 Resume/Pause P. 205
2 Adjust Clock P. 106
BACK ButtonSETUP Button
Selector Knob
(Day/Night) Button
Menu Display
19 ACURA ILX-31TX66610.book 183 ページ 2020年4月17日 金曜日 午前8時52分
Page 186 of 621

185
uuAudio System Basic Operation uAudio/Information Screen
Continued
Features
■Audio display
Shows the current audio information.
2 Audio System Basic Operation P. 183
■Wallpaper
Shows a clock screen or an image you import.
2 Wallpaper Setup P. 186
■Minimum display
Minimizes the display by only showing the clock and audio status on the display.
19 ACURA ILX-31TX66610.book 185 ページ 2020年4月17日 金曜日 午前8時52分
Page 207 of 621
206
Features
Audio System Basic Operation
To use the audio system, the power mode must be in ACCESSORY or ON.
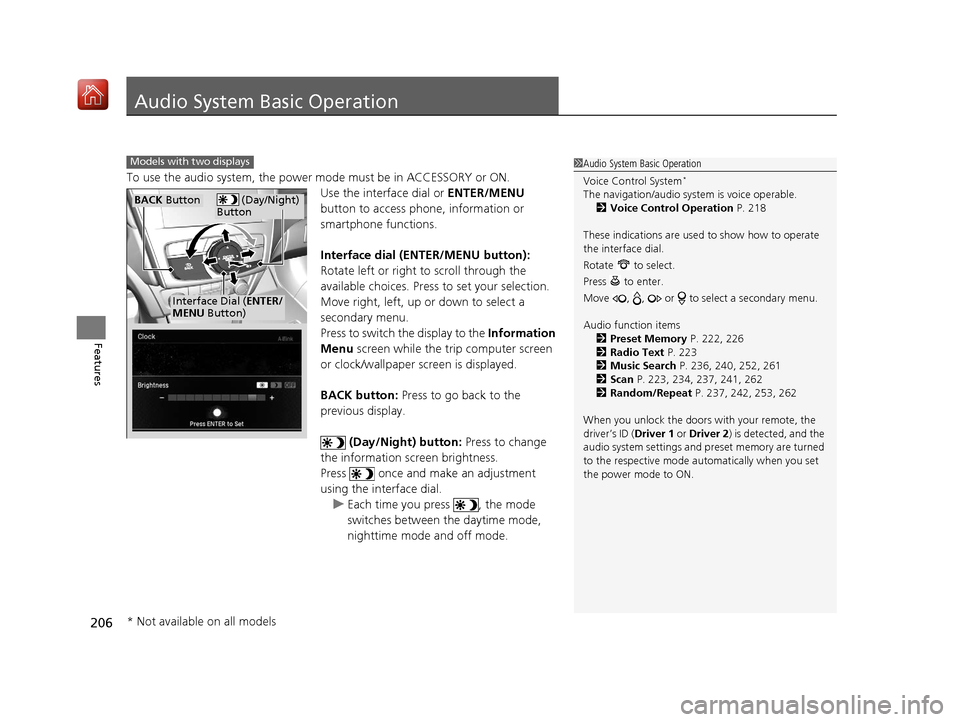
Use the interface dial or ENTER/MENU
button to access phone, information or
smartphone functions.
Interface dial (ENTER/MENU button):
Rotate left or right to scroll through the
available choices. Press to set your selection.
Move right, left, up or down to select a
secondary menu.
Press to switch the display to the Information
Menu screen while the trip computer screen
or clock/wallpaper screen is displayed.
BACK button: Press to go back to the
previous display.
(Day/Night) button: Press to change
the information screen brightness.
Press once and make an adjustment
using the interface dial. u Each time you press , the mode
switches between the daytime mode,
nighttime mode and off mode.
1Audio System Basic Operation
Voice Control System
*
The navigation/audio system is voice operable.
2 Voice Control Operation P. 218
These indications are used to show how to operate
the interface dial.
Rotate to select.
Press to enter.
Move , , or to se lect a secondary menu.
Audio function items 2 Preset Memory P. 222, 226
2 Radio Text P. 223
2 Music Search P. 236, 240, 252, 261
2 Scan P. 223, 234, 237, 241, 262
2 Random/Repeat P. 237, 242, 253, 262
When you unlock the doors with your remote, the
driver’s ID ( Driver 1 or Driver 2) is detected, and the
audio system settings and pr eset memory are turned
to the respective mode automatically when you set
the power mode to ON.
Models with two displays
(Day/Night)
ButtonBACK Button
Interface Dial ( ENTER/
MENU Button)
* Not available on all models
19 ACURA ILX-31TX66610.book 206 ページ 2020年4月17日 金曜日 午前8時52分
Page 212 of 621
211
uuAudio System Basic Operation uInformation Screen
Continued
Features
Information Screen
Displays the navigation*, HFL information, clock/wallp aper, trip computer, Apple
CarPlay and Android Auto. From this screen, you can go to various setup options.
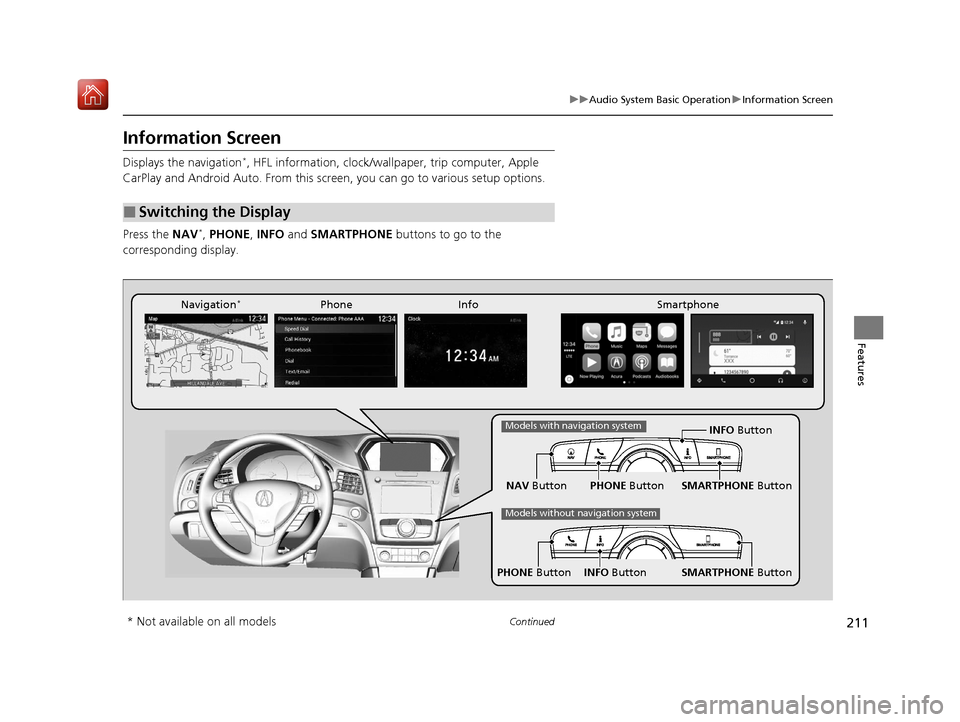
Press the NAV
*, PHONE, INFO and SMARTPHONE buttons to go to the
corresponding display.
■Switching the Display
SMARTPHONE Button
PHONE Button INFO Button
Phone Info Smartphone
SMARTPHONE Button
PHONE Button
NAV Button INFO Button
Models with navigation system
Models without navigation system
Navigation*
* Not available on all models
19 ACURA ILX-31TX66610.book 211 ページ 2020年4月17日 金曜日 午前8時52分
Page 213 of 621
212
uuAudio System Basic Operation uInformation Screen
Features
■Navigation*
Shows the navigation screen.
2 Refer to the Navigation System Manual
■Phone
Shows the HFL information.
2 Bluetooth ® HandsFreeLink ® P. 368
■Info
Shows the AcuraLink/Messages*, Trip Computer , Clock, Traffic Incidents* or
Voice Recognition Guide*. Press or INFO button to display the Information
Menu screen.
AcuraLink/Messages
*:
Shows a AcuraLink ® message menu list.
2AcuraLink®* P. 410
Trip Computer :
Current Drive
Shows the range and instant and average fuel economy of the current trip, as well
as the average fuel economy from your last trip.
History of Trip A
Shows the range, average fuel economy an d distances traveled for the current trip,
as well as the average fuel economy and distances traveled during the last three
driving cycles.
Each time you reset the trip meter A, the information on the display updates. The
history of the previous th ree driving cycles is kept.
* Not available on all models
19 ACURA ILX-31TX66610.book 212 ページ 2020年4月17日 金曜日 午前8時52分
Page 215 of 621
uuAudio System Basic Operation uInformation Screen
214
Features
You can change, store, and delete the wallpaper on the information screen.
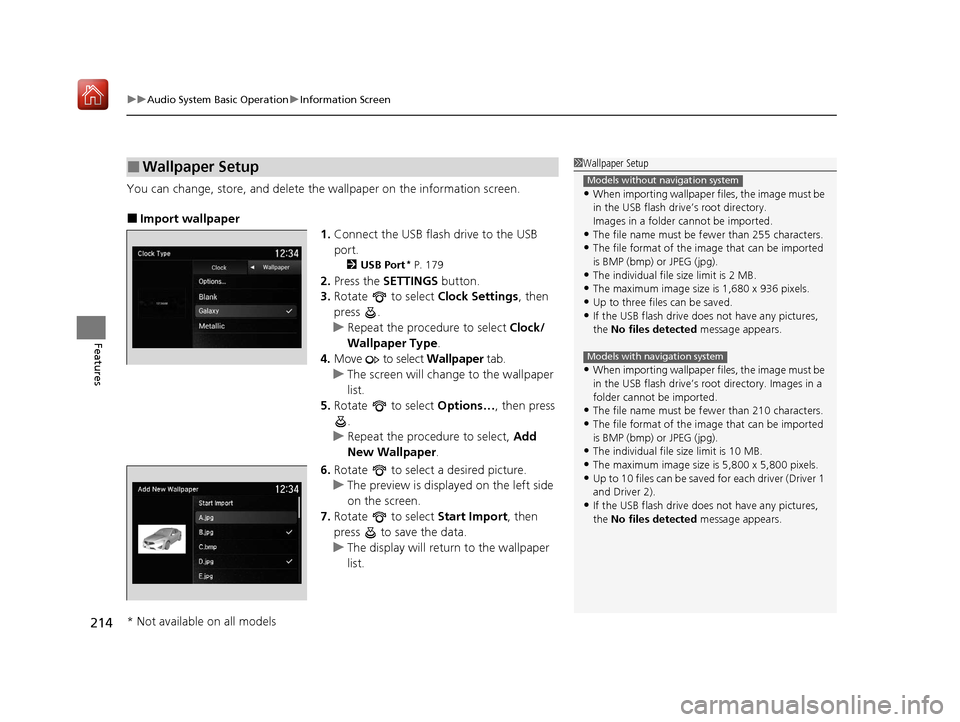
■Import wallpaper
1.Connect the USB flash drive to the USB
port.
2 USB Port* P. 179
2.Press the SETTINGS button.
3. Rotate to select Clock Settings, then
press .
u Repeat the procedure to select Clock/
Wallpaper Type .
4. Move to select Wallpaper tab.
u The screen will change to the wallpaper
list.
5. Rotate to select Options…, then press
.
u Repeat the procedure to select, Add
New Wallpaper .
6. Rotate to select a desired picture.
u The preview is displayed on the left side
on the screen.
7. Rotate to select Start Import, then
press to save the data.
u The display will return to the wallpaper
list.
■Wallpaper Setup1Wallpaper Setup
•When importing wallpaper files, the image must be
in the USB flash drive’s root directory.
Images in a folder cannot be imported.
•The file name must be fewer than 255 characters.
•The file format of the im age that can be imported
is BMP (bmp) or JPEG (jpg).
•The individual file size limit is 2 MB.
•The maximum image size is 1,680 x 936 pixels.
•Up to three files can be saved.•If the USB flash drive doe s not have any pictures,
the No files detected message appears.
•When importing wallpaper files, the image must be
in the USB flash drive’s root directory. Images in a
folder cannot be imported.
•The file name must be fewer than 210 characters.
•The file format of the im age that can be imported
is BMP (bmp) or JPEG (jpg).
•The individual file size limit is 10 MB.
•The maximum image size is 5,800 x 5,800 pixels.
•Up to 10 files can be saved for each driver (Driver 1
and Driver 2).
•If the USB flash drive doe s not have any pictures,
the No files detected message appears.
Models without navigation system
Models with navigation system
* Not available on all models
19 ACURA ILX-31TX66610.book 214 ページ 2020年4月17日 金曜日 午前8時52分
Page 216 of 621
215
uuAudio System Basic Operation uInformation Screen
Features
■Select wallpaper
1. Press the SETTINGS button.
2. Rotate to select Clock Settings, then press .
u Repeat the procedure to select Clock/Wallpaper Type .
3. Move to select Wallpaper.
u The screen changes to the wallpaper list.
4. Rotate to select a desired wallpaper, then press .
u The preview is displayed on the left side on the screen.
u The pop-up menu appears on the screen.
5. Rotate to select Set, then press .
u The display will return to the Clock Settings screen.
■Delete wallpaper
1. Press the SETTINGS button.
2. Rotate to select Clock Settings, then press .
u Repeat the procedure to select Clock/Wallpaper Type .
3. Move to select Wallpaper.
u The screen changes to the wallpaper list.
4. Rotate to select a wallpaper that you want to delete, then press .
u The preview is displayed on the left side on the screen.
u The pop-up menu appears on the screen.
5. Rotate to select Delete, then press .
u The confirmation me ssage will appear.
6. Rotate to select Yes, then press to delete completely.
u The display will return to the wallpaper list.
19 ACURA ILX-31TX66610.book 215 ページ 2020年4月17日 金曜日 午前8時52分