belt Acura Integra 2000 Hatchback Service Manual
[x] Cancel search | Manufacturer: ACURA, Model Year: 2000, Model line: Integra, Model: Acura Integra 2000Pages: 279, PDF Size: 3.57 MB
Page 86 of 279
Foldin
g Rea r Seat , Carg o Are a Cove r
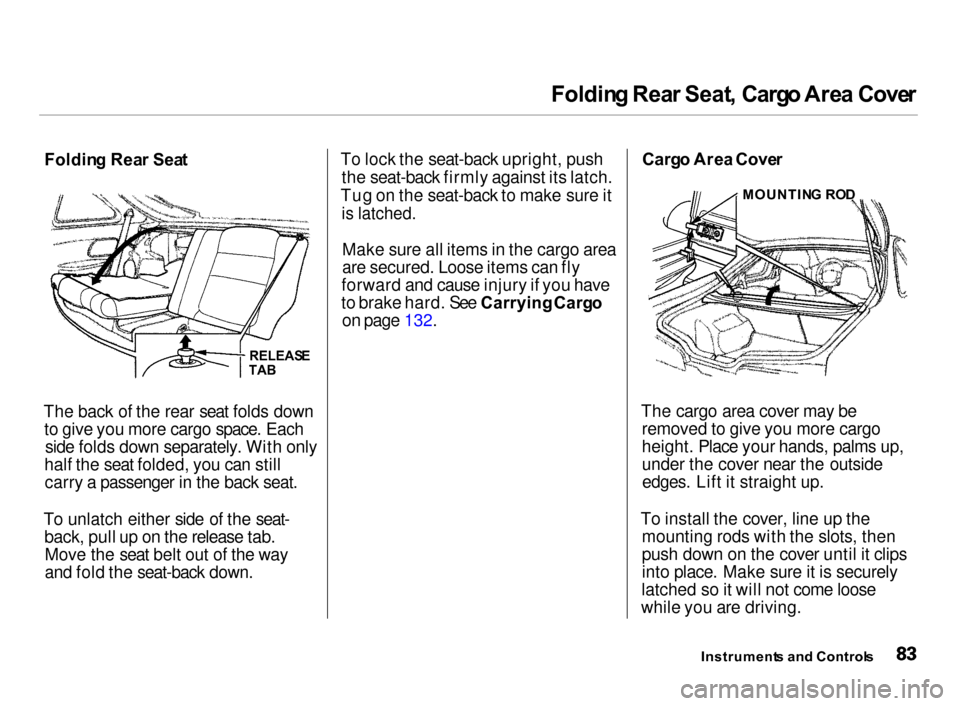
Foldin g Rea r Sea t
RELEASE
TA B
The back of the rear seat folds down to give you more cargo space. Eachside folds down separately. With only
half the seat folded, you can still carry a passenger in the back seat.
To unlatch either side of the seat- back, pull up on the release tab.Move the seat belt out of the way
and fold the seat-back down. To lock the seat-back upright, push
the seat-back firmly against its latch.
Tug on the seat-back to make sure it
is latched.
Make sure all items in the cargo area
are secured. Loose items can fly
forward and cause injury if you have
to brake hard. See Carrying Cargo
on page 132. Carg
o Are a Cove r
The cargo area cover may be removed to give you more cargo
height. Place your hands, palms up,
under the cover near the outsideedges. Lift it straight up.
To install the cover, line up the mounting rods with the slots, then
push down on the cover until it clips
into place. Make sure it is securely
latched so it will not come loose
while you are driving.
Instrument s an d Control s
MOUNTIN
G RO D
Page 139 of 279
Preparin
g to Driv e
You should do the following checks and adjustments every day before
you drive your car.
1. Make sure all windows, mirrors,
and outside lights are clean and
unobstructed. Remove frost, snow, or ice.
2. Check that the hood and hatch are
fully closed.
3. Visually check the tires. If a tire
looks low, use a gauge to check its
pressure.
4. Check that any items you may be
carrying with you inside are stored
properly or fastened down
securely.
5. Check the adjustment of the seat
(see page 79 ).
6. Check the adjustment of the
inside and outside mirrors (see
page 86 ).
7. Check the adjustment of the
steering wheel (see page 66).
8. Make sure the doors are securely
closed and locked.
9. Fasten your seat belt. Check that
your passengers have fastened
their seat belts (see page 16).
10.Turn the ignition switch ON (II).
Check the indicator lights in the
instrument panel.
11.Start the engine (see page 137).
12.Check the gauges and indicator
lights in the instrument panel (see
page 53).
Drivin g
Page 160 of 279
Maintenanc
e
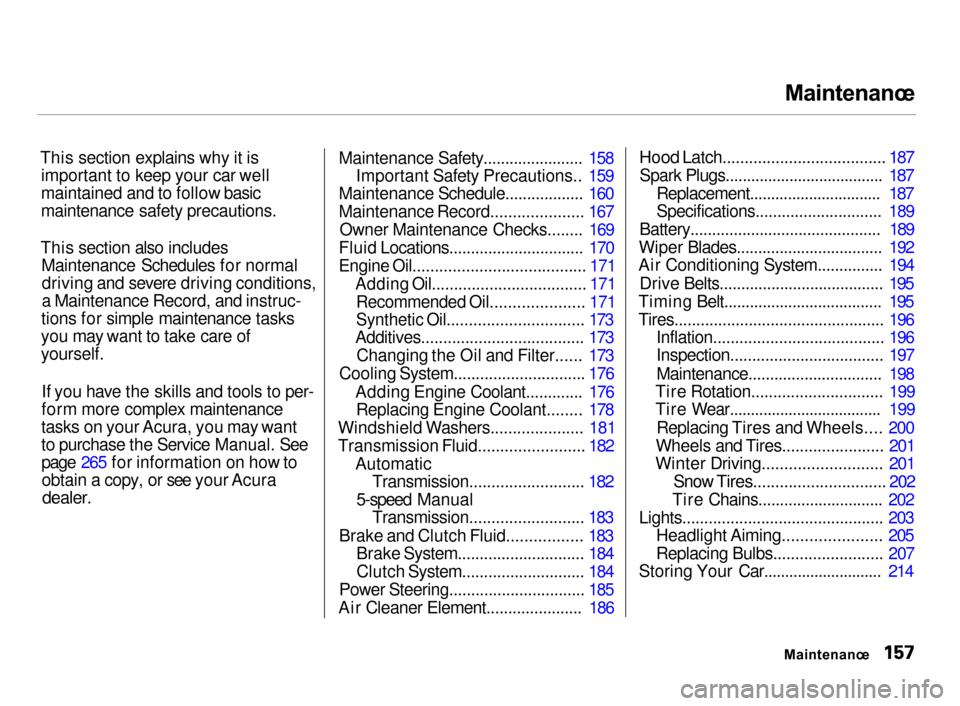
This section explains why it is important to keep your car well
maintained and to follow basic
maintenance safety precautions.
This section also includes Maintenance Schedules for normaldriving and severe driving conditions,
a Maintenance Record, and instruc-
tions for simple maintenance tasks
you may want to take care of
yourself.
If you have the skills and tools to per-
form more complex maintenance
tasks on your Acura, you may want
to purchase the Service Manual. See
page 265 for information on how to obtain a copy, or see your Acura
dealer.
Maintenance Safety....................... 158
Important Safety Precautions.. 159
Maintenance Schedule.................. 160
Maintenance Record..................... 167
Owner Maintenance Checks........ 169
Fluid Locations............................... 170
Engine Oil....................................... 171 Adding Oil................................... 171
Recommended Oil..................... 171
Synthetic Oil............................... 173
Additives..................................... 173
Changing the Oil and Filter...... 173
Cooling System.............................. 176
Adding Engine Coolant............. 176Replacing Engine Coolant........ 178
Windshield Washers..................... 181
Transmission Fluid........................ 182 AutomaticTransmission.......................... 182
5-speed Manual Transmission.......................... 183
Brake and Clutch Fluid................. 183 Brake System............................. 184
Clutch System............................ 184
Power Steering............................... 185
Air Cleaner Element...................... 186
Hood Latch..................................... 187
Spark Plugs..................................... 187 Replacement............................... 187
Specifications............................. 189
Battery............................................ 189
Wiper Blades.................................. 192
Air Conditioning System............... 194
Drive Belts...................................... 195
Timing Belt..................................... 195
Tires................................................ 196 Inflation....................................... 196
Inspection................................... 197
Maintenance............................... 198
Tire Rotation.............................. 199
Tire Wear.................................... 199
Replacing Tires and Wheels.... 200
Wheels and Tires....................... 201
Winter Driving........................... 201
Snow Tires.............................. 202
Tire Chains............................. 202
Lights.............................................. 203 Headlight Aiming...................... 205
Replacing Bulbs......................... 207
Storing Your Car............................ 214
Maintenance
Page 169 of 279
*
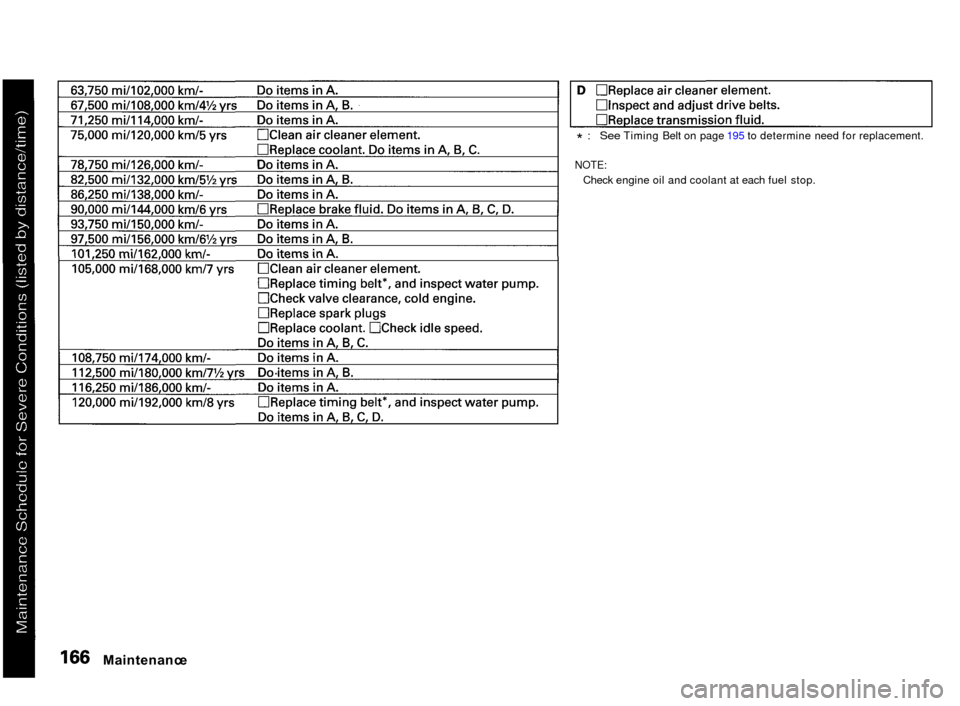
: See Timing Belt on page 195 to determine need for replacement.
NOTE:
Check engine oil and coolant at each fuel stop.
Maintenanc e
Page 198 of 279
Driv
e Belts , Timin g Bel t
Driv e Belt s
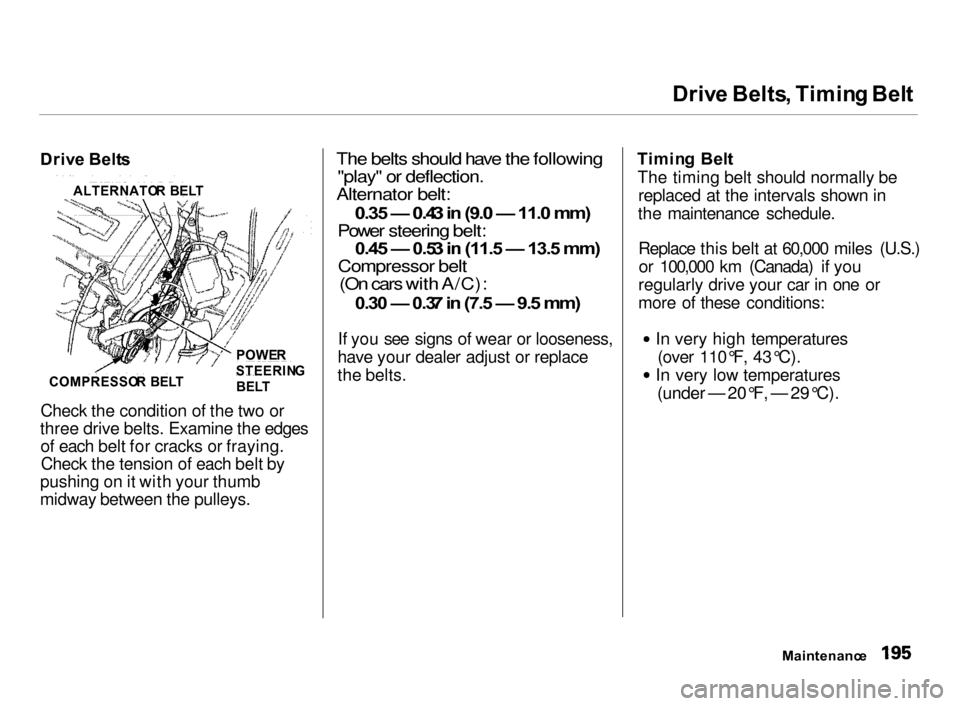
Check the condition of the two or
three drive belts. Examine the edges of each belt for cracks or fraying.Check the tension of each belt by
pushing on it with your thumb
midway between the pulleys.
The belts should have the following
"play" or deflection.
Alternator belt:
0.35 — 0.43 in (9.0 — 11.0 mm)
Power steering belt:
0.45 — 0.53 in (11.5 — 13.5 mm)
Compressor belt
(On cars with A/C):
0.30 — 0.37 in (7.5 — 9.5 mm)
If you see signs of wear or looseness,
have your dealer adjust or replace
the belts. Timin
g Bel t
The timing belt should normally be replaced at the intervals shown in
the maintenance schedule.
Replace this belt at 60,000 miles (U.S.)or 100,000 km (Canada) if you
regularly drive your car in one or
more of these conditions: In very high temperatures
(over 110°F, 43°C). In very low temperatures
(under — 20°F, — 29°C).
Maintenance
ALTERNATO
R BEL T
POWER
STEERIN G
BEL T
COMPRESSO
R BEL T
Page 218 of 279
Appearance Care
Regular cleaning and polishing of
your Acura helps to keep it "new" looking. This section gives you hints on how to clean your car and
preserve its appearance: the paint,
brightwork, wheels and interior. Also included are several things you cando to help prevent corrosion. Exterior Care.................................. 216
Washing...................................... 216Power Antenna Cleaning.......... 216
Waxing........................................ 217
Aluminum Wheels..................... 217
Paint Touch-up...........................
217
Interior Care................................... 218 Carpeting.................................... 218
Fabric.......................................... 218
Vinyl........................................... 218 Leather........................................ 218
Seat Belts.................................... 218
Windows..................................... 219
Air Fresheners........................... 219
Corrosion Protection..................... 220
Body Repairs.................................. 221
Appearance Car e
Page 221 of 279

Interio
r Car e
Carpetin g
Vacuum the carpeting frequently to remove dirt. Ground-in dirt will make
the carpet wear out faster. Periodically shampoo the carpet to
keep it looking new. Use one of the
foam-type carpet cleaners on the market. Follow the instructions that
come with the cleaner, applying it
with a sponge or soft brush. Keep the carpeting as dry as possible bynot adding water to the foam.
Fabri c
Vacuum dirt and dust out of the material frequently. For generalcleaning, use a solution of mild soap
and lukewarm water, letting it air dry.
To clean off stubborn spots, use a commercially-available fabric cleaner.
Test it on a hidden area of the fabric first, to make sure it does not bleachor stain the fabric. Follow the
instructions that come with the
cleaner.
Viny
l
Remove dirt and dust with a vacuum
cleaner. Wipe the vinyl with a soft
cloth dampened in a solution of mild soap and water. Use the same
solution with a soft-bristle brush on
more difficult spots. You can also use
commercially-available spray or
foam-type vinyl cleaners.
Leathe r
On some models
Vacuum dirt and dust from the leather frequently. Pay particular
attention to the pleats and seams.Clean the leather with a soft cloth
dampened with clear water, then
buff it with a clean, dry cloth. If
further cleaning is needed, use a soap specifically for leather, such as
saddle soap. Apply this soap with a
damp, soft cloth. Wipe down and
buff as described above. Sea
t Belt s
If your seat belts get dirty, you can
use a soft brush with a mixture of
mild soap and warm water to clean
them. Do not use bleach, dye, or cleaning solvents. They can weaken
the belt material. Let the belts air- dry before you use the car.
Appearanc e Car e
LOO
P
Page 222 of 279
Interio
r Car e
Dirt build-up in the loops of the seat
belt anchors can cause the belts to retract slowly. Wipe the insides of
the loops with a clean cloth dampened in mild soap and warm
water or isopropyl alcohol. Window
s
Clean the windows, inside and out,
with a commercially-available glass cleaner. You can also use a mixtureof one part white vinegar to ten parts
water. This will remove the haze that
builds up on the inside of the
windows. Use a soft cloth or paper towels to clean all glass and clear
plastic surfaces.
The rear window defogger wires are
bonded to the inside of the glass.
Wiping vigorously up-and-down can
dislodge and break the defogger wires.
When cleaning the rear window, use
gentle pressure and wipe side-to-side.
Ai
r Freshener s
If you want to use an air freshener/ deodorizer in the interior of your car,
it is best to use a solid type. Some
liquid air fresheners contain chemi- cals that may cause parts of the
interior trim and fabric to crack or discolor.
If you use a liquid air freshener,
make sure you fasten it securely so it does not spill as you drive.
Appearance Car e
NOTIC
E
Page 265 of 279
Warrant
y Coverage s
U.S . Owner s
Your new Acura is covered by these
warranties:
New Car Limited Warranty — covers
your new vehicle, except for the
battery, emissions control systems
and accessories, against defects in
materials and workmanship.
Emissions Control Systems Defects
Warranty and Emissions Performance Warranty — these two
warranties cover your vehicle's emis- sions control systems. Time, mileage,
and coverage are conditional. Please
read the warranty manual for exact
information.
Original Equipment Battery Limited
Warranty — this warranty gives up
to 100 percent credit toward a
replacement battery.
Seat Belt Limited Warranty — a seat
belt that fails to function properly is covered for the useful life of the
vehicle.
Rust Perforation Limited Warranty
— all exterior body panels are
covered for rust-through from the
inside for the specified time period
with no mileage limit.
Accessory Limited Warranty —
Genuine Acura Accessories are
covered under this warranty. Time
and mileage limits depend on the
type of accessory and other factors. Please read your warranty manual
for details.
Replacement Parts Limited
Warranty — covers all Genuine
Honda replacement parts against defects in materials and workman-
ship.
Replacement Battery Limited
Warranty — provides prorated
coverage for a replacement battery
purchased from an Acura dealer.
Replacement Muffler Lifetime
Limited Warranty — provides
coverage for as long as the pur-
chaser of the muffler owns the car.
Restrictions and exclusions apply to all these warranties. Please read the
2000 Acura Warranty Information
booklet that came with your car for
precise information on warranty
coverages. Your Acura's original
tires are covered by their manufacturer. Tire warranty infor-
mation is in a separate booklet.
Canadia n Owner s
Please refer to the 2000 Warranty
Manual that came with your car.
Warrant y an d Custome r Relation s
Page 270 of 279
Inde
x
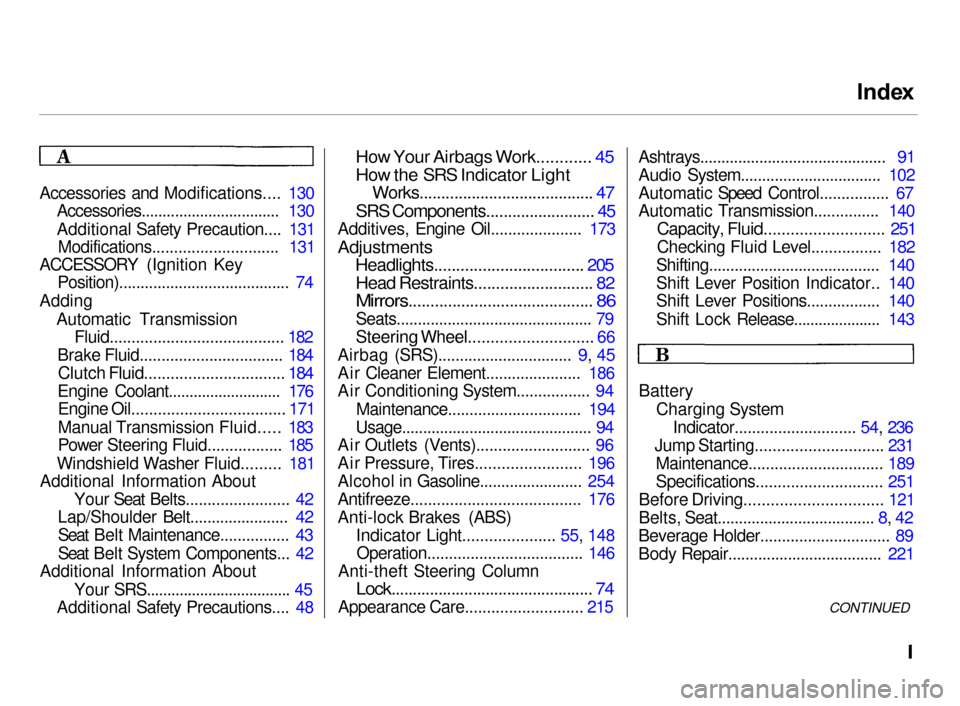
Accessories and Modifications.... 130 Accessories................................. 130
Additional Safety Precaution.... 131Modifications............................. 131
ACCESSORY (Ignition Key Position)........................................ 74
Adding Automatic Transmission Fluid........................................ 182
Brake Fluid................................. 184
Clutch Fluid................................ 184
Engine Coolant........................... 176
Engine Oil................................... 171
Manual Transmission Fluid..... 183
Power Steering Fluid................. 185
Windshield Washer Fluid......... 181
Additional Information About
Your Seat Belts........................ 42
Lap/Shoulder Belt....................... 42
Seat Belt Maintenance................ 43
Seat Belt System Components... 42
Additional Information About
Your SRS................................... 45
Additional Safety Precautions.... 48
How Your Airbags Work............ 45
How the SRS Indicator Light
Works........................................ 47
SRS Components......................... 45
Additives, Engine Oil..................... 173
Adjustments
Headlights.................................. 205
Head Restraints........................... 82
Mirrors.......................................... 86
Seats.............................................. 79
Steering Wheel............................ 66
Airbag (SRS)...............................
9, 45
Air Cleaner Element...................... 186
Air Conditioning System................. 94
Maintenance............................... 194
Usage............................................. 94
Air Outlets (Vents).......................... 96
Air Pressure, Tires........................ 196
Alcohol in Gasoline........................ 254
Antifreeze....................................... 176
Anti-lock Brakes (ABS)
Indicator Light..................... 55, 148Operation.................................... 146
Anti-theft Steering Column
Lock............................................... 74
Appearance Care........................... 215 Ashtrays............................................ 91
Audio System................................. 102
Automatic Speed Control................ 67
Automatic Transmission............... 140
Capacity, Fluid........................... 251
Checking Fluid Level................ 182
Shifting........................................ 140
Shift Lever Position Indicator.. 140
Shift Lever Positions................. 140
Shift Lock Release..................... 143
Battery Charging SystemIndicator............................ 54, 236
Jump Starting............................. 231 Maintenance............................... 189
Specifications............................. 251
Before Driving............................... 121
Belts, Seat..................................... 8, 42
Beverage Holder.............................. 89
Body Repair.................................... 221
CONTINUED