flush Acura Integra 2000 Hatchback Owner's Manual
[x] Cancel search | Manufacturer: ACURA, Model Year: 2000, Model line: Integra, Model: Acura Integra 2000Pages: 279, PDF Size: 3.57 MB
Page 179 of 279
Coolin
g Syste m
Addin g Engin e Coolan t
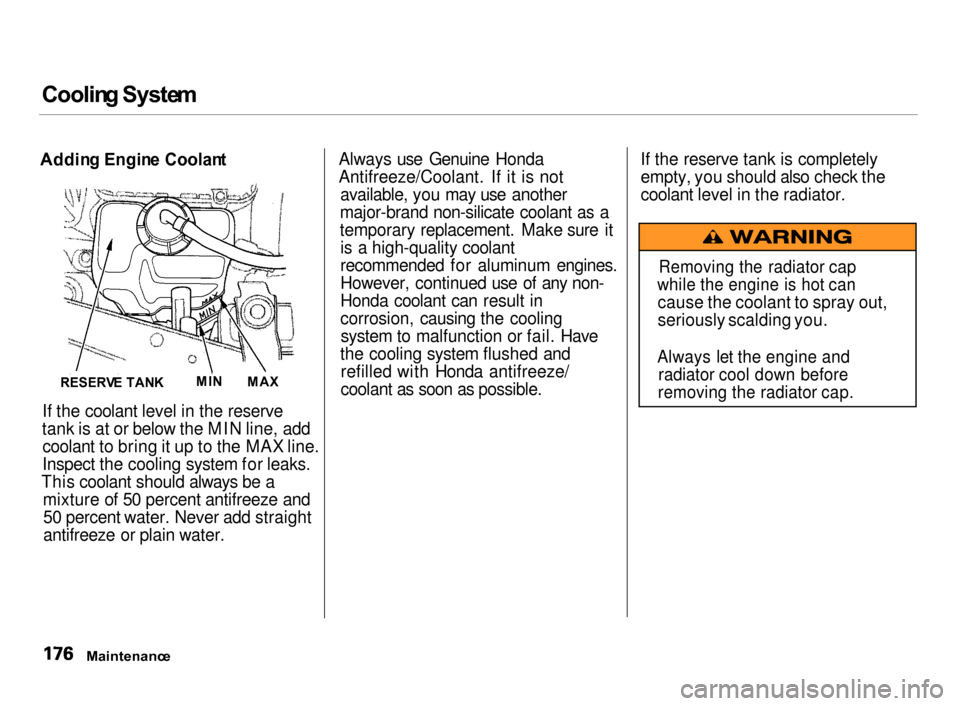
If the coolant level in the reserve
tank is at or below the MIN line, add coolant to bring it up to the MAX line.
Inspect the cooling system for leaks.
This coolant should always be a mixture of 50 percent antifreeze and50 percent water. Never add straight
antifreeze or plain water. Always use Genuine Honda
Antifreeze/Coolant. If it is not
available, you may use another
major-brand non-silicate coolant as a
temporary replacement. Make sure it is a high-quality coolant
recommended for aluminum engines.
However, continued use of any non-
Honda coolant can result in
corrosion, causing the coolingsystem to malfunction or fail. Have
the cooling system flushed and refilled with Honda antifreeze/
coolant as soon as possible. If the reserve tank is completely
empty, you should also check the
coolant level in the radiator.
Maintenanc e
Removing the radiator cap
while the engine is hot can
cause the coolant to spray out,
seriously scalding you.
Always let the engine and radiator cool down before
removing the radiator cap.
MI
N
MAX
RESERV E TAN K
Page 187 of 279
Brak
e an d Clutc h Flui d
Always use Genuine Honda DOT 3 brake fluid. If it is not available, youshould use only DOT 3 or DOT 4
fluid, from a sealed container, as a temporary replacement. However,
the use of any non-Honda brake fluidcan cause corrosion and decrease
the life of the system. Have the
brake system flushed and refilled
with Honda DOT 3 brake fluid as soon as possible.
Brake fluid marked DOT 5 is not
compatible with your car's braking
system and can cause extensive
damage.
Brak
e Syste m
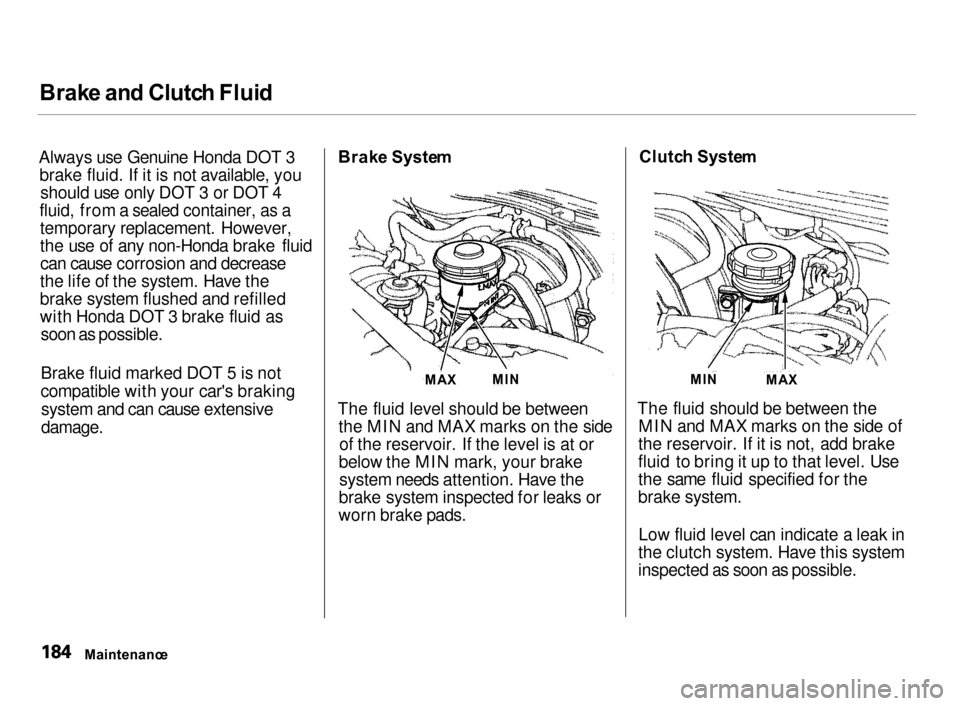
The fluid level should be between the MIN and MAX marks on the sideof the reservoir. If the level is at or
below the MIN mark, your brake system needs attention. Have the
brake system inspected for leaks or
worn brake pads. Clutc
h Syste m
The fluid should be between the MIN and MAX marks on the side of
the reservoir. If it is not, add brake
fluid to bring it up to that level. Use
the same fluid specified for the
brake system.
Low fluid level can indicate a leak in
the clutch system. Have this system
inspected as soon as possible.
Maintenanc e
MA
X
MI
N MIN
MAX
Page 188 of 279
Powe
r Steerin g
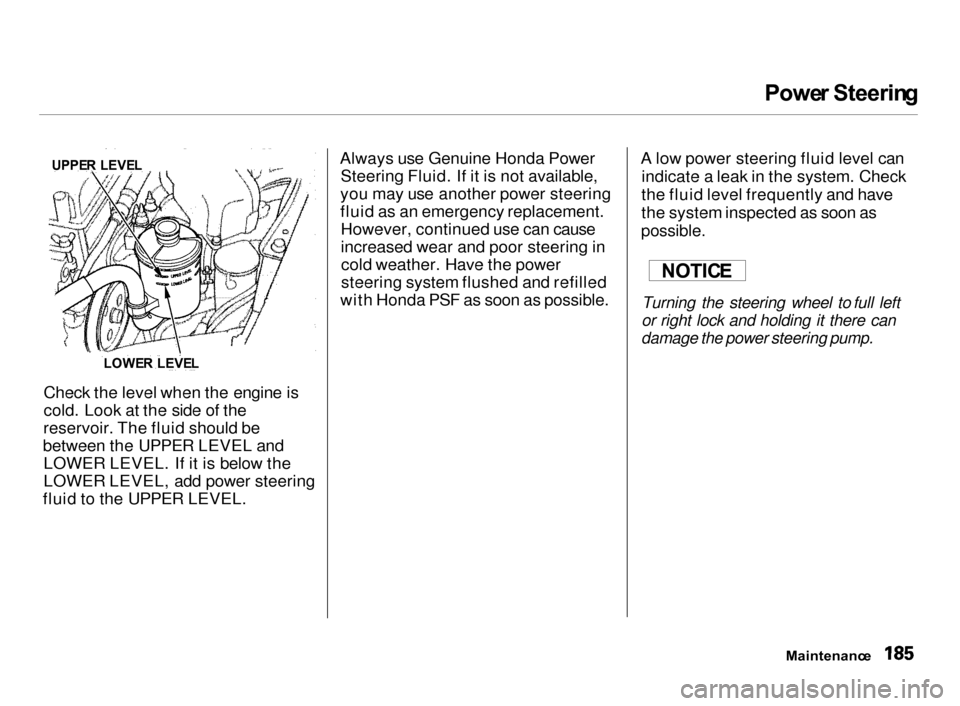
Check the level when the engine is
cold. Look at the side of the
reservoir. The fluid should be
between the UPPER LEVEL and LOWER LEVEL. If it is below the
LOWER LEVEL, add power steering
fluid to the UPPER LEVEL. Always use Genuine Honda Power
Steering Fluid. If it is not available,
you may use another power steering
fluid as an emergency replacement. However, continued use can cause
increased wear and poor steering incold weather. Have the power
steering system flushed and refilled
with Honda PSF as soon as possible. A low power steering fluid level can
indicate a leak in the system. Check
the fluid level frequently and have
the system inspected as soon as
possible.
Turning the steering wheel to full left
or right lock and holding it there can
damage the power steering pump.
Maintenance
NOTIC
E
UPPE
R LEVE L
LOWE R LEVE L
Page 212 of 279
Light
s
Replacin g a High-moun t Brak e
Ligh t Bul b
LS model
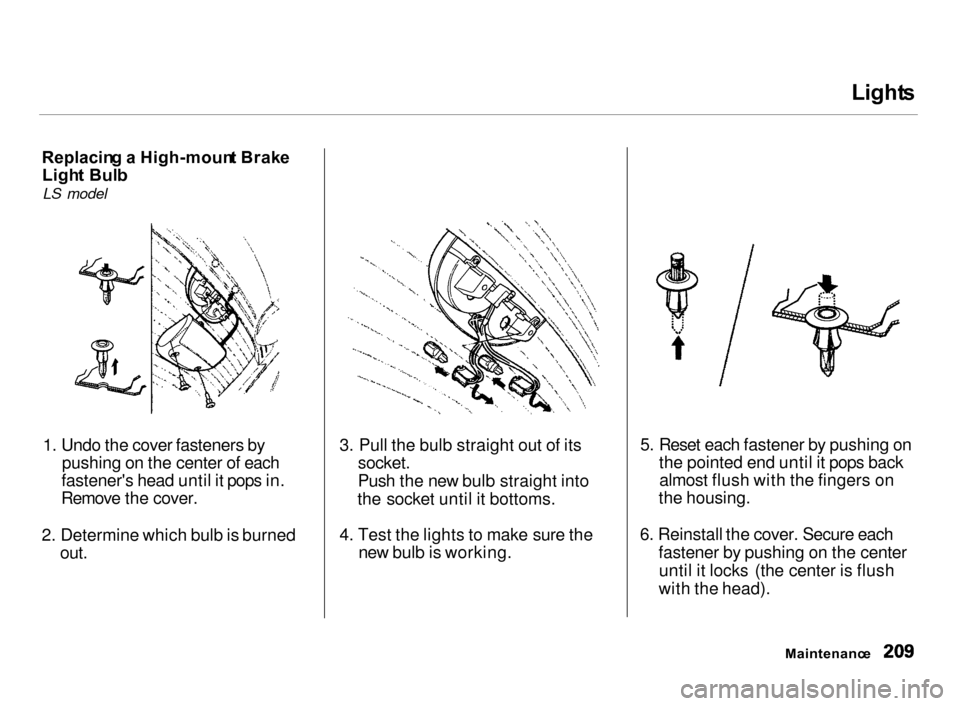
1. Undo the cover fasteners by
pushing on the center of each
fastener's head until it pops in.
Remove the cover.
2. Determine which bulb is burned
out.
3. Pull the bulb straight out of its
socket.
Push the new bulb straight into
the socket until it bottoms.
4. Test the lights to make sure the
new bulb is working.
5. Reset each fastener by pushing on
the pointed end until it pops back almost flush with the fingers on
the housing.
6. Reinstall the cover. Secure each
fastener by pushing on the center
until it locks (the center is flush
with the head).
Maintenanc e
Page 215 of 279
Light
s
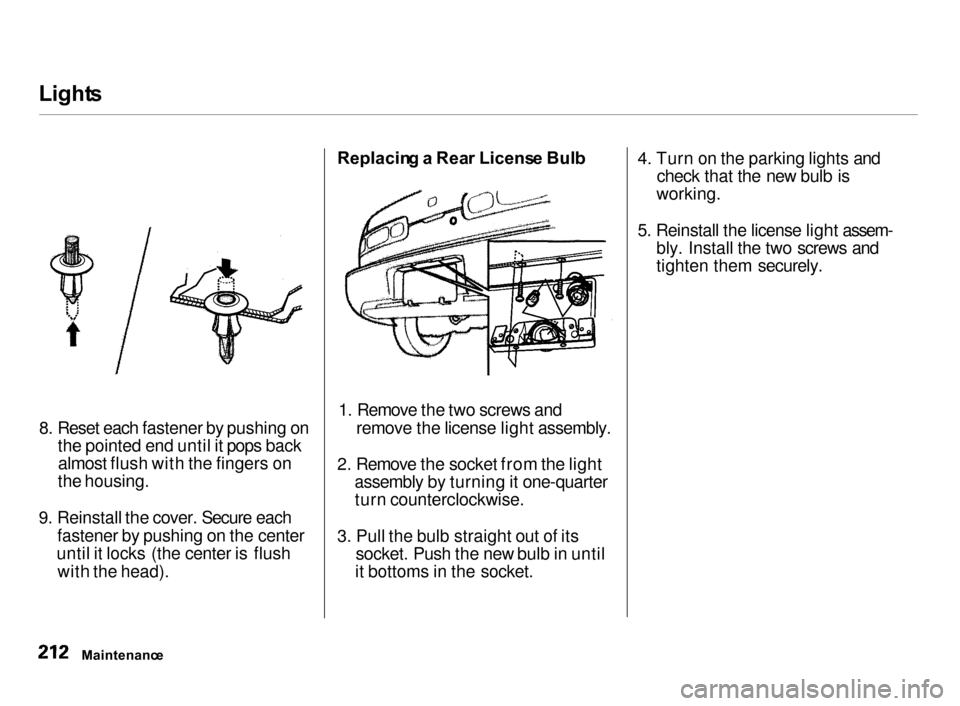
8. Reset each fastener by pushing onthe pointed end until it pops back almost flush with the fingers on
the housing.
9. Reinstall the cover. Secure each
fastener by pushing on the center
until it locks (the center is flush with the head).
Replacin g a Rea r Licens e Bul b
1. Remove the two screws and
remove the license light assembly.
2. Remove the socket from the light assembly by turning it one-quarter
turn counterclockwise.
3. Pull the bulb straight out of its
socket. Push the new bulb in until
it bottoms in the socket.
4. Turn on the parking lights and
check that the new bulb is
working.
5. Reinstall the license light assem-
bly. Install the two screws and
tighten them securely.
Maintenanc e