light ACURA INTEGRA 2024 Owners Manual
[x] Cancel search | Manufacturer: ACURA, Model Year: 2024, Model line: INTEGRA, Model: ACURA INTEGRA 2024Pages: 766, PDF Size: 28.39 MB
Page 683 of 766

681
uuCleaning uExterior Care
Maintenance
The inside lenses of exterior lights (headlig hts, brake lights, etc.) may fog temporarily
if you have driven in the rain, or after the vehicle has been run through a car wash.
Dew condensation also may build up inside the lenses when there is a significant
enough difference between the ambient and inside lens temperatures (similar to
vehicle windows fogging up in rainy conditions). These conditions are natural
processes, not structural design problems in the exterior lights.
Lens design characteristics ma y result in moisture developing on the light lens frame
surfaces. This also is not a malfunction.
However, if you see large amounts of wa ter accumulation, or large water drops
building up inside the lenses, have your vehicle inspected by a dealer.
■Fogged Exterior Light Lenses
24 ACURA INTEGRA-313S56100.book 681 ページ 2023年2月13日 月曜日 午後2時41分
Page 690 of 766

688
Handling the Unexpected
If a Tire Goes Flat
Temporarily Repairing a Flat Tire
If the tire has a large cut or is otherwise severely damaged, you will need to have the
vehicle towed. If the tire only has a smal l puncture, from a nail for instance, you can
use the temporary tire repair kit so that you can drive to the nearest service station
for a more permanent repair.
If a tire goes flat while driving, grasp the steering wheel firmly, and brake gradually
to reduce speed. Then, stop in a safe place.
1. Park the vehicle on a firm, level, non-slippery surface and apply the parking brake.
2. Put the transmission into
(P.
3. Turn on the hazard warning lights an d set the power mode to VEHICLE OFF.
Models with temporary tire repair kit
1Temporarily Repairing a Flat Tire
The kit should not be used in the following situations.
Instead, contact a dealer or roadside assistance to
have the vehicle towed.
•The tire sealant has expired.
•More than one tire is punctured.•The puncture or cut is larger than 3/16 inch (4.8 mm).
•The tire side wall is damaged or the puncture is
outside the contact area.
•Damage has been caused by driving with the tire
extremely under inflated.
•The tire bead is no longer seated.
•The rim is damaged.
Do not remove a nail or screw that punctured the
tire. If you remove it from the tire, you may not be
able to repair the puncture using the kit.
Contact Area
When the puncture is: Kit Use
Smaller than 3/16 inch (4.8 mm)Yes
Larger than 3/16 inch (4.8 mm) No
24 ACURA INTEGRA-313S56100.book 688 ページ 2023年2月13日 月曜日 午後2時41分
Page 706 of 766

704
uuIf a Tire Goes FlatuChanging a Flat Tire
Handling the Unexpected
Changing a Flat Tire
If a tire goes flat while driving, grasp the steering wheel firmly, and brake gradually
to reduce speed. Then, stop in a safe place. Replace the flat tire with a compact
spare tire. Go to a dealer as soon as possible to have th e full-size tire repaired or
replaced.
1. Park the vehicle on a firm, level, non-slippery surface and apply the parking brake.
2. Put the transmission into
(P.
2. Put the transmission into
(R.
3. Turn on the hazard warning lights an d set the power mode to VEHICLE OFF.
Models with optional spare tire
1Changing a Flat Tire
Follow compact spare precautions:
Periodically check the tire pressure of the compact
spare. It should be set to the specified pressure.
Specified Pressure: 60 psi (420 kPa, 4.2 kgf/cm
2)
When driving with the compact spare tire, keep the
vehicle speed under 50 mph (80 km/h). Replace with
a full-size tire as soon as possible.
The compact spare tire and wheel in your vehicle are
specifically for this model. Do not use them with
another vehicle. Do not us e another type of compact
spare tire or wheel with your vehicle.
Do not mount tire chains on a compact spare tire.
If a chain-mounted front tire goes flat, remove one of
the full-size rear tires and replace it with the compact
spare tire. Remove the flat front tire and replace it
with the full-size tire that was removed from the rear.
Mount the tire chains on the front tire.
NOTICE
Do not use the jack if it doesn
Page 717 of 766

715Continued
Handling the Unexpected
If the Battery Is Dead
Jump Starting Procedure
Turn off the power to electric devices, such as audio and lights. Turn off the engine,
then open the hood. 1.Open the cover on the positive + terminal.
2. Connect the first jumper cable to your
vehicle’s battery + terminal.
3. Connect the other end of the first jumper
cable to the booster battery + terminal.
u Use a 12-volt booster battery only.
u When using an automotive battery
charger to boost your 12-volt battery,
select a lower charging voltage than 15-
volt. Check the charger manual for the
proper setting.
4. Connect the second jumper cable to the
booster battery - terminal.1If the Battery Is Dead
Securely attach the jumper cables clips so that they
do not come off when the e ngine vibrates. Be careful
not to tangle the jumper cables or allow the cable
ends to touch each other while attaching or
detaching the jumper cables.
Battery performance degrades in cold conditions and
may prevent the engi ne from starting.
3WARNING
A battery can explode if you do not follow
the correct procedure, seriously injuring
anyone nearby.
Keep all sparks, open flames, and smoking
materials away from the battery.
Booster Battery
1.5 L engine models
2.0 L engine models
Booster Battery
24 ACURA INTEGRA-313S56100.book 715 ページ 2023年2月13日 月曜日 午後2時41分
Page 718 of 766

716
uuIf the Battery Is Dead uJump Starting Procedure
Handling the Unexpected
5. Connect the other end of the second
jumper cable to the stud bolt as shown. Do
not connect this jumper cable to any other
part.
6. If your vehicle is connected to another
vehicle, start the assi sting vehicle’s engine
and increase its rpm slightly.
7. Attempt to start your vehicle’s engine. If it
turns over slowly, check that the jumper
cables have good metal-to-metal contact.1.5 L engine models
2.0 L engine models
24 ACURA INTEGRA-313S56100.book 716 ページ 2023年2月13日 月曜日 午後2時41分
Page 721 of 766

719Continued
Handling the Unexpected
Overheating
How to Handle Overheating
Overheating symptoms are as follows:
•The temperature gauge is at the mark or the engine suddenly loses power.
• The Engine temperature too hot. Do not drive. Allow engine to cool.
message appears on the driv er information interface.
• Steam or spray comes out of the engine compartment.
■First thing to do
1. Immediately park the vehicle in a safe place.
2. Turn off all accessories and turn on the hazard warning lights.
u No steam or spray present: Keep the engine running and open the hood.
u Steam or spray is present: Turn off the engine and wait until it subsides.
Then, open the hood.
1 How to Handle Overheating
NOTICE
Continuing to drive with the temperature gauge at
the mark may damage the engine.
Continuing to drive with the Engine temperature
too hot. Do not drive. Allow engine to cool.
message on the driver information interface may
damage the engine.
3WARNING
Steam and spray from an overheated
engine can seri ously scald you.
Do not open the hood if steam is coming
out.
H
H
24 ACURA INTEGRA-313S56100.book 719 ページ 2023年2月13日 月曜日 午後2時41分
Page 724 of 766

722
Handling the Unexpected
Indicator Coming On/Blinking
If the Engine oil pressure low Warning Appears
■Reasons for the warning to appear
Appears when the engine oil pressure is low.
■What to do as soon as the warning
appears
1. Immediately park the vehicle on level
ground in a safe place.
2. If necessary, turn the hazard warning lights
on.
■What to do after parking the vehicle
1. Stop the engine and let it sit for
approximately three minutes.
2. Open the hood and check the oil level.
u Add oil as necessary.
2 Oil Check P. 641
3.Start the engine and check the Engine oil
pressure low warning.
u The warning disappears: Start driving
again.
u The warning does not disappear within
10 seconds: Immediately stop the engine
and contact a dealer for repairs.
1If the Engine oil pressure low Warning Appears
NOTICE
Running the engine with low oil pressure can cause
serious mechanical damage almost immediatelyM
24 ACURA INTEGRA-313S56100.book 722 ページ 2023年2月13日 月曜日 午後2時41分
Page 726 of 766

724
uuIndicator Coming On/BlinkinguIf the Brake System Indicator (Red) Comes On or Blinks
Handling the Unexpected
If the Brake System Indicator (Red) Comes On or
Blinks
■Reasons for the indicator to come on
• The brake fluid is low.
• There is a malfunction in the brake system.
■What to do when the indicator comes on while driving
Depress the brake pedal lightly to check pedal pressure.
• If normal, check the brake fluid level the next time you stop.
• If abnormal, take immediate action . If necessary, downshift the
transmission to slow the vehicle using engine braking.
■Reasons for the in dicator to blink
There is a problem with the electric parking brake system.
■What to do when the indicator blinks
Avoid using the parking brake and have your vehicle checked by a dealer
immediately.
1 If the Brake System Indicator (Red) Comes On or Blinks
Have your vehicle re paired immediately.
It is dangerous to drive with low brake fluid. If there
is no resistance from the brake pedal, stop
immediately in a safe plac e. If necessary downshift
the gears.
If the brake system indicator (red) and ABS indicator
come on simultaneously , the electronic brake
distribution system is not wo rking. This can result in
vehicle instability under sudden braking.
Have your vehicle inspecte d by a dealer immediately.
If the brake system indicator (red) blinks at the same
time when the brake system indicator (amber) comes
on, the parking br ake may not work.
Avoid using the parking brak e and have your vehicle
checked by a dealer immediately.
2 If the Brake System Indicator (Red) Comes
On or Blinks at the Same Time When the
Brake System Indicator (Amber) Comes On
P. 726
U.S.
Canada
(Red)
24 ACURA INTEGRA-313S56100.book 724 ページ 2023年2月13日 月曜日 午後2時41分
Page 729 of 766

727
uuIndicator Coming On/Blinking uIf the Low Tire Pressure/TPMS Indicator Comes On or Blinks
Handling the Unexpected
If the Low Tire Pressure/TPMS Indicator Comes On or
Blinks
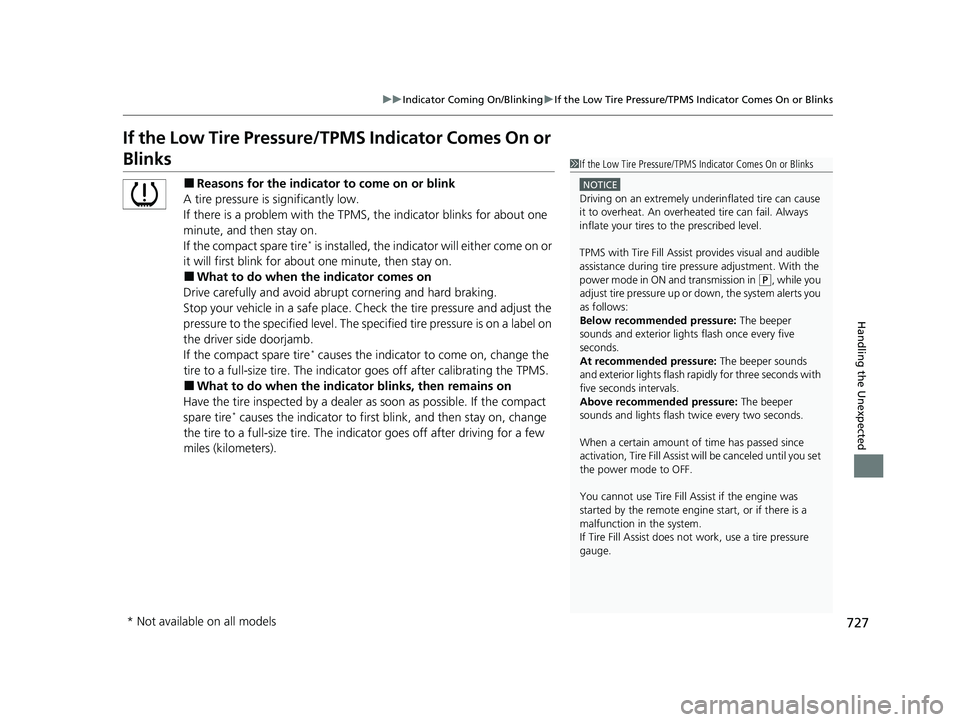
■Reasons for the indicator to come on or blink
A tire pressure is significantly low.
If there is a problem with the TPMS, the indicator blinks for about one
minute, and then stay on.
If the compact spare tire
* is installed, the indicator will either come on or
it will first blink for about one minute, then stay on.
■What to do when th e indicator comes on
Drive carefully and avoid abrupt cornering and hard braking.
Stop your vehicle in a safe place. Ch eck the tire pressure and adjust the
pressure to the specified level. The spec ified tire pressure is on a label on
the driver side doorjamb.
If the compact spare tire
* causes the indicator to come on, change the
tire to a full-size tire. The indicato r goes off after calibrating the TPMS.
■What to do when the indicator blinks, then remains on
Have the tire inspected by a dealer as soon as possible. If the compact
spare tire
* causes the indicator to first b link, and then stay on, change
the tire to a full-size tire. The indi cator goes off after driving for a few
miles (kilometers).
1 If the Low Tire Pressure/TPMS Indicator Comes On or Blinks
NOTICE
Driving on an extremely unde rinflated tire can cause
it to overheat. An overheated tire can fail. Always
inflate your tires to the prescribed levelM
TPMS with Tire Fill Assist provides visual and audible
assistance during tire pre ssure adjustment. With the
power mode in ON and transmission in
( P, while you
adjust tire pressure up or down, the system alerts you
as follows:
Below recommended pressure: The beeper
sounds and exterior lights flash once every five
seconds.
At recommended pressure: The beeper sounds
and exterior lights flash ra pidly for three seconds with
five seconds intervals.
Above recommended pressure: The beeper
sounds and lights flash tw ice every two seconds.
When a certain amount of time has passed since
activation, Tire Fill Assist wi ll be canceled until you set
the power mode to OFF.
You cannot use Tire Fill Assist if the engine was
started by the remote engine start, or if there is a
malfunction in the system.
If Tire Fill Assist does not work, use a tire pressure
gauge.
* Not available on all models
24 ACURA INTEGRA-313S56100.book 727 ページ 2023年2月13日 月曜日 午後2時41分
Page 734 of 766

732
uuFusesuInspecting and Changing Fuses
Handling the Unexpected
Inspecting and Changing Fuses
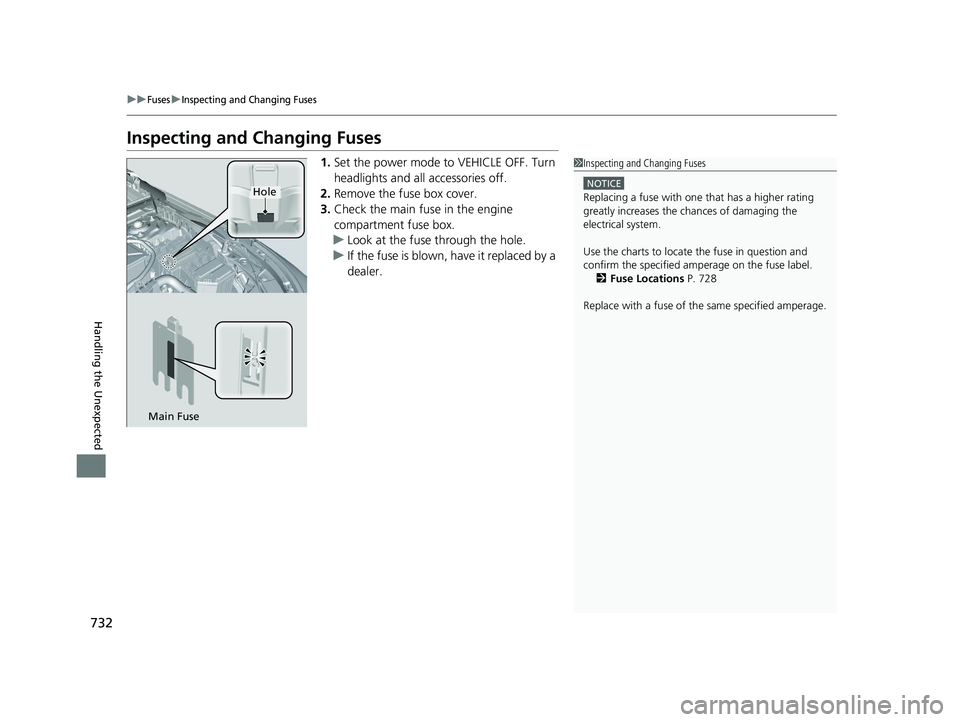
1.Set the power mode to VEHICLE OFF. Turn
headlights and all accessories off.
2. Remove the fuse box cover.
3. Check the main fuse in the engine
compartment fuse box.
u Look at the fuse through the hole.
u If the fuse is blown, have it replaced by a
dealer.1Inspecting and Changing Fuses
NOTICE
Replacing a fuse with on e that has a higher rating
greatly increases the chances of damaging the
electrical system.
Use the charts to locate the fuse in question and
confirm the specified amperage on the fuse labelM
2 Fuse Locations P. 728
Replace with a fuse of the same specified amperage.
Main Fuse
Hole
24 ACURA INTEGRA-313S56100.book 732 ページ 2023年2月13日 月曜日 午後2時41分