keyless Acura MDX 2007 Navigation Manual
[x] Cancel search | Manufacturer: ACURA, Model Year: 2007, Model line: MDX, Model: Acura MDX 2007Pages: 166, PDF Size: 4.21 MB
Page 2 of 166
Navigation System1
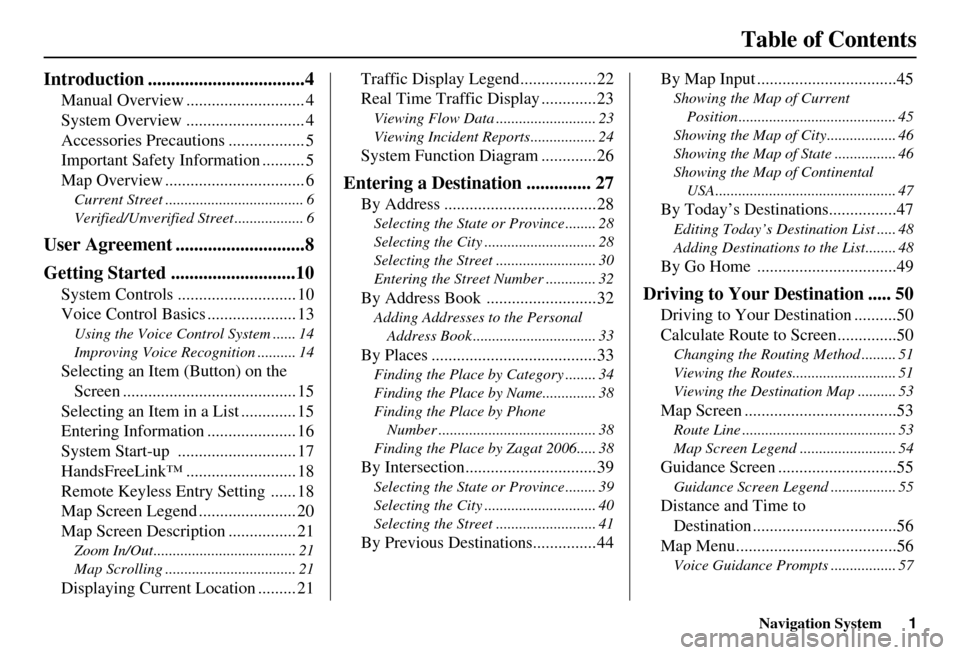
Table of Contents
Introduction ..................................4
Manual Overview ............................ 4
System Overview ............................ 4
Accessories Precautions .................. 5
Important Safety Information .......... 5
Map Overview ................................. 6
Current Street .................................... 6
Verified/Unverified Street .................. 6
User Agreement ............................8
Getting Started ...........................10
System Controls ............................ 10
Voice Control Basics ..................... 13
Using the Voice Control System ...... 14
Improving Voice Recognition .......... 14
Selecting an Item (Button) on the
Screen ......................................... 15
Selecting an Item in a List ............. 15
Entering Information ..................... 16
System Start-up ............................ 17
HandsFreeLink™ .......................... 18
Remote Keyless Entry Setting ...... 18
Map Screen Legend ....................... 20
Map Screen Description ................ 21
Zoom In/Out..................................... 21
Map Scrolling .................................. 21
Displaying Current Location ......... 21 Traffic Display Legend..................22
Real Time Traffic Display .............23
Viewing Flow Data .......................... 23
Viewing Incident Reports................. 24
System Function Diagram .............26
Entering a Destination .............. 27
By Address ....................................28
Selecting the State or Province ........ 28
Selecting the City ............................. 28
Selecting the Street .......................... 30
Entering the Street Number ............. 32
By Address Book ..........................32
Adding Addresses to the Personal
Address Book ................................ 33
By Places .......................................33
Finding the Place by Category ........ 34
Finding the Place by Name.............. 38
Finding the Place by Phone Number ......................................... 38
Finding the Place by Zagat 2006..... 38
By Intersection...............................39
Selecting the State or Province ........ 39
Selecting the City ............................. 40
Selecting the Street .......................... 41
By Previous Destinations...............44 By Map Input .................................45
Showing the Map of Current
Position......................................... 45
Showing the Map of City .................. 46
Showing the Map of Stat e ................ 46
Showing the Map of Continental USA............................................... 47
By Today’s Destinations................47
Editing Today’s Dest ination List ..... 48
Adding Destinations to the List........ 48
By Go Home .................................49
Driving to Your Destination ..... 50
Driving to Your Destination ..........50
Calculate Route to Screen..............50
Changing the Routing Method ......... 51
Viewing the Routes........................... 51
Viewing the Destination Map .......... 53
Map Screen ....................................53
Route Line ........................................ 53
Map Screen Legend ......................... 54
Guidance Screen ............................55
Guidance Screen Legend ................. 55
Distance and Time to
Destination ..................................56
Map Menu......................................56
Voice Guidance Prompt s ................. 57
Page 19 of 166
18Navigation System
Getting Started
If you press the CANCEL button, the
message will be displayed the next time
you start the vehicle.
NOTE:
The system will display the current
message and any older or previously
unread messages, with the newest
message listed first.HandsFreeLink™
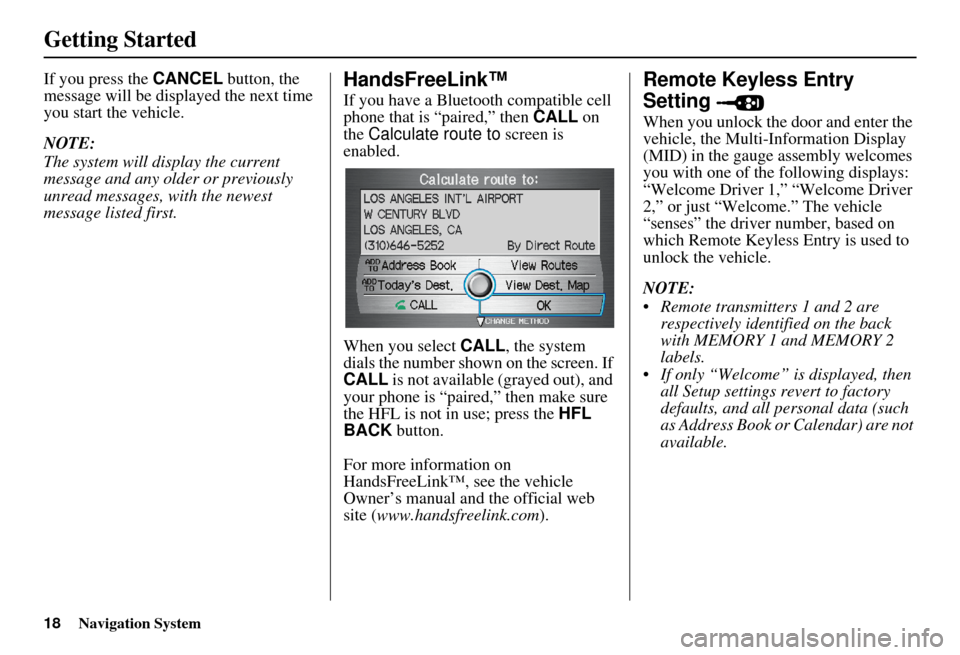
If you have a Bluetooth compatible cell
phone that is “paired,” then CALL on
the Calculate route to screen is
enabled.
When you select CALL, the system
dials the number shown on the screen. If
CALL is not available (grayed out), and
your phone is “paired,” then make sure
the HFL is not in use; press the HFL
BACK button.
For more information on
HandsFreeLink™, see the vehicle
Owner’s manual and the official web
site ( www.handsfreelink.com ).
Remote Keyless Entry
Setting
When you unlock the door and enter the
vehicle, the Multi-Information Display
(MID) in the gauge assembly welcomes
you with one of the following displays:
“Welcome Driver 1,” “Welcome Driver
2,” or just “Welcome.” The vehicle
“senses” the driver number, based on
which Remote Keyless Entry is used to
unlock the vehicle.
NOTE:
Remote transmitters 1 and 2 are respectively identified on the back
with MEMORY 1 and MEMORY 2
labels.
If only “Welcome” is displayed, then all Setup settings revert to factory
defaults, and all personal data (such
as Address Book or Calendar) are not
available.
Page 20 of 166
Navigation System19
Getting Started
The navigation system uses the driver
number (as recognized by the MID) to
personalize the navigation system. For
example, if Driver 1 unlocks the
vehicle, the “Driver 1” Personal address
book and other navigation settings are
automatically loaded when the vehicle
is started. There is no way to change
from one driver’s settings to the others
while driving.
Throughout this manual, the icon
“ ” is used to indicate features
that are dependent on the “Driver
number” as displayed on the MID
“Welcome” display. When the Remote Keyless Entry is
deliberately “unlinked,” (as when giving
the key to a valet) the MID will display
“Welcome.” Then th
e following occurs:
Some settings (e.g., the “Personal Address Book” and the “Calendar”
Information feature), are not
selectable (buttons grayed out).
Setup values (like volume, brightness, etc.) may be changed but
are not remembered the next time you
restart the vehicle.
NOTE:
The MDX Owner’s Manual has
additional information regarding
“linking” and “unlinking” for the
Remote Keyless Entry.
Page 50 of 166
Navigation System49
Entering a Destination
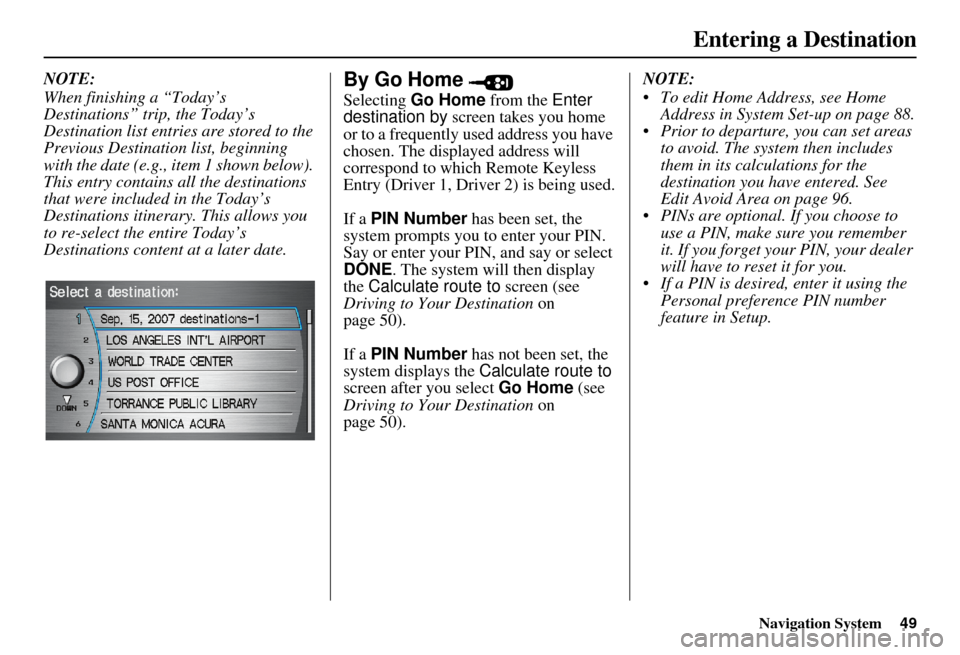
NOTE:
When finishing a “Today’s
Destinations” trip, the Today’s
Destination list entries are stored to the
Previous Destination list, beginning
with the date (e.g., item 1 shown below).
This entry contains all the destinations
that were included in the Today’s
Destinations itinerary. This allows you
to re-select the entire Today’s
Destinations content at a later date.By Go Home
Selecting Go Home from the Enter
destination by screen takes you home
or to a frequently used address you have
chosen. The displayed address will
correspond to which Remote Keyless
Entry (Driver 1, Driver 2) is being used.
If a PIN Number has been set, the
system prompts you to enter your PIN.
Say or enter your PIN, and say or select
DONE . The system will then display
the Calculate route to screen (see
Driving to Your Destination on
page 50).
If a PIN Number has not been set, the
system displays the Calculate route to
screen after you select Go Home (see
Driving to Your Destination on
page 50). NOTE:
To edit Home Address, see Home
Address in System Set-up on page 88.
Prior to departure, you can set areas to avoid. The system then includes
them in its calculations for the
destination you have entered. See
Edit Avoid Area on page 96.
PINs are optional. If you choose to use a PIN, make sure you remember
it. If you forget your PIN, your dealer
will have to reset it for you.
If a PIN is desired, enter it using the Personal preference PIN number
feature in Setup.
Page 83 of 166
82Navigation System
System Set-up
Setup Mode
The Setup function consists of two main
screens, that allows you to change and
update information in the system. To
display the Setup screens, use the voice
control system and say “Setup” or press
the SETUP button, and then select an
item, or say or select MORE in the
upper right corner of the screen.
On any of the Setup screens, you can
use the voice control system to select
any item on the screen. NOTE:
If some items appear to be grayed
out, and cannot be selected, it is
because you did not select OK on the
initial Disclaimer screen. See System
Start-up on page 17.
Setup items in this manual with the symbol indicate that the
display settings depend on what
“Driver #” was displayed on the MID
when the vehicle was started. See
Remote Keyless Entry Setting on
page 18.
If only “Welcome” is displayed, then all Setup settings revert to factory
defaults, and all personal data (such
as Address Book or Calendar) are not
available.
For information on the available voice commands, see Voice
Command Index on page 155.
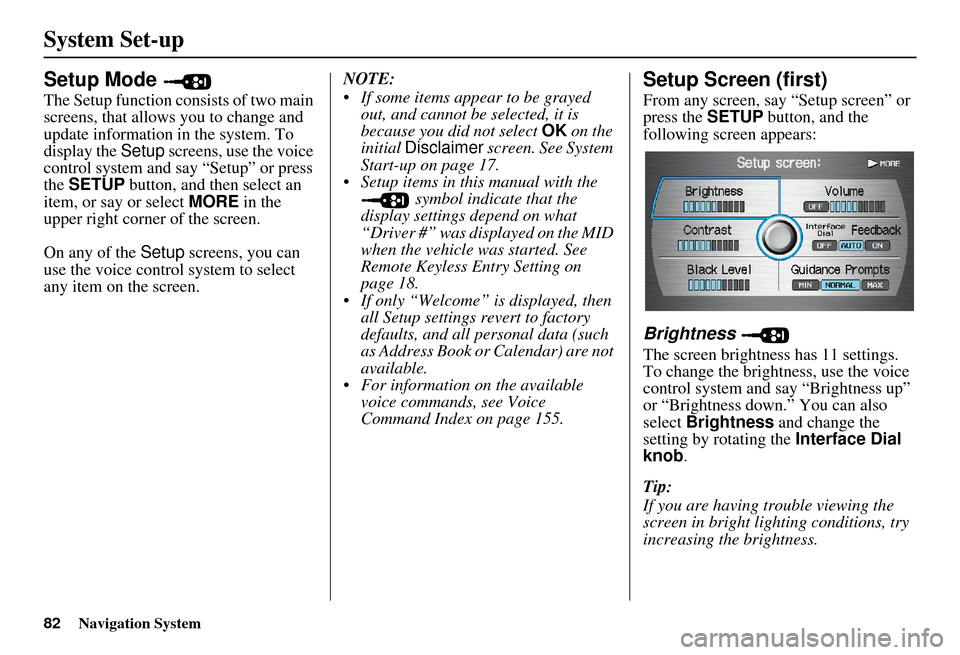
Setup Screen (first)
From any screen, say “Setup screen” or
press the SETUP button, and the
following screen appears:
Brightness
The screen brightness has 11 settings.
To change the brightness, use the voice
control system and say “Brightness up”
or “Brightness down.” You can also
select Brightness and change the
setting by rotating the Interface Dial
knob .
Tip:
If you are having trouble viewing the
screen in bright lighting conditions, try
increasing the brightness.
Page 85 of 166
84Navigation System
System Set-up
* Uses street name in guidance phrase.
NOTE:
To temporarily turn off voice guidance
prompts, select OFF for the Volume
setting in Setup.
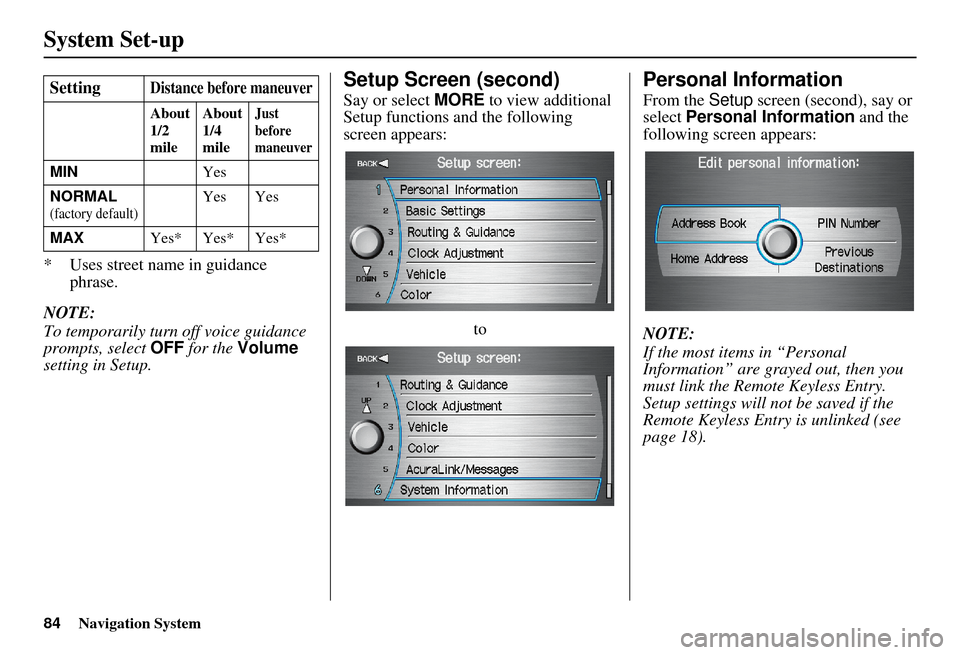
Setup Screen (second)
Say or select MORE to view additional
Setup functions and the following
screen appears:
to
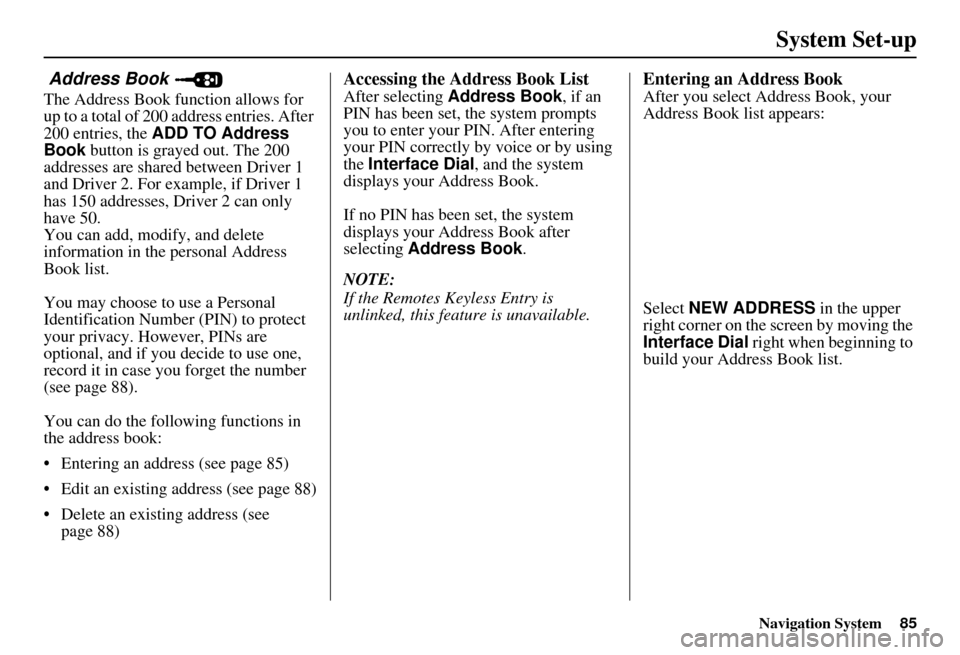
Personal Information
From the Setup screen (second), say or
select Personal Information and the
following screen appears:
NOTE:
If the most items in “Personal
Information” are grayed out, then you
must link the Remote Keyless Entry.
Setup settings will not be saved if the
Remote Keyless Entr y is unlinked (see
page 18).
SettingDistance before maneuver
About
1/2
mile
About
1/4
mileJust
before
maneuver
MIN
Yes
NORMAL
(factory default)Yes Yes
MAX Yes* Yes* Yes*
Page 86 of 166
Navigation System85
System Set-up
Address Book
The Address Book function allows for
up to a total of 200 address entries. After
200 entries, the ADD TO Address
Book button is grayed out. The 200
addresses are shared between Driver 1
and Driver 2. For example, if Driver 1
has 150 addresses, Driver 2 can only
have 50.
You can add, modify, and delete
information in the personal Address
Book list.
You may choose to use a Personal
Identification Number (PIN) to protect
your privacy. However, PINs are
optional, and if you decide to use one,
record it in case yo u forget the number
(see page 88).
You can do the following functions in
the address book:
Entering an address (see page 85)
Edit an existing address (see page 88)
Delete an existing address (see page 88)
Accessing the Address Book List
After selecting Address Book , if an
PIN has been set, the system prompts
you to enter your PIN. After entering
your PIN correctly by voice or by using
the Interface Dial , and the system
displays your Address Book.
If no PIN has been set, the system
displays your Address Book after
selecting Address Book .
NOTE:
If the Remotes Keyless Entry is
unlinked, this feature is unavailable.
Entering an Address Book
After you select Address Book, your
Address Book list appears:
Select NEW ADDRESS in the upper
right corner on the screen by moving the
Interface Dial right when beginning to
build your Address Book list.
Page 130 of 166
Navigation System129
Frequently Asked Questions
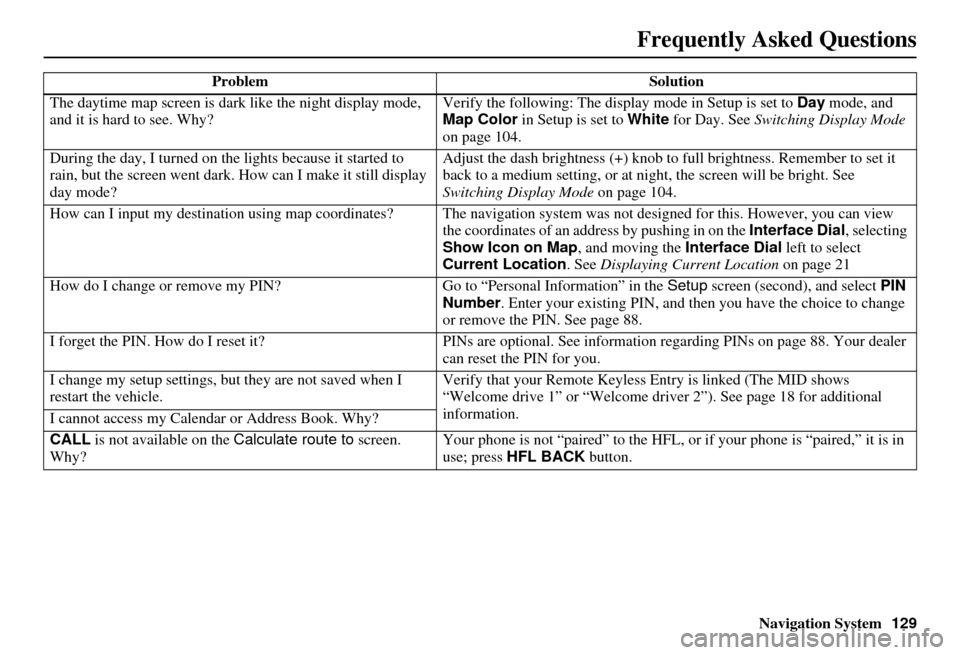
The daytime map screen is dark like the night display mode,
and it is hard to see. Why? Verify the following: The disp
lay mode in Setup is set to Day mode, and
Map Color in Setup is set to White for Day. See Switching Display Mode
on page 104.
During the day, I turned on the lights because it started to
rain, but the screen went dark. How can I make it still display
day mode? Adjust the dash brightness (+) knob to fu
ll brightness. Remember to set it
back to a medium setting, or at ni ght, the screen will be bright. See
Switching Display Mode on page 104.
How can I input my destination using map coordinates? The navigation system was not designed for this. However, you can view
the coordinates of an address by pushing in on the Interface Dial, selecting
Show Icon on Map , and moving the Interface Dial left to select
Current Location . See Displaying Current Location on page 21
How do I change or remove my PIN? Go to “Personal Information” in the Setup screen (second) , and select PIN
Number . Enter your existing PIN, and then you have the choice to change
or remove the PIN. See page 88.
I forget the PIN. How do I reset it? PINs are optional. See information regarding PINs on page 88. Your dealer
can reset the PIN for you.
I change my setup settings, bu t they are not saved when I
restart the vehicle. Verify that your Remote Keyless
Entry is linked (The MID shows
“Welcome drive 1” or “Welcome dr iver 2”). See page 18 for additional
information.
I cannot access my Calendar or Address Book. Why?
CALL is not available on the Calculate route to screen.
Why? Your phone is not “paired” to the HFL,
or if your phone is “paired,” it is in
use; press HFL BACK button.
Problem
Solution
Page 139 of 166
138Navigation System
Glossary
Initialization - This refers to the period
needed to reacquire the GPS satellite
orbital information whenever the
navigation system power has been
disconnected. This can take 10 to 45
minutes with the ve hicle out in an
open area.
Instant Fuel - The current
instantaneous fuel economy value as
displayed by the Trip computer
screen.
LCD - Liquid Crystal Display. The
navigation screen.
Map Matching - The received GPS information allows the navigation
system to position the vehicle on the
map. Map matching has occurred if
the map screen is displaying the
current street name in the bottom-
shaded area.
Mic - Abbreviation for the microphone
used for receiving voice commands.
It is located near the map light in the
ceiling.
Multi-Information Display (MID) - Located in the gauge assembly. See
the Owner’s manual for additional
information. MW -
Maneuver Window. While on-
route to a destination, this window
displays information about the next
maneuver.
Navi - Abbreviation for the navigation
system.
North Pointer - The map symbol
showing the map orientation. See
page 61.
Off Route - This occurs when the user
leaves mapped roads. Off road
tracking dots (“breadcrumbs”) are
displayed if the option is enabled in
the Setup screen. The user can use
them to return to a mapped road. The
bottom of the navigation screen will
say “Not on a digitized road”
Outlying Areas - These are rural areas
that typically have only their main
roads mapped. All other roads are
shown in light brown for reference
only, since they have not been
verified.
PIN - Personal Identification Number.
A random 4-digit number created by
the customer to protect personal
information. POI -
Point Of Interest. These are the
businesses, schools etc. found under
the Places option on the Enter
destination by screen. See page 51.
Polygon - Colored areas on the map
screen denoting parks, schools etc.
See Map Screen “features” for a list
of the assigned colors. See page 51.
Reminder - Automatic “pop-up”
Calendar message. See Calendar on
page 78.
Remote Keyless Entry - Allows you to
lock/unlock the doors, unlock the
tailgate, and link/ unlink Driver 1/
Driver 2 settings.
RES - Rear Entertainment System.
(Factory installed)
Security Code - Code needed to
activate the navigation system or
audio system. See Entering the
Security Code on page 109.