page 11 Acura MDX 2008 Navigation Manual
[x] Cancel search | Manufacturer: ACURA, Model Year: 2008, Model line: MDX, Model: Acura MDX 2008Pages: 171, PDF Size: 6.52 MB
Page 42 of 171
42Navigation System
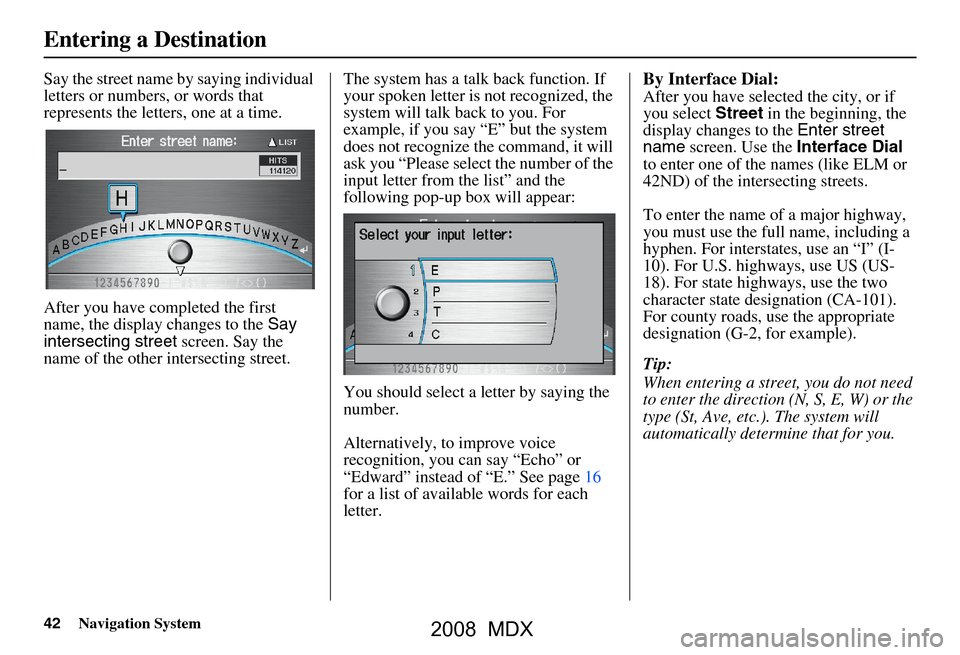
Say the street name by saying individual
letters or numbers, or words that
represents the letters, one at a time.
After you have completed the first
name, the display changes to the Say
intersecting street screen. Say the
name of the other intersecting street. The system has a talk back function. If
your spoken letter is
not recognized, the
system will talk back to you. For
example, if you say “E” but the system
does not recognize the command, it will
ask you “Please select the number of the
input letter from the list” and the
following pop-up box will appear:
You should select a letter by saying the
number.
Alternatively, to improve voice
recognition, you can say “Echo” or
“Edward” instead of “E.” See page16
for a list of availa ble words for each
letter.By Interface Dial:
After you have selected the city, or if
you select Street in the beginning, the
display changes to the Enter street
name screen. Use the Interface Dial
to enter one of the names (like ELM or
42ND) of the intersecting streets.
To enter the name of a major highway,
you must use the full name, including a
hyphen. For intersta tes, use an “I” (I-
10). For U.S. highways, use US (US-
18). For state highways, use the two
character state designation (CA-101).
For county roads, use the appropriate
designation (G-2, for example).
Tip:
When entering a street, you do not need
to enter the direction (N, S, E, W) or the
type (St, Ave, etc.). The system will
automatically determine that for you.
Entering a Destination
2008 MDX
Page 43 of 171
Navigation System43
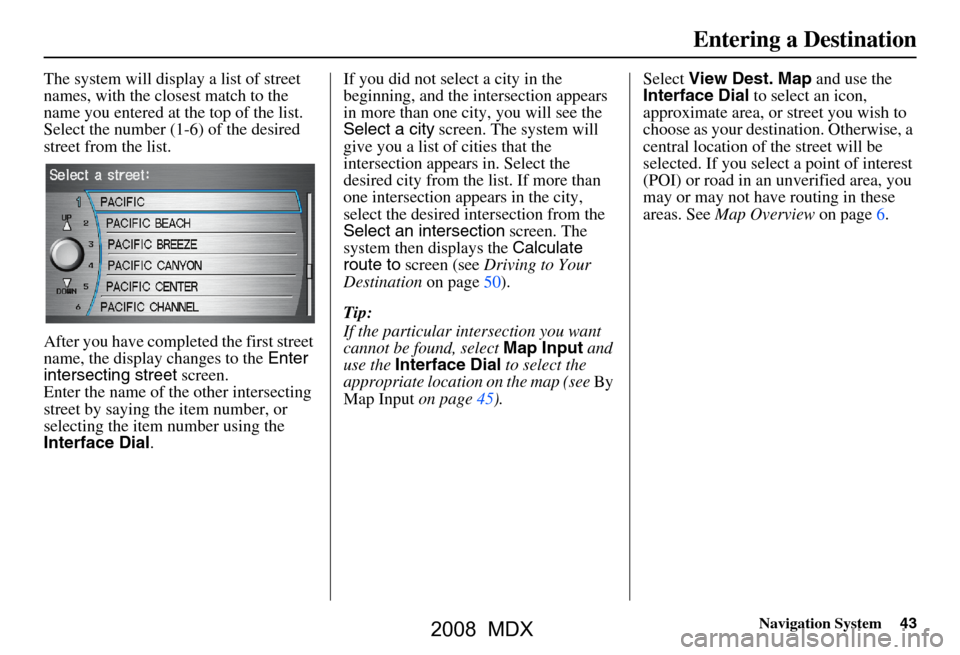
The system will display a list of street
names, with the closest match to the
name you entered at the top of the list.
Select the number (1-6) of the desired
street from the list.
After you have completed the first street
name, the display changes to the Enter
intersecting street screen.
Enter the name of the other intersecting
street by saying the item number, or
selecting the item number using the
Interface Dial . If you did not select a city in the
beginning, and the intersection appears
in more than one city, you will see the
Select a city
screen. The system will
give you a list of cities that the
intersection appears in. Select the
desired city from the list. If more than
one intersection appears in the city,
select the desired intersection from the
Select an intersection screen. The
system then displays the Calculate
route to screen (see Driving to Your
Destination on page50).
Tip:
If the particular intersection you want
cannot be found, select Map Input and
use the Interface Dial to select the
appropriate location on the map (see By
Map Input on page45). Select
View Dest. Map and use the
Interface Dial to select an icon,
approximate area, or street you wish to
choose as your destination. Otherwise, a
central location of the street will be
selected. If you select a point of interest
(POI) or road in an unverified area, you
may or may not have routing in these
areas. See Map Overview on page6.
Entering a Destination
2008 MDX
Page 44 of 171
44Navigation System
By Previous Destinations
Every time you route to a destination,
that destination is saved by the system.
Up to 50 destinations can be stored.
Select Previous Destinations from
the Enter destination by screen to
choose one of those destinations.
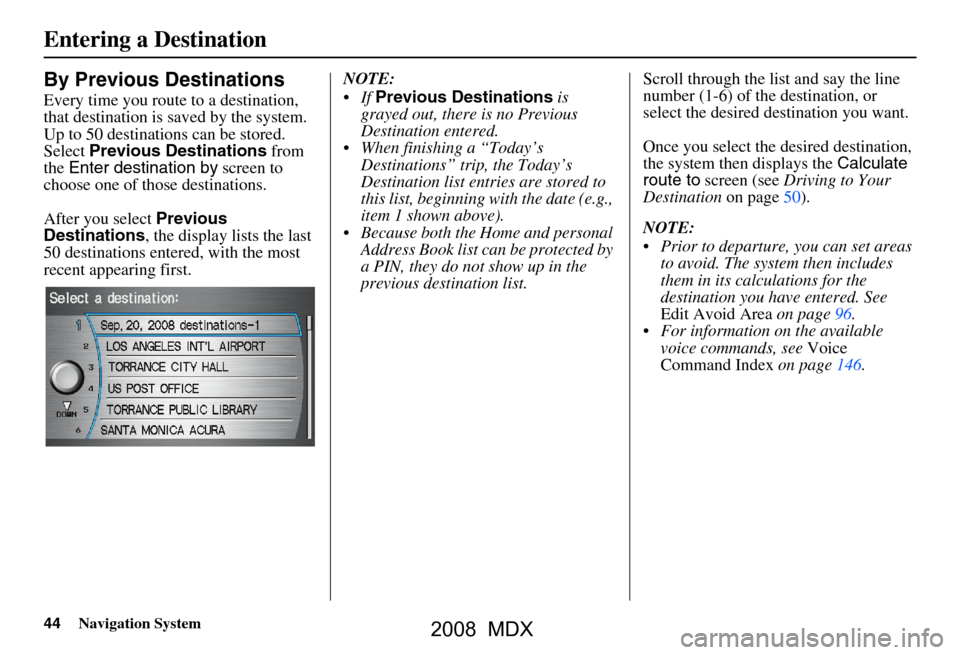
After you select Previous
Destinations , the display lists the last
50 destinations entered, with the most
recent appearing first. NOTE:
If
Previous Destinations is
grayed out, there is no Previous
Destination entered.
When finishing a “Today’s Destinations” trip, the Today’s
Destination list entries are stored to
this list, beginning with the date (e.g.,
item 1 shown above).
Because both the Home and personal Address Book list can be protected by
a PIN, they do not show up in the
previous destination list. Scroll through the list and say the line
number (1-6) of the destination, or
select the desired destination you want.
Once you select the desired destination,
the system then displays the
Calculate
route to screen (see Driving to Your
Destination on page50).
NOTE:
Prior to departure, you can set areas to avoid. The system then includes
them in its calculations for the
destination you have entered. See
Edit Avoid Area on page96.
For information on the available voice commands, see Voice
Command Index on page146.
Entering a Destination
2008 MDX
Page 45 of 171
Navigation System45
By Map Input
After you select Map Input from the
Enter destination by screen, the
display changes to:
NOTE:
Prior to departure, you can set areas to avoid. The system then includes
them in its calculations for the
destination you have entered. See
Edit Avoid Area on page96.
For information on the available voice commands, see Voice
Command Index on page146.
Showing the Map of Current
Position
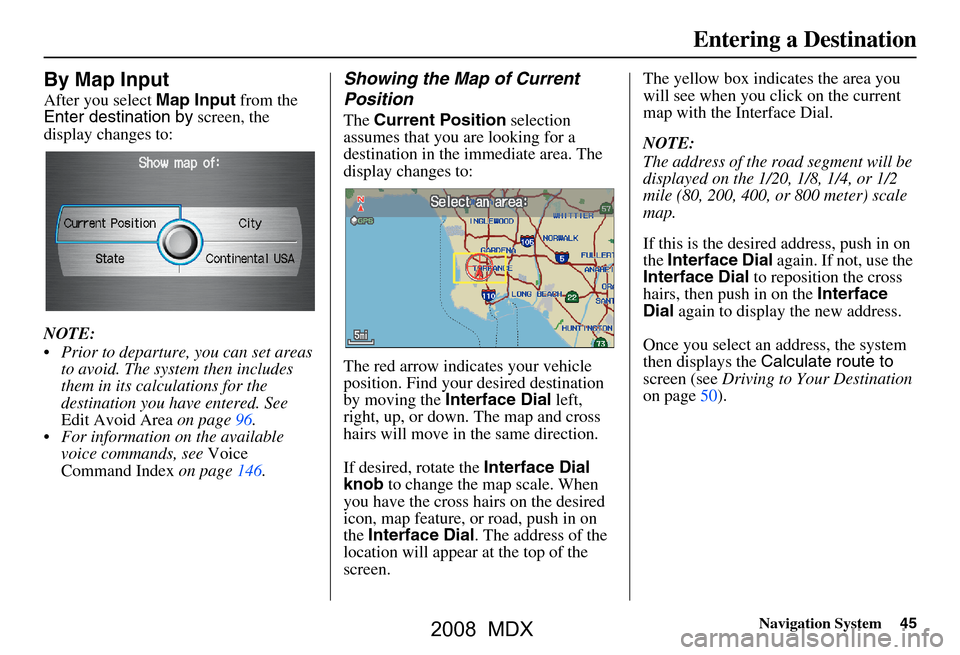
The Current Position selection
assumes that you are looking for a
destination in the immediate area. The
display changes to:
The red arrow indicates your vehicle
position. Find your desired destination
by moving the Interface Dial left,
right, up, or down. The map and cross
hairs will move in the same direction.
If desired, rotate the Interface Dial
knob to change the map scale. When
you have the cross hairs on the desired
icon, map feature, or road, push in on
the Interface Dial . The address of the
location will appear at the top of the
screen. The yellow box indicates the area you
will see when you click on the current
map with the Interface Dial.
NOTE:
The address of the road segment will be
displayed on the 1/20, 1/8, 1/4, or 1/2
mile (80, 200, 400, or 800 meter) scale
map.
If this is the desired address, push in on
the
Interface Dial again. If not, use the
Interface Dial to reposition the cross
hairs, then push in on the Interface
Dial again to display the new address.
Once you select an address, the system
then displays the Calculate route to
screen (see Driving to Your Destination
on page50).
Entering a Destination
2008 MDX
Page 46 of 171
46Navigation System
Showing the Map of City
With the City selection, the display
changes to the Enter city name screen.
When you have entered the desired city,
the display changes to a map. The
starting location will be the central
position in the selected city.
See Showing the Map of Current
Position on page45 for instructions on
finding and entering your desired
destination.
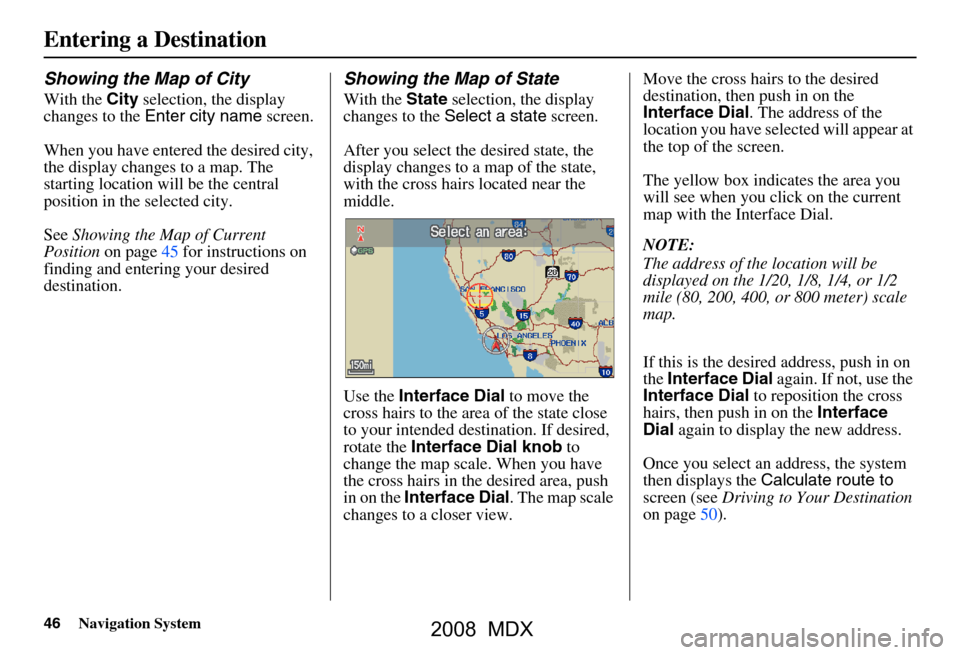
Showing the Map of State
With the State selection, the display
changes to the Select a state screen.
After you select the desired state, the
display changes to a map of the state,
with the cross hairs located near the
middle.
Use the Interface Dial to move the
cross hairs to the area of the state close
to your intended destination. If desired,
rotate the Interface Dial knob to
change the map scale. When you have
the cross hairs in the desired area, push
in on the Interface Dial . The map scale
changes to a closer view. Move the cross hairs to the desired
destination, then push in on the
Interface Dial
. The address of the
location you have selected will appear at
the top of the screen.
The yellow box indicates the area you
will see when you click on the current
map with the Interface Dial.
NOTE:
The address of the location will be
displayed on the 1/20, 1/8, 1/4, or 1/2
mile (80, 200, 400, or 800 meter) scale
map.
If this is the desired address, push in on
the Interface Dial again. If not, use the
Interface Dial to reposition the cross
hairs, then push in on the Interface
Dial again to display the new address.
Once you select an address, the system
then displays the Calculate route to
screen (see Driving to Your Destination
on page50).
Entering a Destination
2008 MDX
Page 47 of 171
Navigation System47
Entering a Destination
Showing the Map of Continental
USA
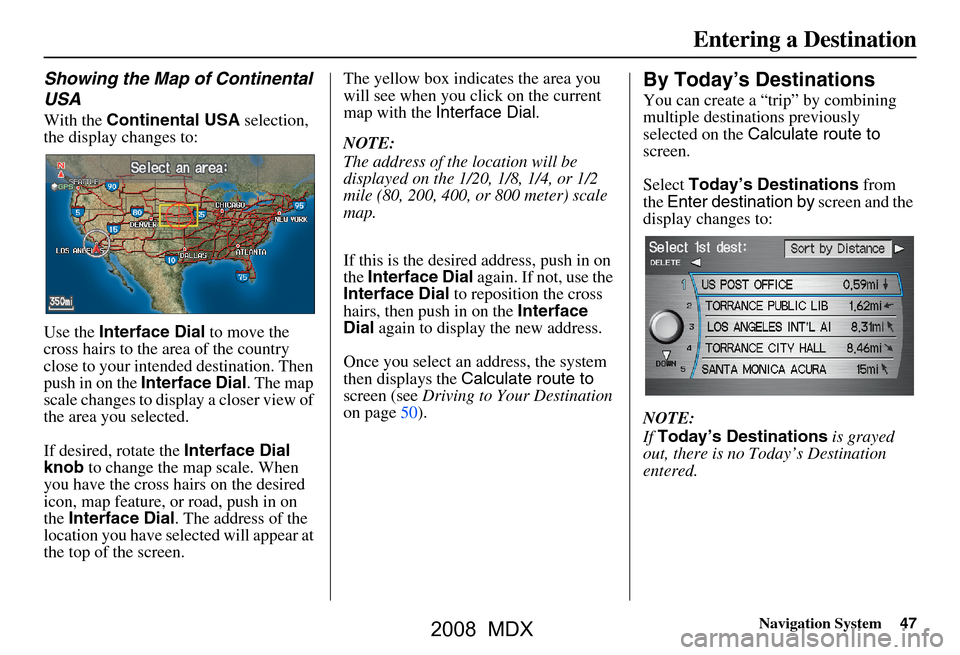
With the Continental USA selection,
the display changes to:
Use the Interface Dial to move the
cross hairs to the area of the country
close to your intended destination. Then
push in on the Interface Dial . The map
scale changes to display a closer view of
the area you selected.
If desired, rotate the Interface Dial
knob to change the map scale. When
you have the cross hairs on the desired
icon, map feature, or road, push in on
the Interface Dial . The address of the
location you have selected will appear at
the top of the screen. The yellow box indi
cates the area you
will see when you click on the current
map with the Interface Dial .
NOTE:
The address of the location will be
displayed on the 1/20, 1/8, 1/4, or 1/2
mile (80, 200, 400, or 800 meter) scale
map.
If this is the desired address, push in on
the Interface Dial again. If not, use the
Interface Dial to reposition the cross
hairs, then push in on the Interface
Dial again to display the new address.
Once you select an address, the system
then displays the Calculate route to
screen (see Driving to Your Destination
on page50).
By Today’s Destinations
You can create a “trip” by combining
multiple destinations previously
selected on the Calculate route to
screen.
Select Today’s Destinations from
the Enter destination by screen and the
display changes to:
NOTE:
If Today’s Destinations is grayed
out, there is no Today’s Destination
entered.
2008 MDX
Page 48 of 171
48Navigation System
Entering a Destination
Editing Today’s Destination List
If you change your plans, you can
modify the Today’s Destination list
order by distance, or by order of entry.
Say or select Sort by Entry to sort the
list by the entry order, and say or select
Sort by Distance to sort the list by the
distance order. To delete a destination,
say or select DELETE and the display
changes to Select a destination to
delete screen. Select the destination to
delete. Say or select DONE to perform
the deletion, and the display returns to
the previous screen. To cancel the
deletion, press the CANCEL button.
NOTE:
For information on the available voice
commands, see Voice Command Index
on page146.
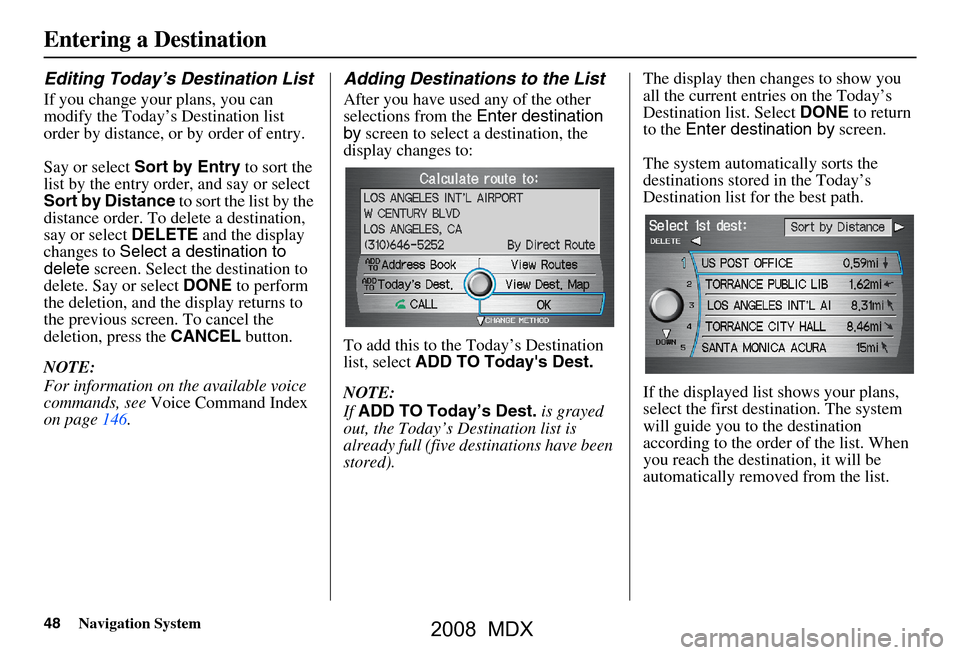
Adding Destinations to the List
After you have used any of the other
selections from the Enter destination
by screen to select a destination, the
display changes to:
To add this to the Today’s Destination
list, select ADD TO Today's Dest.
NOTE:
If ADD TO Today’s Dest. is grayed
out, the Today’s Destination list is
already full (five destinations have been
stored). The display then changes to show you
all the current entries on the Today’s
Destination list. Select
DONE to return
to the Enter destination by screen.
The system automatically sorts the
destinations stored in the Today’s
Destination list for the best path.
If the displayed list shows your plans,
select the first dest ination. The system
will guide you to the destination
according to the order of the list. When
you reach the destination, it will be
automatically removed from the list.
2008 MDX
Page 49 of 171
Navigation System49
Entering a Destination
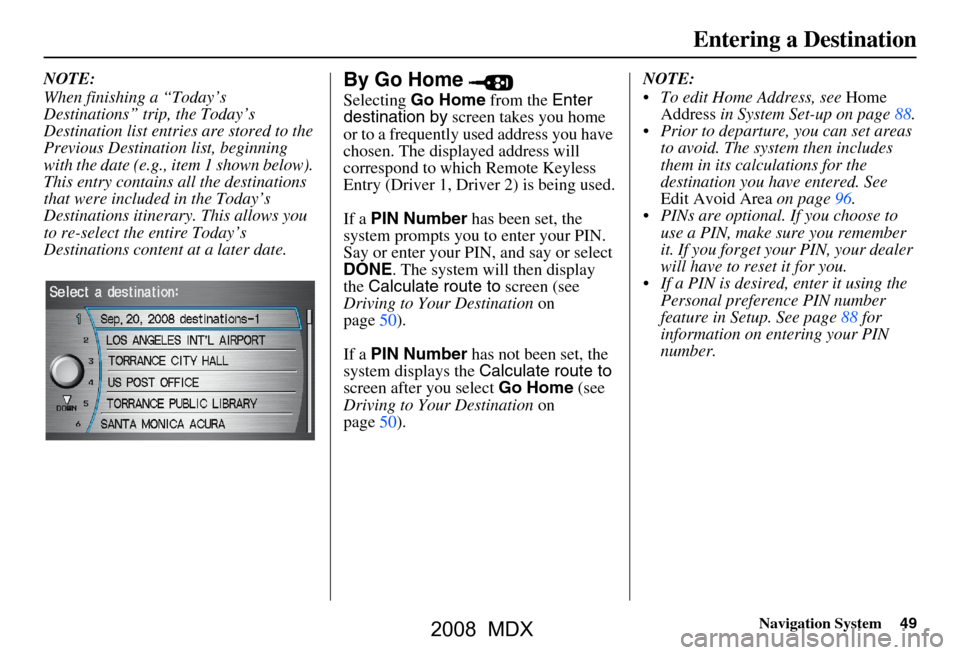
NOTE:
When finishing a “Today’s
Destinations” trip, the Today’s
Destination list entries are stored to the
Previous Destination list, beginning
with the date (e.g., item 1 shown below).
This entry contains all the destinations
that were included in the Today’s
Destinations itinerary. This allows you
to re-select the entire Today’s
Destinations content at a later date.By Go Home
Selecting Go Home from the Enter
destination by screen takes you home
or to a frequently used address you have
chosen. The displayed address will
correspond to which Remote Keyless
Entry (Driver 1, Driver 2) is being used.
If a PIN Number has been set, the
system prompts you to enter your PIN.
Say or enter your PIN, and say or select
DONE . The system will then display
the Calculate route to screen (see
Driving to Your Destination on
page50).
If a PIN Number has not been set, the
system displays the Calculate route to
screen after you select Go Home (see
Driving to Your Destination on
page50). NOTE:
To edit Home Address, see
Home
Address in System Set-up on page88.
Prior to departure, you can set areas to avoid. The system then includes
them in its calculations for the
destination you have entered. See
Edit Avoid Area on page96.
PINs are optional. If you choose to use a PIN, make sure you remember
it. If you forget your PIN, your dealer
will have to reset it for you.
If a PIN is desired, enter it using the Personal preference PIN number
feature in Setup. See page88 for
information on entering your PIN
number.
2008 MDX
Page 50 of 171
50Navigation System
Driving to Your Destination
Driving to Your Destination
A route typically has three phases.
Initial route calculation (Calculate
route to screen) (see page50).
Change the route while en route (see page70).
Resume the route when restarting the engine (see Continue Trip Screen on
page74).
Calculate Route to Screen
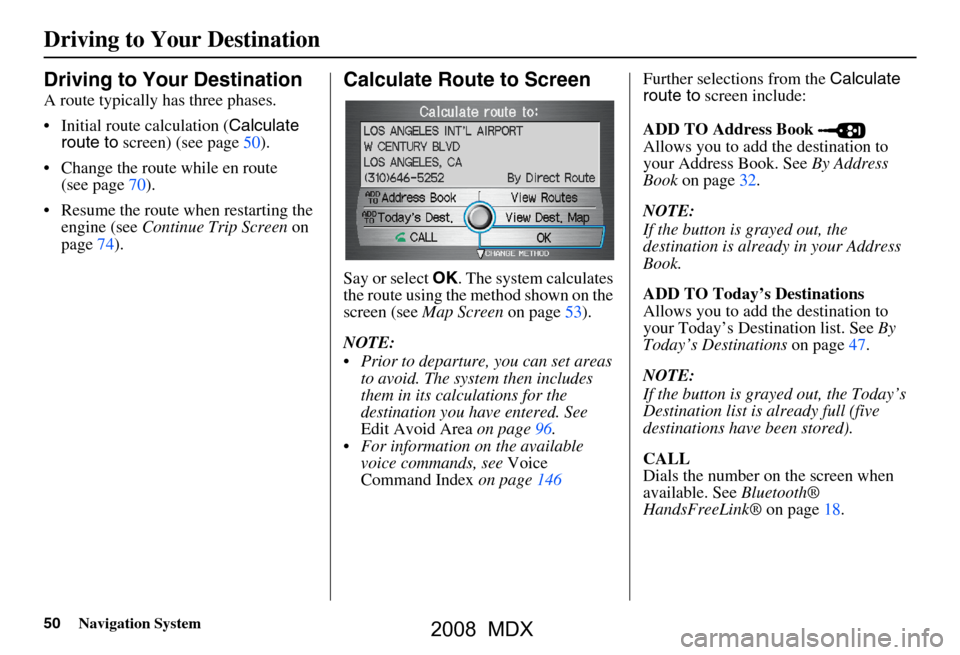
Say or select OK. The system calculates
the route using the method shown on the
screen (see Map Screen on page53).
NOTE:
Prior to departure, you can set areas to avoid. The system then includes
them in its calculations for the
destination you have entered. See
Edit Avoid Area on page96.
For information on the available voice commands, see Voice
Command Index on page146 Further selections from the
Calculate
route to screen include:
ADD TO Address Book
Allows you to add the destination to
your Address Book. See By Address
Book on page32.
NOTE:
If the button is grayed out, the
destination is already in your Address
Book.
ADD TO Today’s Destinations
Allows you to add the destination to
your Today’s Destination list. See By
Today’s Destinations on page47.
NOTE:
If the button is grayed out, the Today’s
Destination list is already full (five
destinations have been stored).
CALL
Dials the number on the screen when
available. See Bluetooth®
HandsFreeLink® on page18.
2008 MDX
Page 53 of 171
Navigation System53
Driving to Your Destination
Viewing the Destination Map
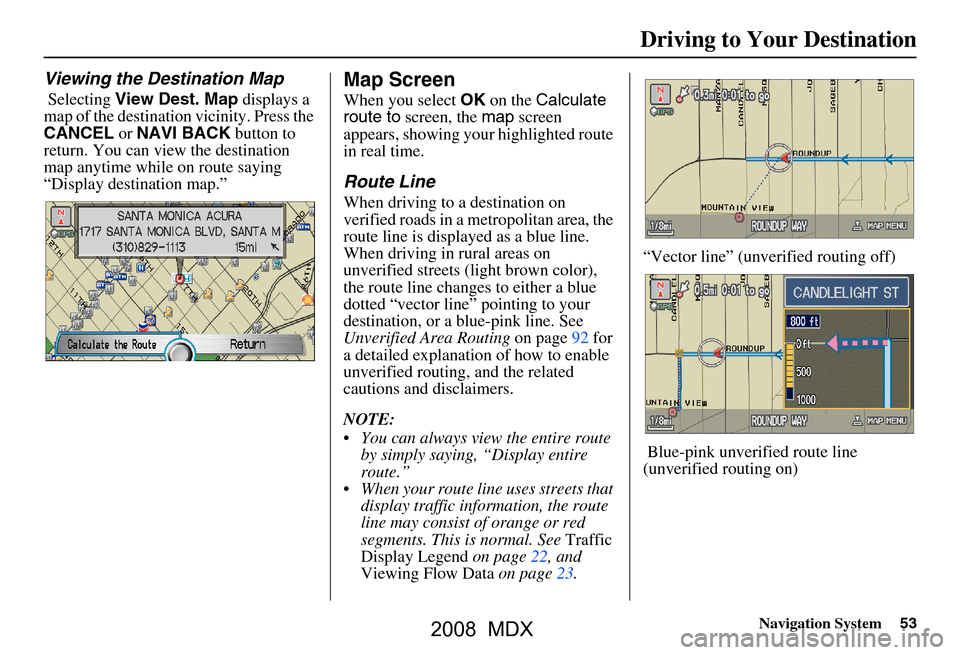
Selecting View Dest. Map displays a
map of the destination vicinity. Press the
CANCEL or NAVI BACK button to
return. You can view the destination
map anytime while on route saying
“Display destination map.”
Map Screen
When you select OK on the Calculate
route to screen, the map screen
appears, showing your highlighted route
in real time.
Route Line
When driving to a destination on
verified roads in a metropolitan area, the
route line is displayed as a blue line.
When driving in rural areas on
unverified streets (light brown color),
the route line changes to either a blue
dotted “vector line” pointing to your
destination, or a blue-pink line. See
Unverified Area Routing on page92 for
a detailed explanatio n of how to enable
unverified routing, and the related
cautions and disclaimers.
NOTE:
You can always view the entire route by simply saying, “Display entire
route.”
When your route line uses streets that display traffic information, the route
line may consist of orange or red
segments. This is normal. See Traffic
Display Legend on page22, and
Viewing Flow Data on page23. “Vector line” (unverified routing off)
Blue-pink unverified route line
(unverified routing on)
2008 MDX