display Acura MDX 2011 Owner's Manual
[x] Cancel search | Manufacturer: ACURA, Model Year: 2011, Model line: MDX, Model: Acura MDX 2011Pages: 609, PDF Size: 12.7 MB
Page 543 of 609
Tire Maintenance
In addition to proper inflation, correct
wheel alignment helps to decrease
tire wear. If you find a tire is worn
unevenly, have your dealer check the
wheel alignment.
Have your dealer check the tires if
you feel a consistent vibration while
driving. A tire should always be
rebalanced if it is removed from the
wheel. When you have new tires
installed, make sure they are
balanced. This increases riding
comfort and tire life. For best results,
have the installer perform a dynamic
balance.Improper wheel weights can damage
your vehicle's aluminum wheels. Use
only Acura wheel weights for
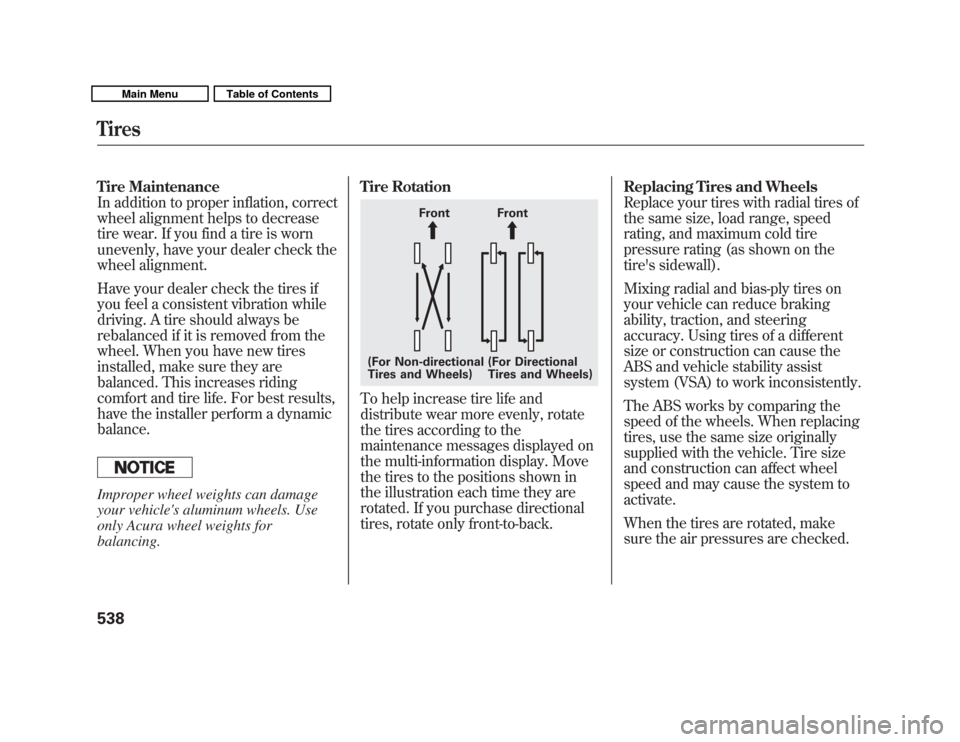
balancing.Tire Rotation
To help increase tire life and
distribute wear more evenly, rotate
the tires according to the
maintenance messages displayed on
the multi-information display. Move
the tires to the positions shown in
the illustration each time they are
rotated. If you purchase directional
tires, rotate only front-to-back.
Replacing Tires and Wheels
Replace your tires with radial tires of
the same size, load range, speed
rating, and maximum cold tire
pressure rating (as shown on the
tire's sidewall).
Mixing radial and bias-ply tires on
your vehicle can reduce braking
ability, traction, and steering
accuracy. Using tires of a different
size or construction can cause the
ABS and vehicle stability assist
system (VSA) to work inconsistently.
The ABS works by comparing the
speed of the wheels. When replacing
tires, use the same size originally
supplied with the vehicle. Tire size
and construction can affect wheel
speed and may cause the system to
activate.
When the tires are rotated, make
sure the air pressures are checked.
Front Front
(For Non-directional
Tires and Wheels) (For Directional
Tires and Wheels)
Tires53810/06/29 11:59:04 11 ACURA MDX MMC North America Owner's M 50 31STX640 enu
Page 546 of 609
The sensor on the negative terminal
monitors your vehicles battery
condition.
If there is a problem with the sensor,
you will see a‘‘CHECK BATTERY
SENSOR’’ message on the multi-
information display. Have the vehicle
checked by your dealer. Check the terminals for corrosion (a
white or yellowish powder). To
remove it, cover the terminals with a
solution of baking soda and water. It
will bubble up and turn brown. When
this stops, wash it off with plain
water. Dry off the battery with a cloth
or paper towel. Coat the terminals
with grease to help prevent further
corrosion.
If additional battery maintenance is
needed, see your dealer or a
qualified technician.
WARNING:
Battery posts,
terminals, and related accessories
contain lead and lead compounds.
Wash your hands after handling.
If you need to connect the battery to
a charger, disconnect both cables to
prevent damaging your vehicle's
electrical system. Always disconnect
the negative (- ) cable first, and
reconnect it last.
The battery gives off explosive
hydrogen gas during normal
operation.
A spark or flame can cause the
battery to explode with enough
force to kill or seriously hurt
you.
Wear protective clothing and a
face shield, or have a skilled
technician do the battery
maintenance.
If the radio fuse is removed, the
audio system will disable itself. The
next time you turn on the radio you
will see ‘‘ENTER CODE ’’in the
frequency display. Use the preset
buttons to enter the digit code (see
page 305).
Checking the Battery
541
Maintenance
10/06/29 11:59:04 11 ACURA MDX MMC North America Owner's M 50 31STX640 enu
Page 549 of 609
Use the compact spare tire as a
temporary replacement only. Get
your regular tire repaired or
replaced, and put it back on your
vehicle as soon as you can.
Check the inflation pressure of the
compact spare tire every time you
check the other tires. It should be
inflated to:
60 psi (420 kPa, 4.2 kgf/cm
2)
Follow these precautions:
●
Never exceed 50 mph (80 km/h).
●
This tire gives a harsher ride and
less traction on some road
surfaces. Use greater caution while
driving.
●
Do not mount snow chains on a
compact spare.
●
Do not use your compact spare tire
on another vehicle unless it is the
same make and model.
●
After the flat tire is replaced with
the spare tire, the low tire
pressure/TPMS indicator stays on.
After several miles (kilometers)
driving with the spare, this
indicator begins to flash, then
stays on again. You will also see a
‘‘ CHECK TPMS SYSTEM ’’
message on the multi-information
display (see page 452).
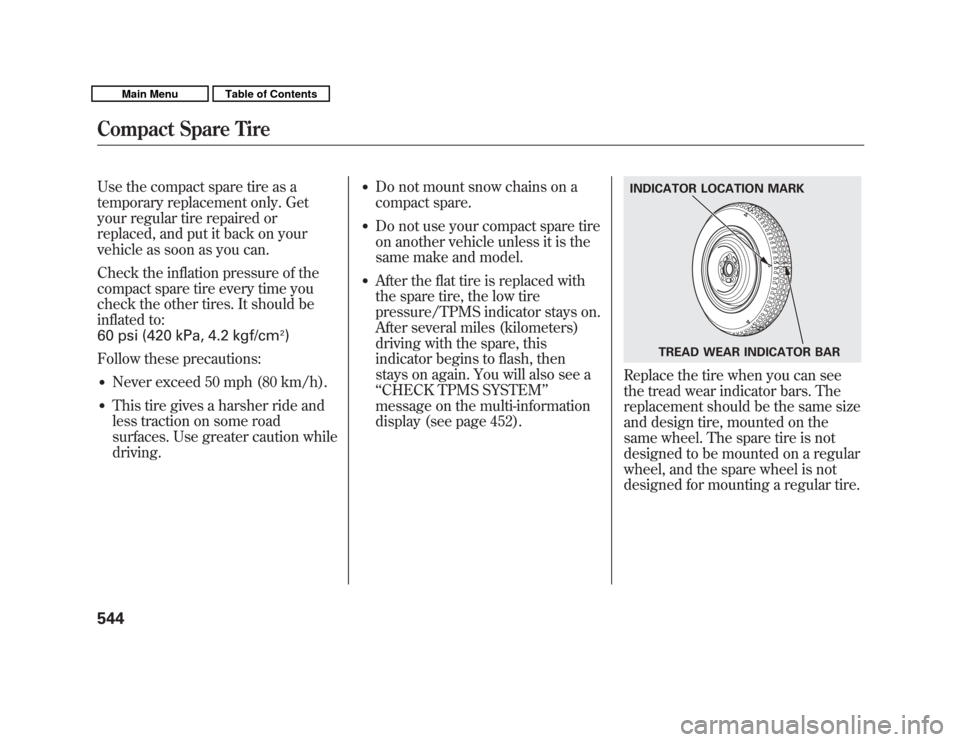
Replace the tire when you can see
the tread wear indicator bars. The
replacement should be the same size
and design tire, mounted on the
same wheel. The spare tire is not
designed to be mounted on a regular
wheel, and the spare wheel is not
designed for mounting a regular tire.INDICATOR LOCATION MARK
TREAD WEAR INDICATOR BAR
Compact Spare Tire54410/06/29 11:59:04 11 ACURA MDX MMC North America Owner's M 50 31STX640 enu
Page 561 of 609
Low Oil Pressure Indicator
This indicator should never
come on when the engine is
running. If it starts flashing or stays
on, the oil pressure has dropped very
low or lost pressure. Serious engine
damage is possible, and you should
take immediate action.
You will also see a ‘‘CHECK
ENGINE OIL LEVEL’’ message on
the multi-information display when
this indicator comes on.
Running the engine with low oil
pressure can cause serious mechanical
damage almost immediately. Turn off
the engine as soon as you can safely get
the vehicle stopped. 1. Safely pull off the road, and shut
off the engine. Turn on the hazard
warning indicators.
2. Let the vehicle sit for a minute. Open the hood, and check the oil
level (see page 422). An engine
very low on oil can lose pressure
during cornering and other driving
maneuvers.
3. If necessary, add oil to bring the level back to the full mark on the
dipstick (see page 511).
4. Start the engine, and watch the oil pressure indicator. If it does not go
out within 10 seconds, turn off the
engine. There is a mechanical
problem that needs to be repaired
before you can continue driving
(see Emergency Towing on page
566). Charging System Indicator
If the charging system
indicator comes on brightly
when the engine is running, the
battery is not being charged.
You will also see a ‘‘CHECK
CHARGING SYSTEM’’ message on
the multi-information display (see
page 86).
Immediately turn off all electrical
accessories. Try not to use other
electrically operated controls such as
the power windows. Keep the engine
running; starting the engine will
discharge the battery rapidly.
Go to a service station or garage
where you can get technical
assistance.
If you see a ‘‘REPLACE BATTERY ’’
message on the multi-information
display, along with this indicator on,
you may need to replace the battery.
Have your vehicle's battery checked
and replaced by your dealer.
Low Oil Pressure Indicator, Charging System Indicator55610/06/29 11:59:04 11 ACURA MDX MMC North America Owner's M 50 31STX640 enu
Page 562 of 609
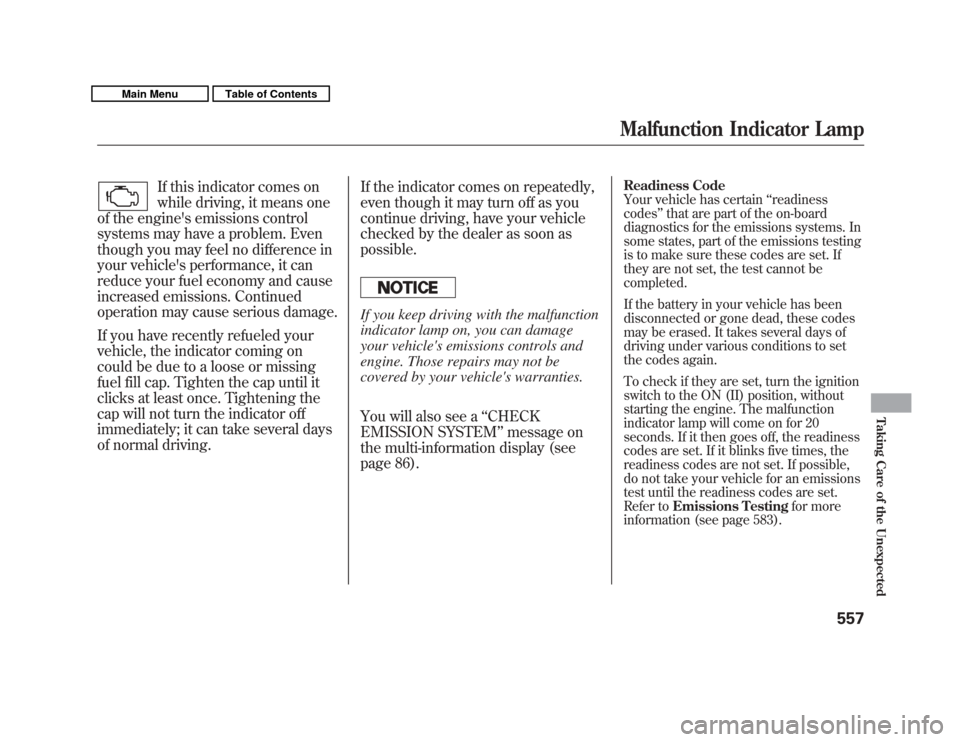
If this indicator comes on
while driving, it means one
of the engine's emissions control
systems may have a problem. Even
though you may feel no difference in
your vehicle's performance, it can
reduce your fuel economy and cause
increased emissions. Continued
operation may cause serious damage.
If you have recently refueled your
vehicle, the indicator coming on
could be due to a loose or missing
fuel fill cap. Tighten the cap until it
clicks at least once. Tightening the
cap will not turn the indicator off
immediately; it can take several days
of normal driving. If the indicator comes on repeatedly,
even though it may turn off as you
continue driving, have your vehicle
checked by the dealer as soon as
possible.
If you keep driving with the malfunction
indicator lamp on, you can damage
your vehicle's emissions controls and
engine. Those repairs may not be
covered by your vehicle's warranties.
You will also see a
‘‘CHECK
EMISSION SYSTEM ’’message on
the multi-information display (see
page 86).
Readiness Code
Your vehicle has certain ‘‘readiness
codes ’’that are part of the on-board
diagnostics for the emissions systems. In
some states, part of the emissions testing
is to make sure these codes are set. If
they are not set, the test cannot be
completed.
If the battery in your vehicle has been
disconnected or gone dead, these codes
may be erased. It takes several days of
driving under various conditions to set
the codes again.
To check if they are set, turn the ignition
switch to the ON (II) position, without
starting the engine. The malfunction
indicator lamp will come on for 20
seconds. If it then goes off, the readiness
codes are set. If it blinks five times, the
readiness codes are not set. If possible,
do not take your vehicle for an emissions
test until the readiness codes are set.
Refer to Emissions Testing for more
information (see page 583).Malfunction Indicator Lamp
557
Taking Care of the Unexpected
10/06/29 11:59:04 11 ACURA MDX MMC North America Owner's M 50 31STX640 enu
Page 563 of 609
U.S. Canada
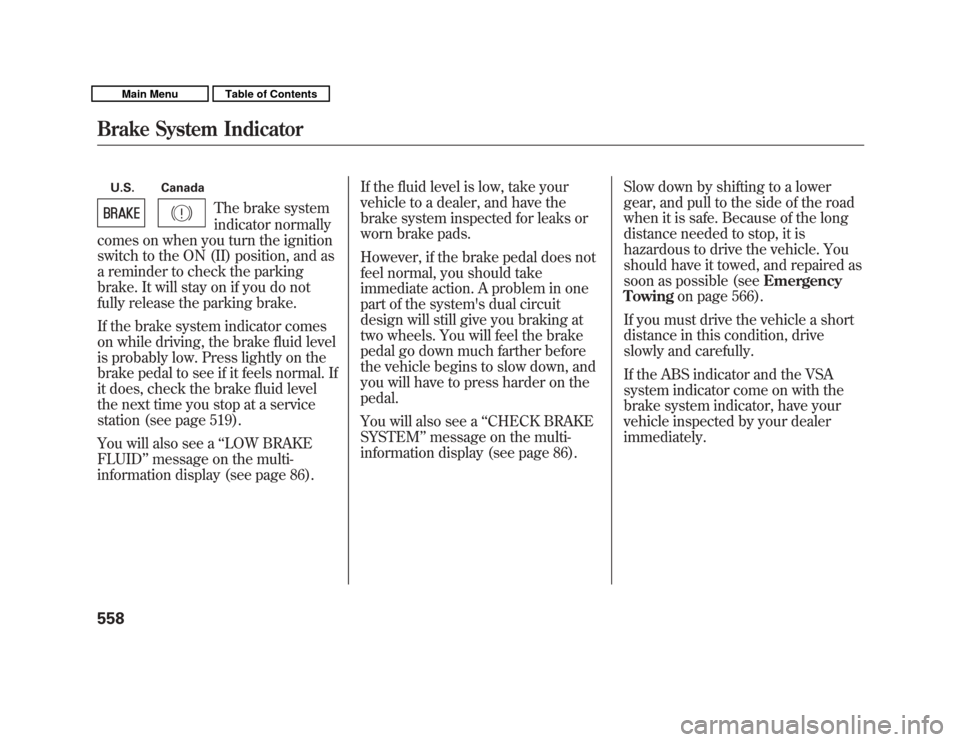
The brake system
indicator normally
comes on when you turn the ignition
switch to the ON (II) position, and as
a reminder to check the parking
brake. It will stay on if you do not
fully release the parking brake.
If the brake system indicator comes
on while driving, the brake fluid level
is probably low. Press lightly on the
brake pedal to see if it feels normal. If
it does, check the brake fluid level
the next time you stop at a service
station (see page 519).
You will also see a ‘‘LOW BRAKE
FLUID ’’message on the multi-
information display (see page 86). If the fluid level is low, take your
vehicle to a dealer, and have the
brake system inspected for leaks or
worn brake pads.
However, if the brake pedal does not
feel normal, you should take
immediate action. A problem in one
part of the system's dual circuit
design will still give you braking at
two wheels. You will feel the brake
pedal go down much farther before
the vehicle begins to slow down, and
you will have to press harder on the
pedal.
You will also see a
‘‘CHECK BRAKE
SYSTEM ’’message on the multi-
information display (see page 86). Slow down by shifting to a lower
gear, and pull to the side of the road
when it is safe. Because of the long
distance needed to stop, it is
hazardous to drive the vehicle. You
should have it towed, and repaired as
soon as possible (see
Emergency
Towing on page 566).
If you must drive the vehicle a short
distance in this condition, drive
slowly and carefully.
If the ABS indicator and the VSA
system indicator come on with the
brake system indicator, have your
vehicle inspected by your dealer
immediately.
Brake System Indicator55810/06/29 11:59:04 11 ACURA MDX MMC North America Owner's M 50 31STX640 enu
Page 567 of 609

5. Look for a burned wire inside thefuse. If it is burned out, replace it
with one of the spare fuses of the
same rating or lower. If you cannot drive the vehicle
without fixing the problem, and you
do not have a spare fuse, take a fuse
of the same rating or a lower rating
from one of the other circuits. Make
sure you can do without that circuit
temporarily (such as the accessory
power socket or radio).
If you replace the blown fuse with a
spare fuse that has a lower rating, it
might blow out again. This does not
indicate that anything is wrong.
Replace the fuse with one of the
correct rating as soon as you can.
Replacing a fuse with one that has a
higher rating greatly increases the
chances of damaging the electrical
system. If you do not have a
replacement fuse with the proper rating
for the circuit, install one with a lower
rating.
6. If the replacement fuse of the same
rating blows in a short time, there
is probably a serious electrical
problem with your vehicle. Leave
the blown fuse in that circuit, and
have your vehicle checked by a
qualified technician.
If the radio fuse is removed, the
audio system will disable itself. The
next time you turn on the radio you
will see ‘‘ENTER CODE ’’in the
frequency display. Use the preset
buttons to enter the digit code (see
page 305).
BLOWN
Fuses56210/06/29 11:59:04 11 ACURA MDX MMC North America Owner's M 50 31STX640 enu
Page 602 of 609
Turn Signal
.............................
127
Load Limit
...........................
429, 481
LOCK (Ignition Key Position)....
138
Locks
Anti-theft Steering Column
......
138
Childproof Door
......................
140
Fuel Fill Door
..........................
419
Glove Box
...............................
173
Lockout Prevention
.................
140
Power Door
.............................
139
Tailgate
...........................
140, 141
Low Coolant Level
......................
422
Lower Anchors
.............................
49
Low Fuel Indicator
.......................
75
Low Oil Pressure Indicator
...........................
67, 556
Lubricant Specifications Chart...
572
Luggage, Storing (cargo)
...........
428
M
Maintenance
..............................
499
Main Items and Sub Items
......
505
Minder
....................................
501 Owner's Maintenance
Checks
................................
507
Safety
......................................
500
Schedule
.................................
508
Malfunction Indicator Lamp
................................
67, 557
Memory, Driving Position
..........
166
Message Display
..........................
85
Message Indicator
.......................
71
Meters, Gauges
............................
76
Methanol in Gasoline
.................
418
Mirrors, Adjusting
......................
164
Modifications
.............................
427
Modifying Your Vehicle
.............
427
Moonroof
...................................
161
Multi-Information Display
............
77
N
Neutral Gear Position
.................
439
New Vehicle Break-in
.................
418
NOTICE, Explanation of
................
i
Numbers, Identification
.............
570 O
Octane Requirement,
Gasoline
.................................
418
Odometer
.....................................
79
Odometer, Trip
............................
79
Off-Highway Driving Guidelines
..............................
494
Oil Change, How to
......................
512
Change, When to
....................
501
Checking Engine
....................
422
Life, Engine
.............................
501
Pressure Indicator
.............
67, 556
Selecting Proper Viscosity Chart
...................................
511
ON (Ignition Key Position)
........
138
Outside Mirrors
.........................
163
Outside Temperature
...................
80
Overheating, Engine
..................
554
Owner's Maintenance Checks
....
507
Oxygenated Fuels
......................
418
CONTINUED
Index
VII
INDEX
10/06/29 11:59:04 11 ACURA MDX MMC North America Owner's M 50 31STX640 enu
Page 603 of 609
P
Panel Brightness Control
...........
132
Park Gear Position
.....................
438
Parking
......................................
448
Parking Brake
............................
163
Parking Brake and Brake System Indicator
...........................
67, 558
Parking Lights
...........................
127
Parking Over Things that Burn
................................
448, 582
Passenger Airbag Off Indicator
....
36
PGM-FI System
..........................
581
Playing a Disc
............................
232
Playing an iPod
®.........................
275
Playing a USB Flash Memory Device
....................................
284
Playing Disc
...............................
200
Playing Hard Disc Drive (HDD) Audio (Models with navigationsystem)
...............................
247
Playing the AM/FM Radio
...............................
191, 210
Playing the XM
®Radio
........
195, 223
Pollen Filter
...............................
528 Power Seat Adjustments
............
148
Power Socket Locations
.............
175
Power Steering Fluid
.................
520
Power Windows
.........................
158
Pregnancy, Using Seat Belts
........
19
Preparing to Drive
......................
435
Proper Seat Belt Usage
................
16
Protecting Adults and Teens
........
12
Additional Safety Precautions
...
20
Advice for Pregnant Women
....
19
Protecting Children
......................
39
General Guidelines
..................
39
Protecting Infants
.....................
44
Protecting Larger Children
......
56
Protecting Small Children
........
45
Using Child Seats with Tethers
.................................
53
Using LATCH
..........................
49
R
Radiator Overheating
.................
554
Radio/CD Sound System
...........
190
Radio/Disc Sound System
............................
191, 210 Radio Theft Protection
...............
305
Readiness Codes
........................
583
Rear A/C Unit
............................
185
Rear Audio Control Panel
...........
312
Rear Entertainment System
.......
307
Rear Lights, Bulb Replacement
...........................
525
Rearview Mirror
.........................
163
Rearview Mirror with Rearview Camera Display
......................
414
Rear Window Defogger
..............
131
Rear Window Wiper and
Washer
...................................
126
Recalling a Memorized Driving Position
..................................
147
Reclining the Seat Backs
............
148
Reclining the Second Seats
........
152
Refueling
....................................
419
Reminder Indicators
.....................
66
Remote Audio Controls
..............
302
Remote Control (RES)
...............
331
Remote Transmitter
...................
144
Replacement Information Dust and Pollen Filter
.............
528
Engine Oil and Filter
...............
512
Fuses
......................................
559
IndexVIII10/06/29 11:59:04 11 ACURA MDX MMC North America Owner's M 50 31STX640 enu